Internship Experiences at Doyensec
The following blog post gives a voice to our 2023 interns and their experiences with us.
Aleandro
During my last high school year I took part in the Cyberchallenge.it program, whose goal is to introduce young students to the world of offensive cybersecurity, via lessons and CTFs competitions. After that experience, some friends and I founded the r00tstici CTF team, attempting to bring some cybersecurity culture to the south of Italy. We also organized various workshops and events at the University of Salento.
Once I moved from south of Italy to Pisa, to study at the university, I joined the fibonhack CTF team. I then also started working as a developer and penetration tester on small projects, both inside the university and outside.
Getting recruited
During April 2023, the Doyensec Twitter account posted a call for summer interns. Since I had been following Doyensec for months, after Luca’s talk at No Hat 2022, I submitted my application. This was both because I was bored with the university routine and because I also wanted to try a job in the research field. This was a good fit, since I was coming from an environment of development and freelance pentesting, alongside CTF competitions.
The selection process I went through has already been described, in large part, by Robert in his previous post about his internship experience. Basically it consisted of:
- An interview with the Practice Manager
- A technical challenge on both web and mobile topics
- Finally, a technical interview with two different security engineers
The interview was about various aspects of application security. This ranged from web security to low level stuff like assembly and even CPU internals.
First weeks
The actual internship started with a couple of weeks of research, where I went through some web application frameworks in Rust. After completing that research, I then moved on to an actual pentest for a client. I remember the first week felt really different and challenging. The code base was so large and so filled with functionalities that I felt overwhelmed with things to test, ideas to try and scenarios to replicate. Despite the size and complexity, there were initially no vulnerabilities found. Impostor syndrome started to kick in.
Eventually, things started to improve during the second week of that engagement. While we’re a 100% remote company, sometimes we get together to work in small teams. That week, I worked in-person with Luca. He helped me understand that sometimes software is just well-written and well-architected from a security perspective. For those situations, I needed to learn how to deal with not having immediate success, the focus required for testing and how to provide value to the client despite having low severity findings. Thankfully, we eventually found good bugs in that codebase anyway :)

Research weeks
The main research topic of my internship experience was about developing internal tools. Although this project was not mainly about security, I enjoyed it a lot. Developing applications, fixing bugs and screaming about non-existent documentation is something I’ve done ever since I bought my first personal computer.
Responsibilities
It is important to note that even though you are the last one who has joined the company and have limited experience, all Doyensec team members treat you like all other employees. You could be in charge of actually talking with the client if you have any issues during an assessment, you will have to write and possibly peer review the reports, you will have to evaluate and assign severities to the vulnerabilities you’ve found, you will have your name on the report, and so on. Of course, you are assigned to work alongside more experienced engineers that will guide you through the process (Lorenzo in my case - who I would like to thank for helping me in managing the flexible schedule and for all the other advice he gave me). However, you learn the most by actually doing and making your own decisions on how to proceed and of course making errors.
To me this was a mind blowing feeling, I did not expect to be completely part of the team, and that my opinions would have mattered. It was really a good approach, in my opinion. It took me a while to fit entirely in the role, but then it was fun all along the way.
Leonardo
Hi, my name is Leonardo, some of you may better know me as maitai, which is the handle that I’ve been using in the CTF scene from the start of my journey. I encountered cybersecurity during my journey while earning my Bachelor of Science in computer science. From the very first moment I was amazed by it. So I decided to dig a bit more into hacking, starting with the PortSwigger Academy, which literally changed my life.
Getting recruited
If you have read the previous part of this blog post you have already met Aleandro. I knew him prior to joining Doyensec, since we played together on the same CTF team: fibonhack. While I was pursuing my previous internship, Aleandro and I talked a lot regarding our jobs and what to do in the near future. One day he told me that Doyensec would have an open internship position during the winter. I was a bit scared at first, just because it would be a really huge step for me to take on such a challenge. My previous internship had already ended when Doyensec opened the position. Although I was considering pursuing a master’s degree, I was still thinking about this opportunity all the time. I didn’t want to miss such a great opportunity, so I decided to submit my application. After all, what did I have to lose? I took it as a way to really challenge myself.
After a quick interview with the Practice Manager, I was made aware of the next steps in the interview process. First of all, the technical challenges used during the process were brand new. The Practice Manager told me that Doyensec had entirely renewed the challenges with a brand new platform and new challenges. I was essentially the first candidate to ever use this new platform.
The topics of the challenges were mostly web applications in several different languages, with different bugs to spot, alongside mobile challenges that involved the use of state-of-art technologies. I had 2 hours to complete as many challenges as I could, from a pool of 8. The time constraint was right in my opinion. You have around 15 minutes per challenge, which is a reasonable amount of time. Even though I wasn’t experienced with mobile hacking, I pushed myself to the limit in order to find as many bugs as possible and eventually to pass onto the next steps of the interview process. It was later explained to me that the review of numerous (but short) code snapshots in a limited time-frame is meant to simulate the complexity of reviewing larger codebases with several weeks at your disposal.
A couple of days after the technical challenges I received an email from Doyensec in which they congratulated me for passing the technical challenges. I was thrilled at that point! I literally couldn’t wait for what would come after that! The email stated that the next step was a technical call with Luca. I reserved a spot on his calendar and waited for the day of the interview.
Luca asked me several questions, ranging from threat modeling to how to exploit certain vulnerabilities, to how to patch vulnerable code. It was a 360 degree interview. It also included some live code review. The interview lasted for an hour or so, and in the end Luca said that he will evaluate my performance and he will let me know. The day after, another email arrived. I had advanced to the final step, the interview with John, Doyensec’s other co-founder. During this interview, he asked me about different things, not strictly related to the application security world. As I said before, they examined me from many angles. The meeting with John also lasted for an hour. At this point, I had completed the whole process. I only needed to wait for their response, which didn’t take too long to come.
They offered me the internship position. I did it! I was happy to have overcome the challenge that I set for myself. I quickly accepted the position in order to jump straight into the action!
First weeks
In my first weeks, I did a lot of different things including retesting web and network level bugs, in order to be sure that all the vulnerabilities previously found by other engineers were properly fixed. I also did standard web application penetration testing. The application itself was really interesting and complex enough to keep my eyes glued to the screen, without losing interest in it. Another amazing engineer was assigned to the aforementioned project with me, so I was not alone during testing.
Since Doyensec is a fully remote company, we also need to hold some meetings during the day, in order to synchronize on different things that can happen during the penetration test. Communication is a key part of Doyensec, and from great communication comes great bugs.
Research weeks
During the internship, you’re also given 50% of your time to perform application security R&D. During my research weeks I was assigned to an open source project. In fact, I was tasked to write some plugins for Google’s web security scanner Tsunami. This is a general purpose network security scanner, with an extensible plugins system for detecting high severity vulnerabilities with high confidence. Essentially, writing a plugin for Tsunami requires understanding a certain vulnerability in a product and writing an exploit for it, that can be used to confirm its existence when scanning. I was assigned to write two plugins which detect weak credentials on the RabbitMQ Management Portal and RStudio server. The plugins are written in Java, and since I’ve done a bit of Java programming during my Bachelor’s degree program I felt quite confident about it.
I really enjoyed writing those plugins and was also asked to write unit tests and a testbed that were used to actually reproduce the vulnerabilities. It was a really fun experience!
Responsibilities
As Aleandro already explained, interns are given a lot of responsibilities along with a great sense of freedom at Doyensec. I would add just one thing, which is about time management. This is one of the most difficult things for me to do. In a remote company, you don’t have time clocks or similar, so you can choose to work the way that you prefer. Luca told me several times that at Doyensec the output is what is evaluated. This is a big thing for me to deal with since I was used to work a fixed schedule. Doyensec gave me the flexibility to work in the way I prefer, which for me, is invaluable. That said, the activities are complex enough to keep you busy for several hours a day, but they are so enjoyable.
Conclusions
Being an intern at Doyensec is an awesome experience because it allows you to jump into the world of application security without the need for extensive job experience. You can be successful as long as you have the skills and knowledge, regardless of how you acquired them.
Moreover, during those three months you’ll be able to test your skills and learn new ones on different technologies across a variety of targets. You’ll also get to know passionate and skilled people, and if you’re lucky enough, take part in company retreats and get some exclusive swag.
In the end, you should consider applying for the next call for interns, if you:
- are passionate about application security
- have already good web security skills
- have organizational capabilities
- want scheduling flexibility
- can manage remote work
If you’re interested in the role and think you’d make a good fit, apply via our careers page: https://www.careers-page.com/doyensec-llc. We’re now accepting candidates for the Summer Internship 2024.


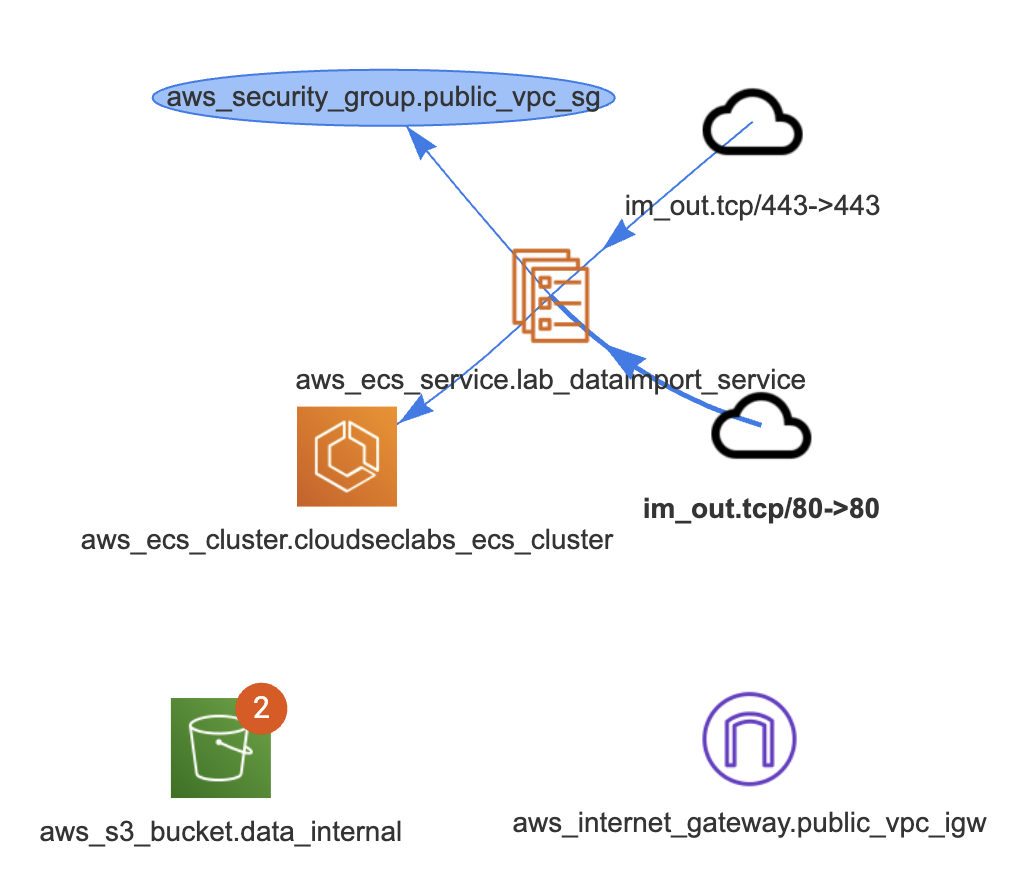
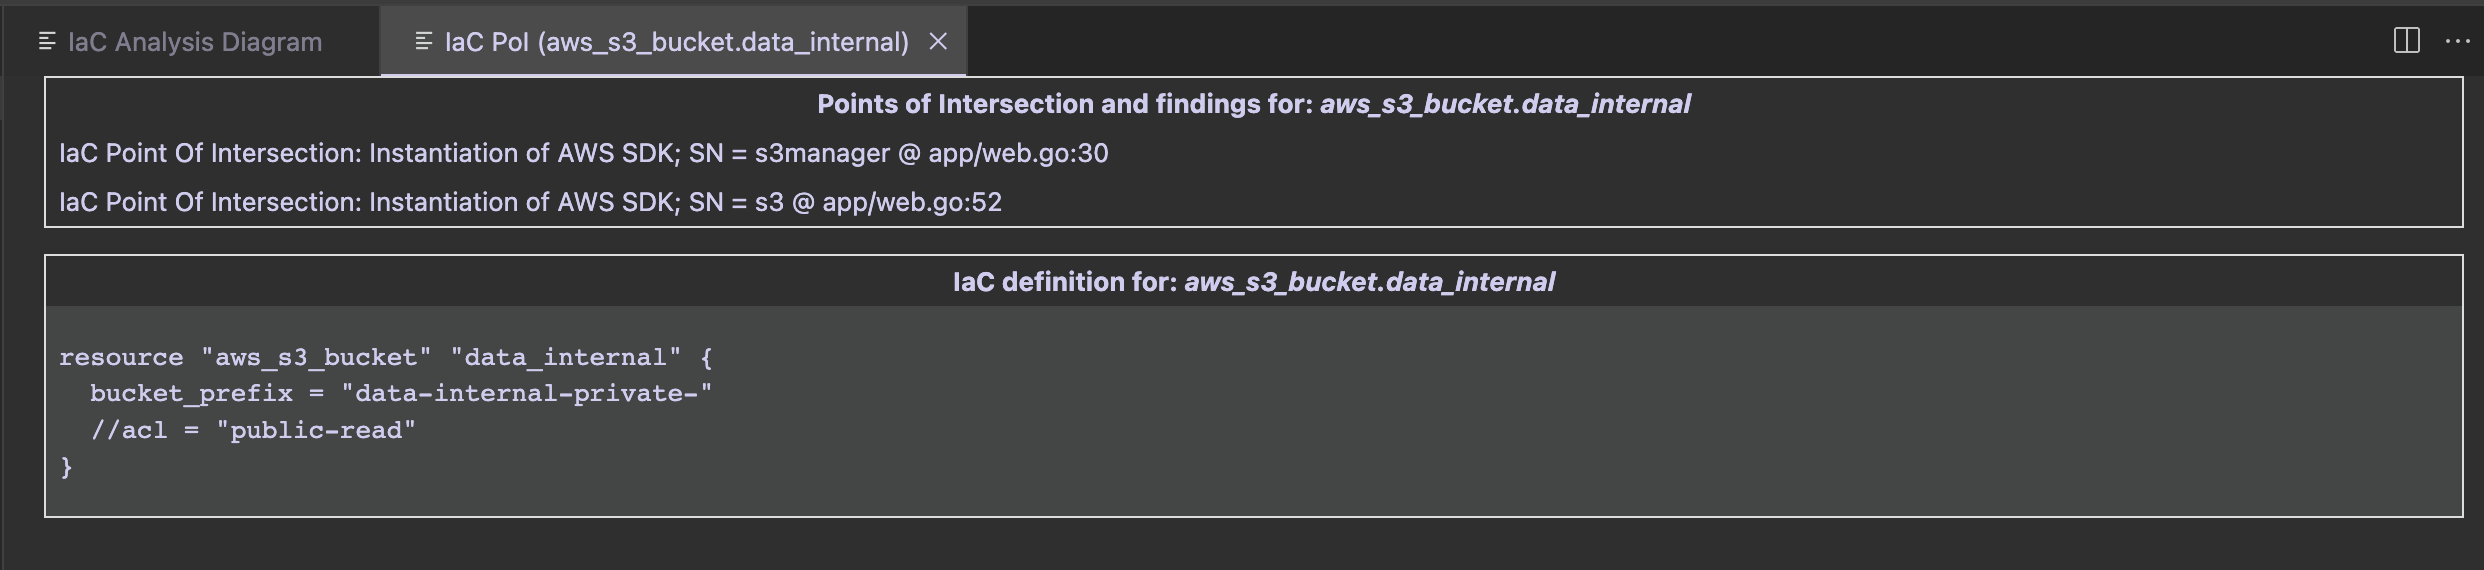


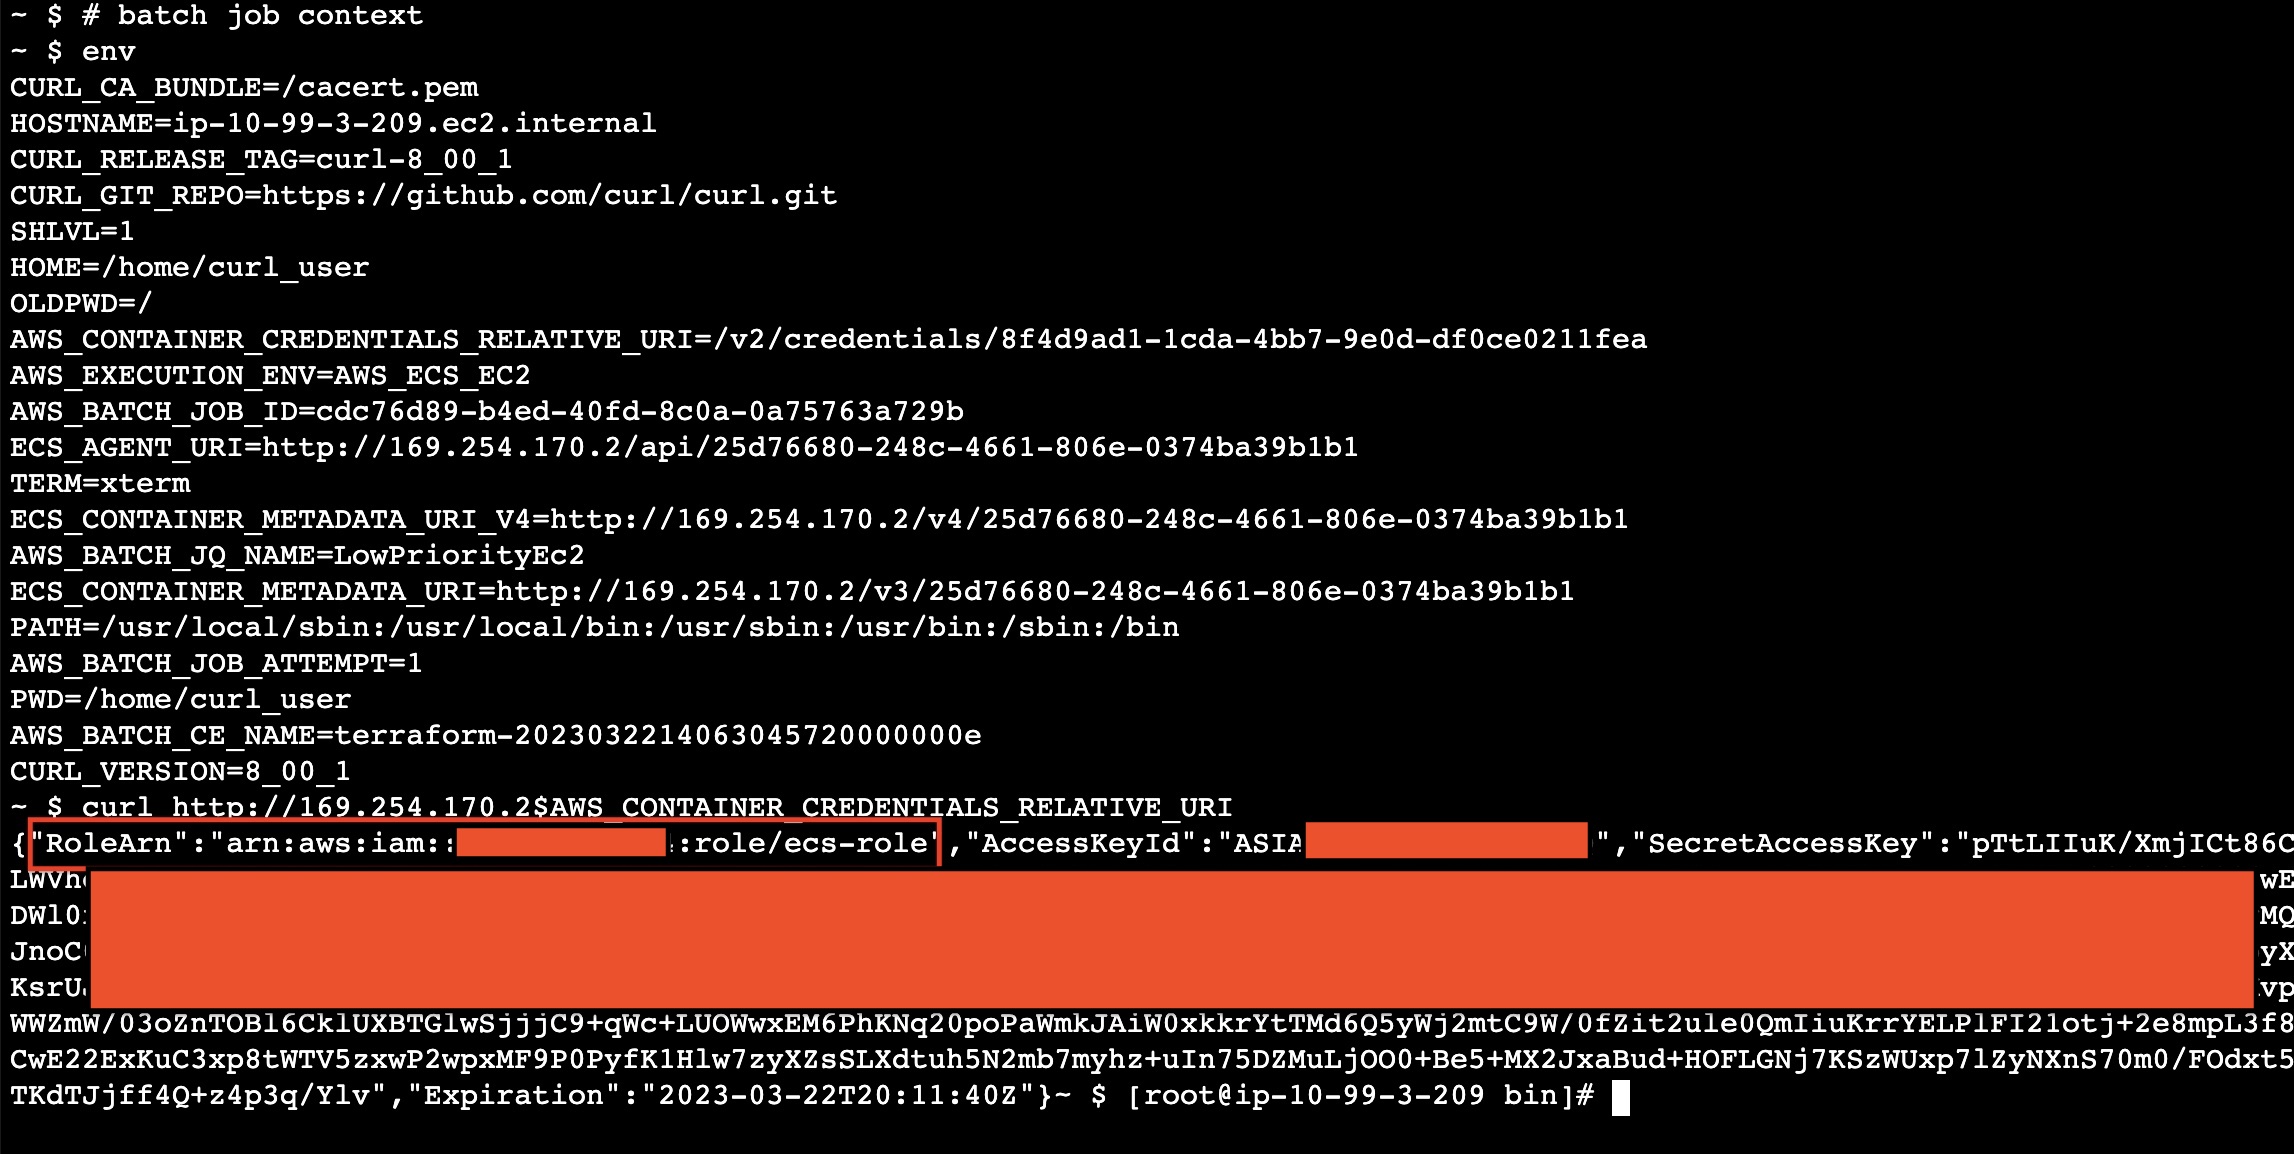


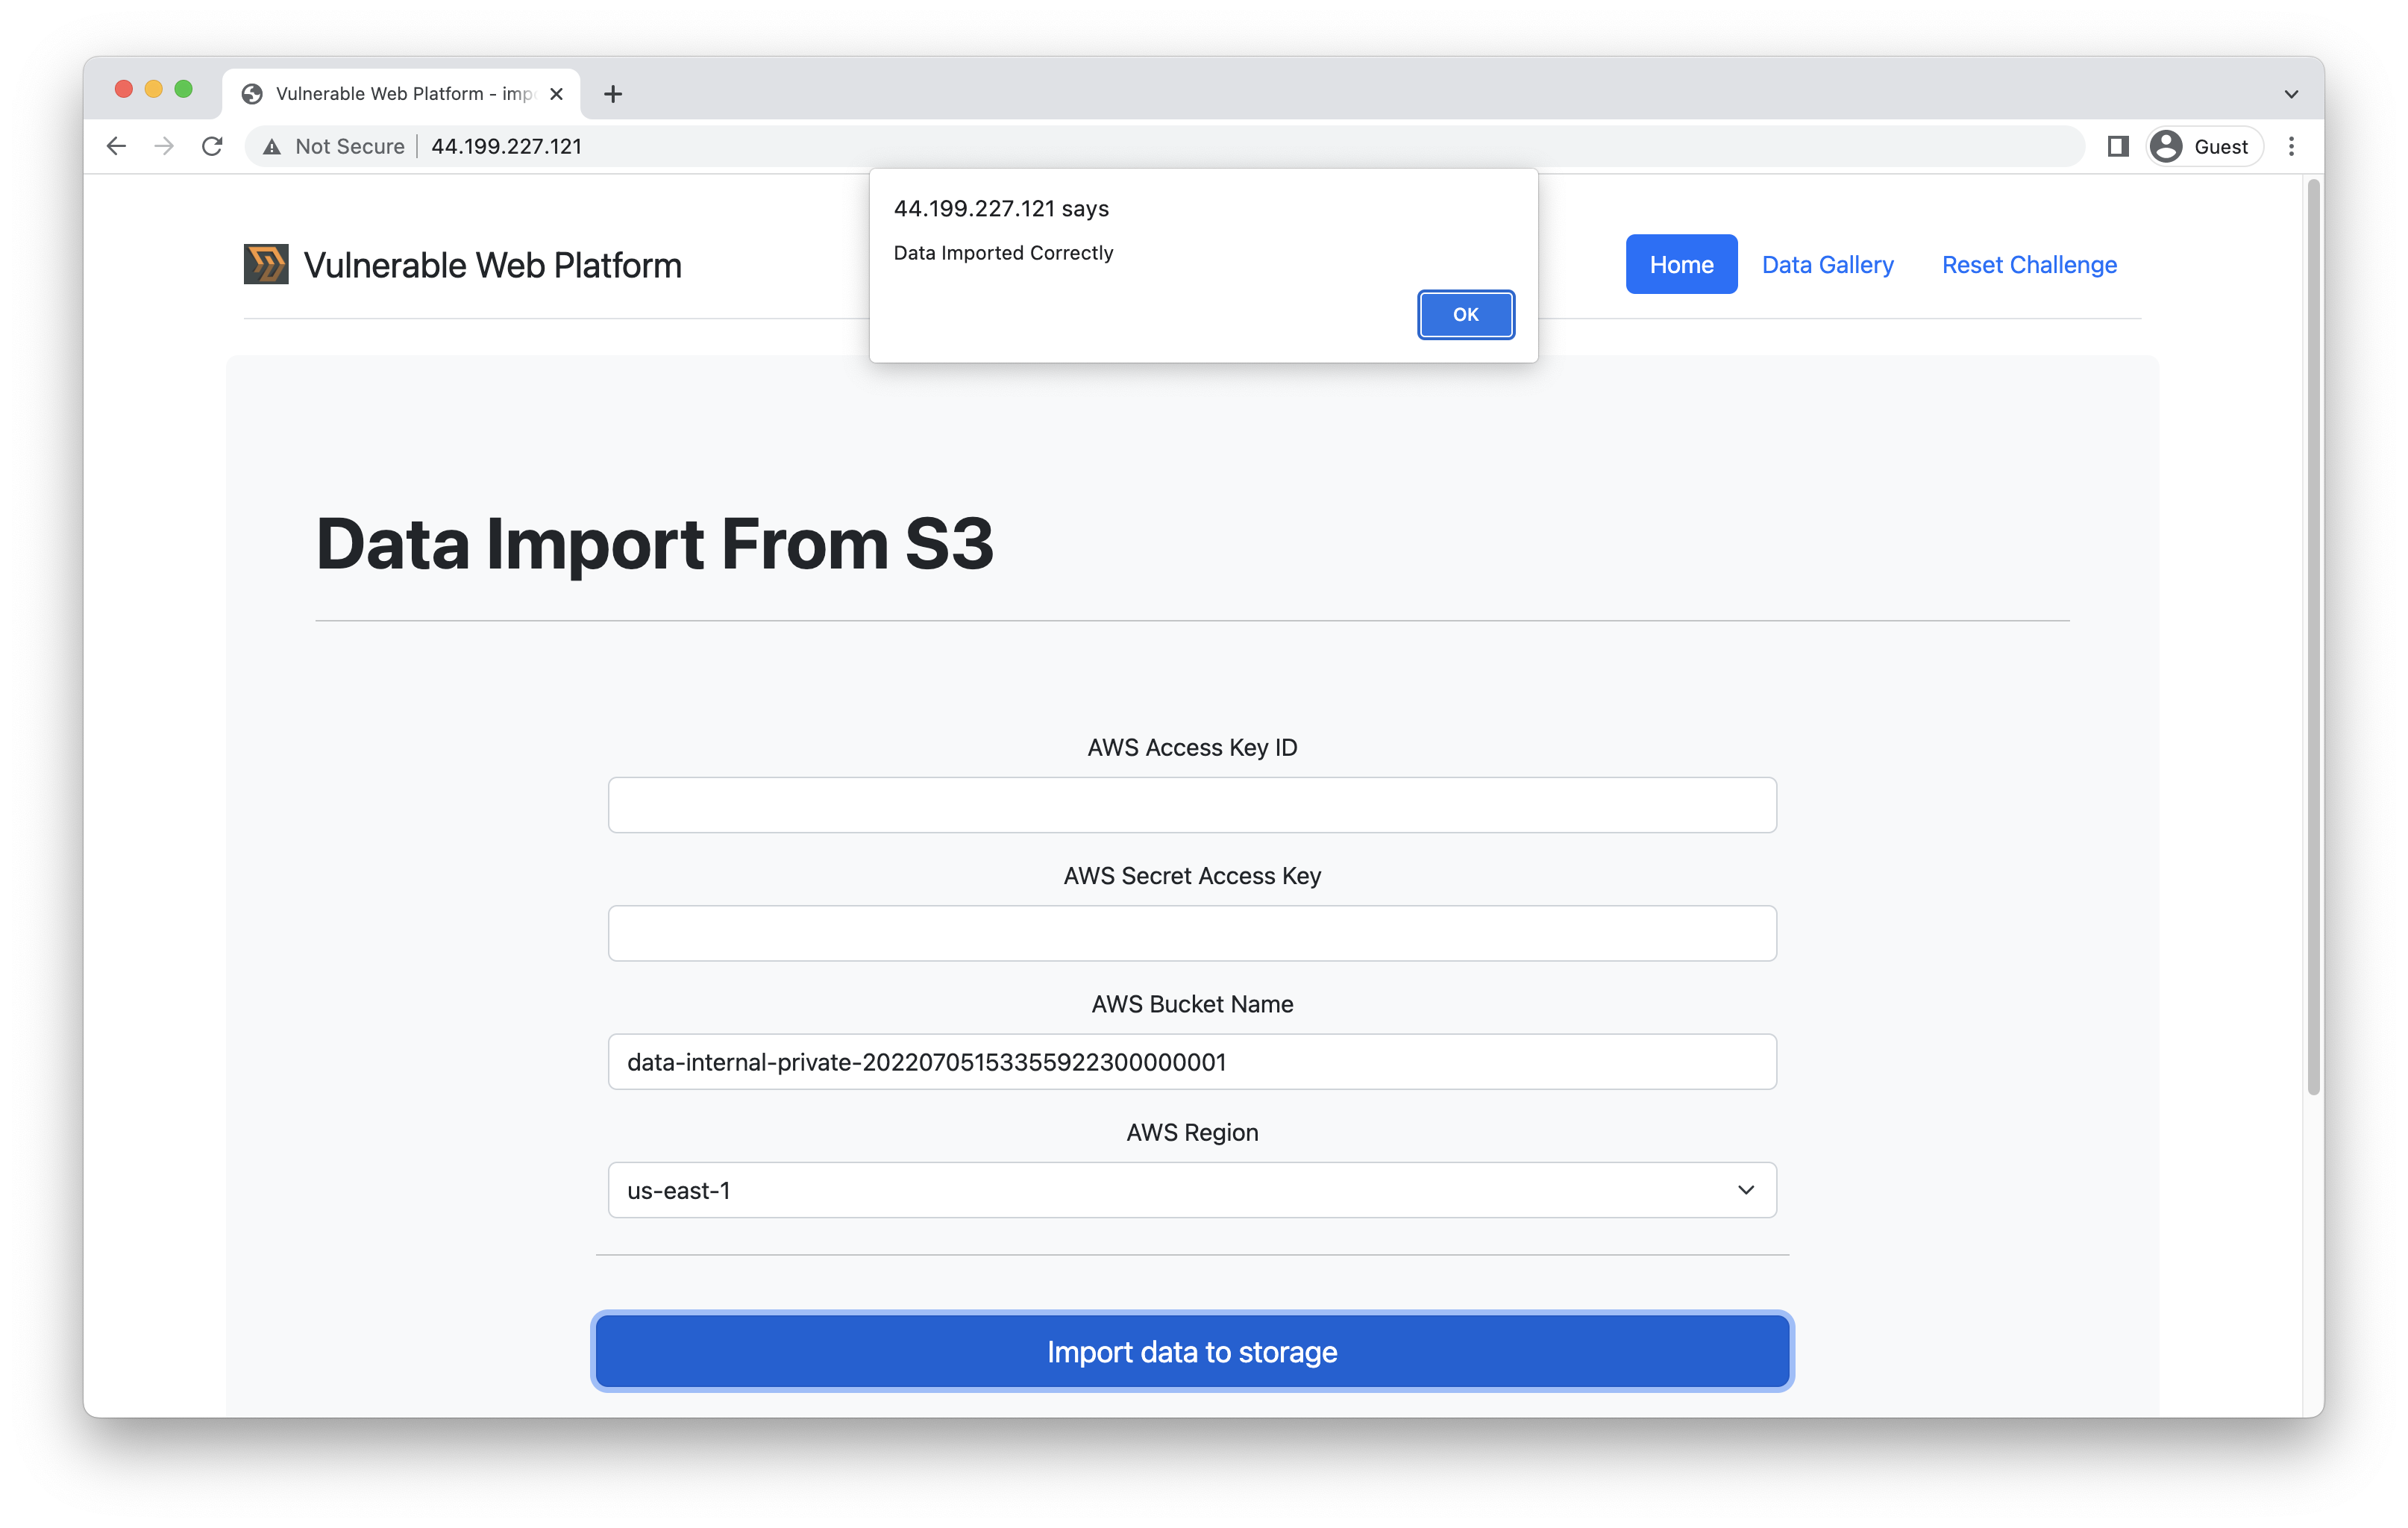 Extracting data from the internal S3 bucket